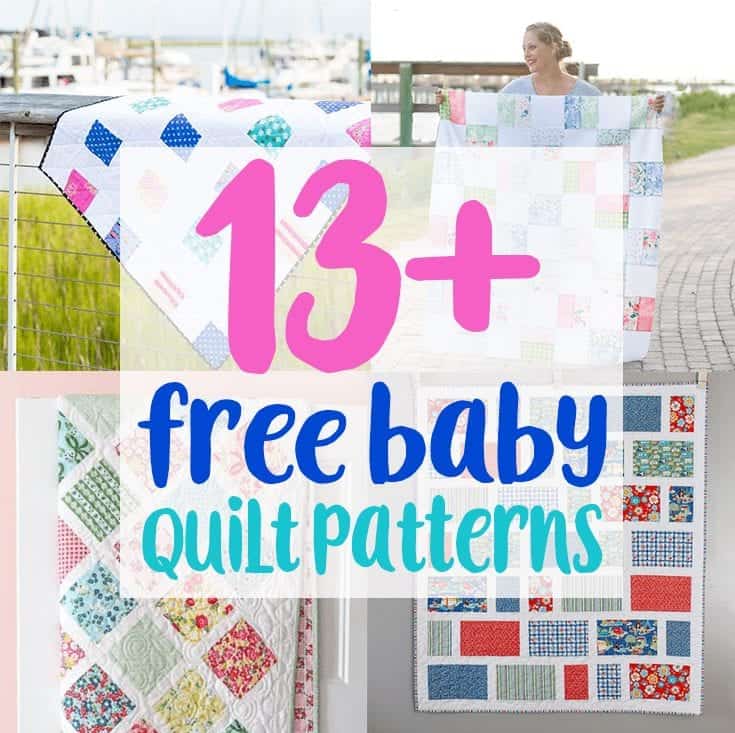
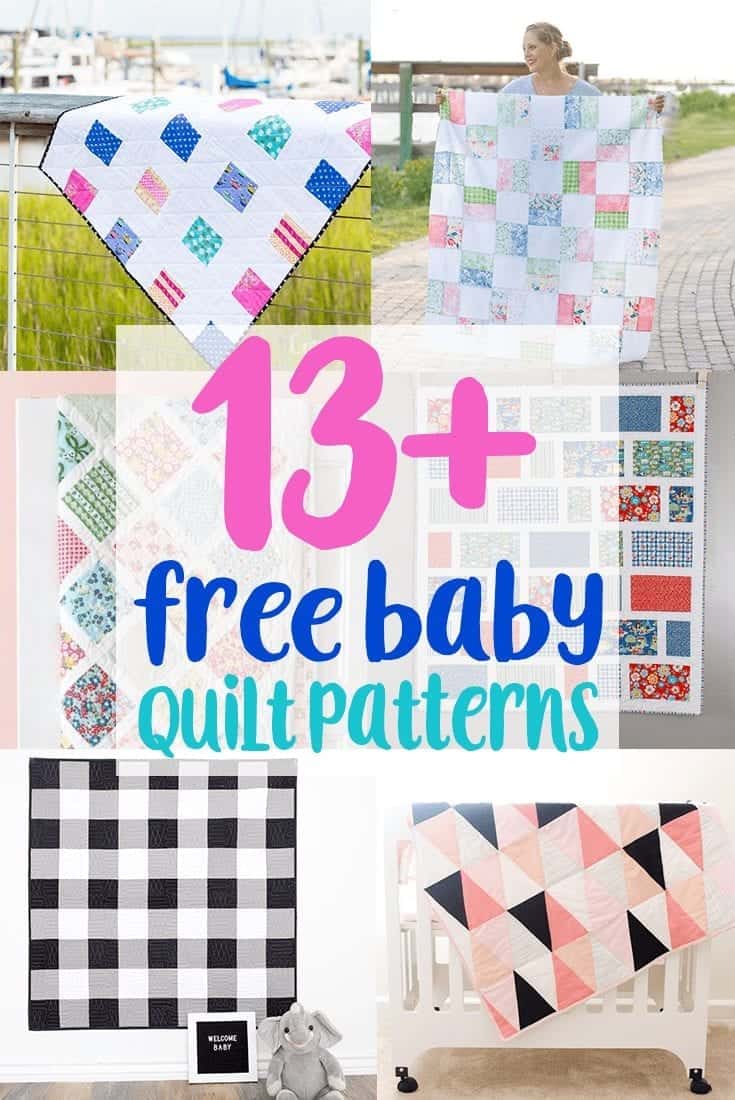
13+ Easy Free Baby Quilt Patterns to Sew! Baby quilts are the best! They are adorable and come together so quickly. Here are some absolutely charming Free Baby Quilt Patterns to sew! Do you have a favorite?
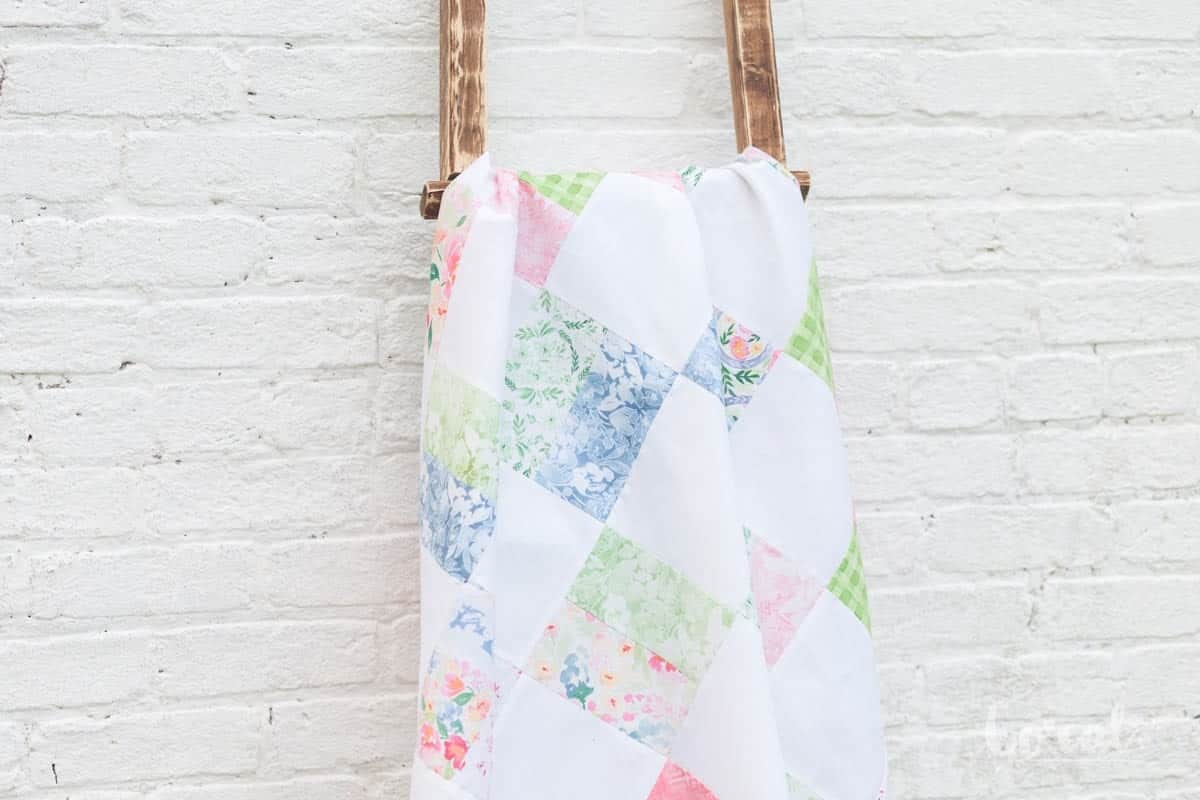
Four Square Baby Quilt Pattern – this free baby quilt pattern is a take on the old kids game foursquare and can be used easily with charm packs. It is perfect for big prints as well as bold colors. You might also like this easy charm square quilt pattern.
Simple Squares Baby Quilt Pattern – this baby quilt pattern is perfect for the beginner quilter. This pattern is fat quarter friendly and uses an easy shortcut to piece the strips.
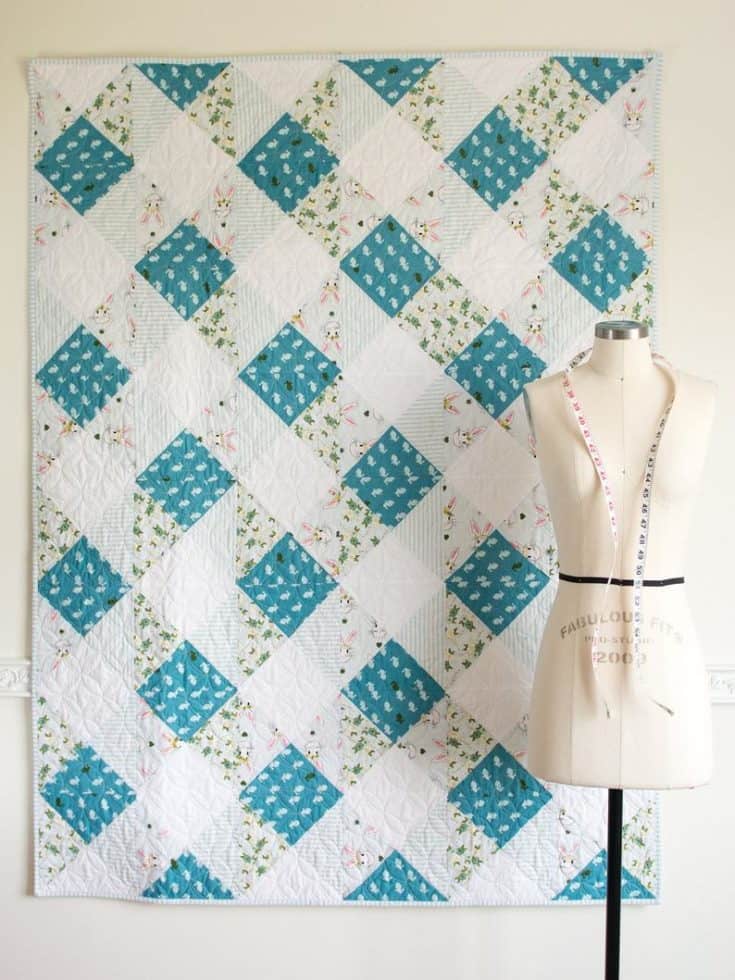
Lattice baby quilt pattern – this baby quilt is perfect for using charm squares or your favorite scrap fabric to make this free baby quilt pattern.
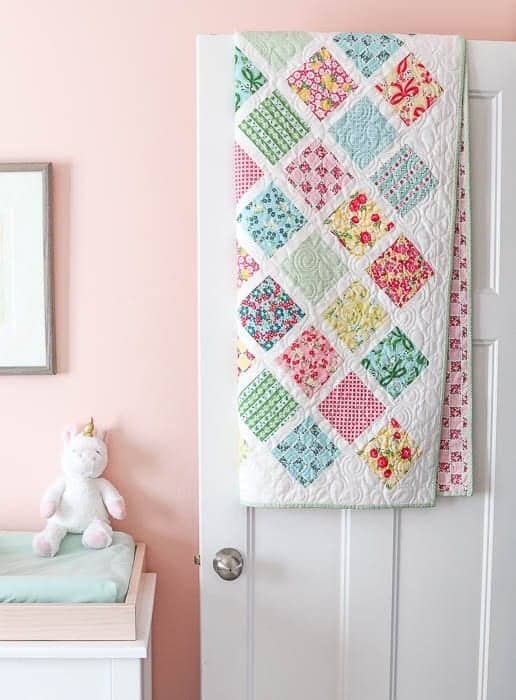
Pink Hourglass Baby Quilt Pattern – this adorable free baby quilt pattern comes together easily and can be made with a layer cake or out of your scrap bin fabrics.
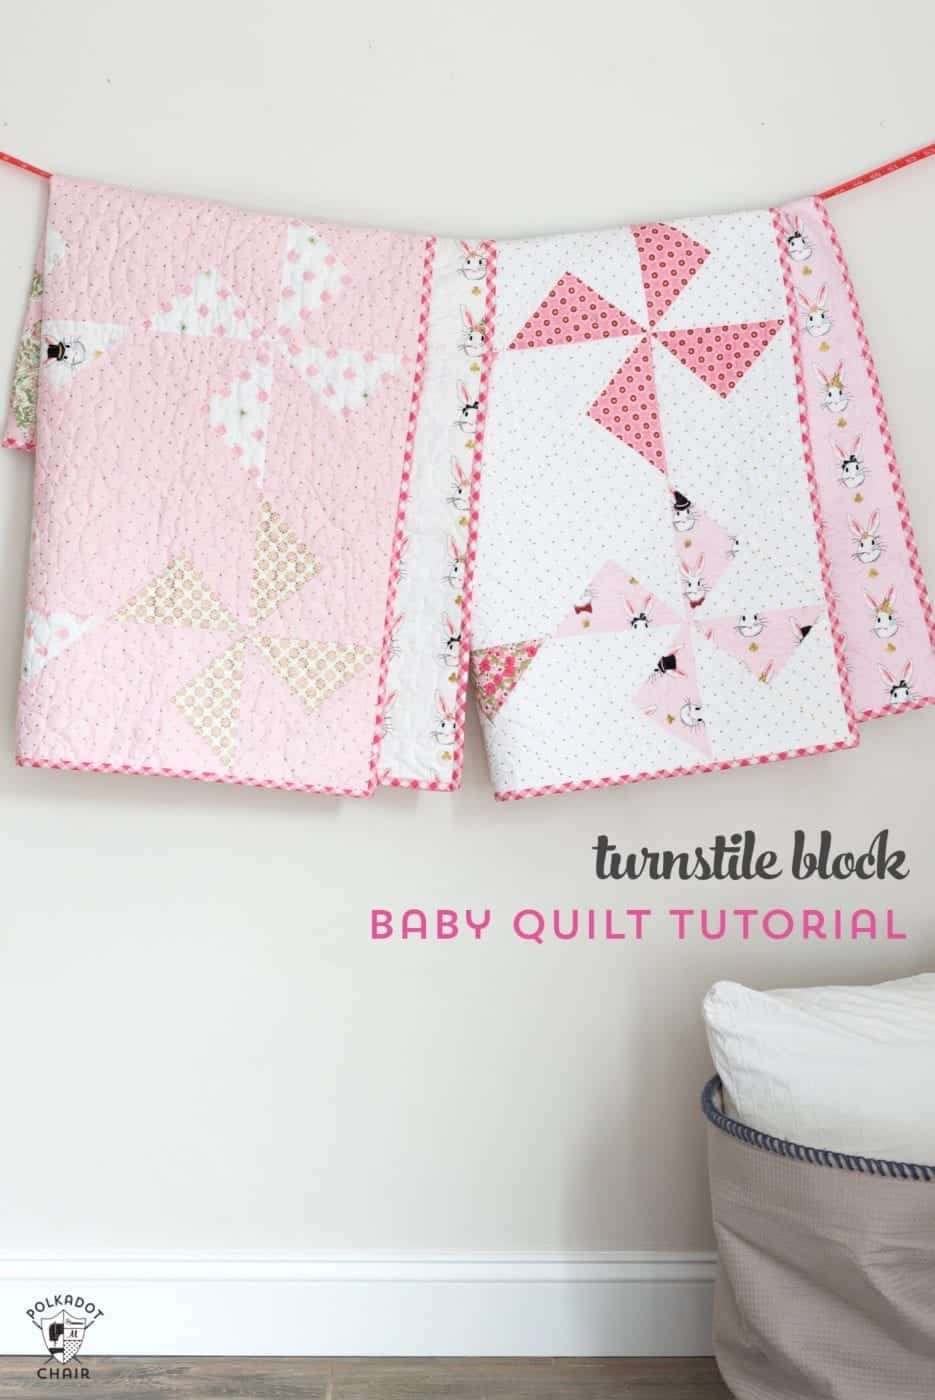
Turnstile Block Baby Quilt Pattern – This free baby quilt pattern uses half square triangles to make the turnstile block. You can use the shortcut 8 half square triangles at a time to piece it more quickly.
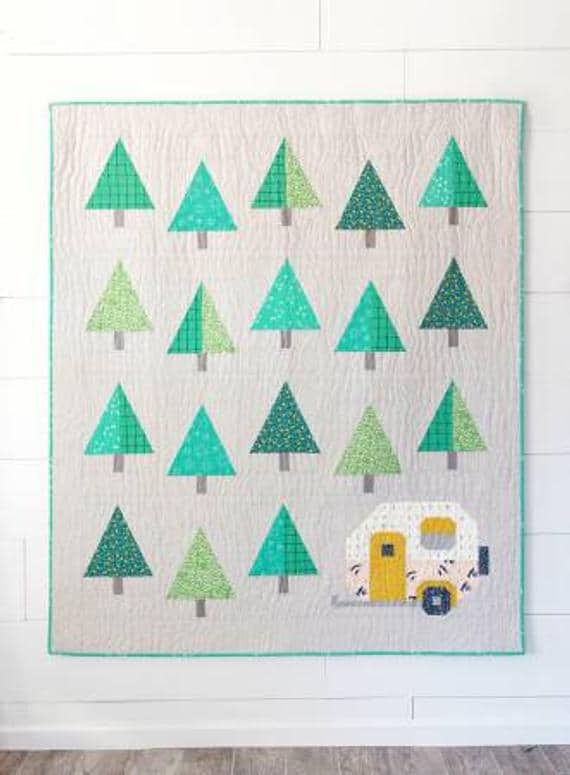
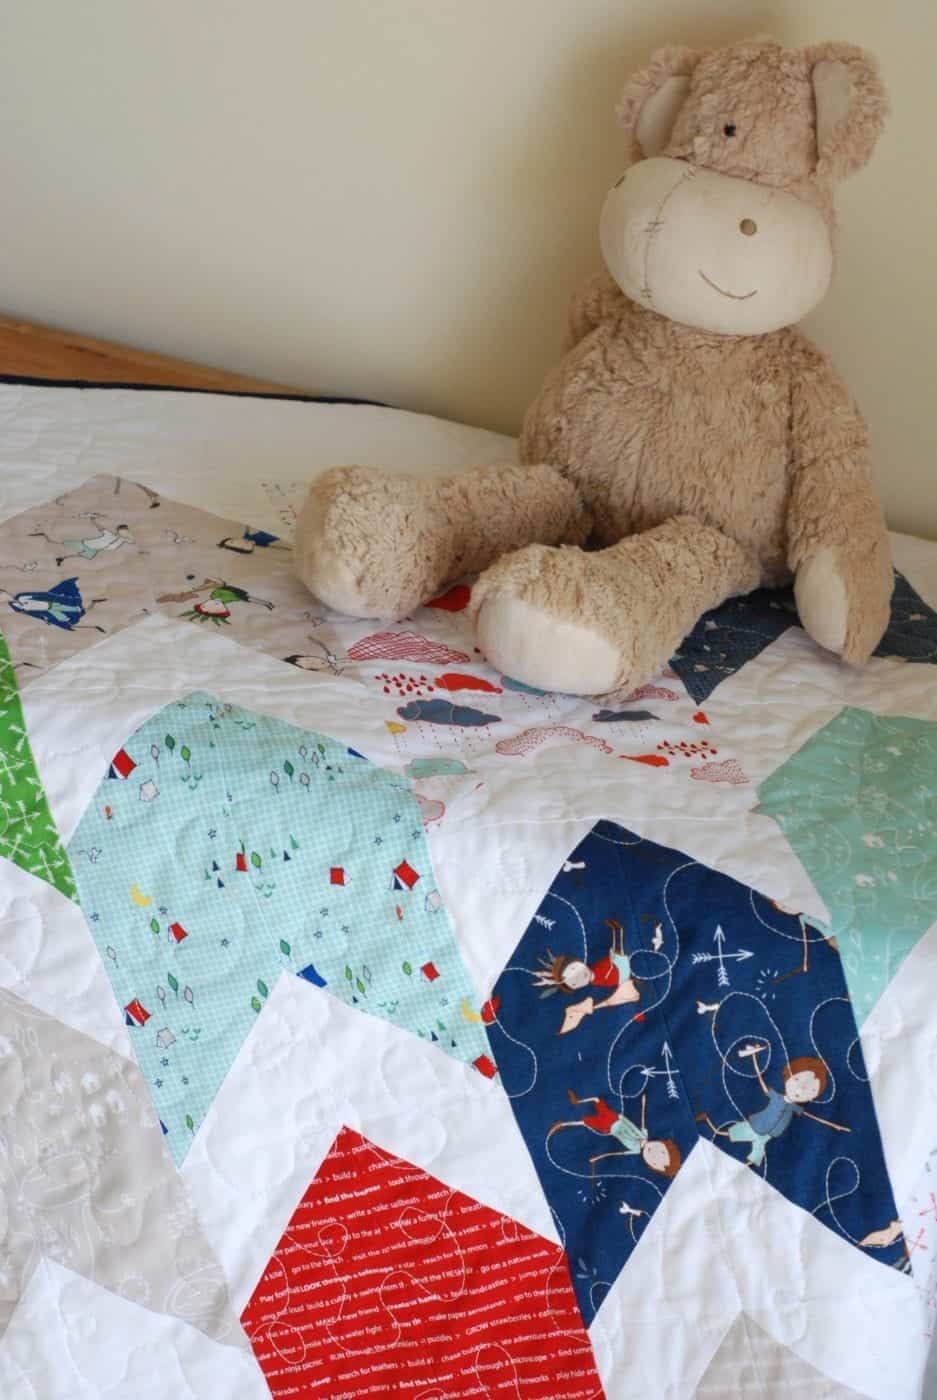
Zoo Dwellers Baby Quilt Pattern – This is a simple quilt pattern that uses large blocks to make a fun quilt for baby. Using large fabric pieces helps it to come together quickly.
Going Up Baby Quilt Pattern – mix and match your favorite fabrics to make modern arrow blocks with this free baby quilt pattern.
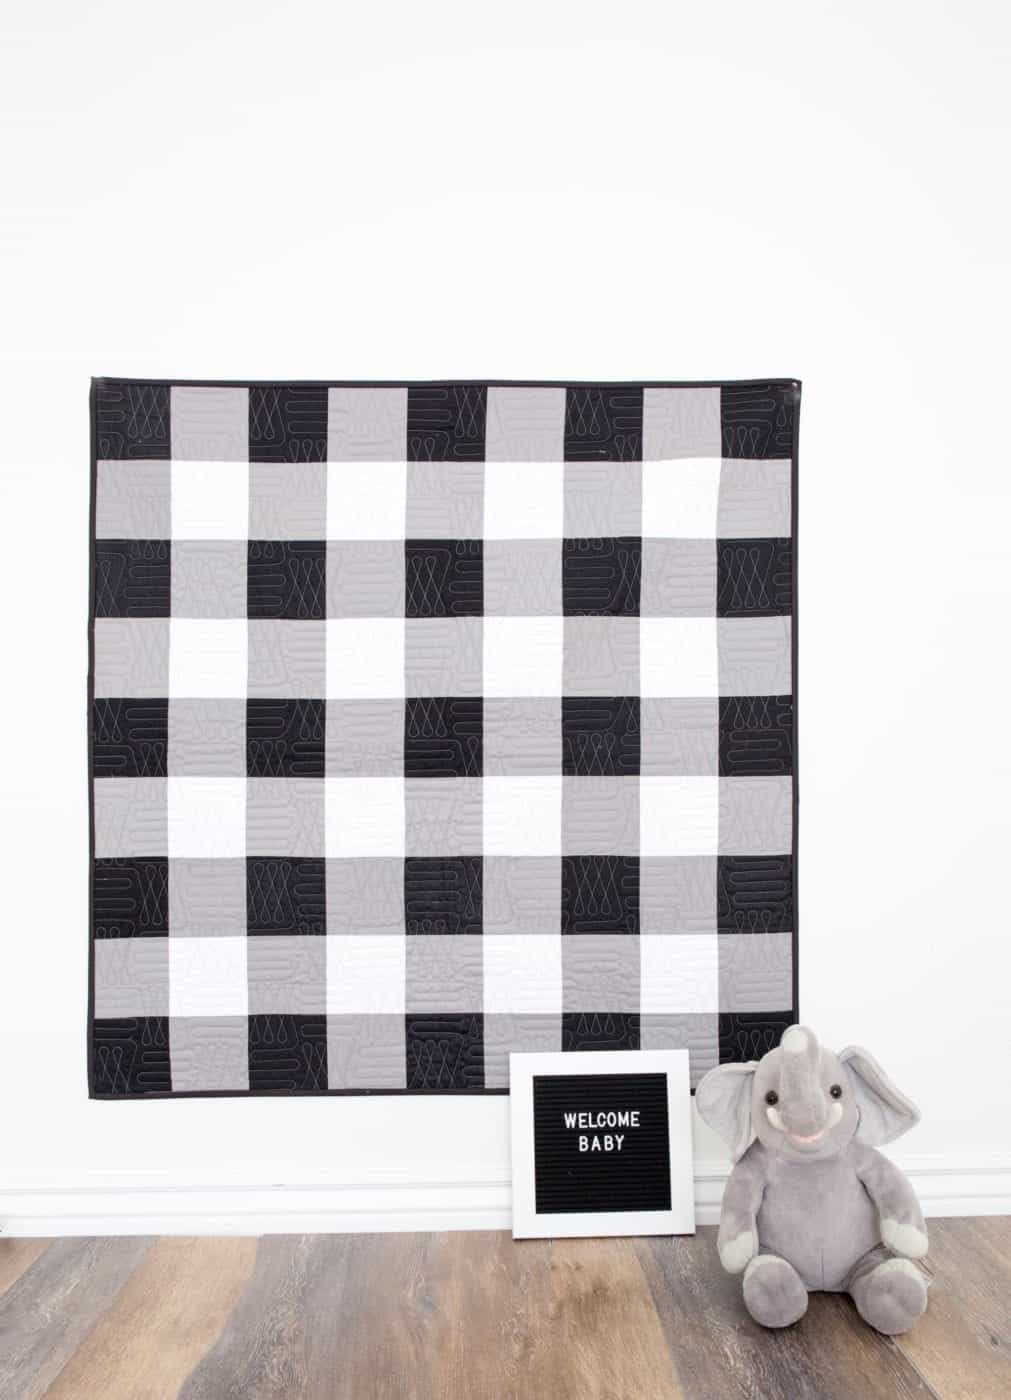
Giant Gingham Baby Quilt – make a modern baby quilt out of a classic pattern. This free baby quilt pattern can easily be made with charm packs.
One hour Baby Quilt – Use scraps or precuts to make this free and easy baby quilt pattern.
Half Snowball Baby Quilt – This Baby Quilt comes together quickly and easy enough even for a beginner to sew. Use your favorite colors for a coordinated look.
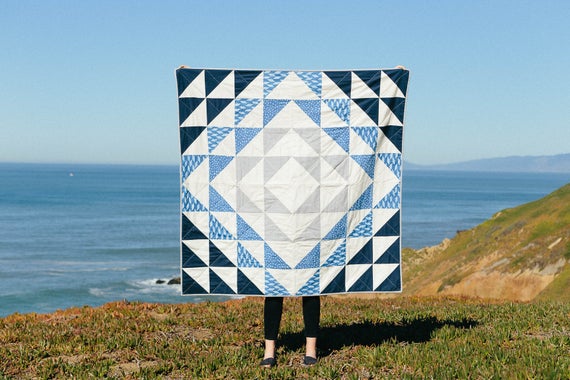
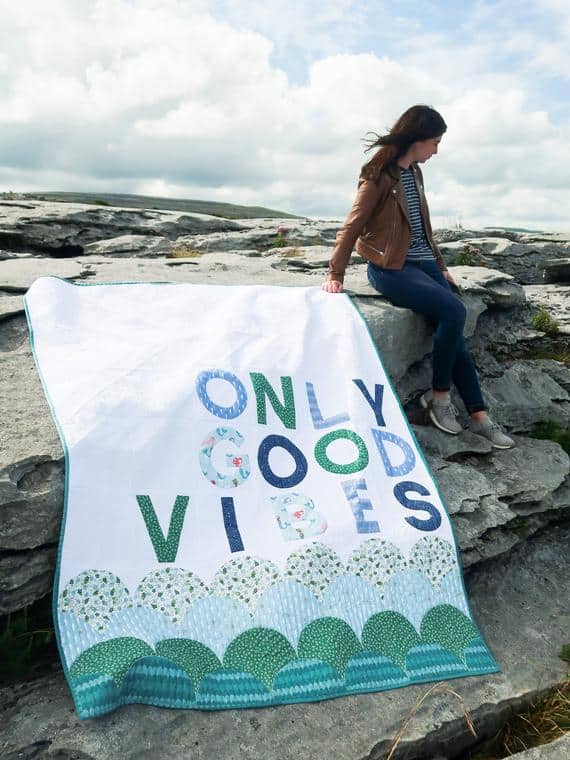
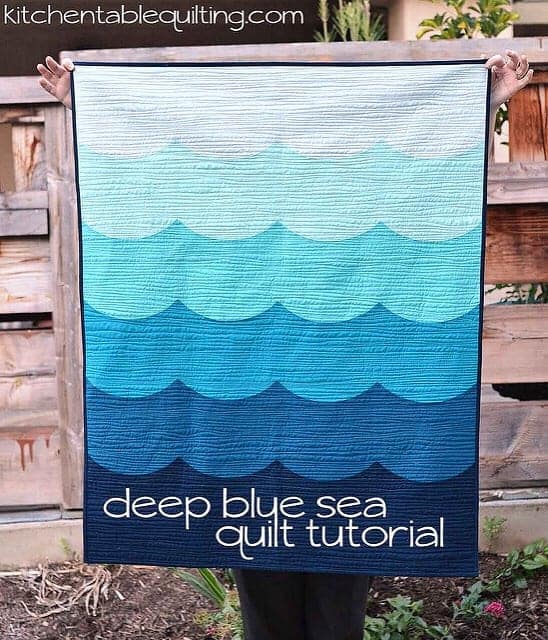
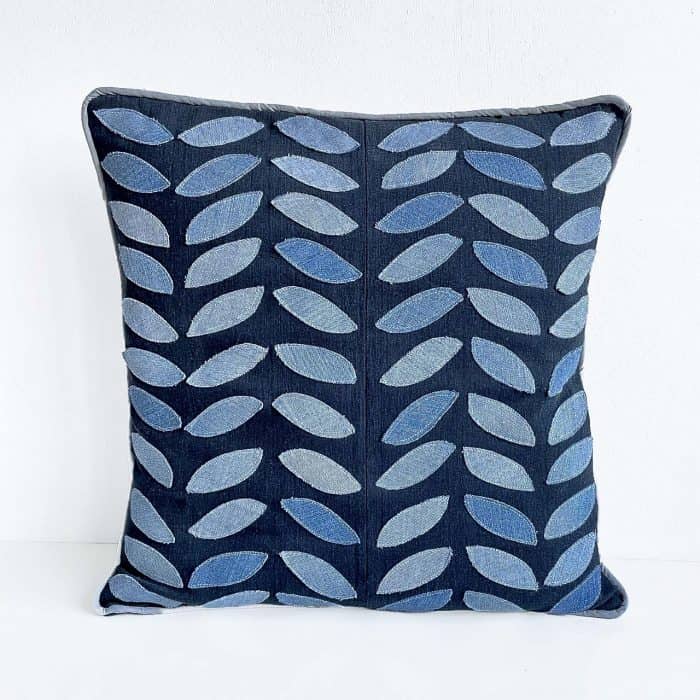
Deep Blue Sea Baby Quilt – Any Nautical inspired baby room is in need of this adorable blue sea baby quilt.
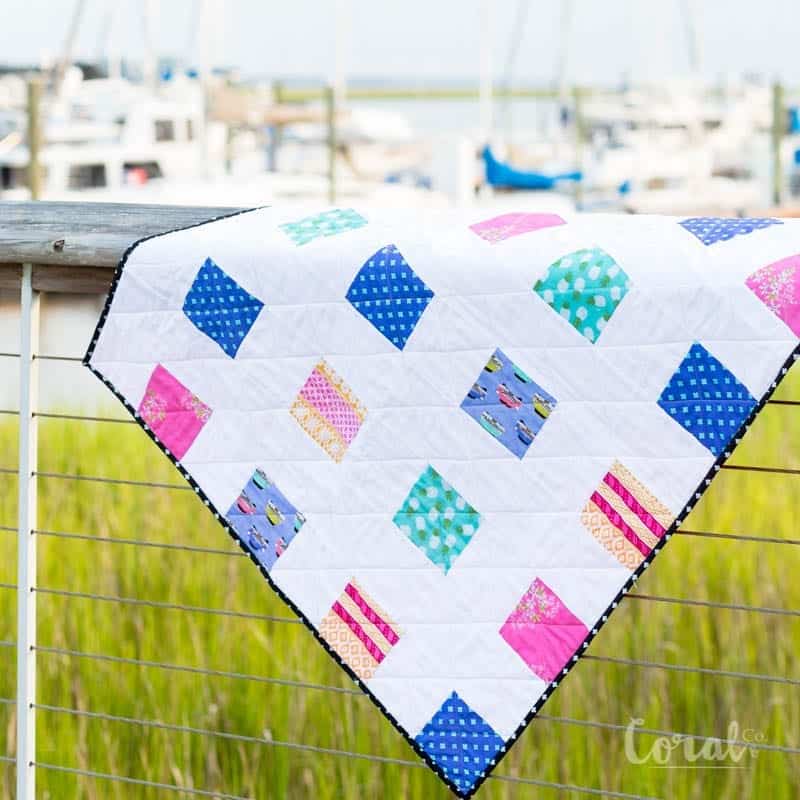
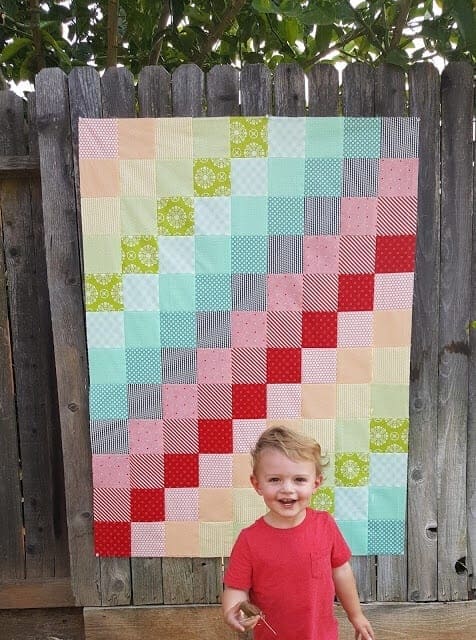
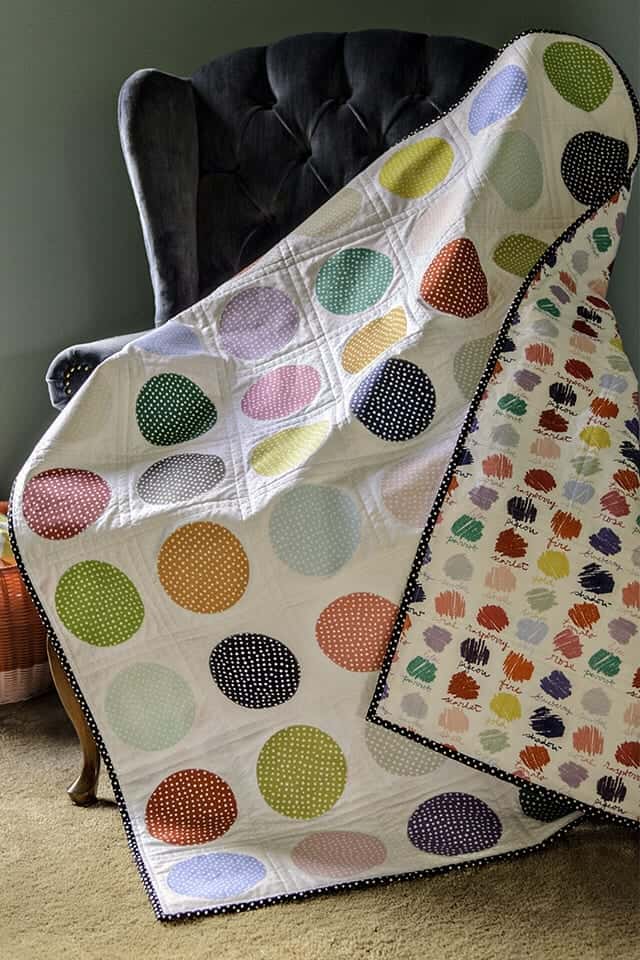
Colorful Confetti Baby Quilt – This is a delightful baby quilt that is sure to bring lots of color to babies room.
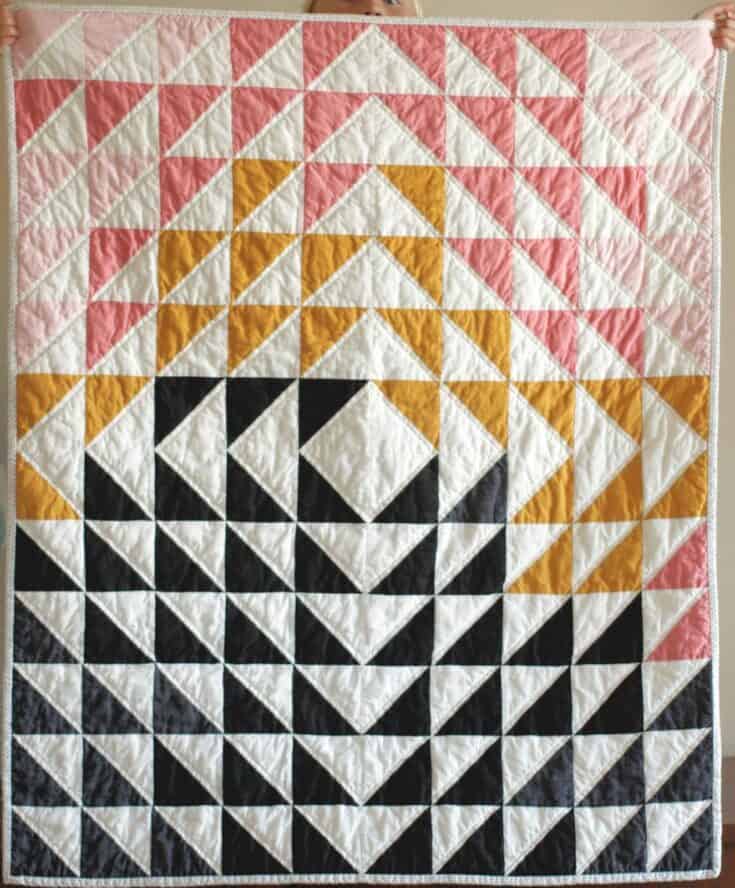
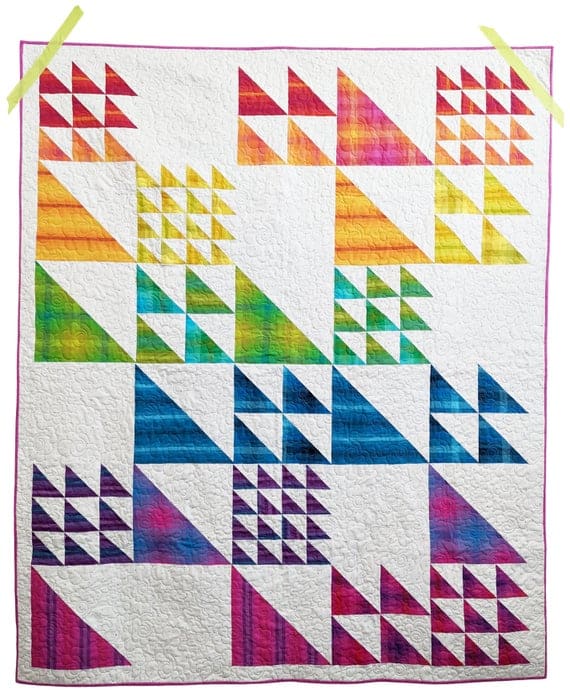
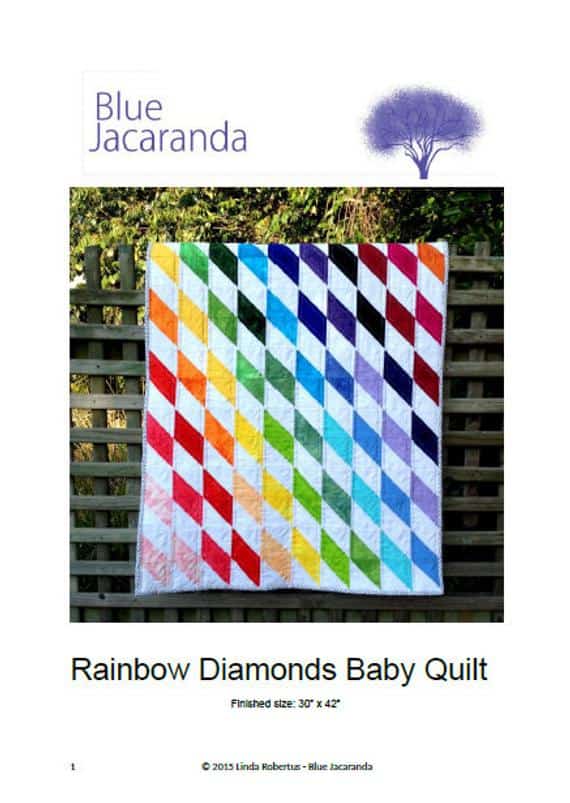
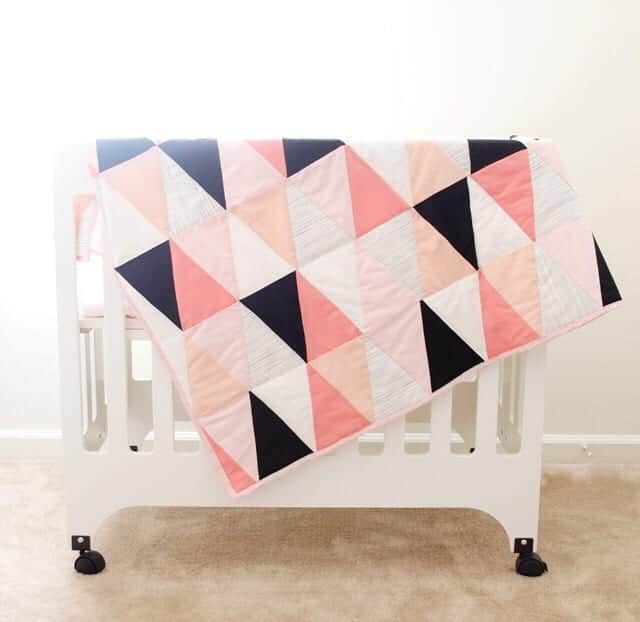
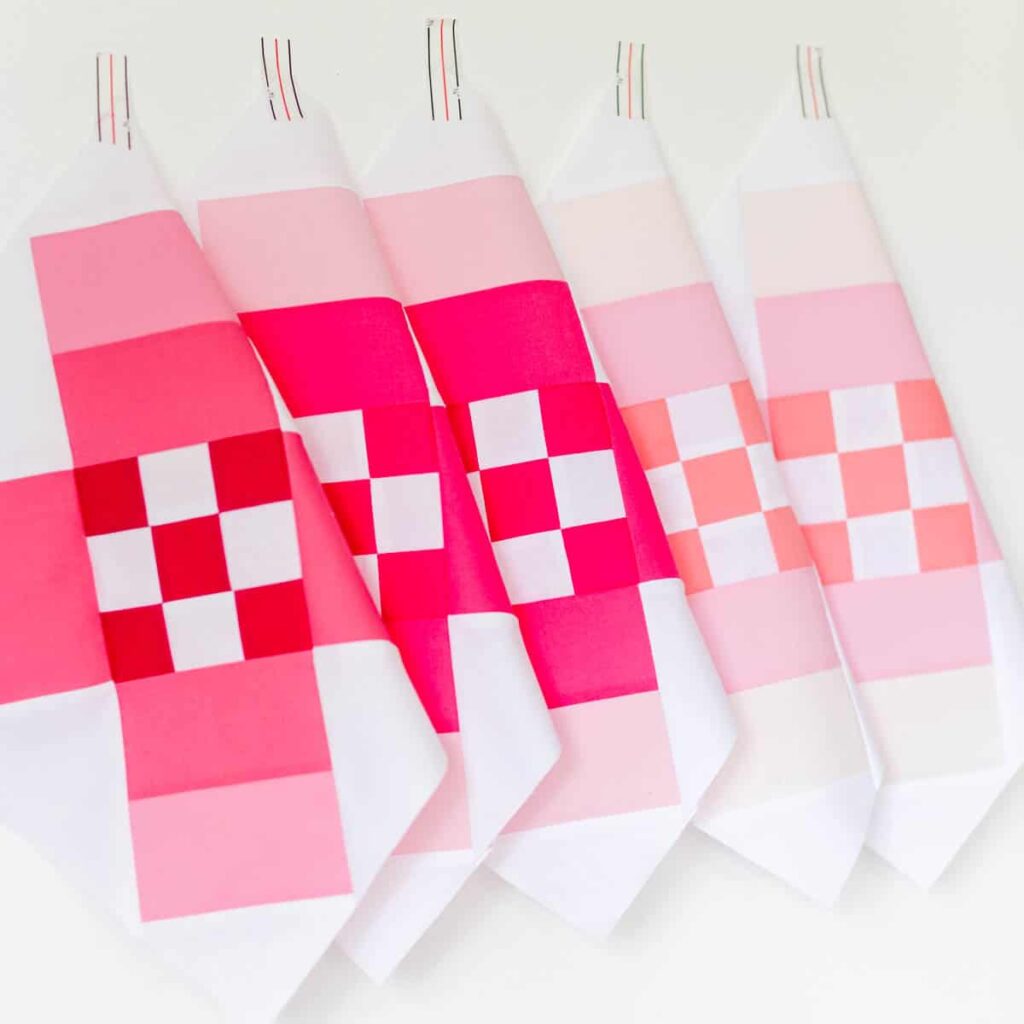
Modern Ombré Triangle Baby Quilt – modern mamas this is the baby quilt pattern for you. Any minimalist color scheme will look fantastic with this quilt.
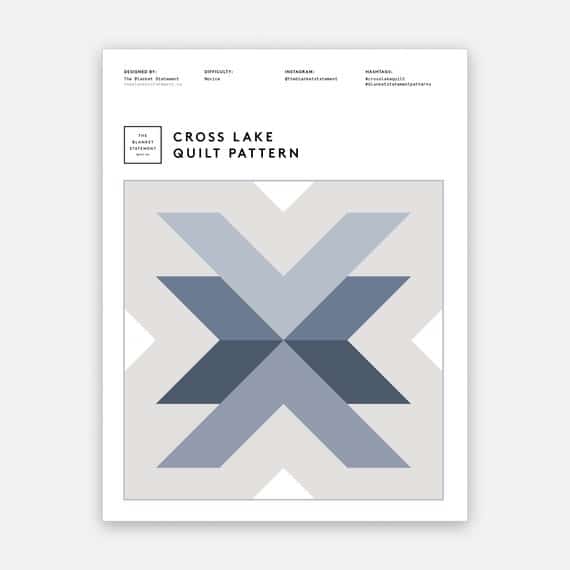
15. Modern Swiss Cross Quilt Pattern – This modern baby quilt pattern is minimal and bold and is perfect for the gender-neutral nursey or the modern momma.
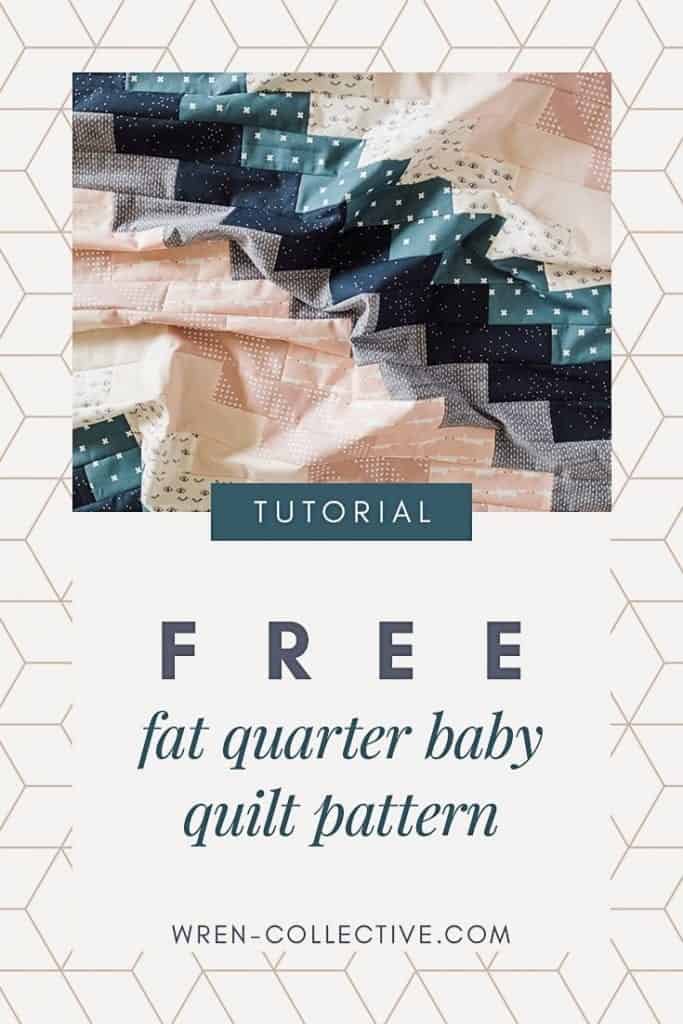
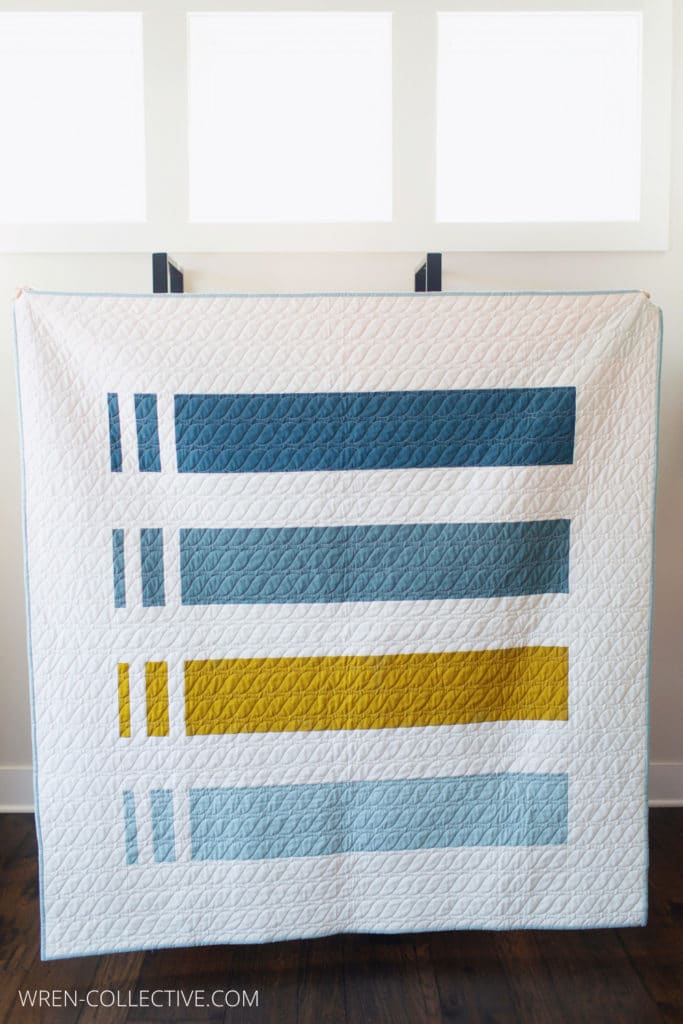
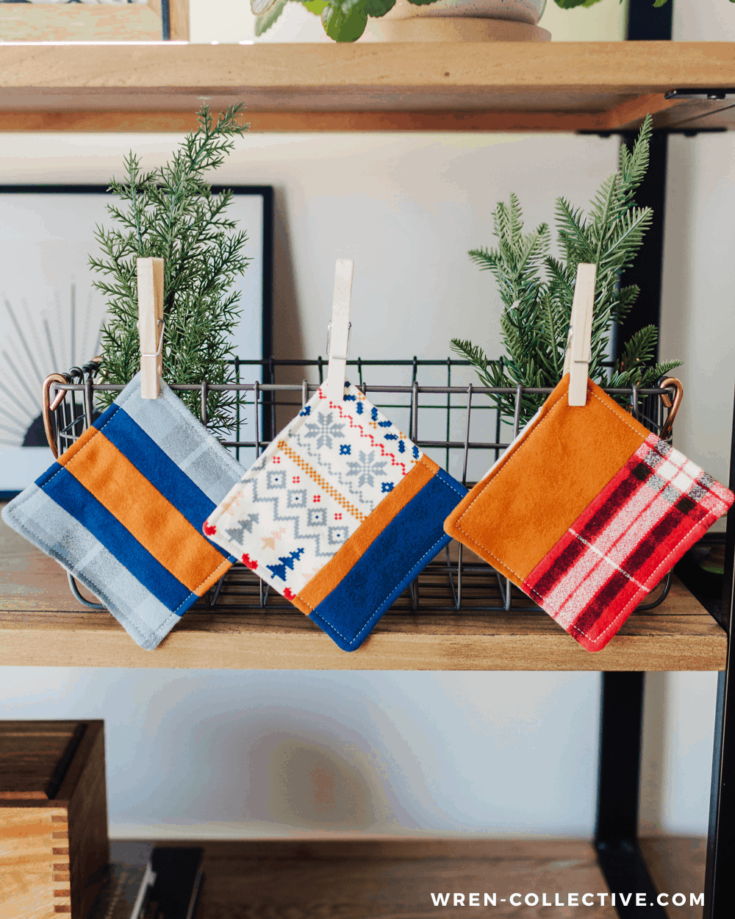
16. Baby Steps Quilt Pattern – This fat quarter friendly baby quilt pattern from Wren Collective has a modern aesthetic and is a fast sew.
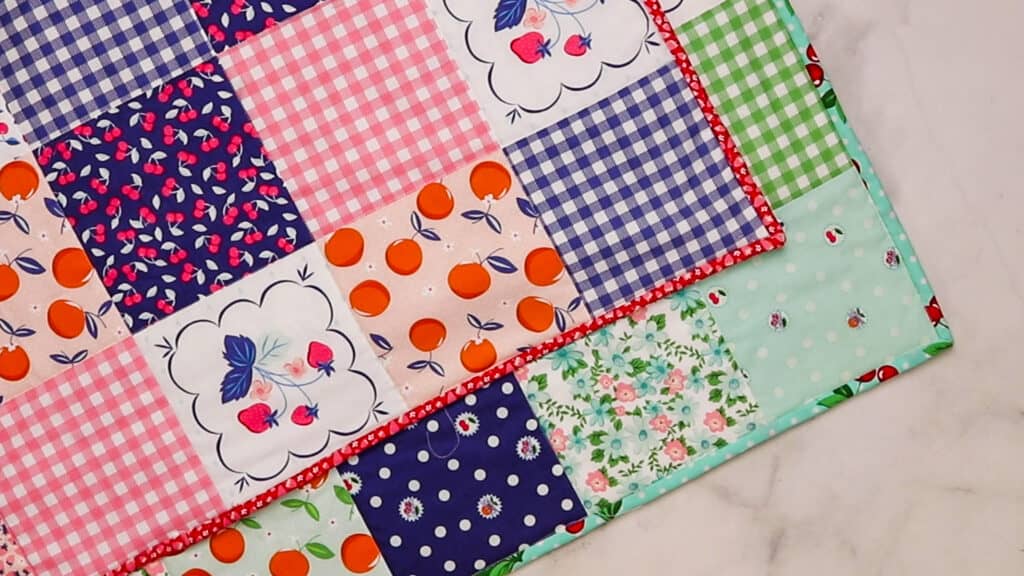
17. This super charming patchwork quilt from Flamingo Toes is simply adorable and comes together really fast.
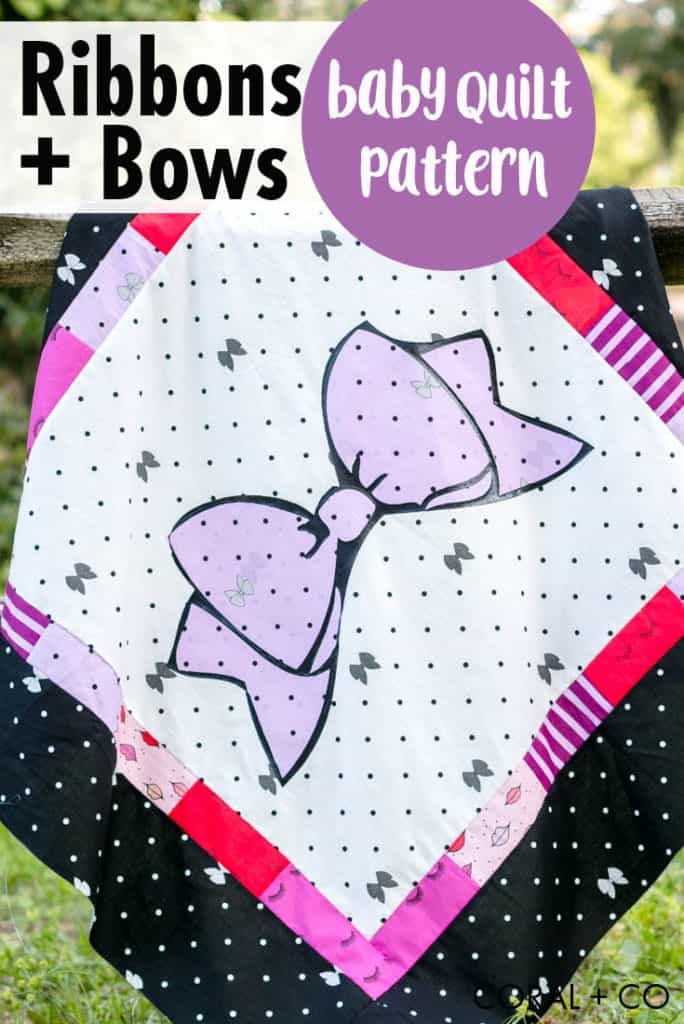
18. The Ribbons and Bows Baby Quilt is the perfect pattern for framing a fabric panel or appliqué center. It comes together quickly and is a sweet little baby quilt.
19. Punchlines is another beautiful quilt pattern from Wren-Collective. This one is so simple and elegant.
20. A Cheater Quilt – Skip the piecing and use a pre-printed fabric panel to make a super fast cheater quilt.
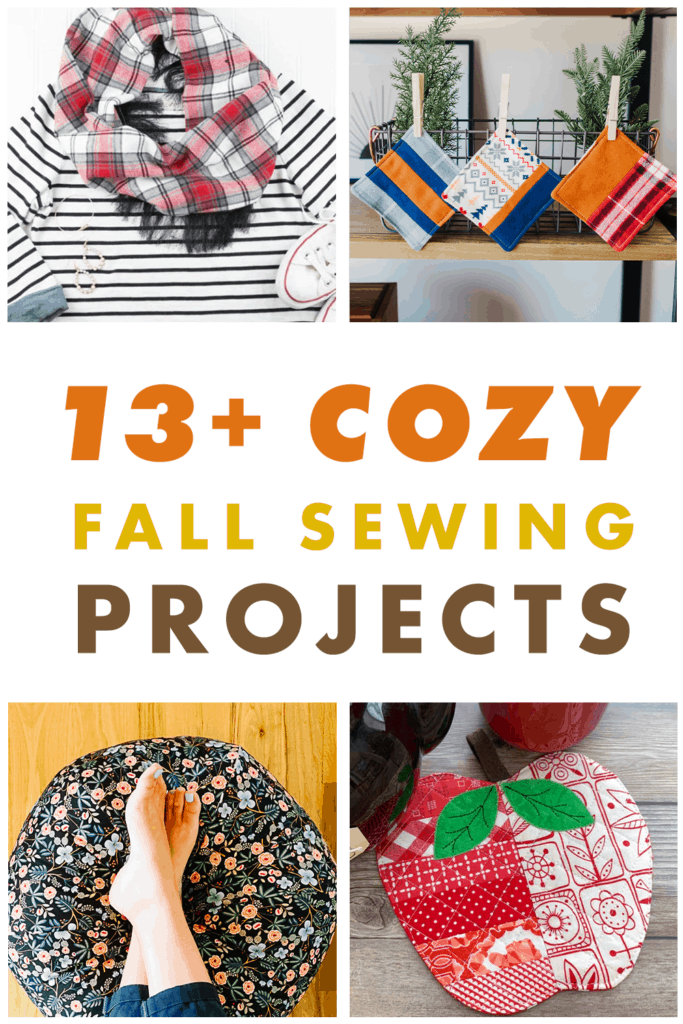
Bring on the fleece and the flannel for some cozy fall sewing! These fun fall sewing projects will have you feeling all the pumpkin latte and boots vibes for sure. Every year, even when it’s still 80 degrees outside, labor day hits and suddenly we are yearning for the cooler fall weather. I’ve got you covered for that first day of crisp air and changing leaves with so super cute sewing projects that invoke all things fall.
Cozy Fall Sewing Projects and Tutorials
Cozy Fall Sewing
Perfect for the crisp air and cool weather. Projects include lots of flannel sewing, some simple scarf tutorials, the most adorable coaster patterns, and some stylish home decor sewing. Click to find your favorite fall sewing project!
Cuddle up for fall with this cozy flannel and fleece sherpa blanket tutorial. It even comes with a video to help walk you through the step by step instructions.
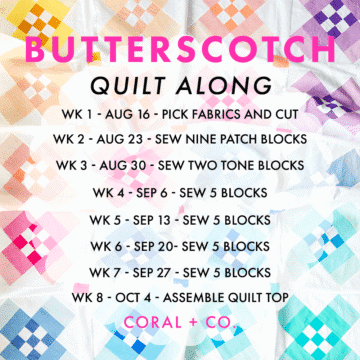
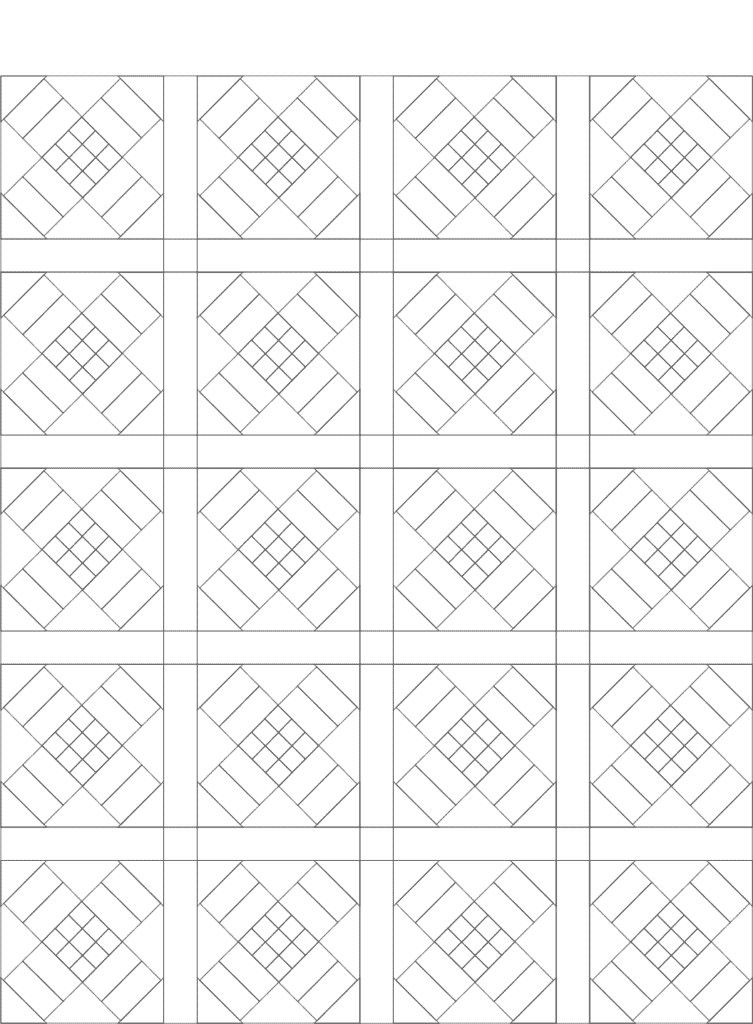
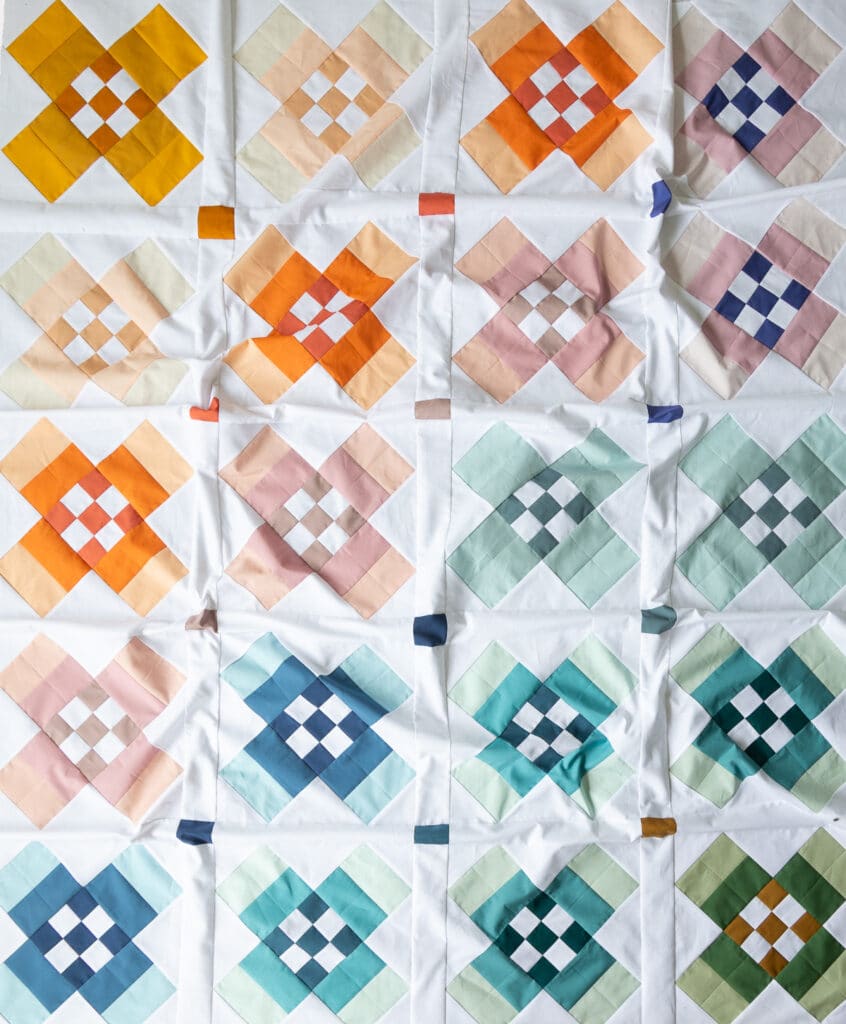
For each of the weeks 4 – 7 we will be assembling five quilt blocks each week to make a total of twenty blocks. The blocks should come together fairly quickly since you have done some of the block prep work in the last two weeks.
In this post, I am including some tips for how to perfectly square up your blocks.
The Quilt Along will be taking place on Instagram. At the end of each week I will announce that week’s winner. To enter you will post a photo sharing your progress with that weeks prompt. To enter the giveaway just use the hashtag #butterscotchqal so I can find all your lovely progress.
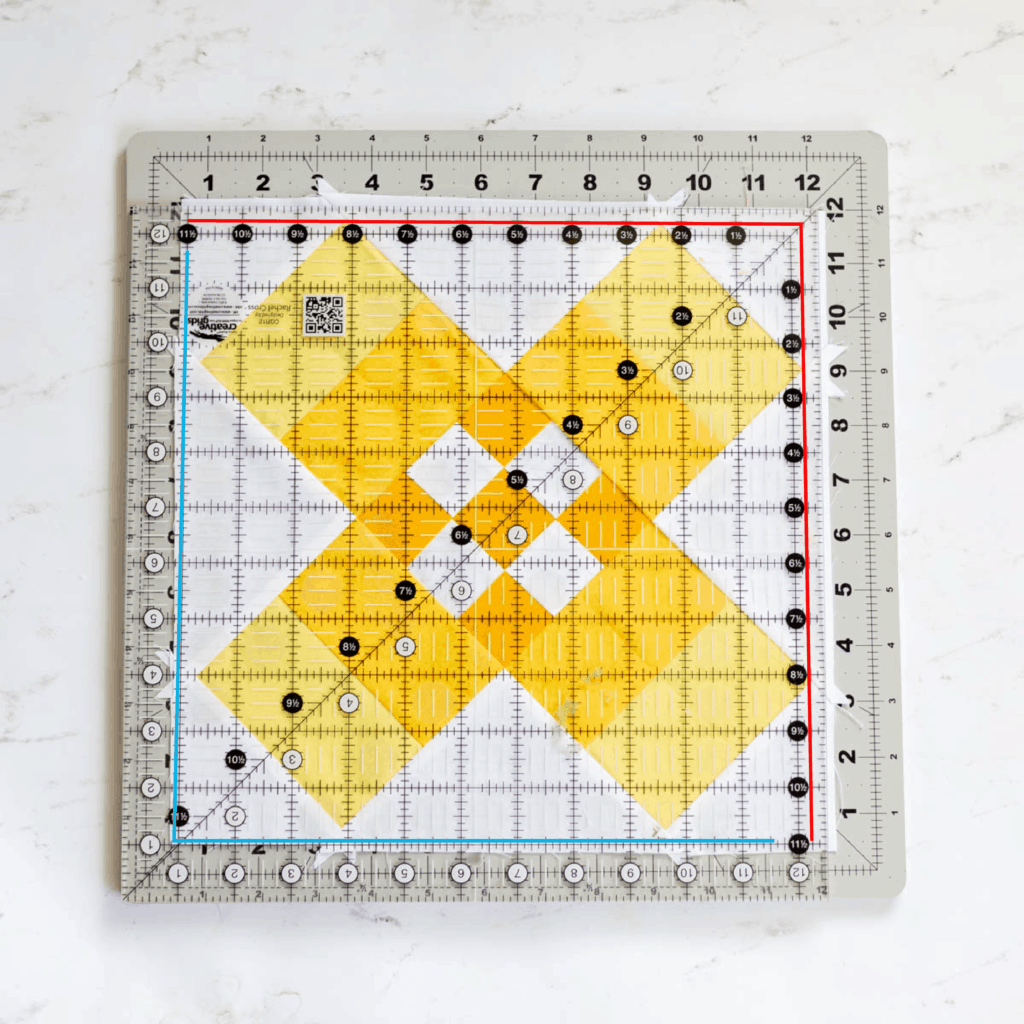
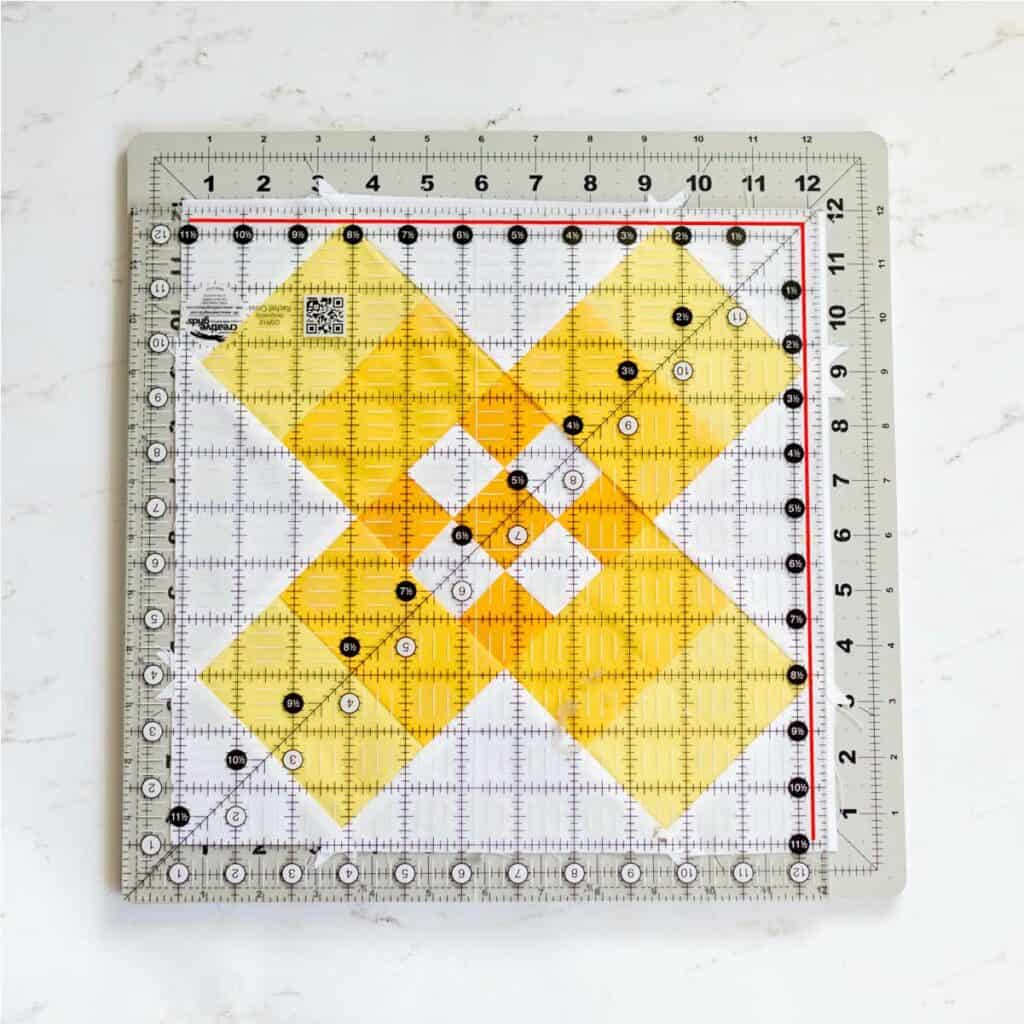
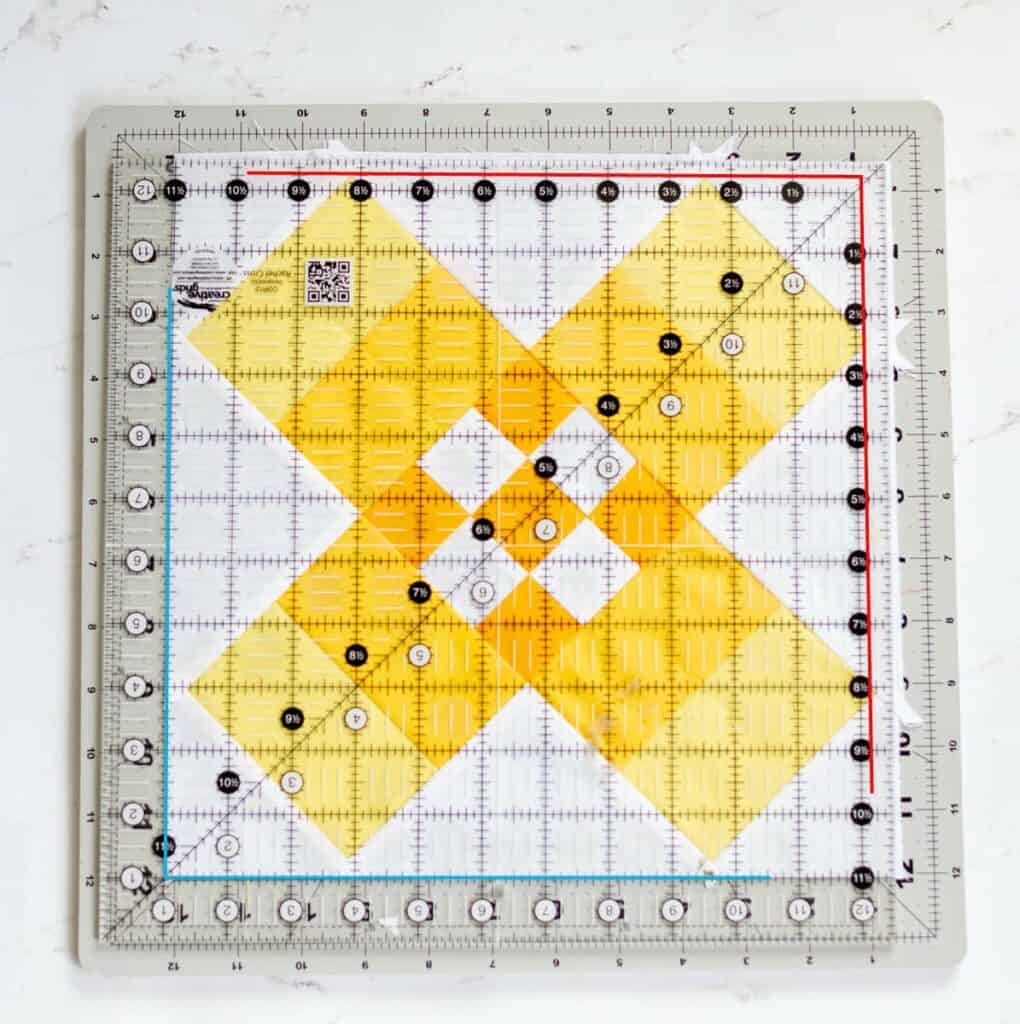
Using your 12.5″ square ruler, place it on the block so that the right and top sides have 1/4″ seam allowance. You will want to place the ruler so that the points of the color blocks are aligned with marks 1/4″ away from the edge of the ruler, as shown by the red line.
The blue line is placed on the 11.5″ line. You will want to make sure that the left and bottom edges of the block falls on or below this line. If it is above the blue line, your block will be too small.
Additionally the diagonal line of the ruler should run from the upper right hand corner, through the center of the two tone, and nine patch blocks, down to the lower left hand corner.
Turn your block 180 degrees and line up the ruler so that the color points on the top and right sides line up with the markings 1/4″ from the edge of the ruler, where the red line is shown. You may have a little extra on the left side of the block as I did in the photo above, where the block extends past the 11.5″ line. Squaring it up one more time will fix this.
Turn the block 180 degrees one more time. Line up the left and bottom sides with the 11.5″ lines on the ruler, shown by the blue line. Then once again line up the color points on the top and right with markings 1/4″ from the ruler edge on the right side, as shown by the red line.
Your block should be 11.5″ square now, with 1/4″ seam allowance between the color points and edge on all sides. The blocks are now ready to add the sashing to.
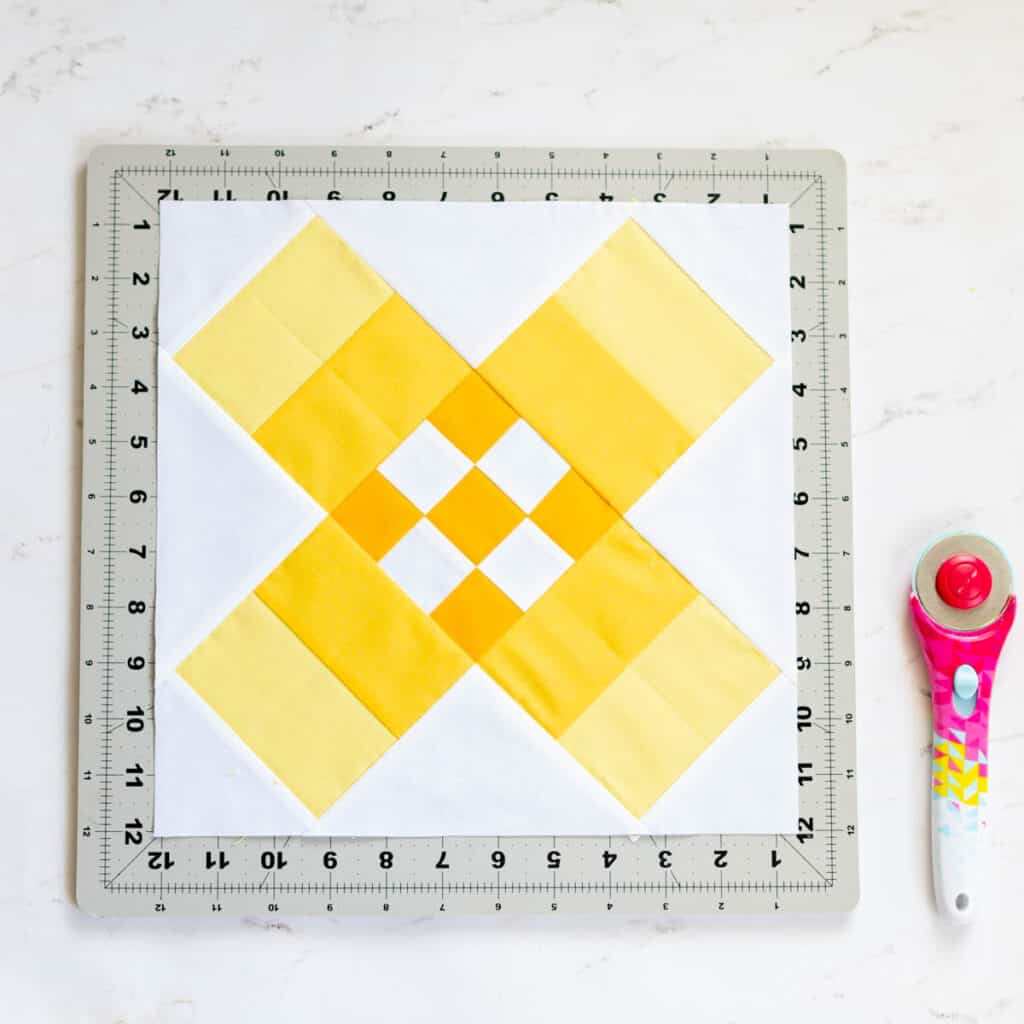
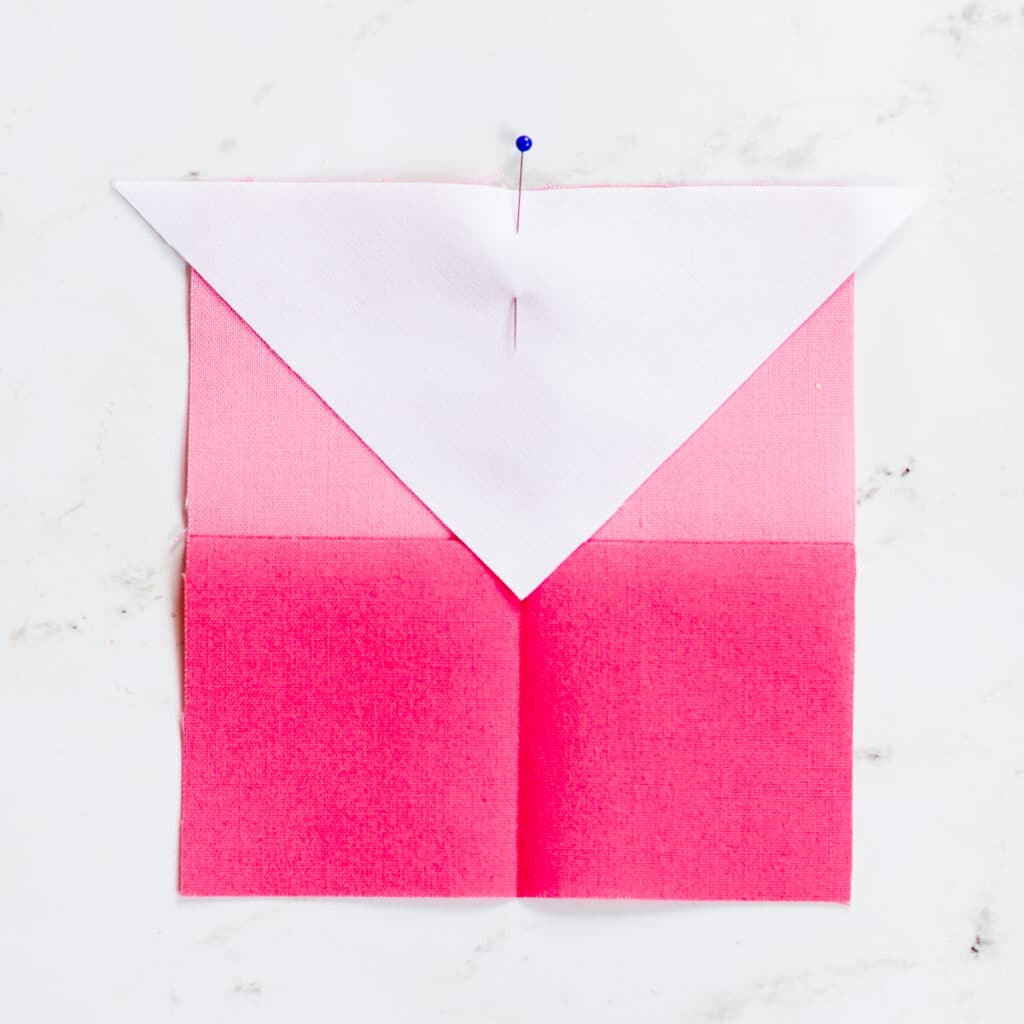
This week we will be making the two tone color block squares and adding the triangle to the top of it. If you are making the throw size you will be making 10 different two tone block sets and adding the triangle tops to each of them.
Next week we will finally start piecing our blocks together.
The Quilt Along will be taking place on Instagram. At the end of each week I will announce that week’s winner. To enter you will post a photo sharing your progress with that weeks prompt. To enter the giveaway just use the hashtag #butterscotchqal so I can find all your lovely progress.
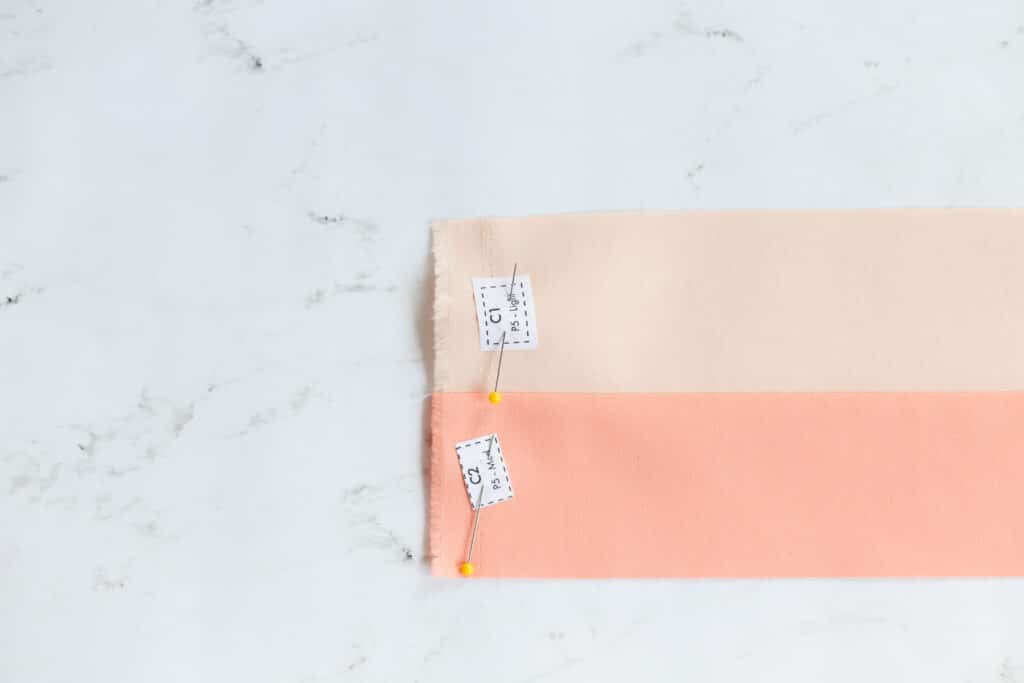
In week one you will have cut and labeled your strips. Organize them into sets of C1 and C2 for each palette. That way they are in the pairs that are needed to make each block.
If you pin the label in the center of the block on the selvage edge (or just the end of the strip if there is no selvage), you should be able to sew the strips together without needing to remove the pins and labels. If you find you do need to remove the pin, just place it back after you have sewn it together. This will help you stay organized when cutting later on.
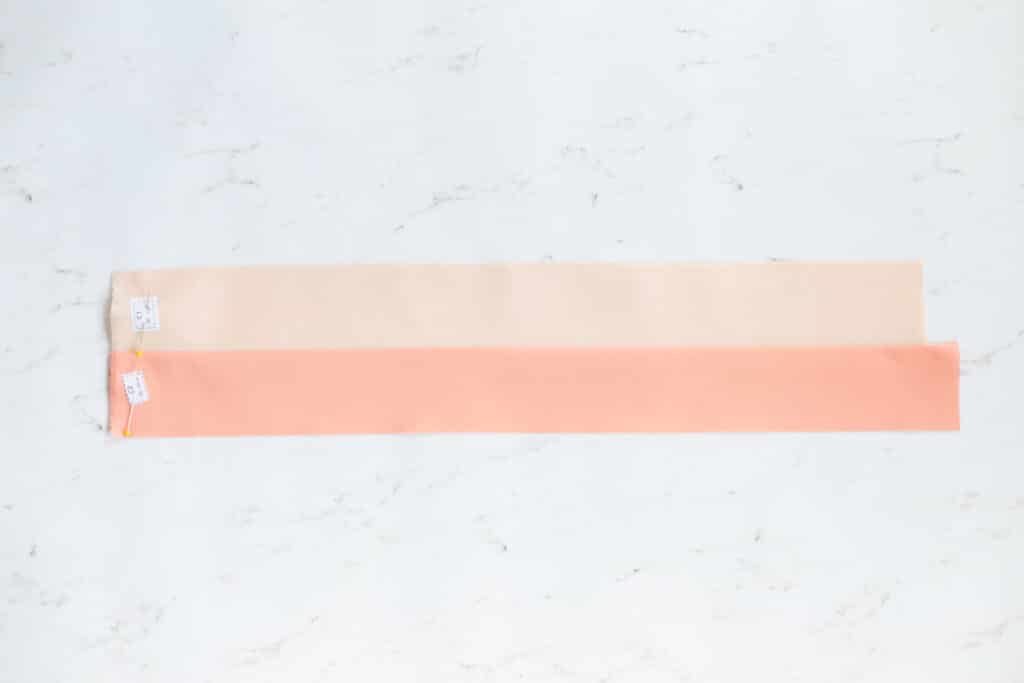
Then you will strip piece C1 and C2 for each block. Gently finger press the seam allowance toward darker side of the strips. Then press with the iron to set.
When subcutting the color block squares be sure to reattach the label to the top square of each color set to keep track of which palette number it is. Stack them in palette order 1 -10.
Fold the two tone block in half (perpendicular to seam) and finger press to make a line in the fabric. This line will allow you to make sure that the triangle top is centered in the middle of the color block. When placing the triangle on the block, line up the center point of the triangle with the vertical finger pressed line. Then pin in place so it doesn’t slip.
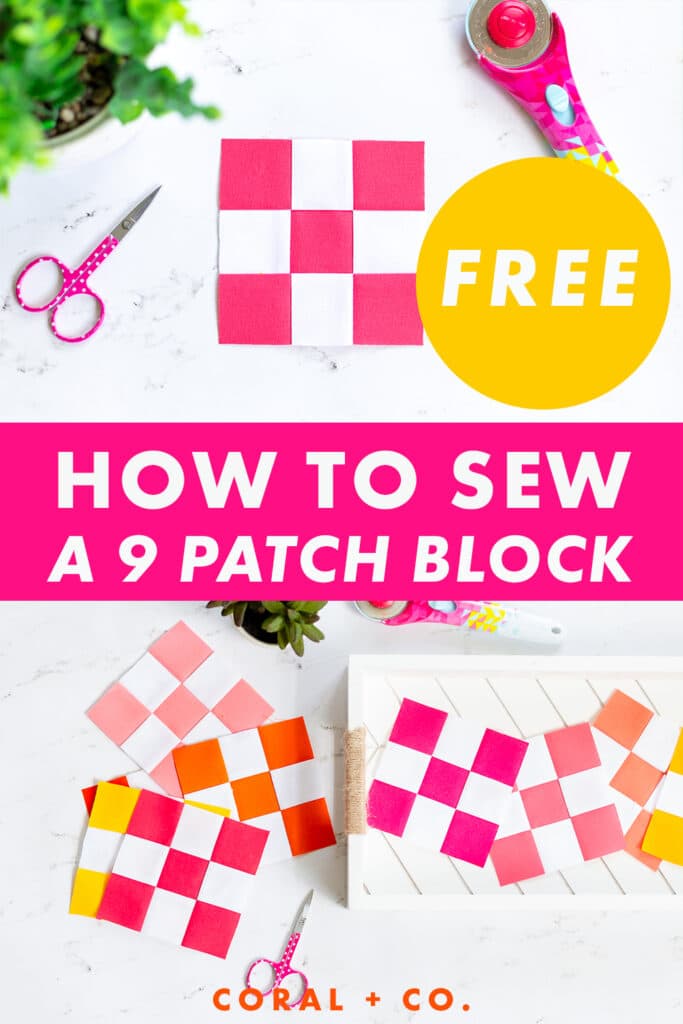
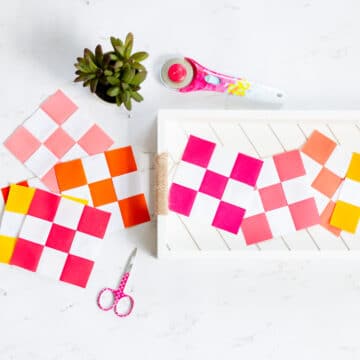
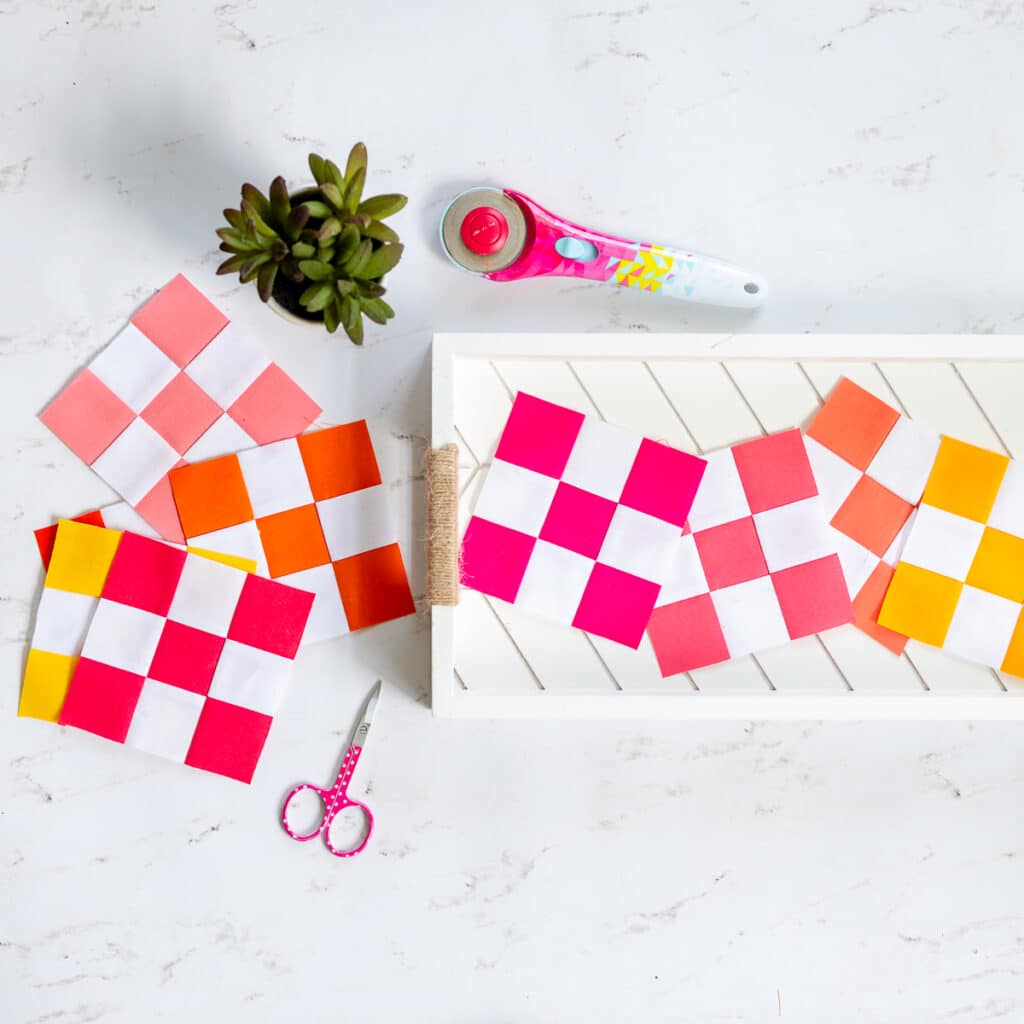
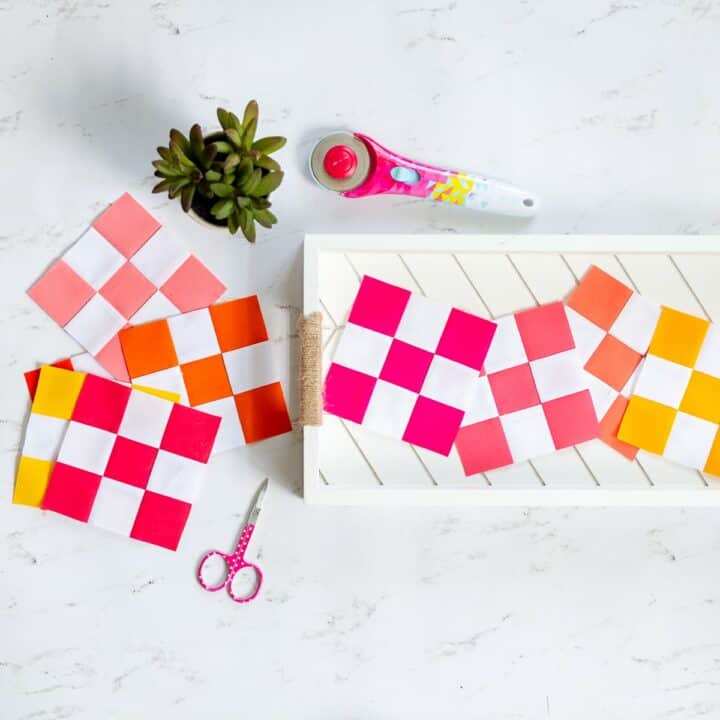
Learn how to sew a 9 patch quilt block with this comprehensive guide to making and sewing nine patch quilt blocks. This guide will teach you what a nine patch block is, how to sew a nine patch quilt block, with scraps or square by square, how to strip piece a nine patch block, how correctly press a nine patch block, how to nest the seams, and how to square up a nine patch block.
You will also learn the formula to figure out what size squares to cut. I have made a hand PDF 9 patch block cutting chart as well as a hand pdf cheat cheat for piecing. Additionally I have provided some fun 9 patch block variations for inspiration.
To quickly jump to the section you would like, click the underlined link below.
Table of Contents
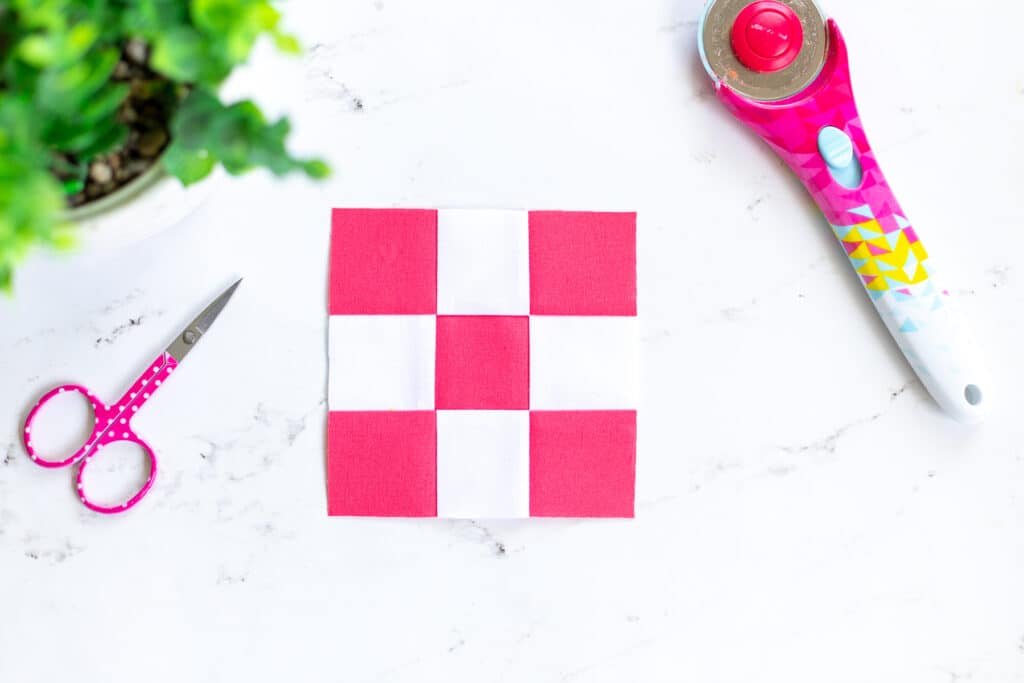
What is a Nine Patch Block?
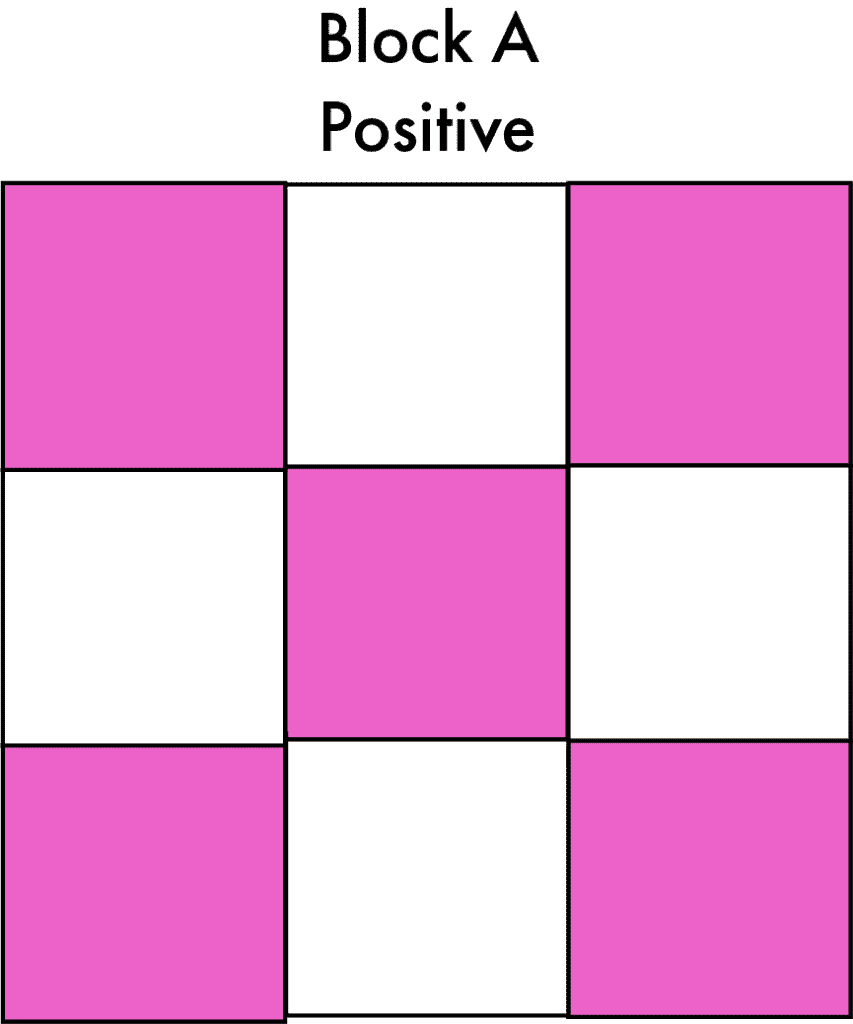
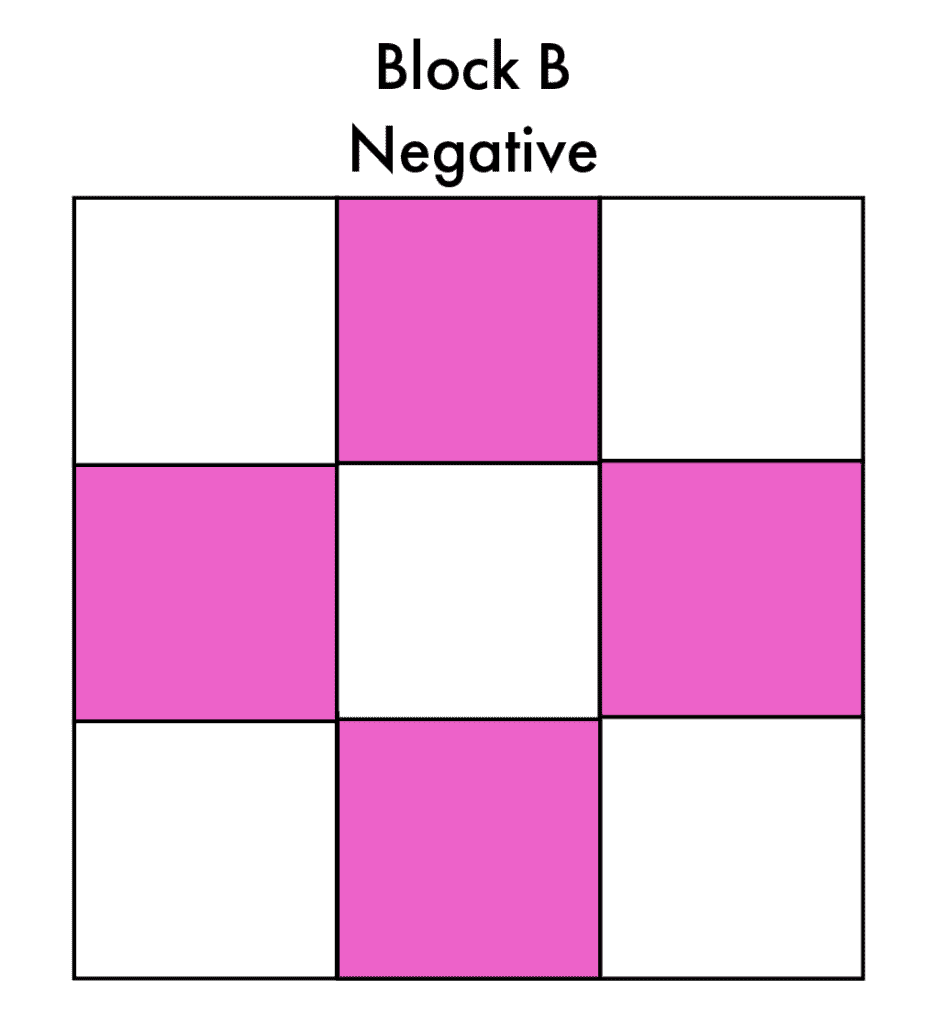
A nine patch block is one of the basic quilt blocks. It is a beginner friendly quilt block that joins nine smaller squares to become one larger block, usually resulting in a repeating pattern using light and dark squares. Although it can be composed of other blocks such as half square triangles and four patch blocks and does not necessarily form a repeating or symmetrical pattern.
Nine patch blocks are usually made with light and dark contrasting colors. Block A is sometimes known as a positive block, while reversing the placement of light and dark colors will make Block B or a negative 9 patch.
How to Sew a 9 Patch Block using squares or scraps.
To make a 9 patch block using single squares or scrap pieces follow the directions below. You will piece each row a square at a time and then join the rows together to form a 9 patch block.
Chain piecing can make the 9 patch block come together more quickly. Learn how to chain piece with this video and tips.
How to Sew a 9 Patch Quilt Block - Nine Patch Block Strip Piece or Block by Block
Prep Time: 10 minutes
Active Time: 10 minutes
Total Time: 20 minutes
Difficulty: beginner
Learn how to sew a nine patch quilt block either block by block or by strip piecing
Instructions
. Using a 1/4" seam sew a dark square to the opposite sides of the white block. Make 2
. Using a 1/4" seam sew a light square to the opposite sides of the color block.
. Positve or A Block - Using a 1/4" seam sew a strip made in step 1 to the opposite sides of the strip made in step 2. Or alternatively make it with the opposite placement as shown in step 4.
. Negative or B Block - Using a 1/4" seam sew a strip made in step 2 to the opposite sides of the strip made in step 1.
Did you make this project?
Please leave a comment on the blog or share a photo on Pinterest
How to Strip Piece a 9 Patch Block
To strip piece a nine patch block you will start with several strips of fabric the height of the block you want to make. You will join the strips for form long rows of alternating colors. Once the rows are formed you will cut them into smaller strips and then join these strips together to form the nine patch block.
How to Strip Piece a Nine Patch Block
Prep Time: 10 minutes
Active Time: 10 minutes
Total Time: 20 minutes
Difficulty: beginner
Make a 9 patch block using the strip piecing method.
Instructions
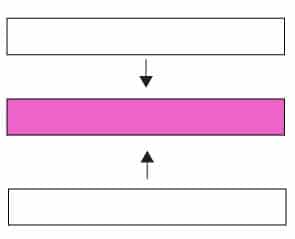
. Using a 1/4" seam sew two dark strips to the opposite sides of the white strip.
. Using a rotary cutter, cut the unit made in step 1 to the block width needed.
. Using a 1/4" seam sew two light strips to the opposite sides of the color strip.
. Using a rotary cutter, cut the unit made in step 3 to the block width needed.
. Positve or A Block - Using a 1/4" seam sew a strip made in step 2 to the opposite sides of the strip made in step 4. Or alternatively make it with the opposite placement as shown in step 4.
. Negative or B Block - Using a 1/4" seam sew a strip made in step 4 to the opposite sides of the strip made in step 2.
Did you make this project?
Please leave a comment on the blog or share a photo on Pinterest
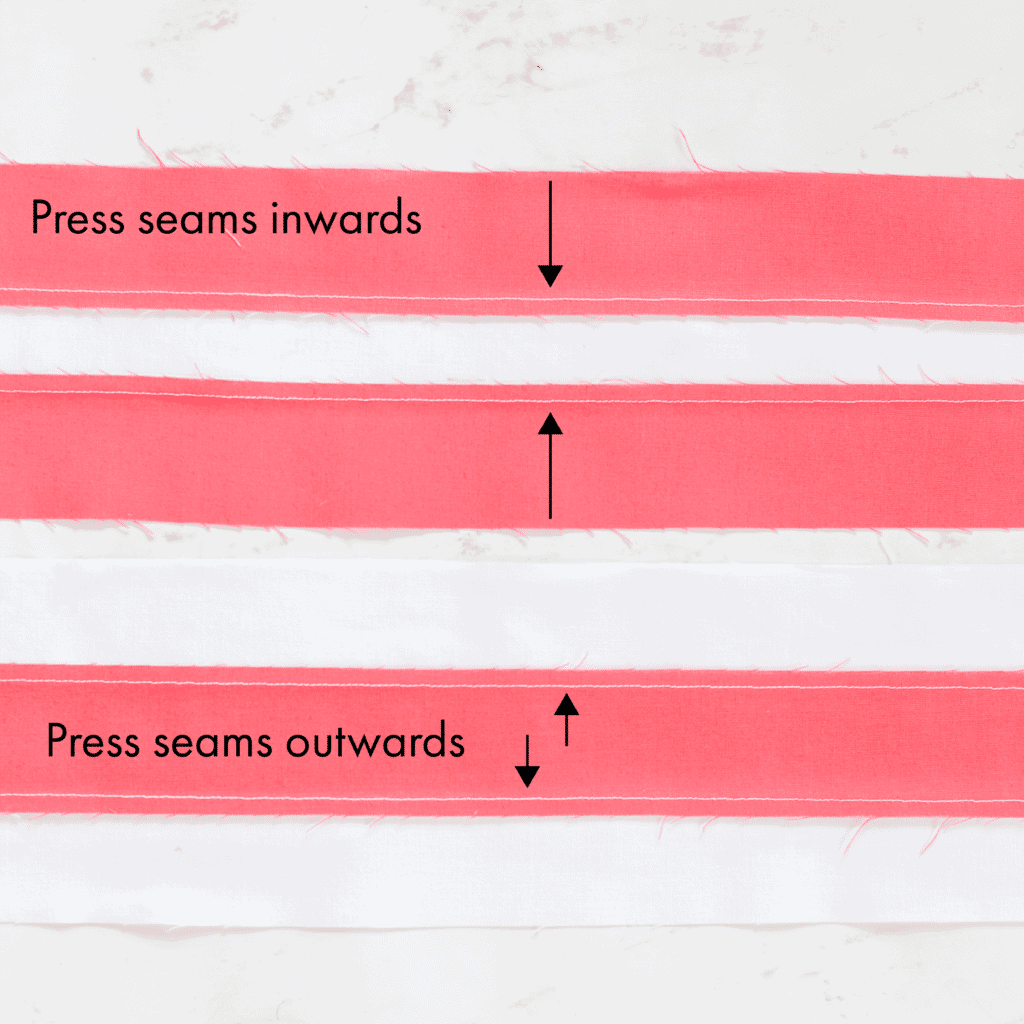
How to Iron a Nine Patch Block
Pressing the nine patch block is an important step to help the strips sit together nicely. On Block A press the seams inward toward the middle strip. On Block B press the seams outward toward the top and bottom strips.
The rows will now have the seams facing in the opposite directions. The outer strips seams will be facing inward and the middle strip seams will face outward. When joined, the seams will “lock” in place so they can fit together and the seams will match.
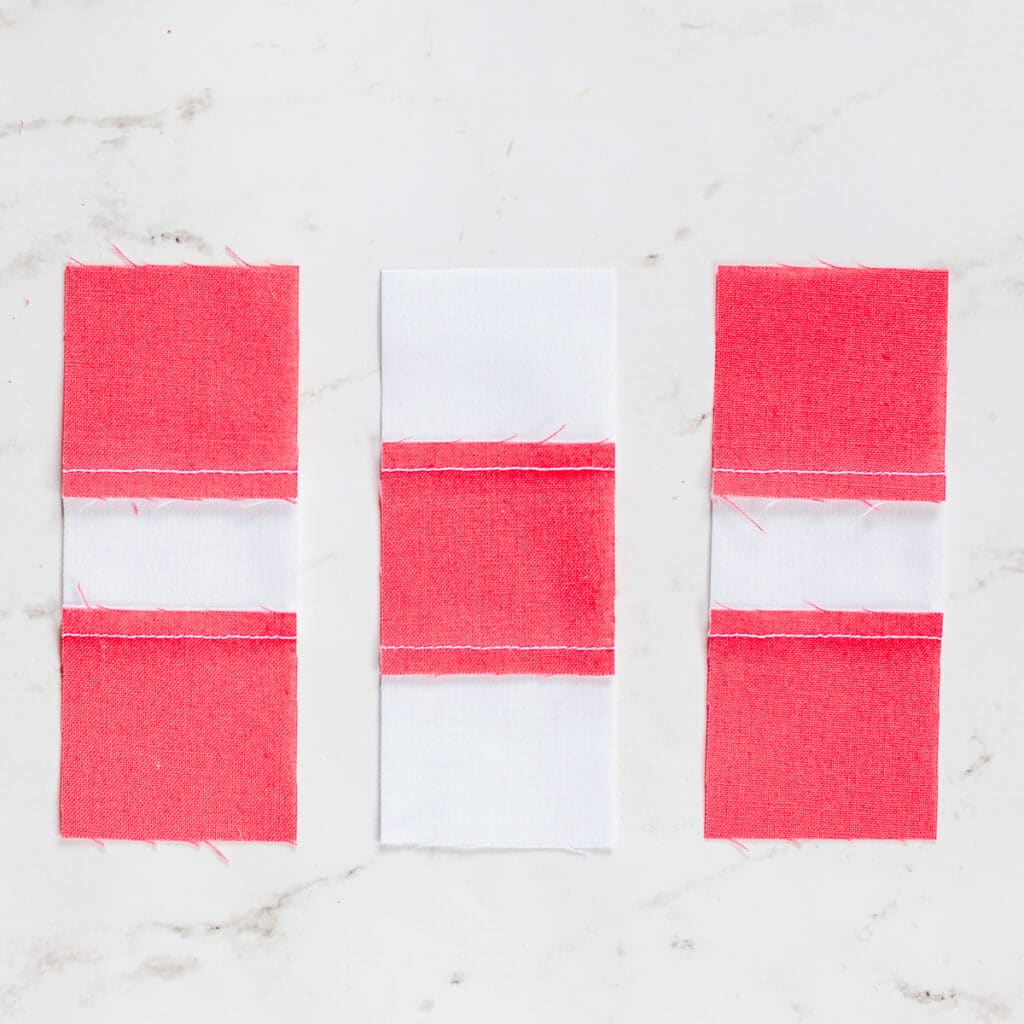
How To Nest Seams for a Nine Patch Block
As you can see in the photo below the seams on the adjacent rows face the opposite directions. The stitch lines are still able to line up so when the rows are placed together you will have a perfectly joined seam.
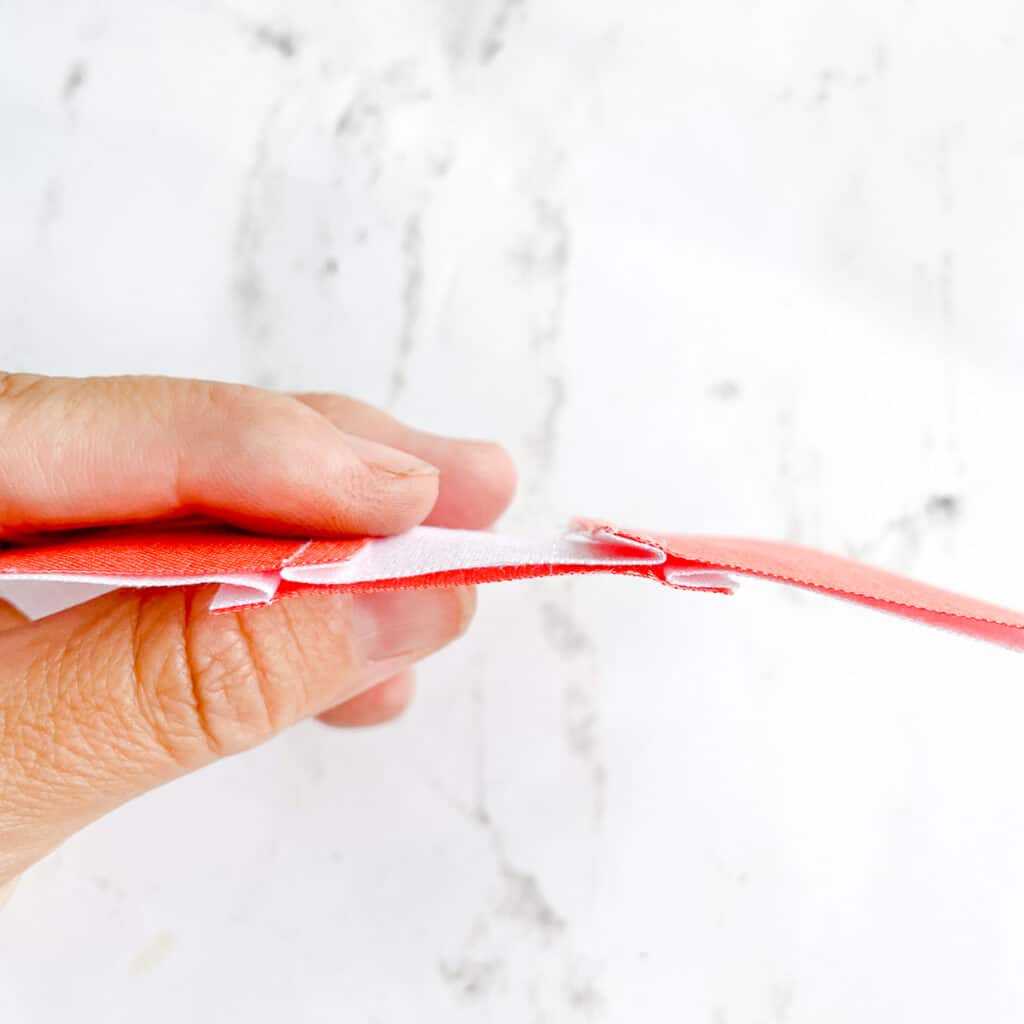
To nest the seams, place the strips right sides together. The seams pressed in the opposite directions from one another will join together, as shown below, and will form a “lock” of sorts so that the blocks will not move or shift apart as easily and when sewn, the squares will line up perfectly. It also removes excess bulk.
If the seams allowance were both press the same direction, the seam would be much bulkier, and would be more likely to slip and shift out of place and the squares would not line up as nicely.
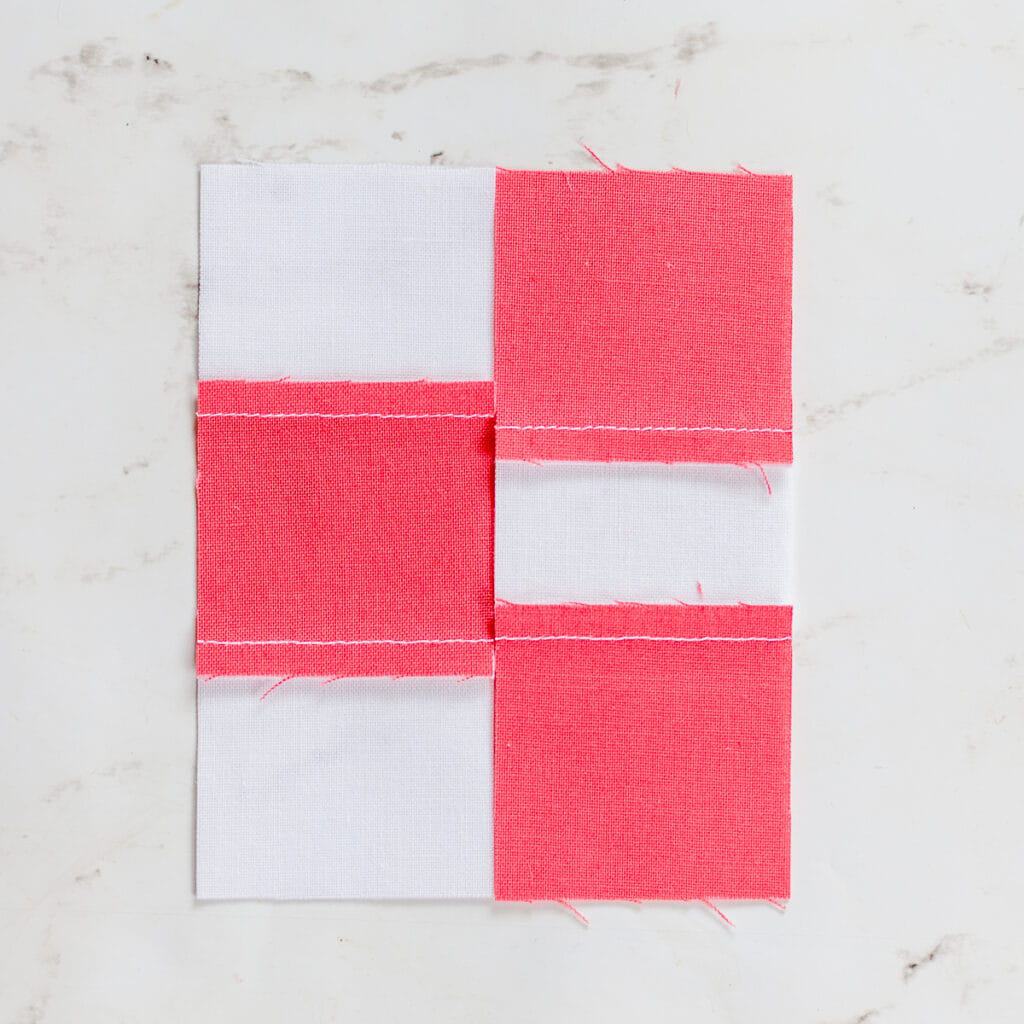
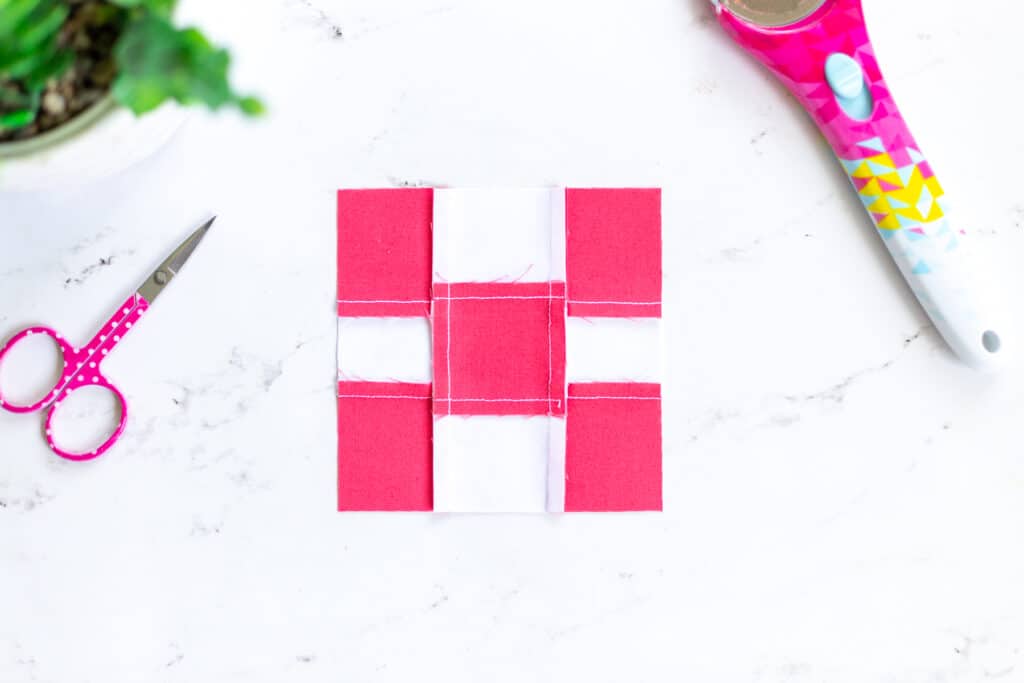
As you can see on the finished 9 patch block below, the stitch line travels straight across all the squares, while the seams on the outer and inner strips are pressed in the opposite directions, as shown in the first photo.
Press the vertical seams to one side to finish.
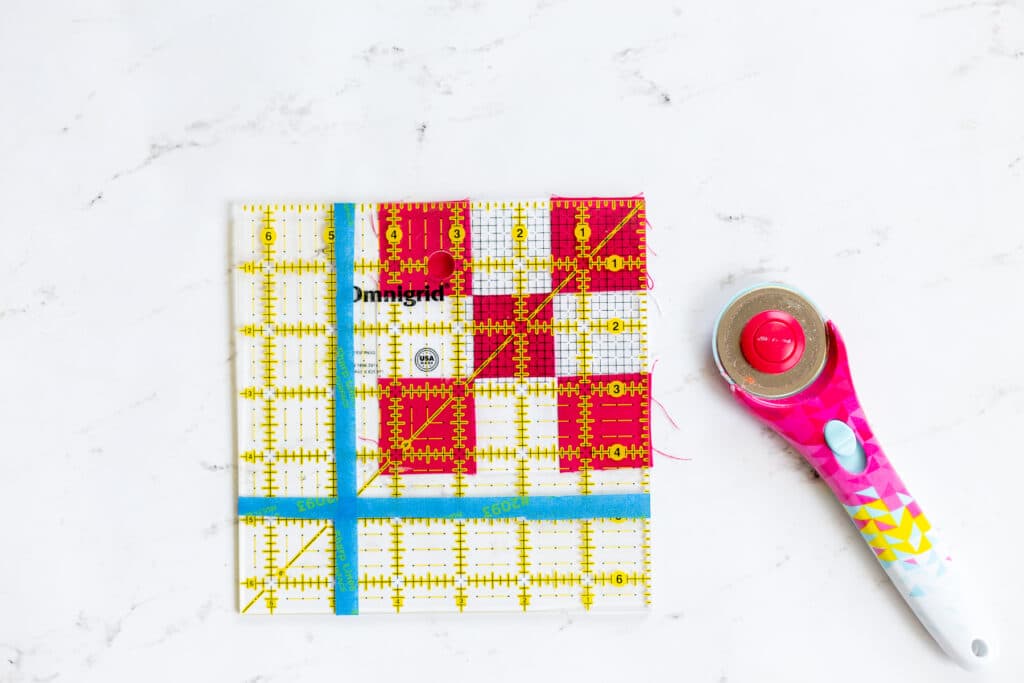
How to Square Up a Nine Patch Quilt Block
When sewing a nine patch block, it is important to start with a consistent seam allowance. I highly recommend using a scant 1/4″ seam allowance. If your seam is consistent there will be less squaring up that you will need to do.
Even with a consistent seam allowance I find that I still need to square up the nine patch block so that all side of the block are equal before I sew it to another block.
Since the middle square will be smaller than the other squares that have not been sewn yet, I find the easiest way to go about square up is to use a square ruler.
Center the diagonal line on the ruler down the diagonal of the nine patch. The line should travel from the corner of one block, through both corners of the middle block, to the outside corner of the last block.
Once you have achieved this, then look to the bottom and left edge to find the finished block dimensions. In this case, the block needs to be 4.25″. Once you have made sure that the block is at least the finished dimensions, then you able to trim the top and right sides.
Turn the block 180 degrees and repeat the steps above. You will now have a perfectly square block that is the correct size.
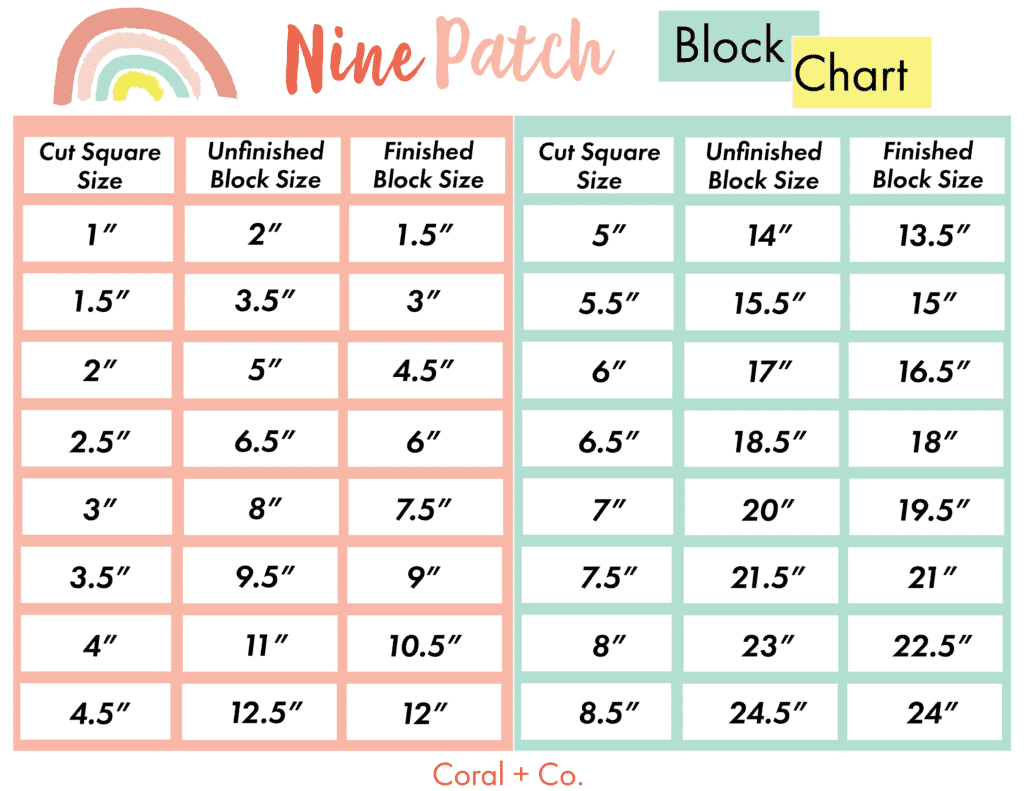
Nine Patch Block Sizes Chart
Nine Patch Block measurements can be calculated with an easy formula. You will need to add the seam allowance to come to the size needed.
To find the block size needed, follow the formula below:
To figure out what size block you will need to cut, first you need to know what the finished block size you need , then add 1.5″ for seam allowance, and then divide this number by the number of blocks you are using which is 3.
You can also use the chart below or print out the pdf by clicking the picture.
If you are going to use the strip piecing method, use the cut square size for the height and cut the strip the width of the fabric.
For a 1.5″ finished size block, cut three (3) 1″ x WOF strips and then subcut the pieced row into 1″ x 2″ strips.
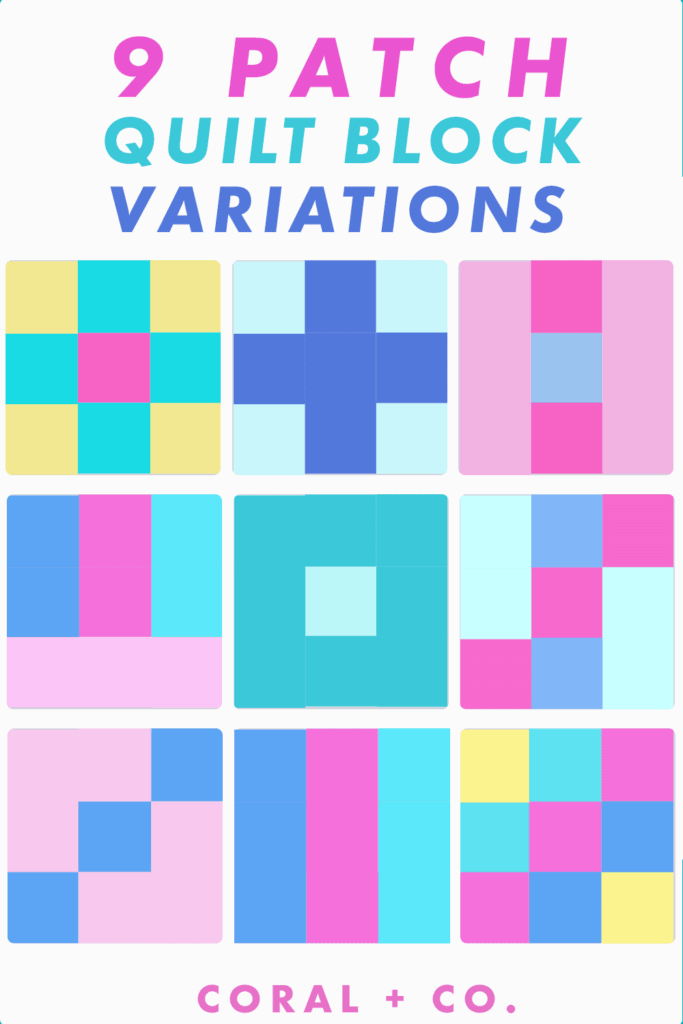
Nine Patch Block Layouts
There are countless variations that can be made with the nine patch block. Some will work better using a strip piecing method than others. All of these can be made block by block and using scraps. Here are some great nine patch block variations to inspire you.
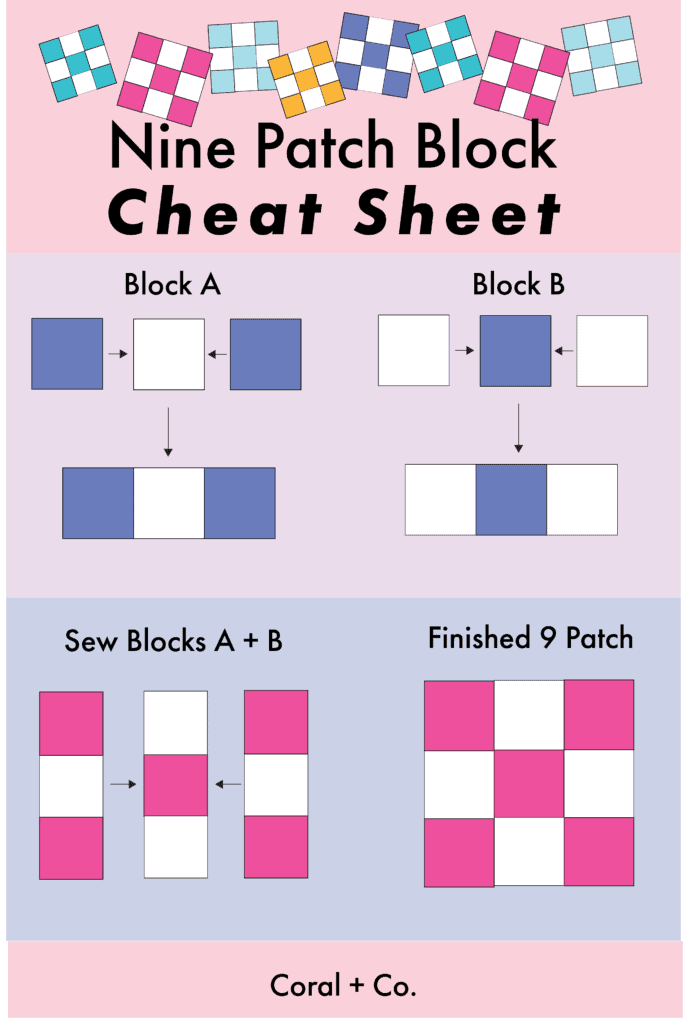
Click to Download the Nine Patch Block PDF Cheat Sheet
Print the Nine Patch Cheat Sheet PDF to have as a quick reference.
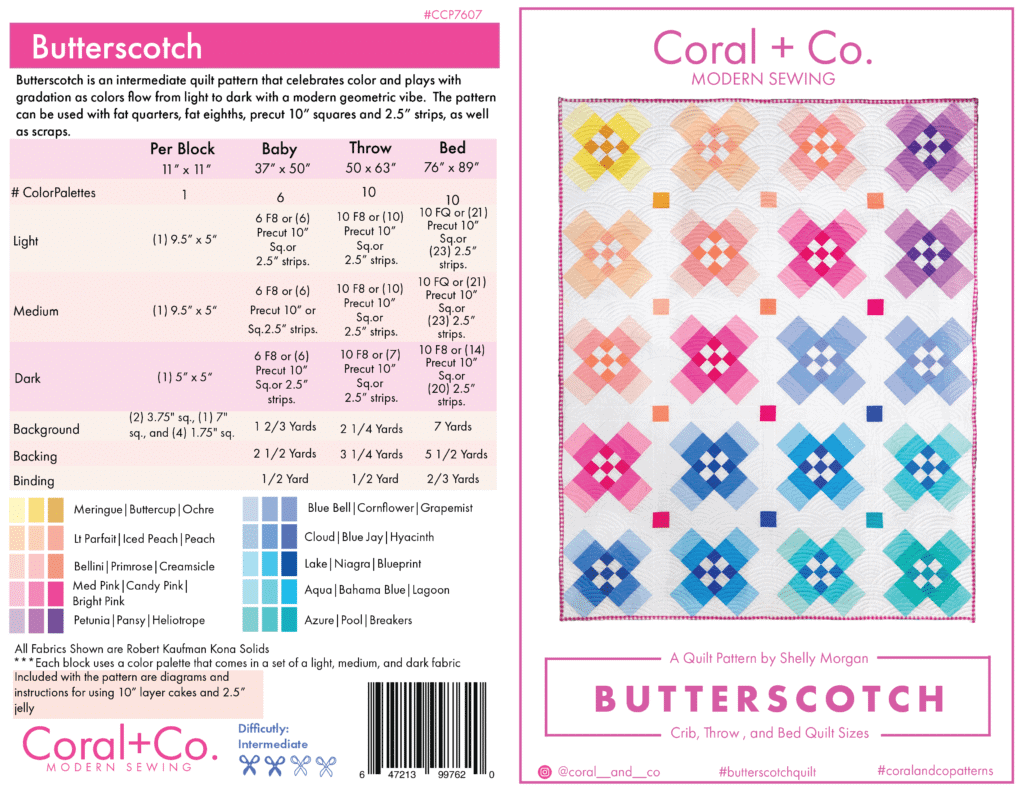
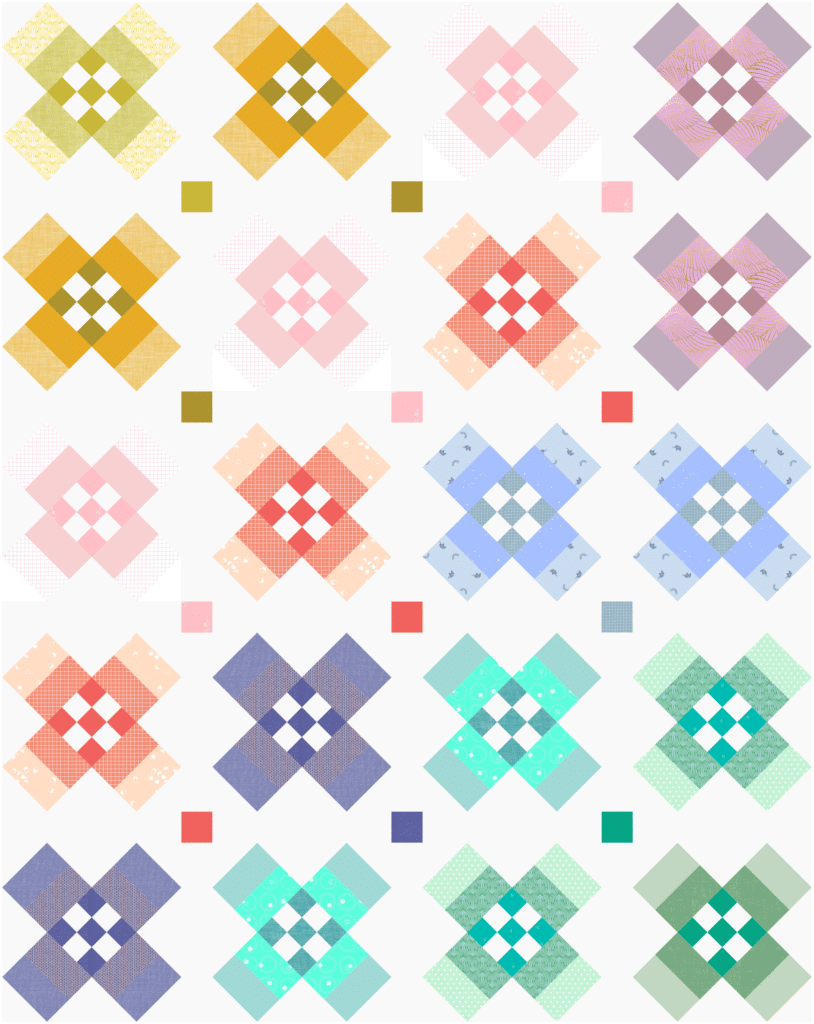
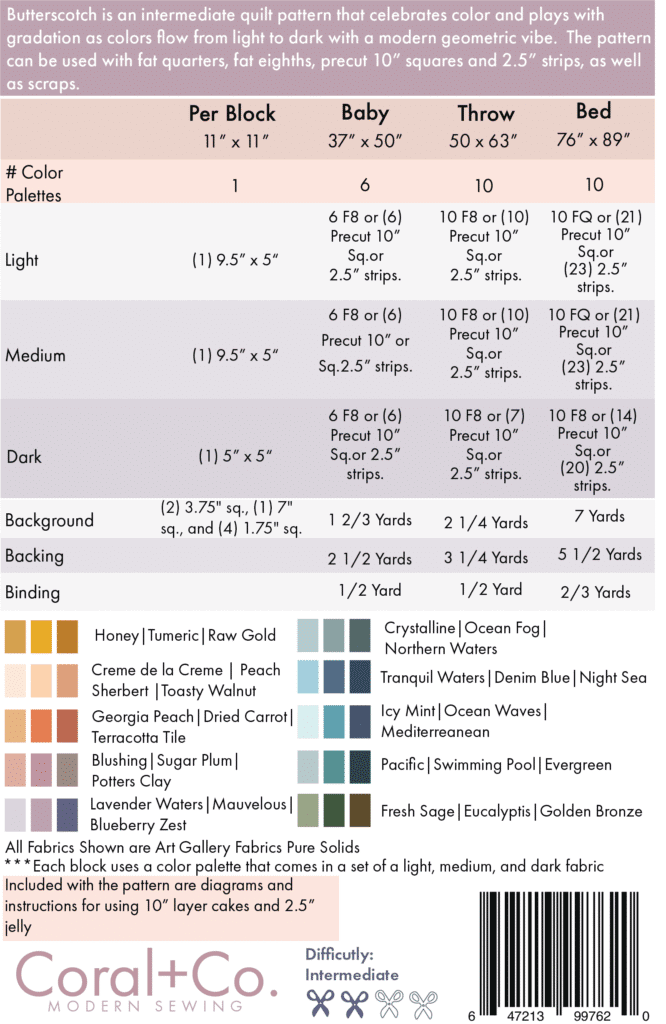
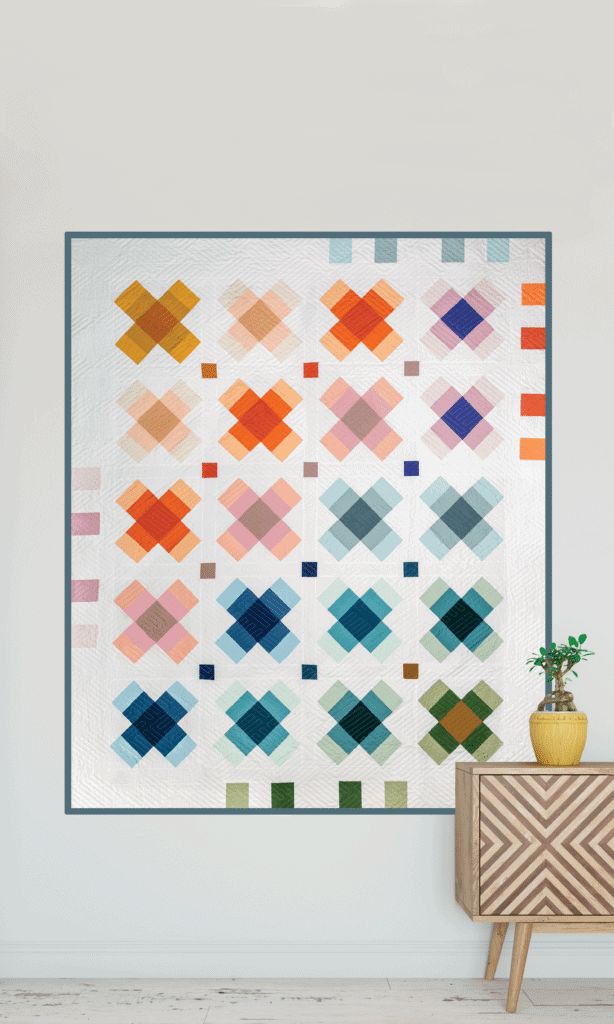
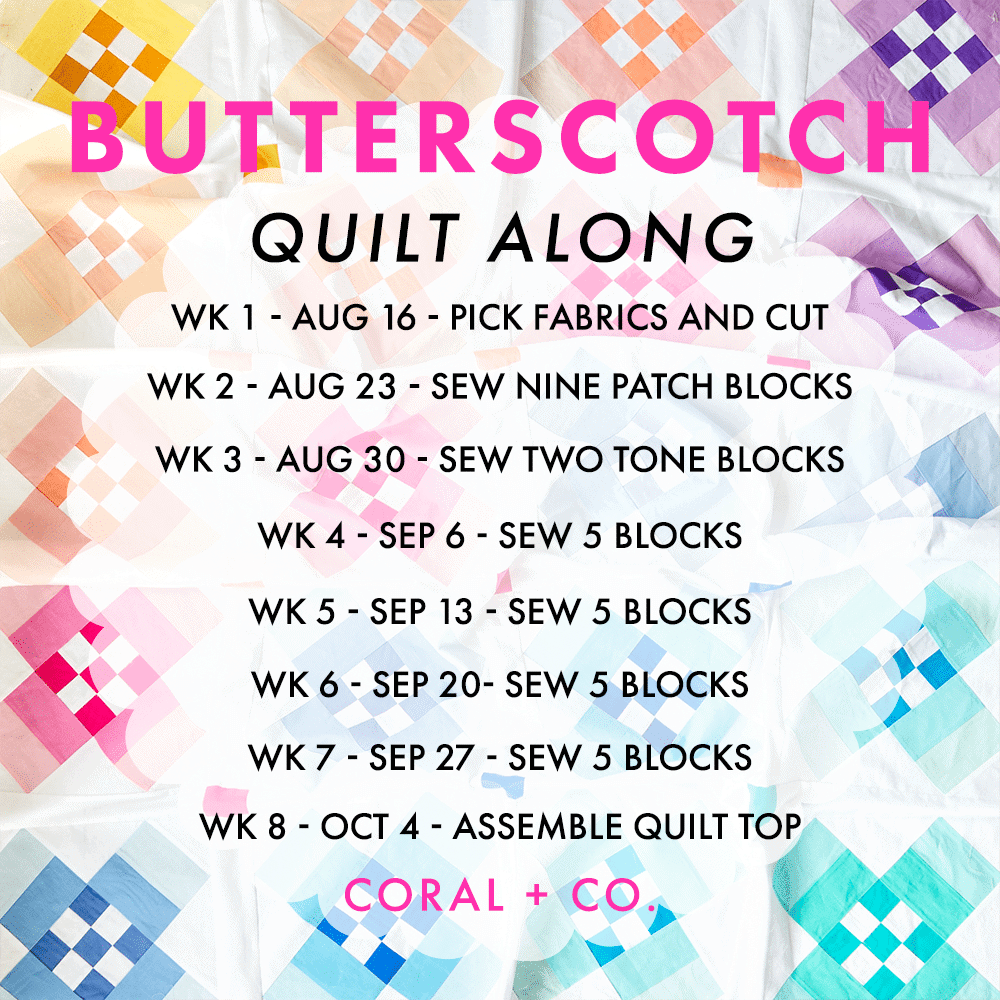
It’s week one of the Butterscotch Quilt Along. I am so happy you are here and can’t wait to see all your beautiful quilts! For this quilt along I will be making the throw size, but you are free to make any size you would like.
This week we will be picking out our fabrics and cutting. I have some tips for staying organized when cutting your fabrics below.
Post on Instagram
The Quilt Along will be taking place on Instagram. At the end of each week I will announce that week’s winner. To enter you will post a photo sharing your progress with that weeks prompt. To enter the giveaway just use the hashtag #butterscotchqal so I can find all your lovely progress.
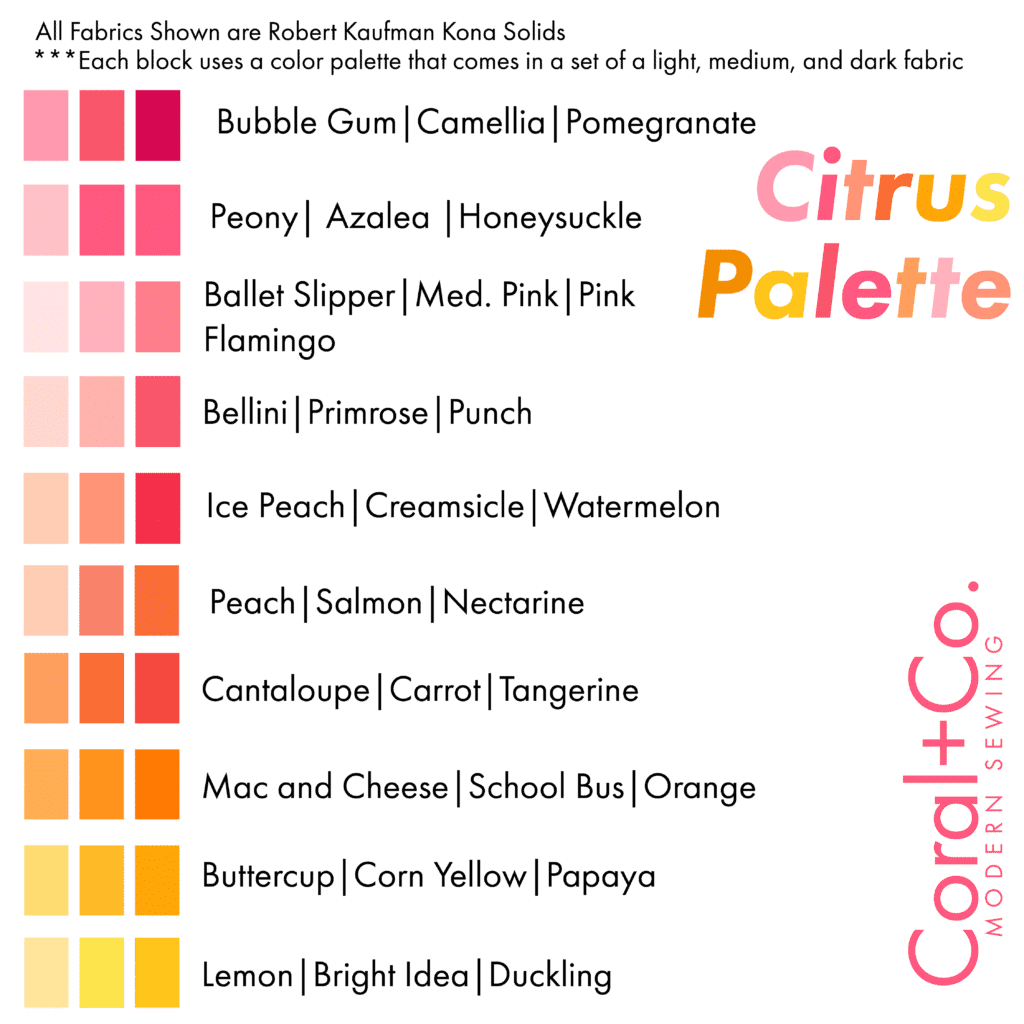
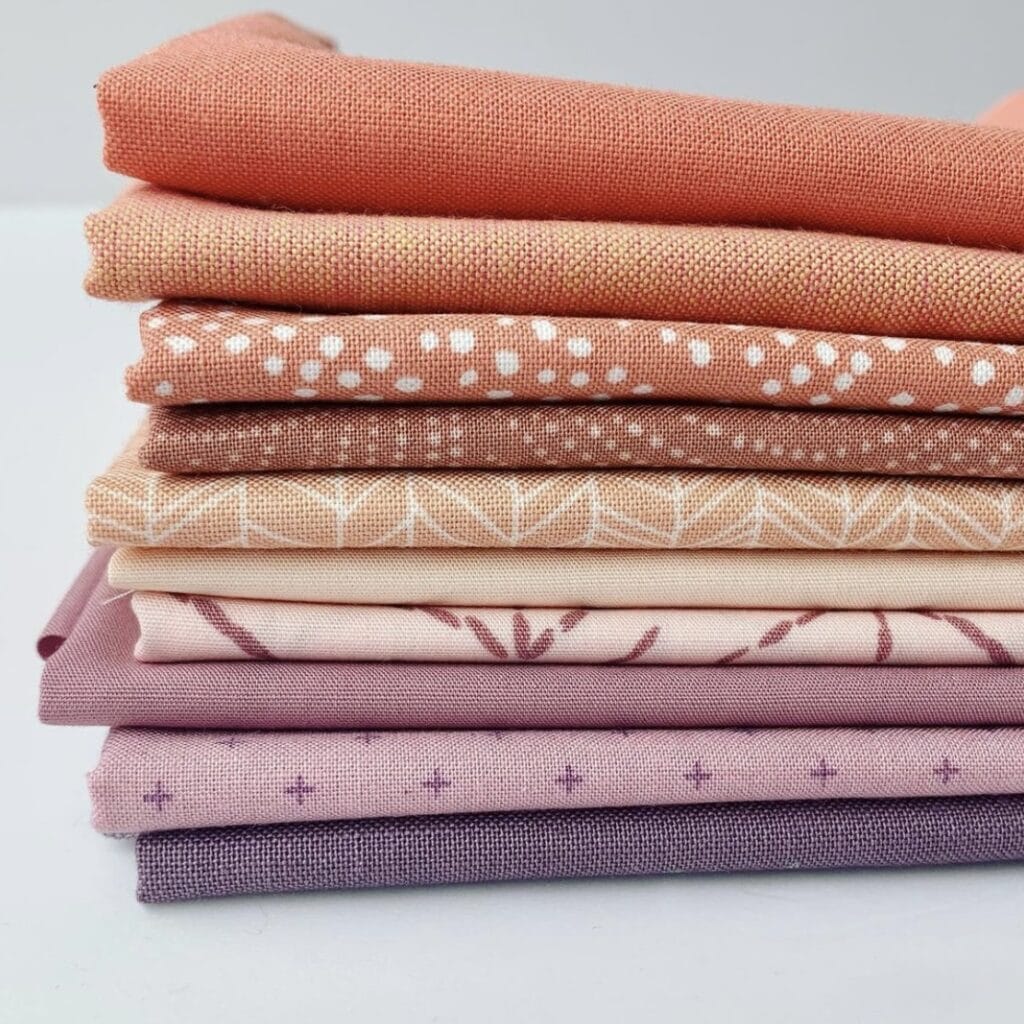
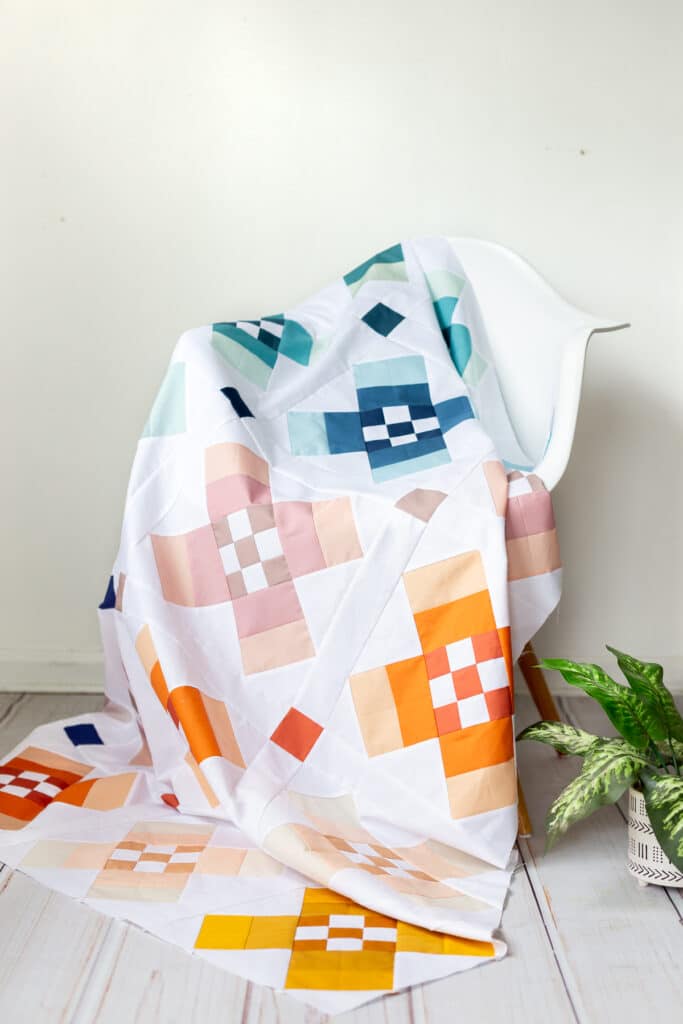
For the quilt along I will be making a bright and sunny citrus version of the butterscotch quilt. I’m ready to try my hand at using lots of orange which is something I never do.
Butterscotch Quilt Cutting + Organizing Tips
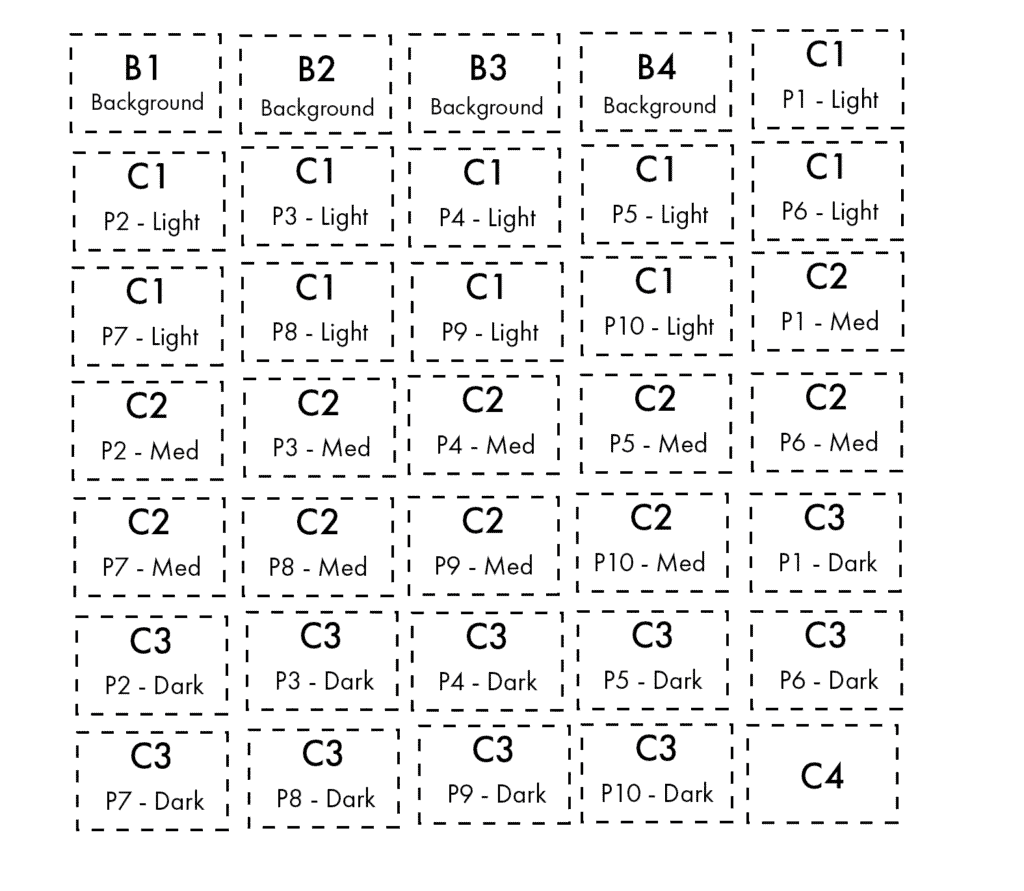
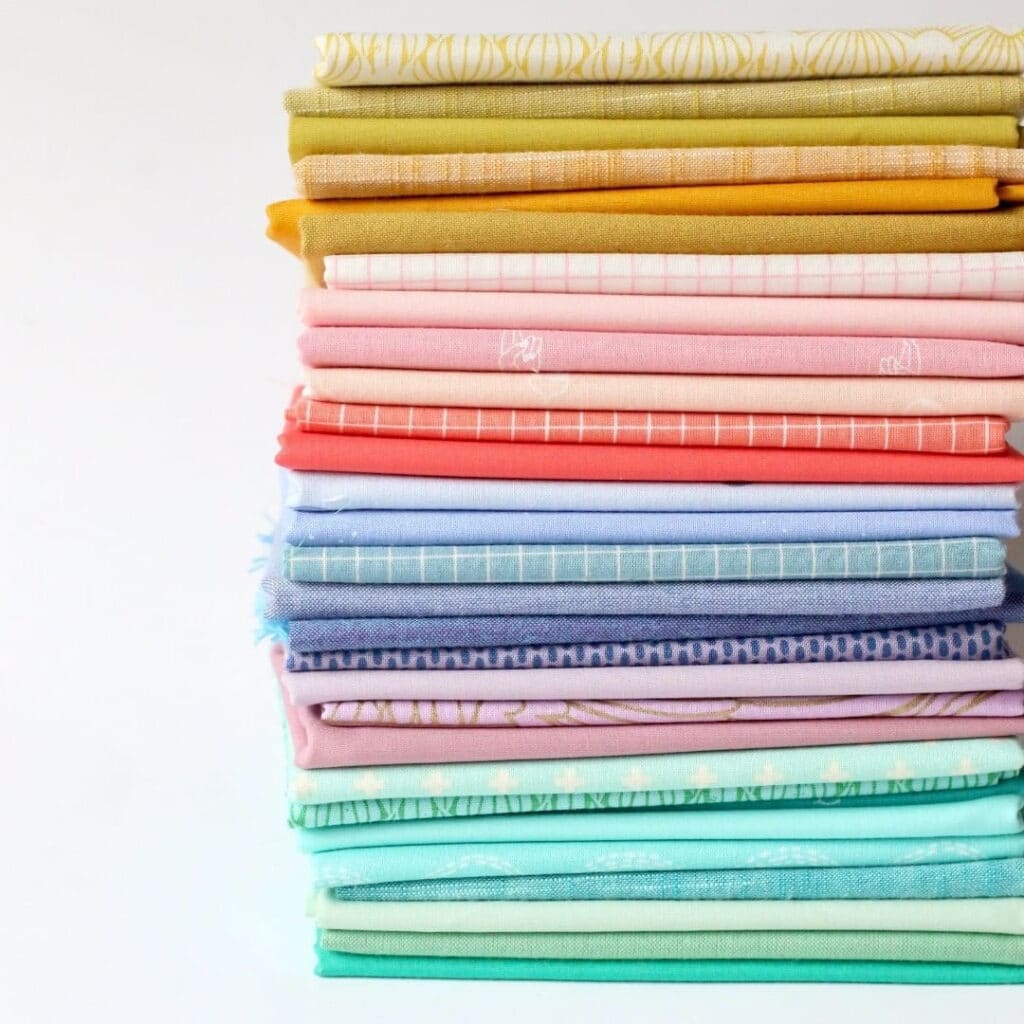
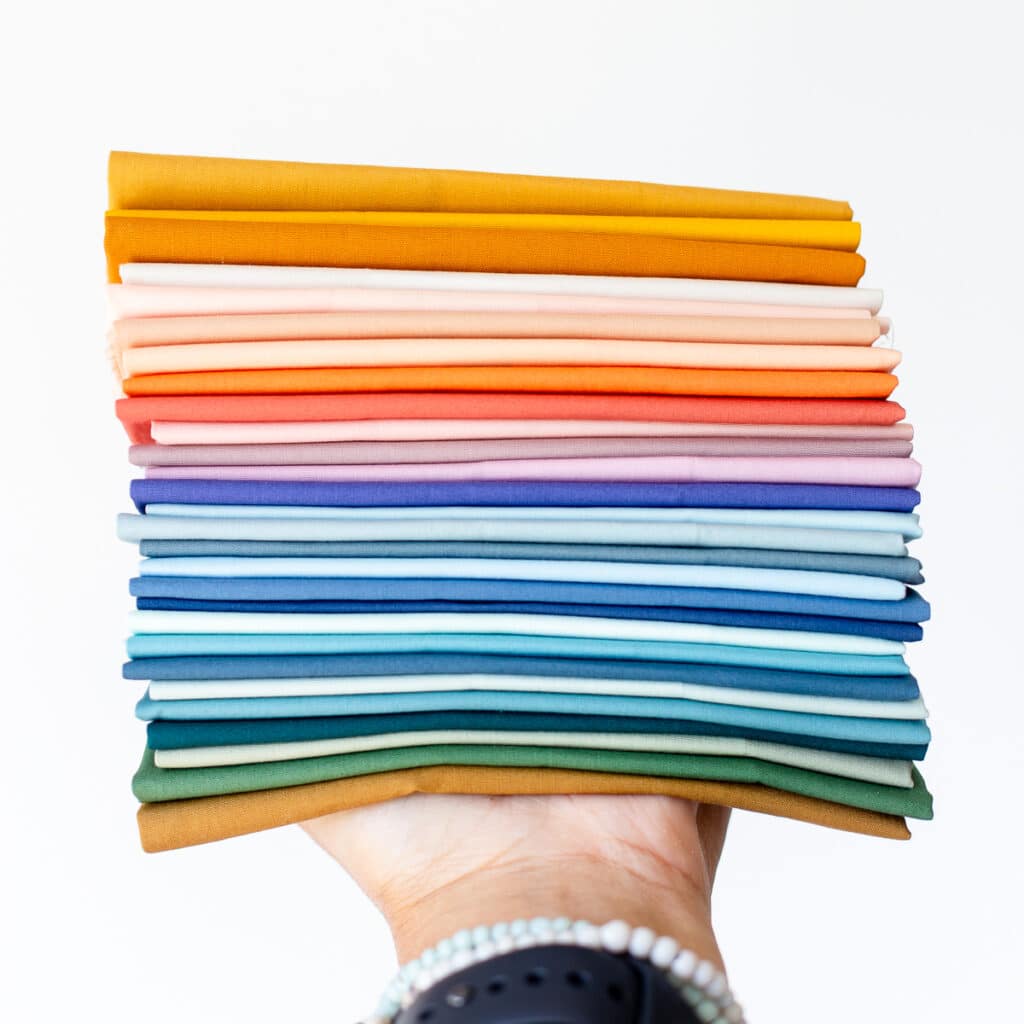
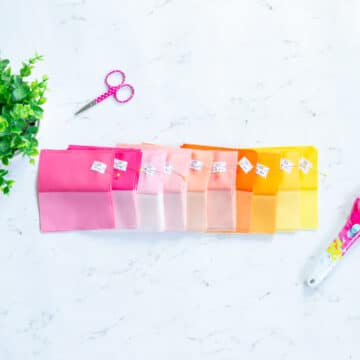
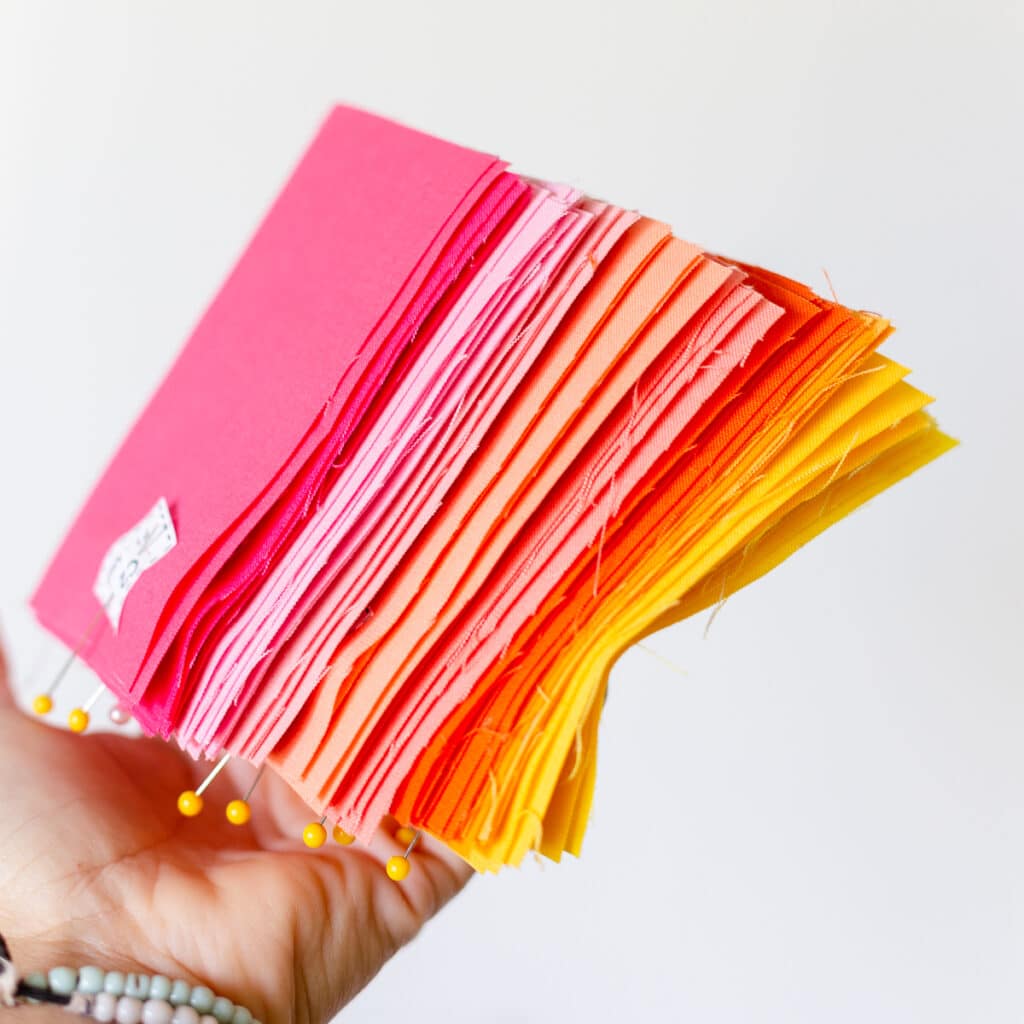
There are 30 different fabrics in the quilt, so it is easy to lose track of which color belongs where. Here are some tips to help you keep track of all your fabrics.
Print out the fabric labels below
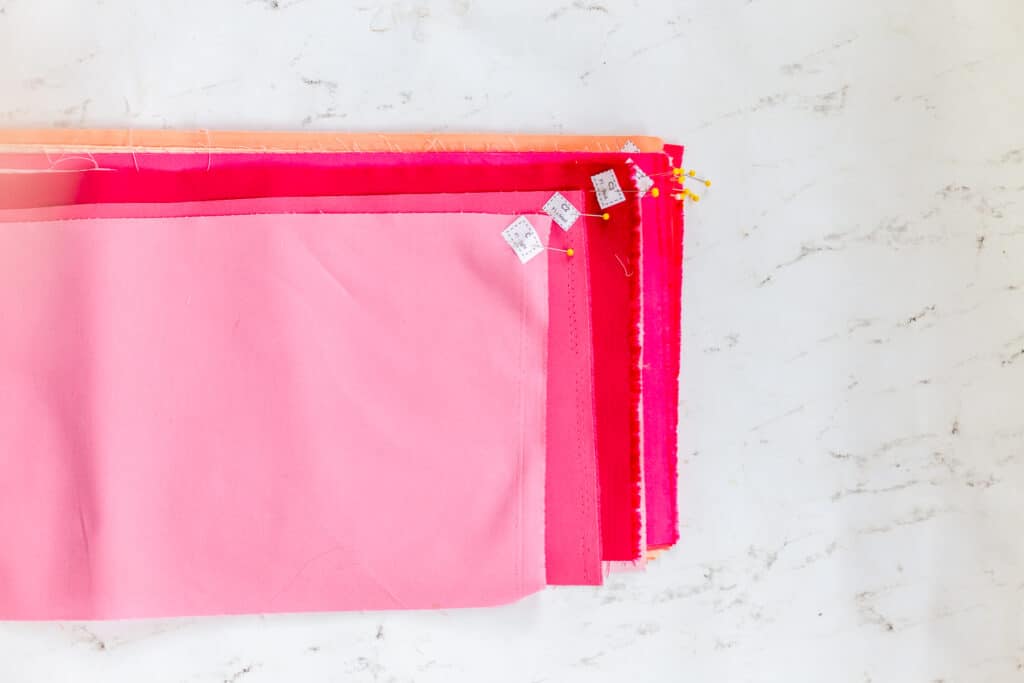
Take a picture of all your fabrics in color order, even better add the labels and then take the picture. This will help you reference them should the label become detached or the fabrics become out of order.
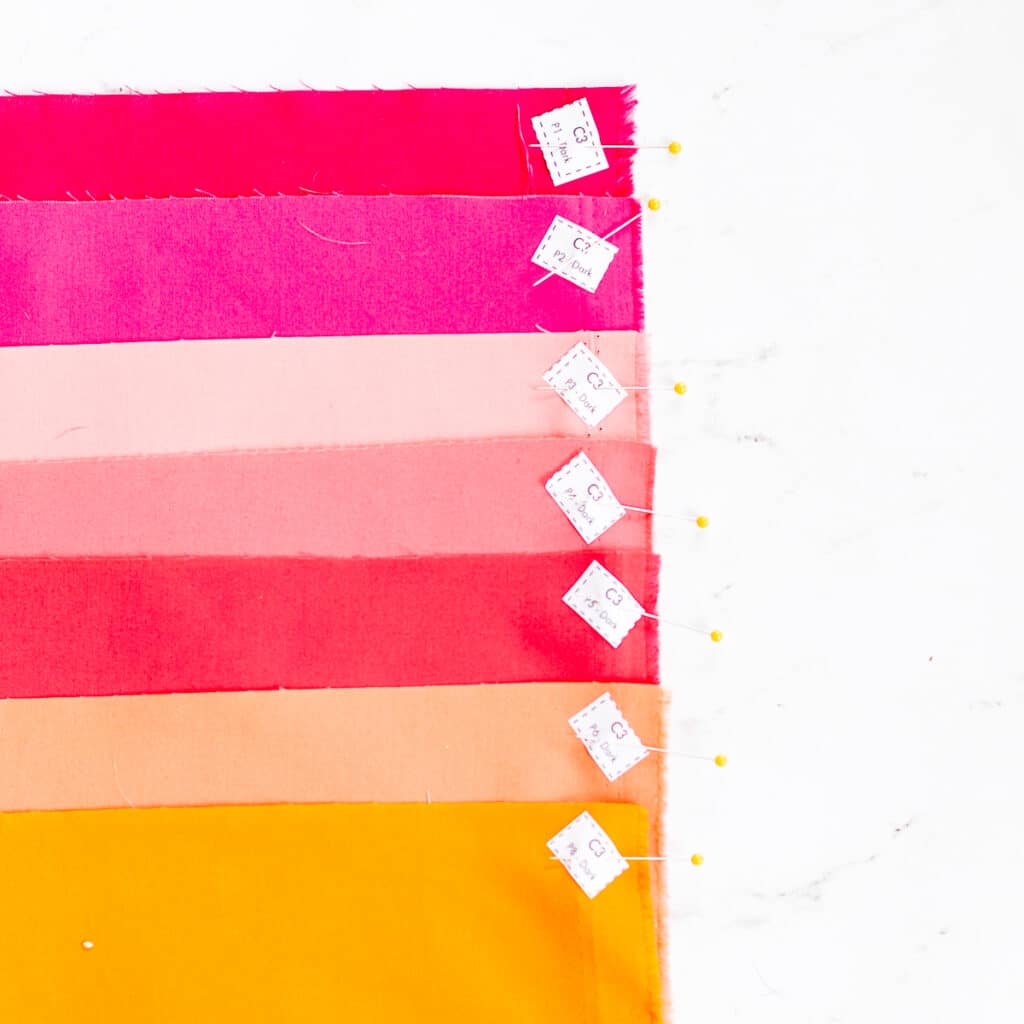
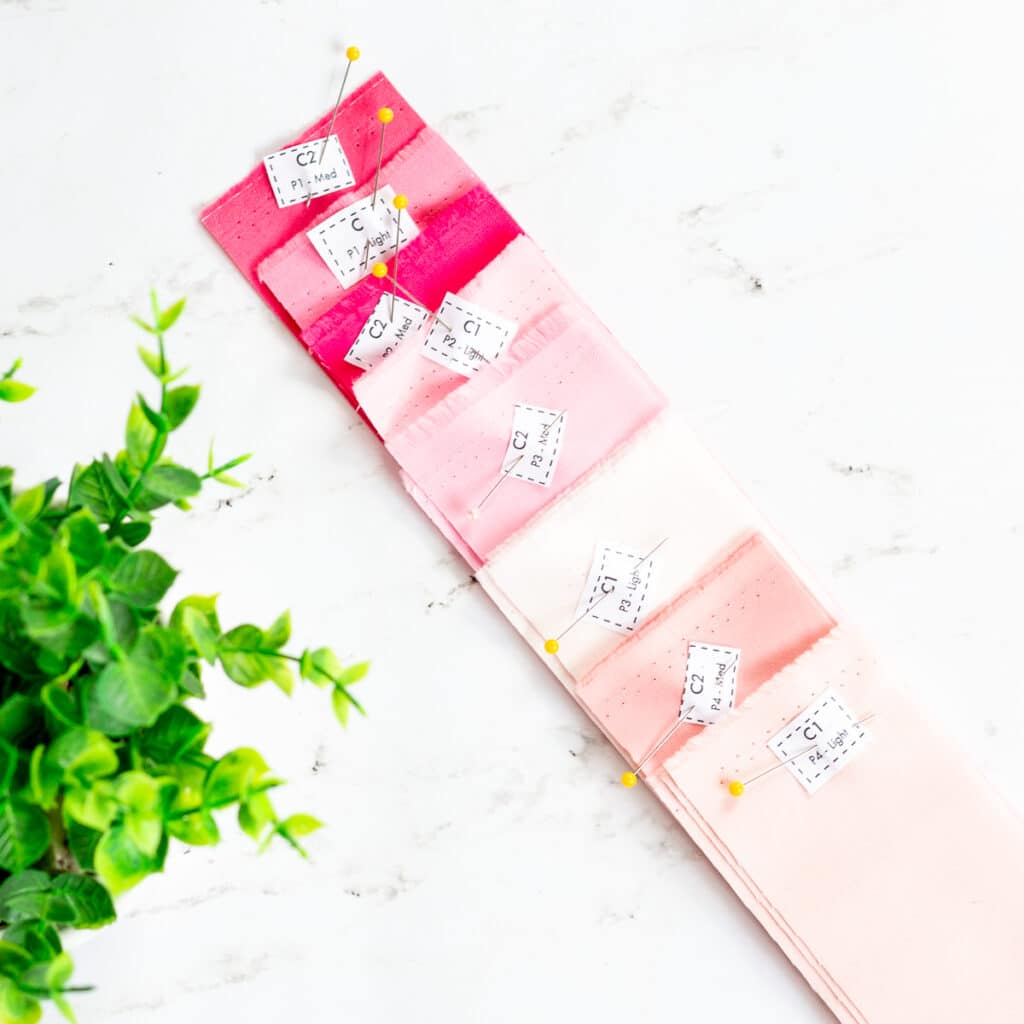
In the photo above I placed the fabrics in order of C1 light, med, dark, C2 light, med, dark, C3 light, med, dark, etc. and attached the labels to the corner with pins.
Next I separated them into a stack of C1 light + med, C2 light + med, C3 light + med, etc and a stack of C3 since C3 will be cut a different size.
When cutting transfer the label on to the top strip of the color that has been cut. I kept each light and medium color together for each palette, so they are in the correct order and ready to be sewn together, As shown above.
Also transfer the label on the ends of the C3 strips to keep them organized as well.
Click to download an Extra Copy of Labels if Needed
Click to download a coloring sheet for the throw size
Still need to get the pattern?
It is 20% off the first week of the sew along with the code BUTTERSCOTCHQAL
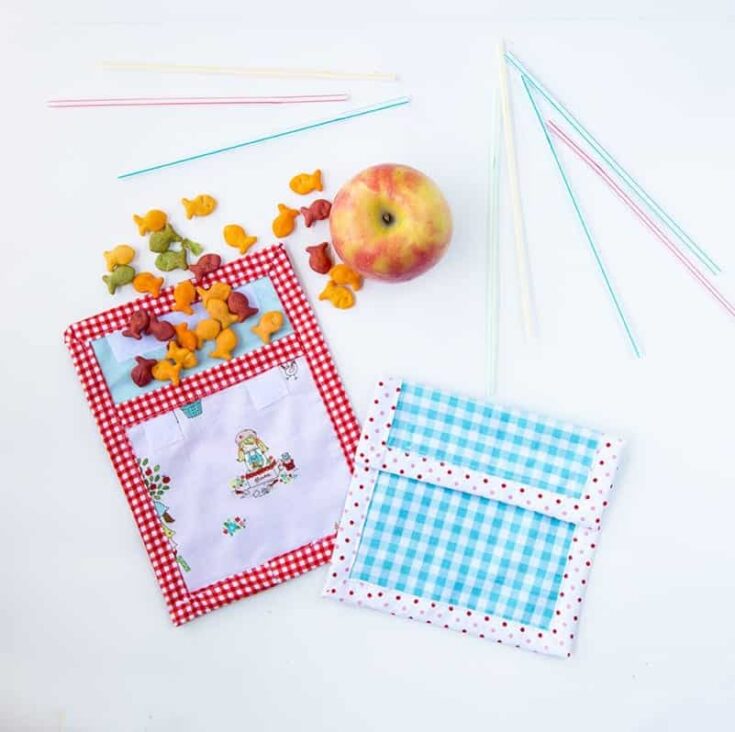
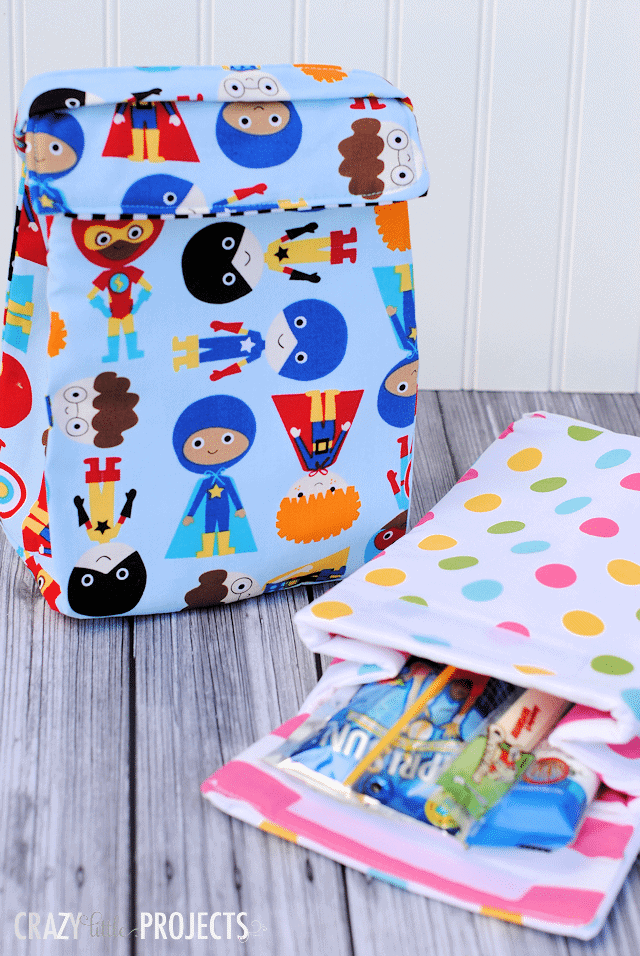
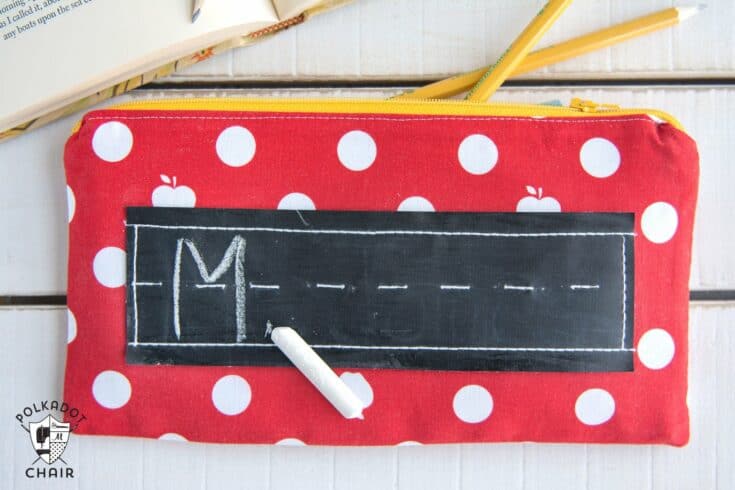
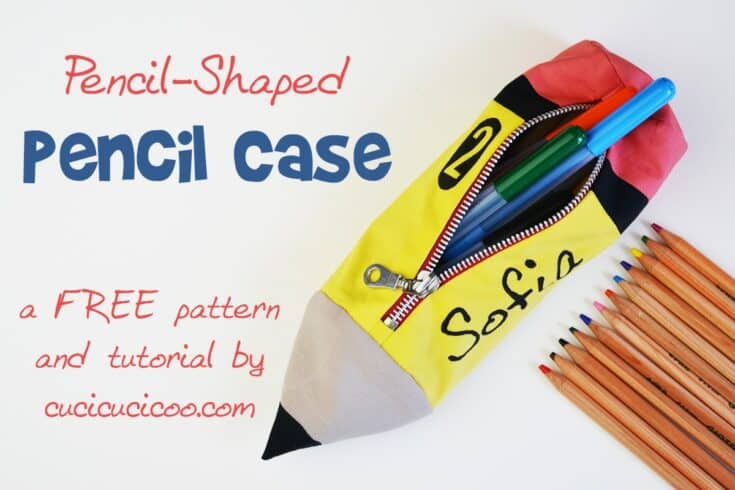
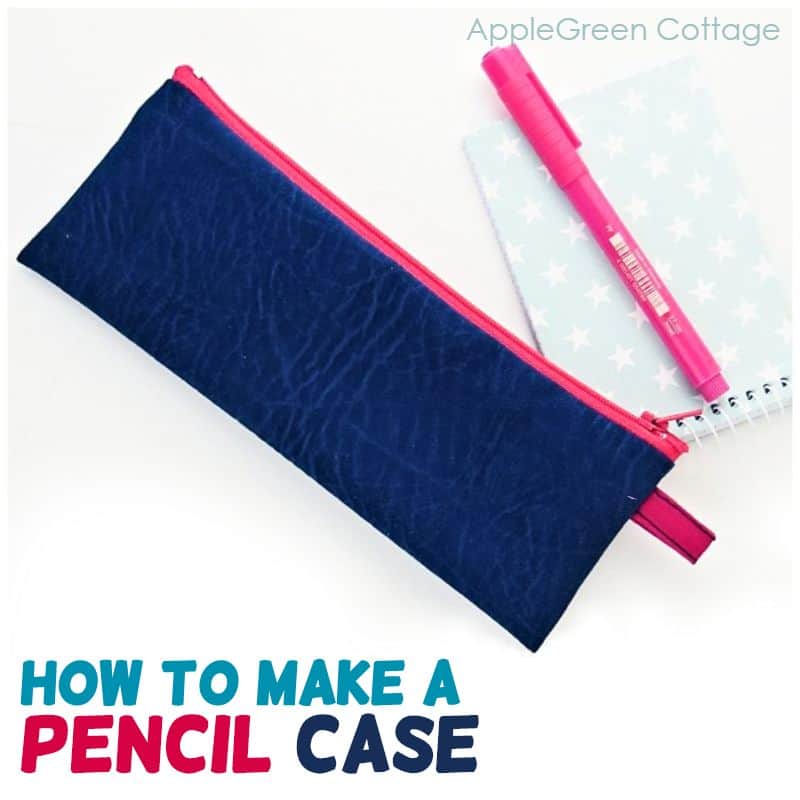
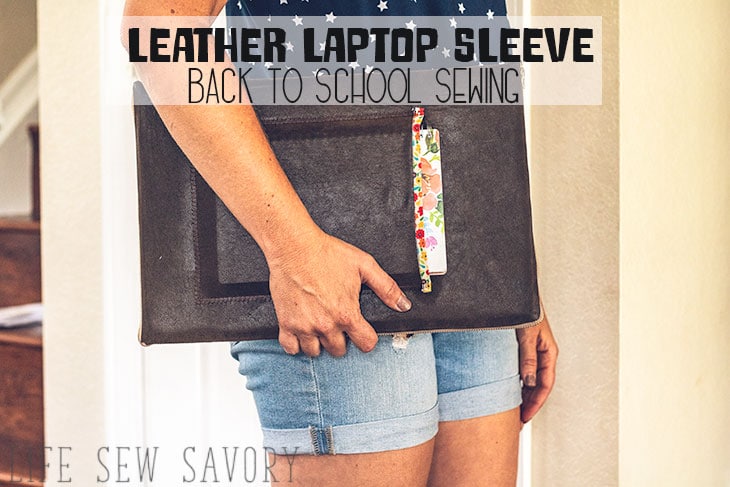
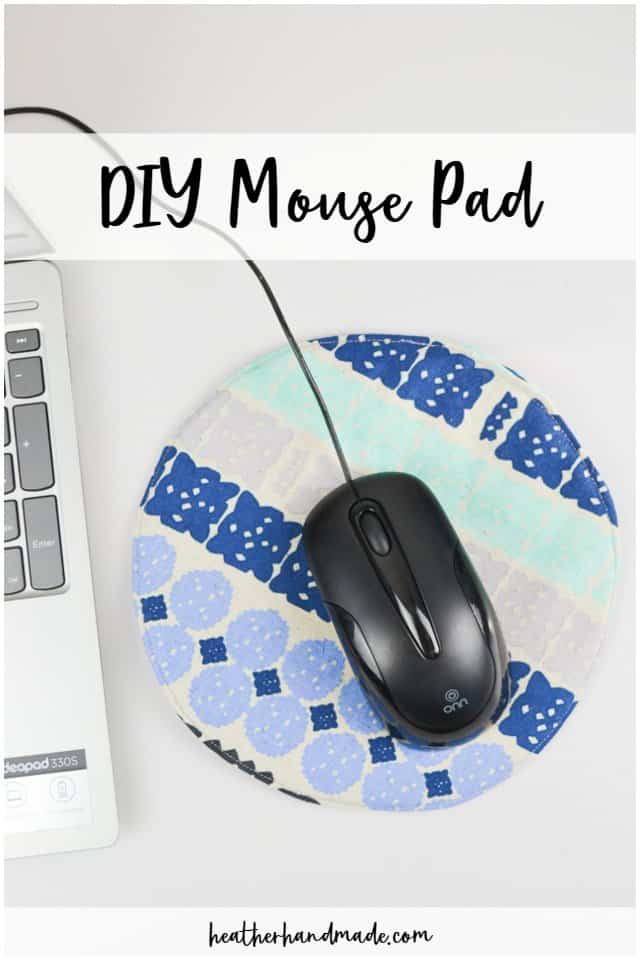
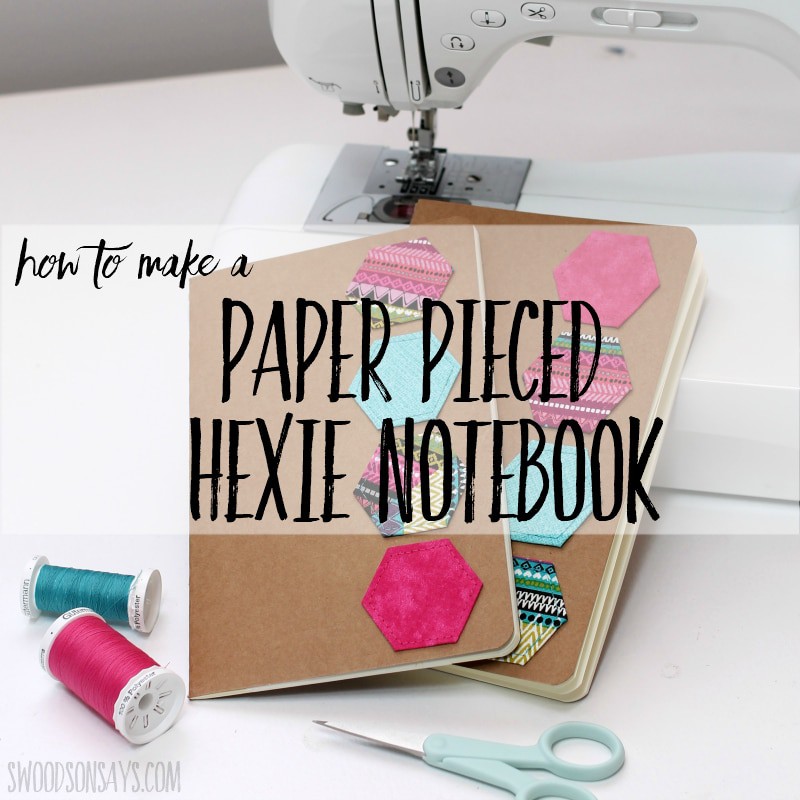
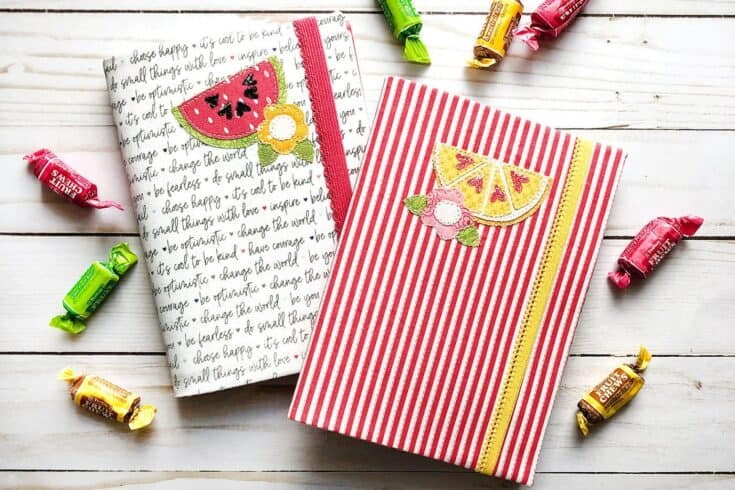
15+ of your favorite Back to School Sewing Projects and Ideas. Make the kids feel extra special at school with these simple back to school sewing ideas and tutorials.
Sew simple pencil pouches, reusable lunch bags, and fabric covered notebooks for a custom back to school look. Scroll down to find your favorites!
Back to School Sewing Projects
Back To School Sewing Projects
15+ of your favorite Back to School Sewing Projects and Ideas. These simple sewing projects will be extra special while they are away from you at school.
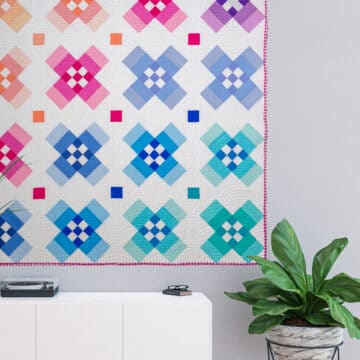
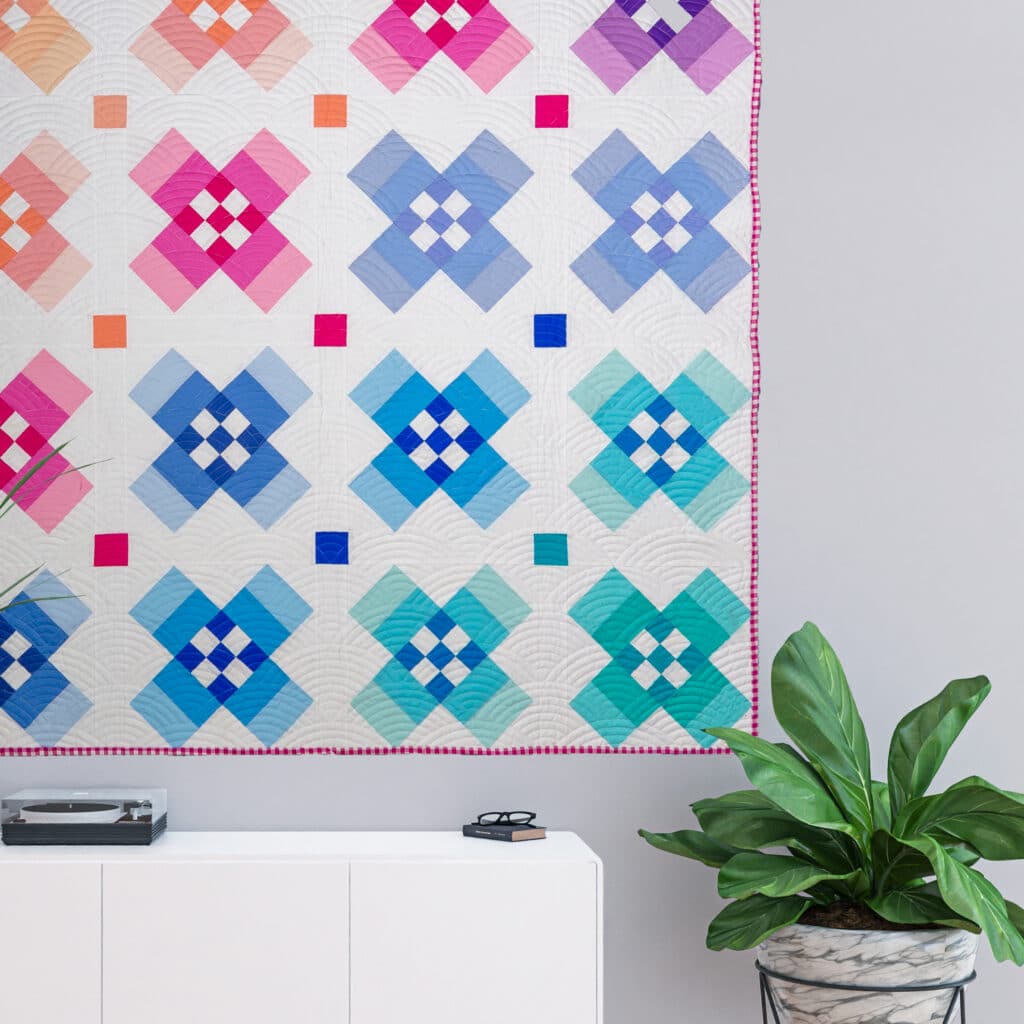
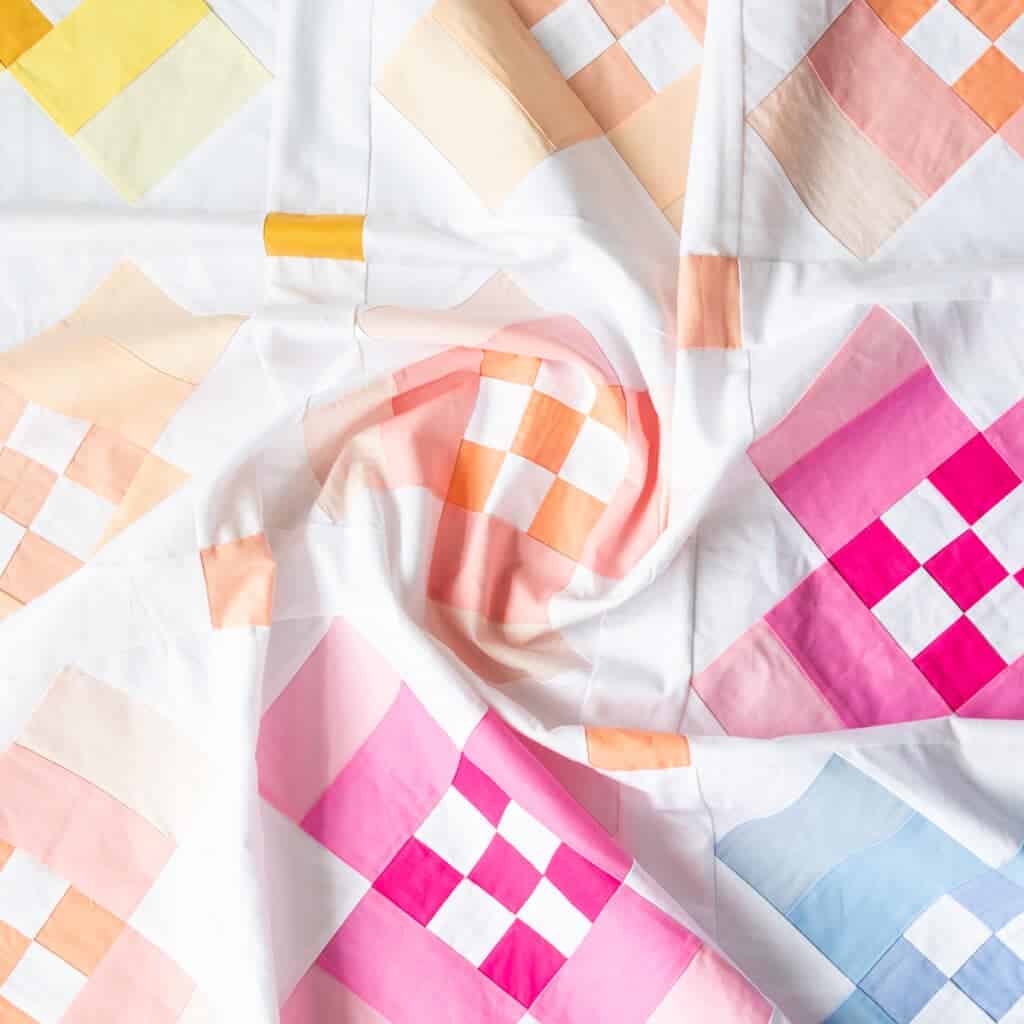
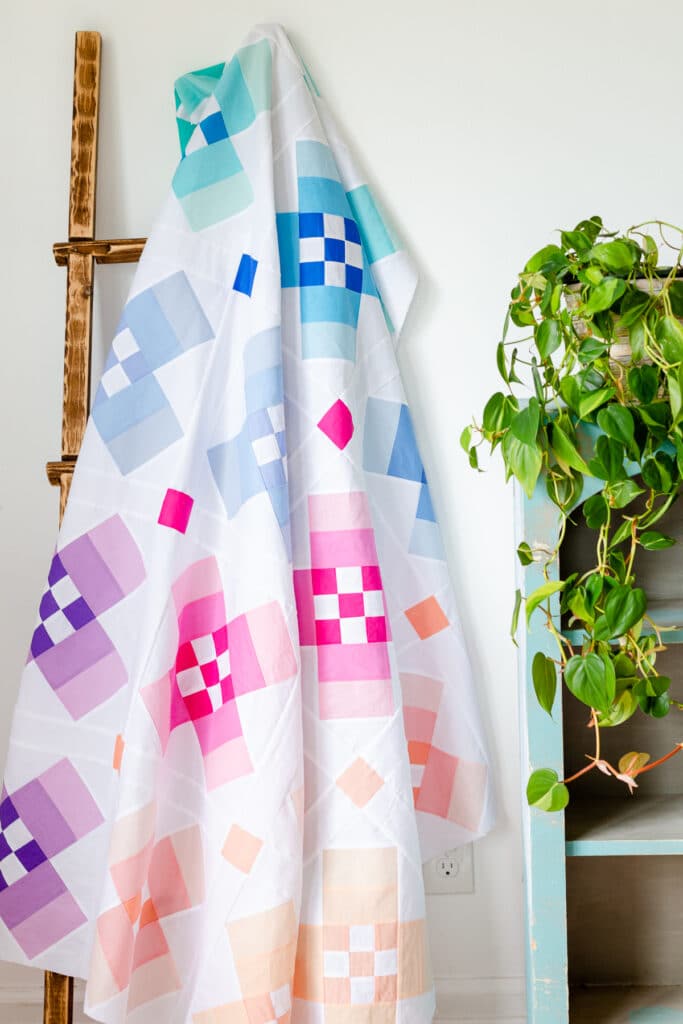
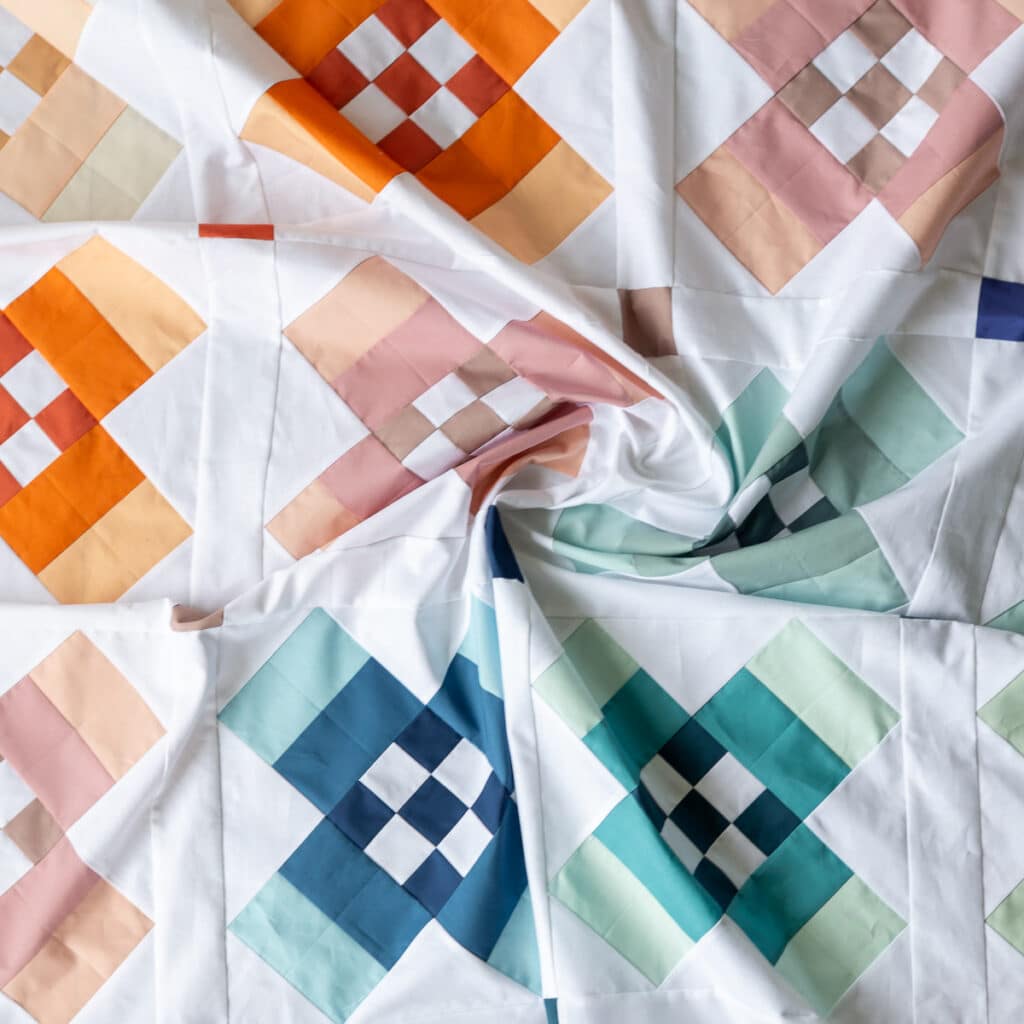
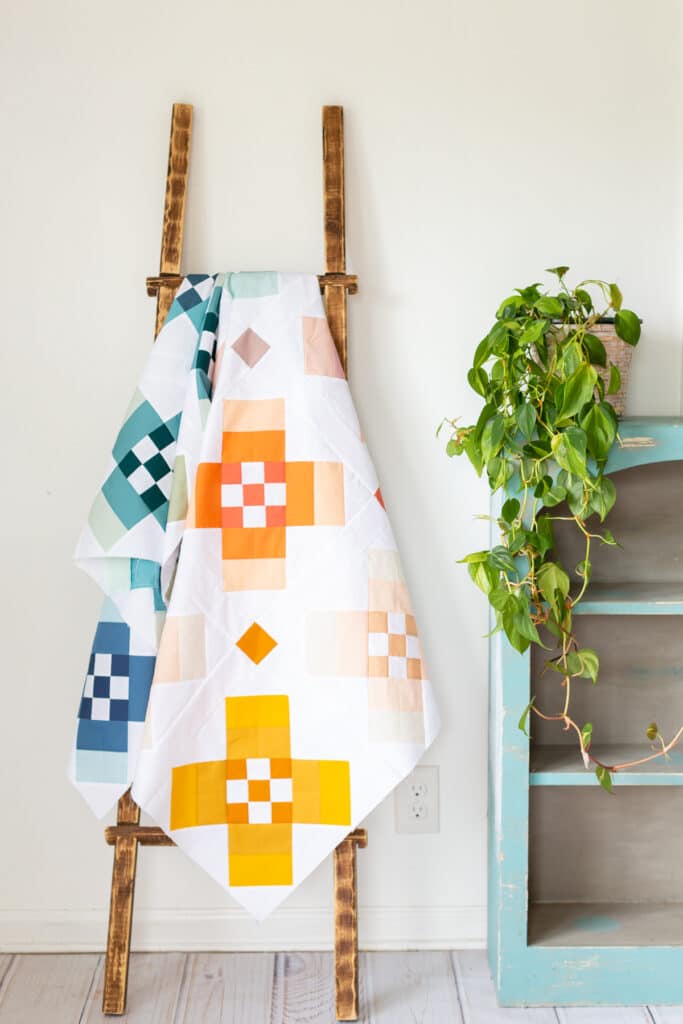
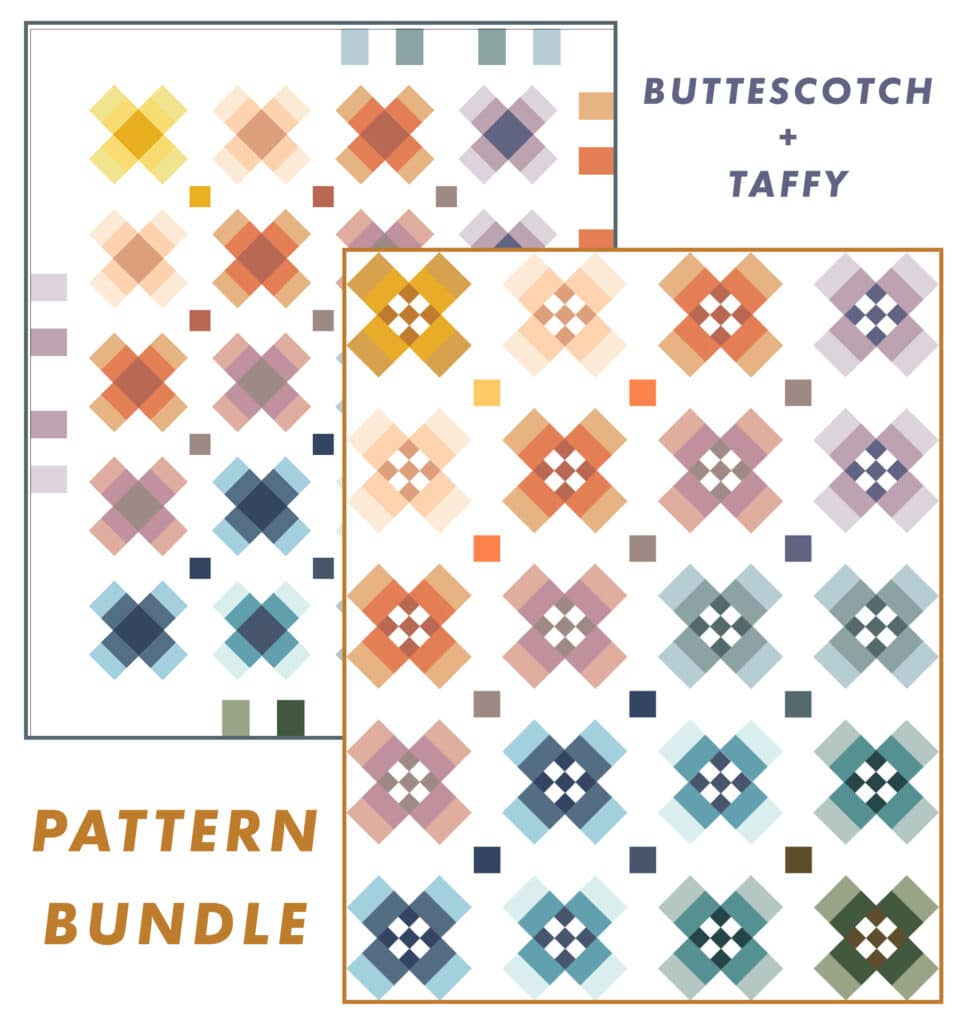
Introducing the new Butterscotch quilt pattern. She is all things you remember about summer as a youth. She loves popcorn and cotton candy, carnival rides and lazy days at the beach. She is modern and loves to play with color making for endless possibilities when it comes to picking fabrics.
The Butterscotch Quilt Pattern is perfect for using fat quarter bundles, fat eighth bundles, 2.5″ jelly rolls, and 10″ layer cakes. There are even scrap measurements given per block so you can use those colorful scraps up.
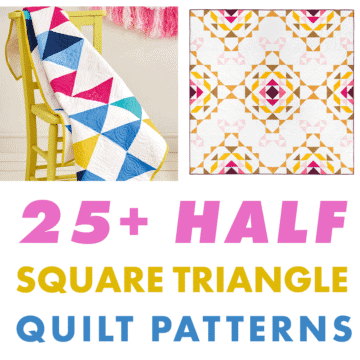
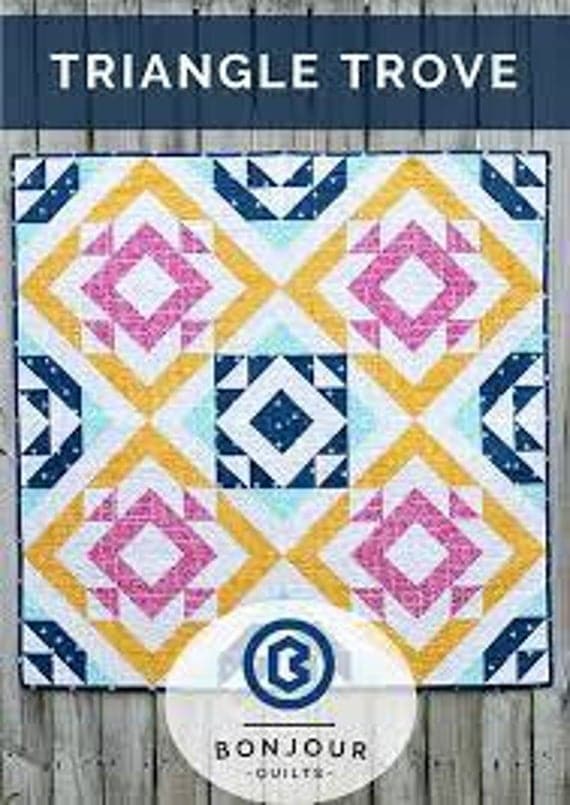
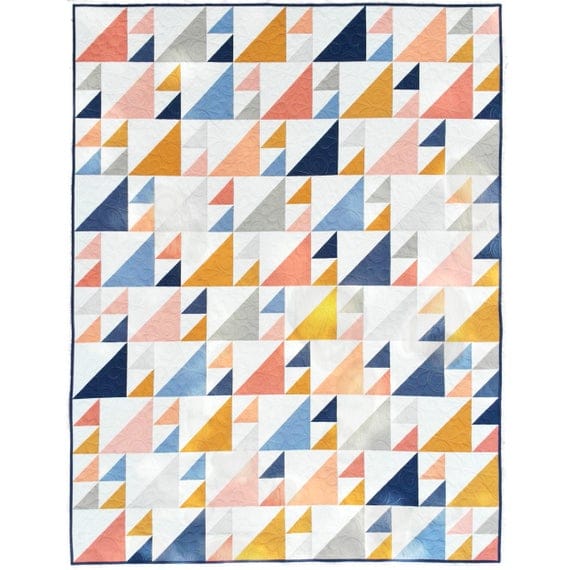
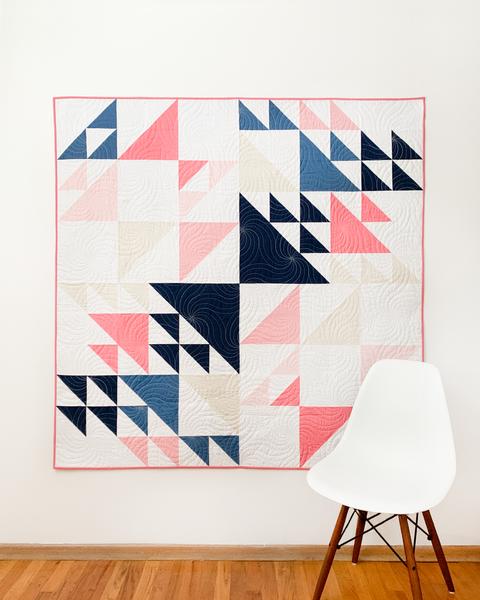
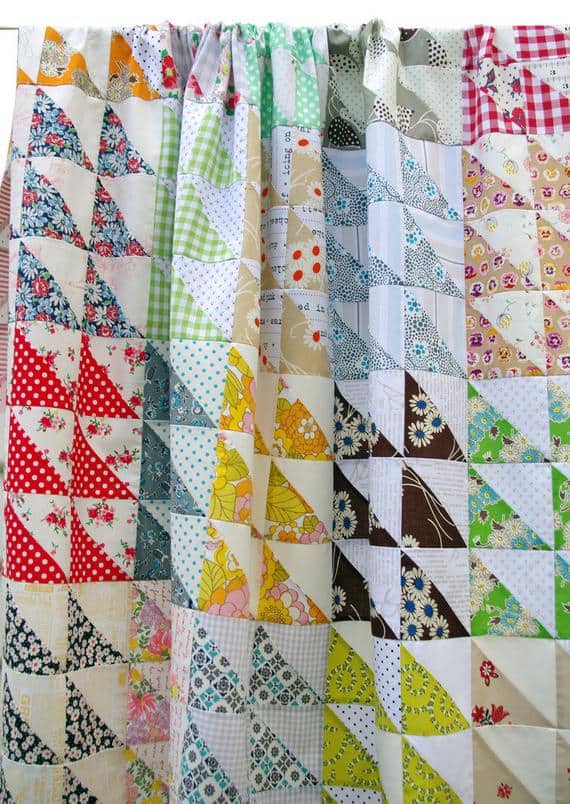
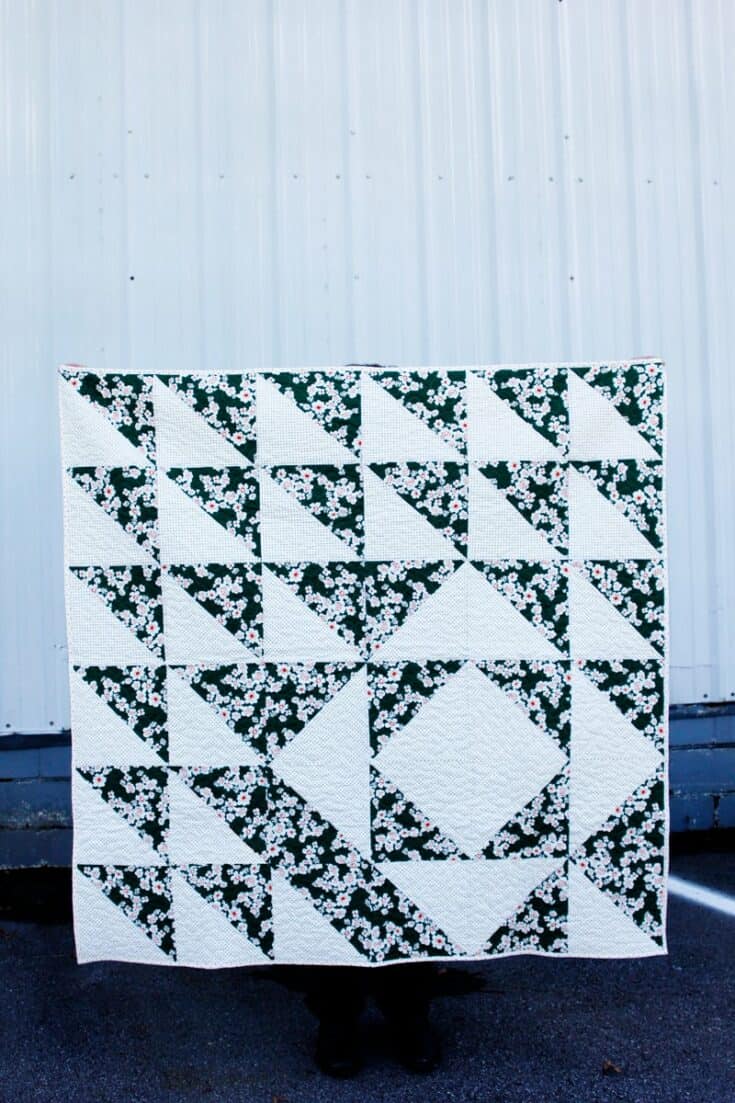
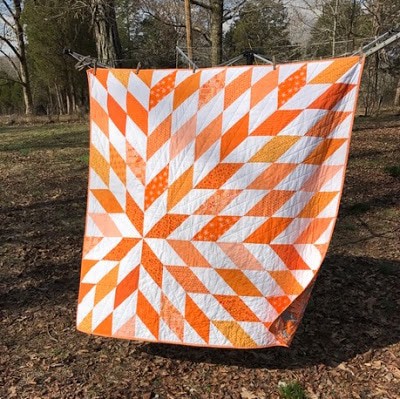
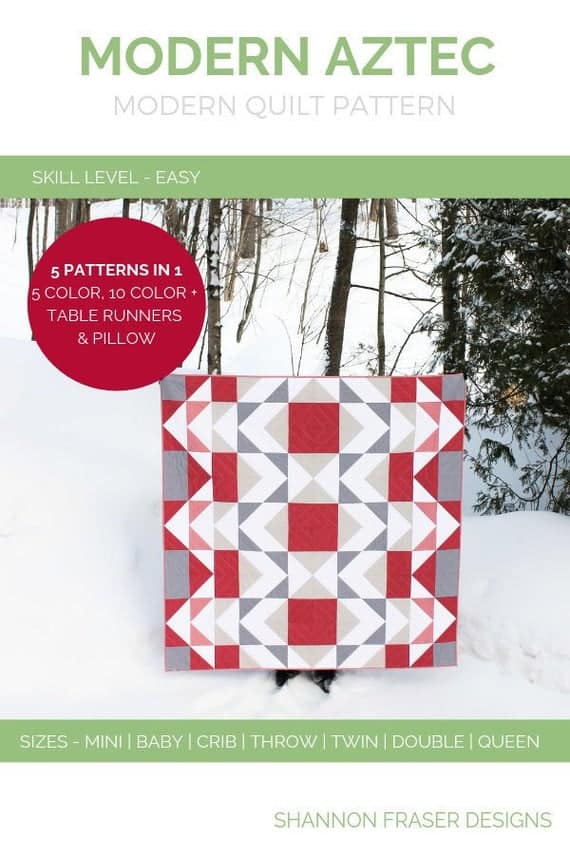
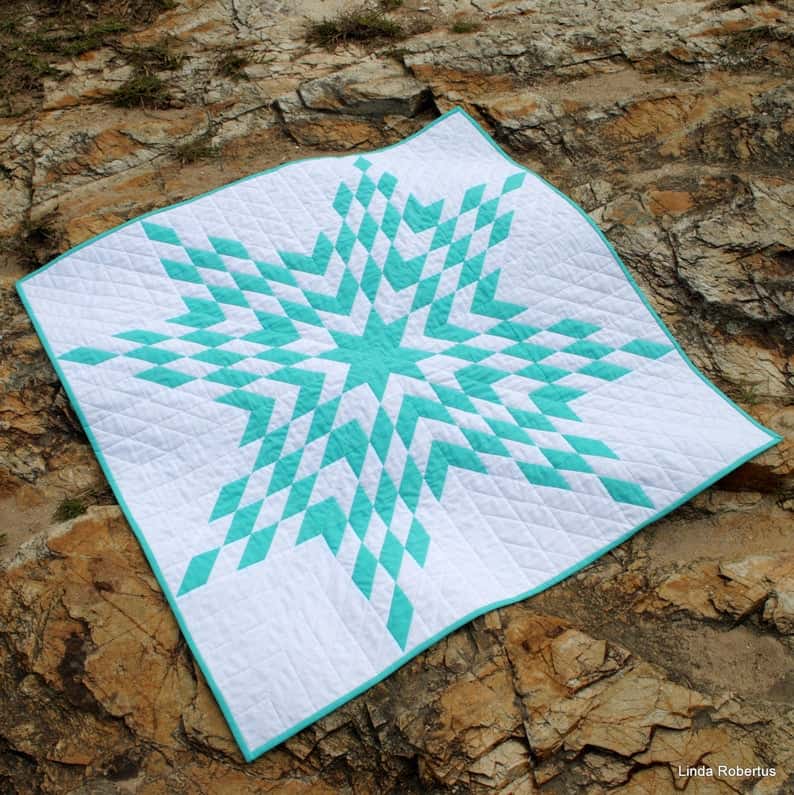
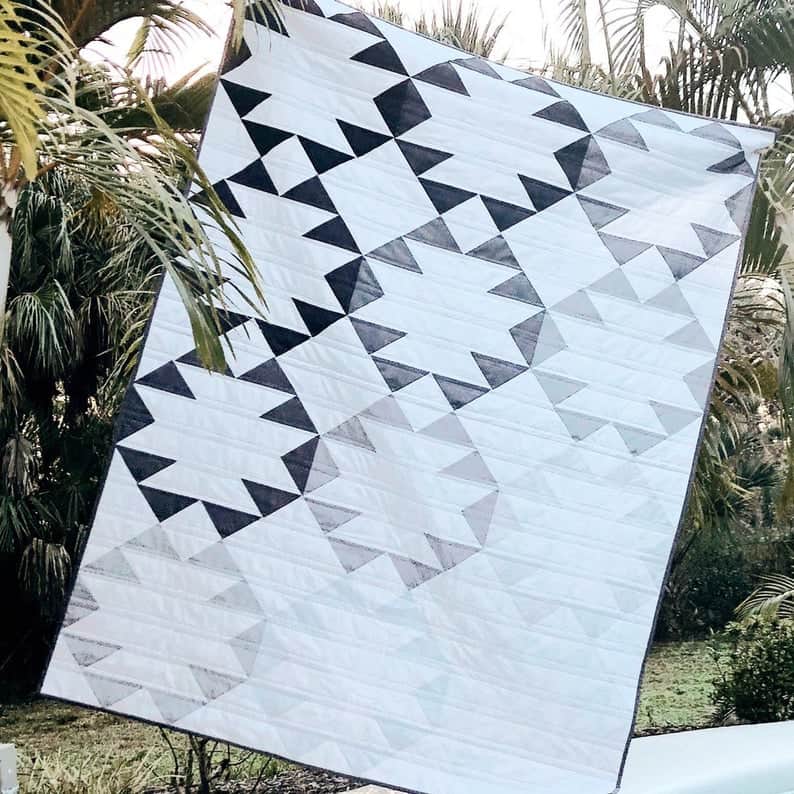
Half Square Triangle Quilt Patterns for you to sew! Find you favorite half square triangle quilts with this big list of 25+ Half Square Triangle Quilt Patterns including modern and beginner friendly quilt patterns. Want to Learn how to sew half square triangles? Learn 5 different ways with these easy tutorials and videos, including half square triangle charts.
Half Square Triangle Quilt Patterns for you to sew! Find you favorite half square triangle quilts with this big list of 25+ Half Square Triangle Quilt Patterns including modern and beginner friendly quilt patterns. Learn how to sew half square triangles 5 different ways with these easy tutorials.
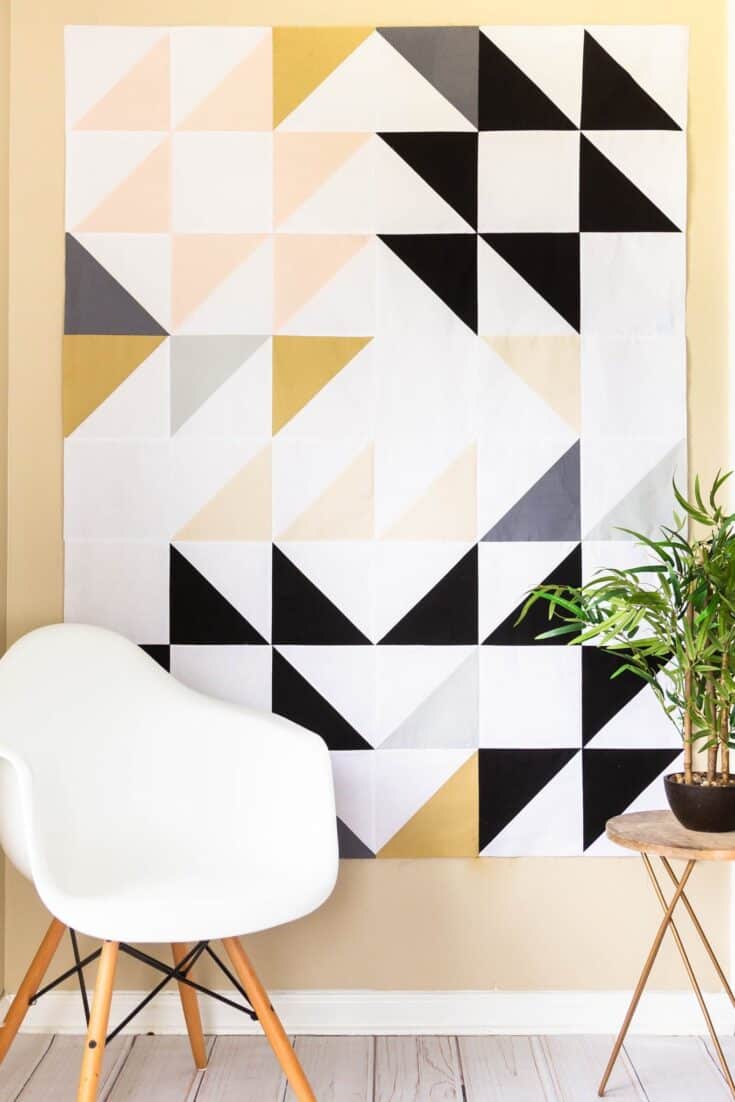
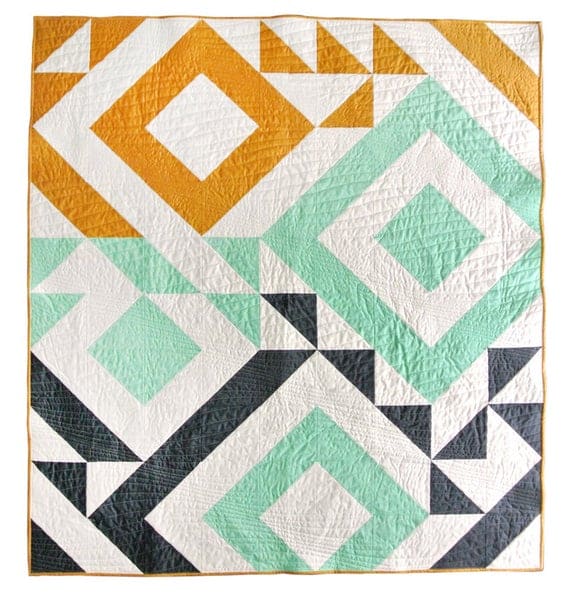
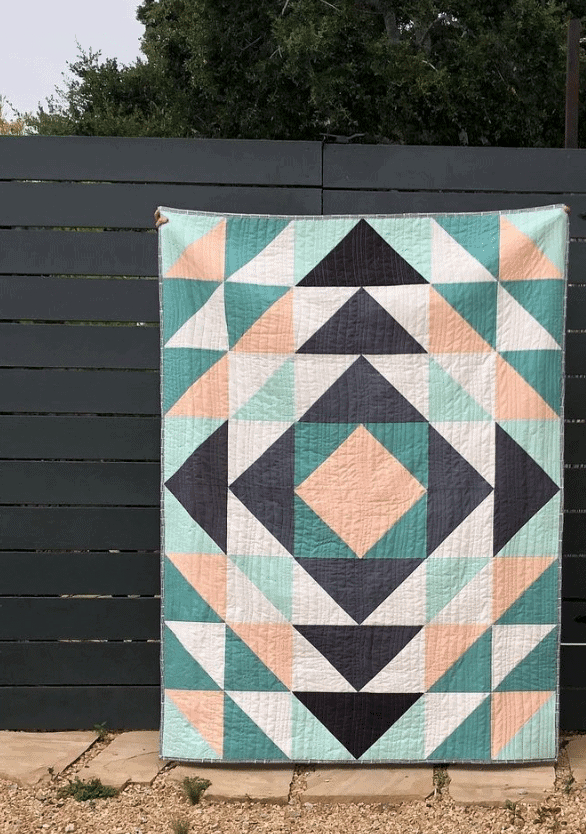
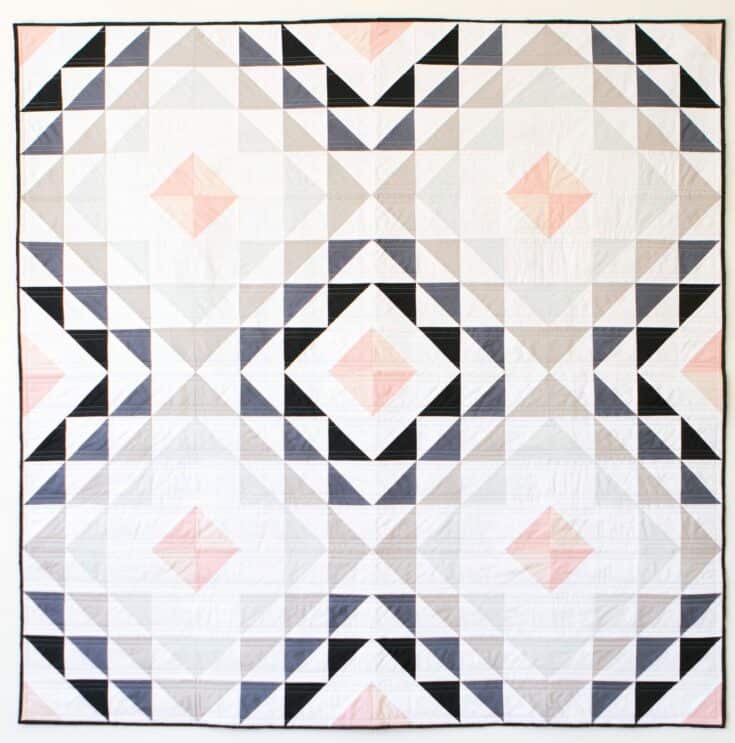
This modern take on half square triangles is a minimalist yet geometric quilt pattern and its so beginner friendly it could be your first quilt you ever make.
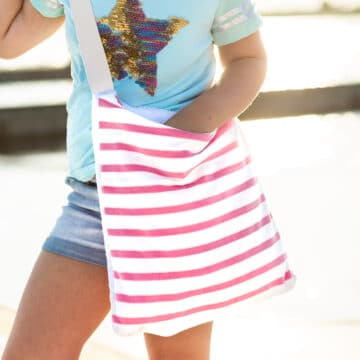
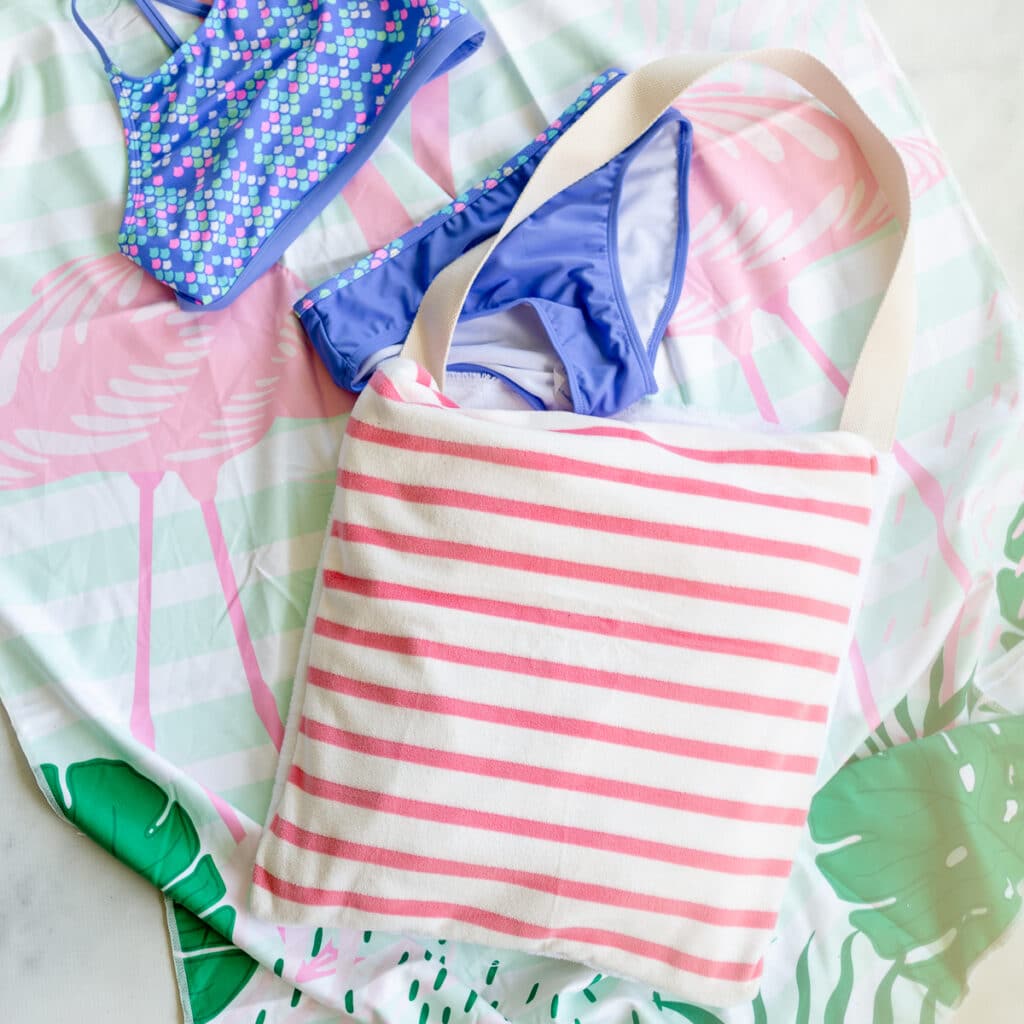
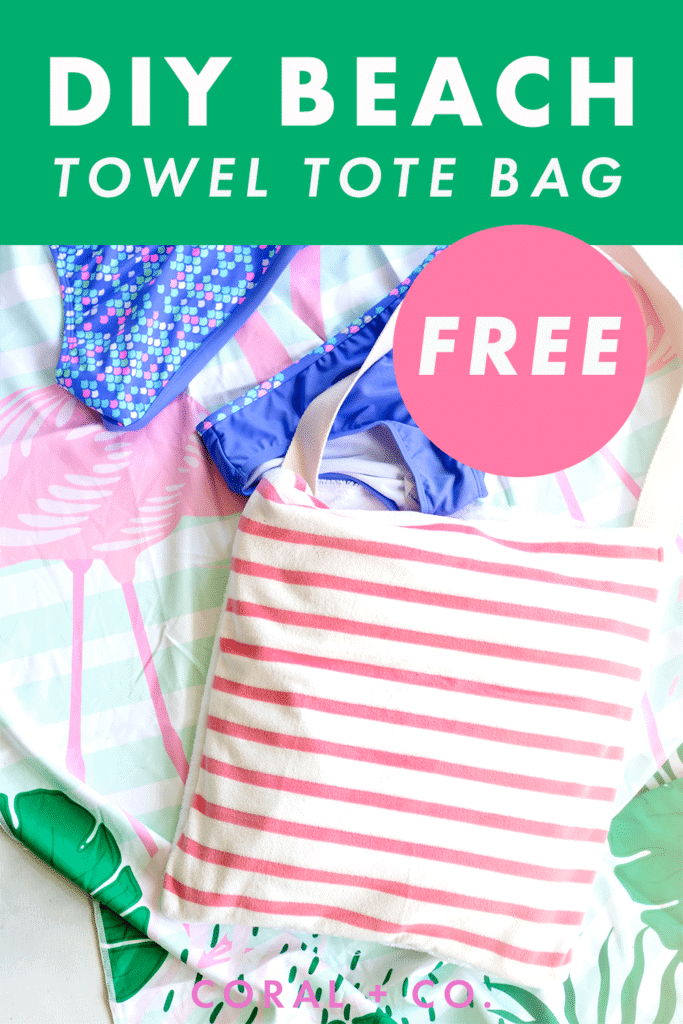
DIY Beach Towel Tote Bag! Learn how to make a beach towel tote bag with this easy tutorial. Did you know that you can make a beach bag out of a beach towel? Yes, you can make a towel and bag in one! With this tutorial you will turn your beach towel into a grab and go bag and it even comes with a pocket to tuck all your pool or beach gear into.
The beach towel tote is perfect for the kids who hate to carry their own towels to the beach and pool. They can stuff their goggles into in and sling it over their shoulder and go! No more fussing. I would know, I tested it myself! Worked like a charm. 😉
How to Sew a Beach Towel Tote Bag DIY Tutorial and Instructions
Time needed: 30 minutes.
How to Sew a Beach Towel Into a Tote Bag DIY
Cut Fabric Pouch
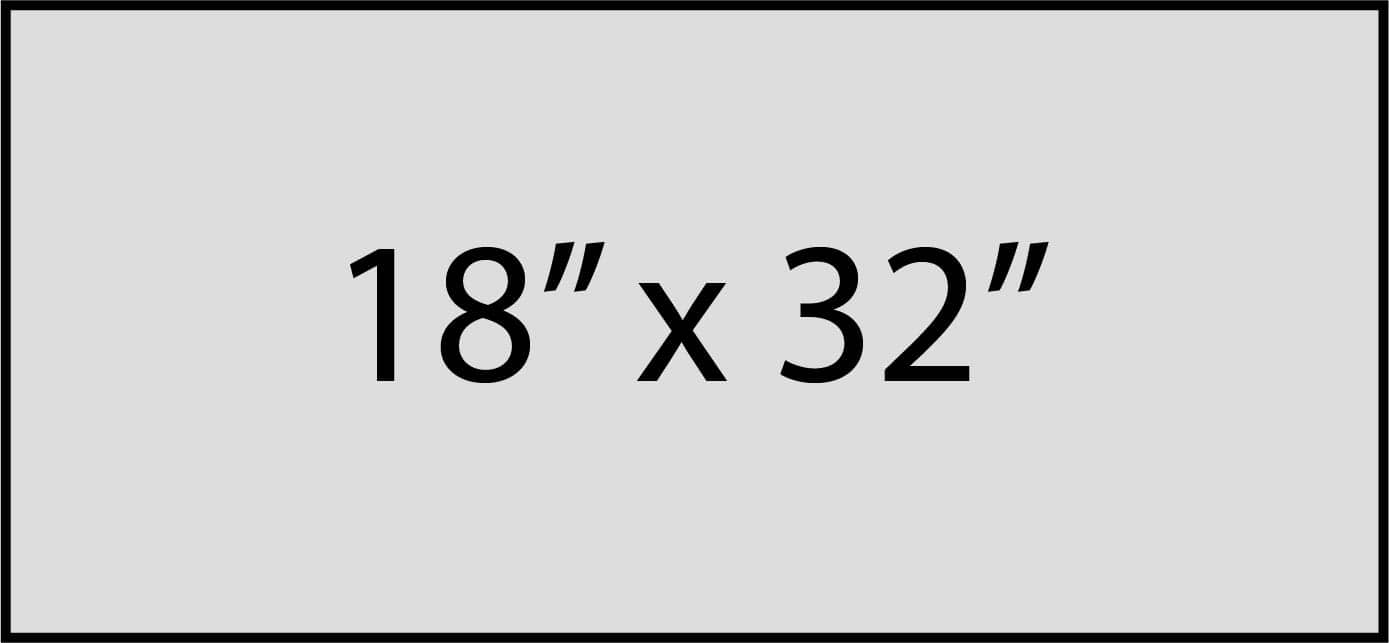
Cut a 19″ x 32″ fabric rectangle.
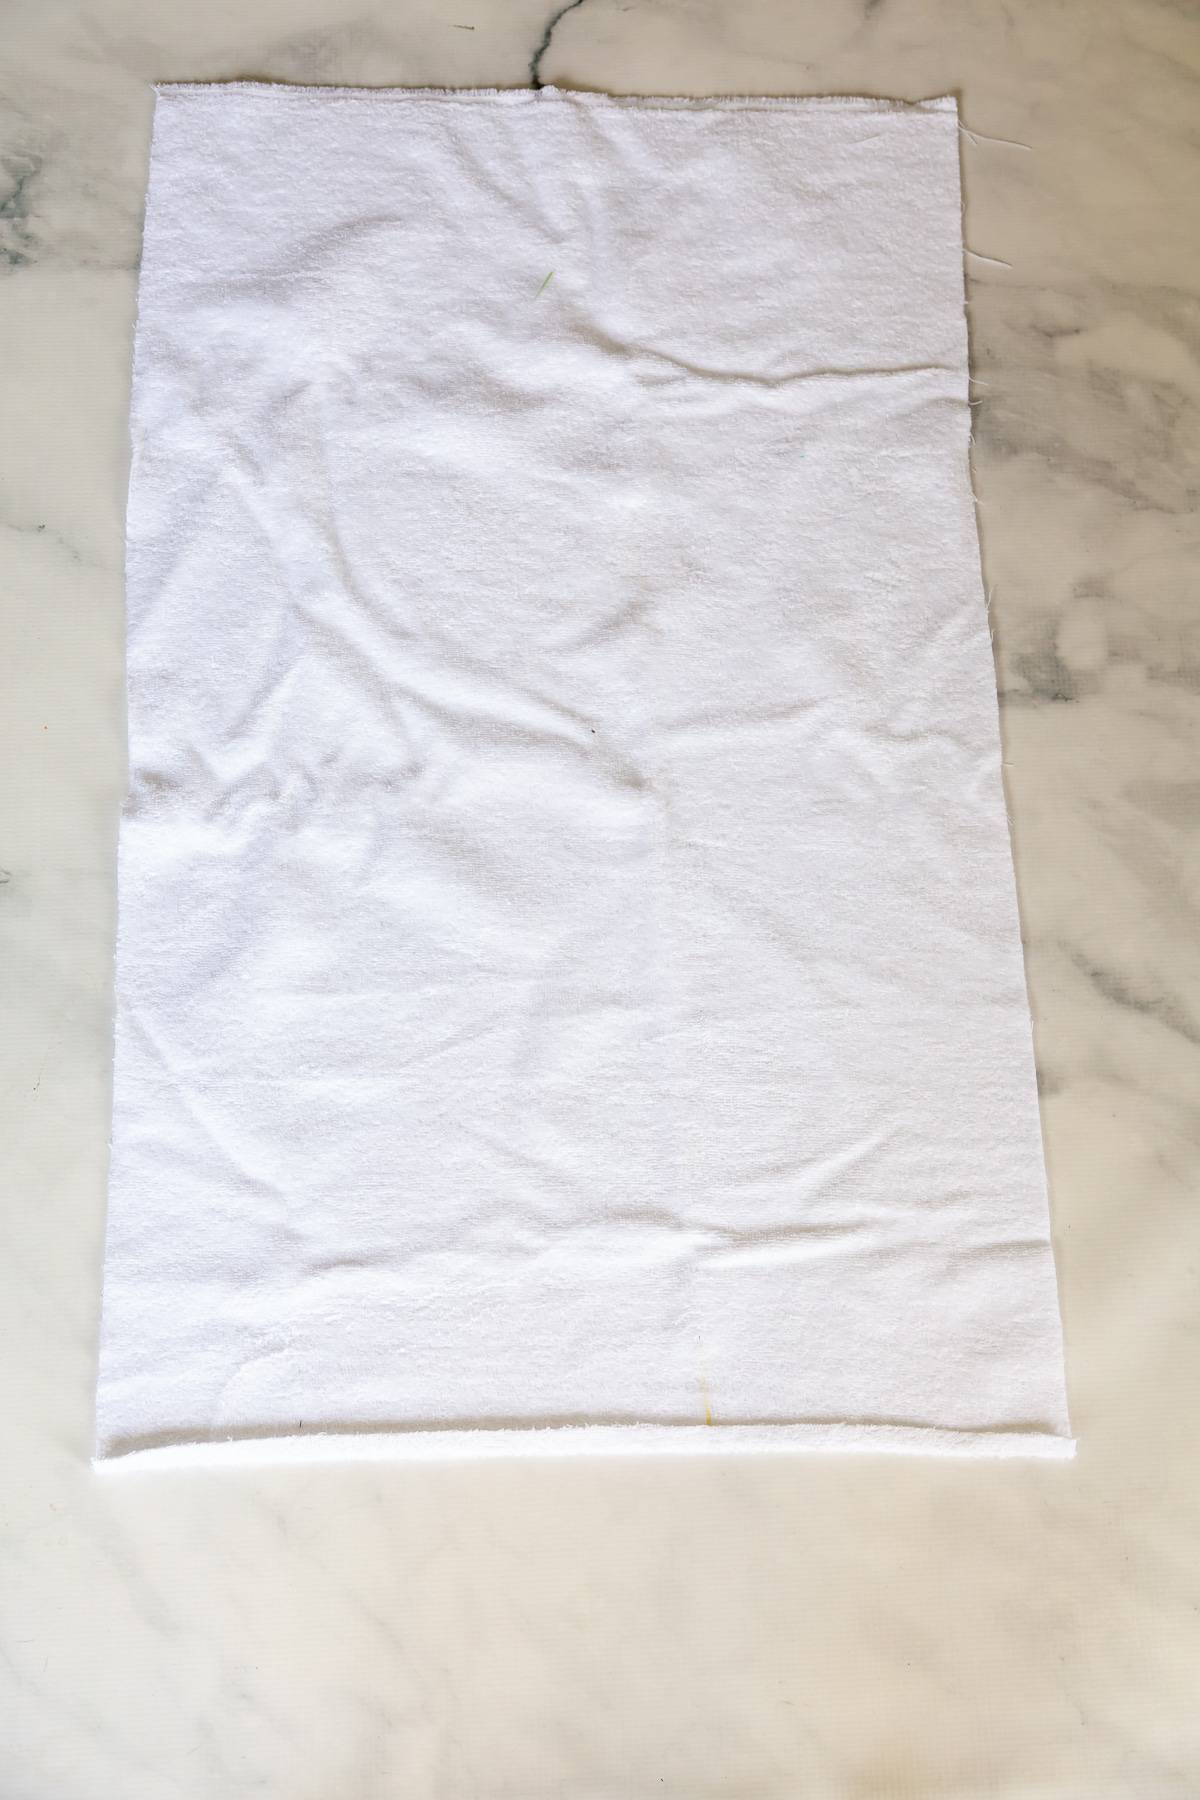
Fold Fabric Edge
Fold over 1/4″ seam allowance on a short edge and press.
Fold Fabric Again
Fold over the short fabric edge another 1/4″ to form a finished edge. Press and Pin in Place.
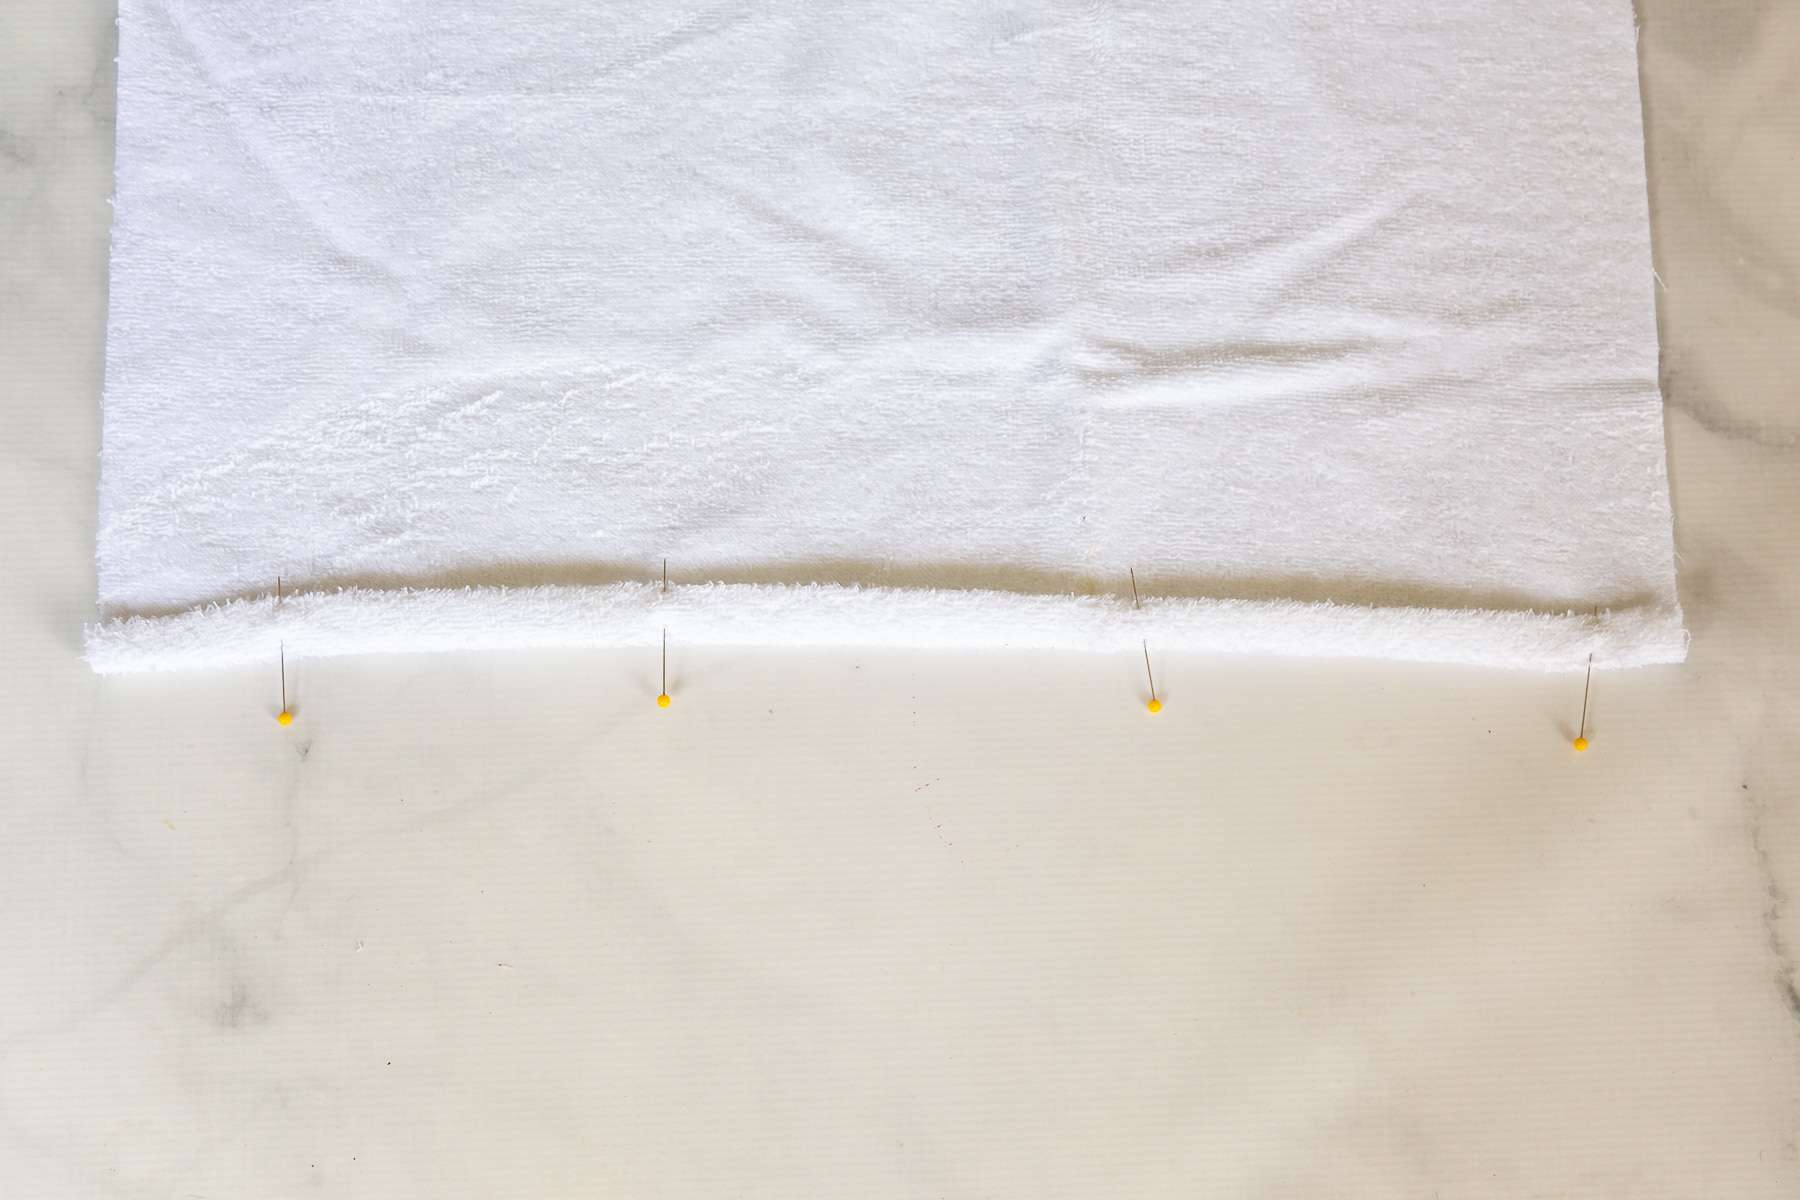
Sew the Finished Edge
Sew along the inside edge of the finished edge to create an edge that will not ravel. Repeat for the other short side of the fabric piece.
Form the Pouch
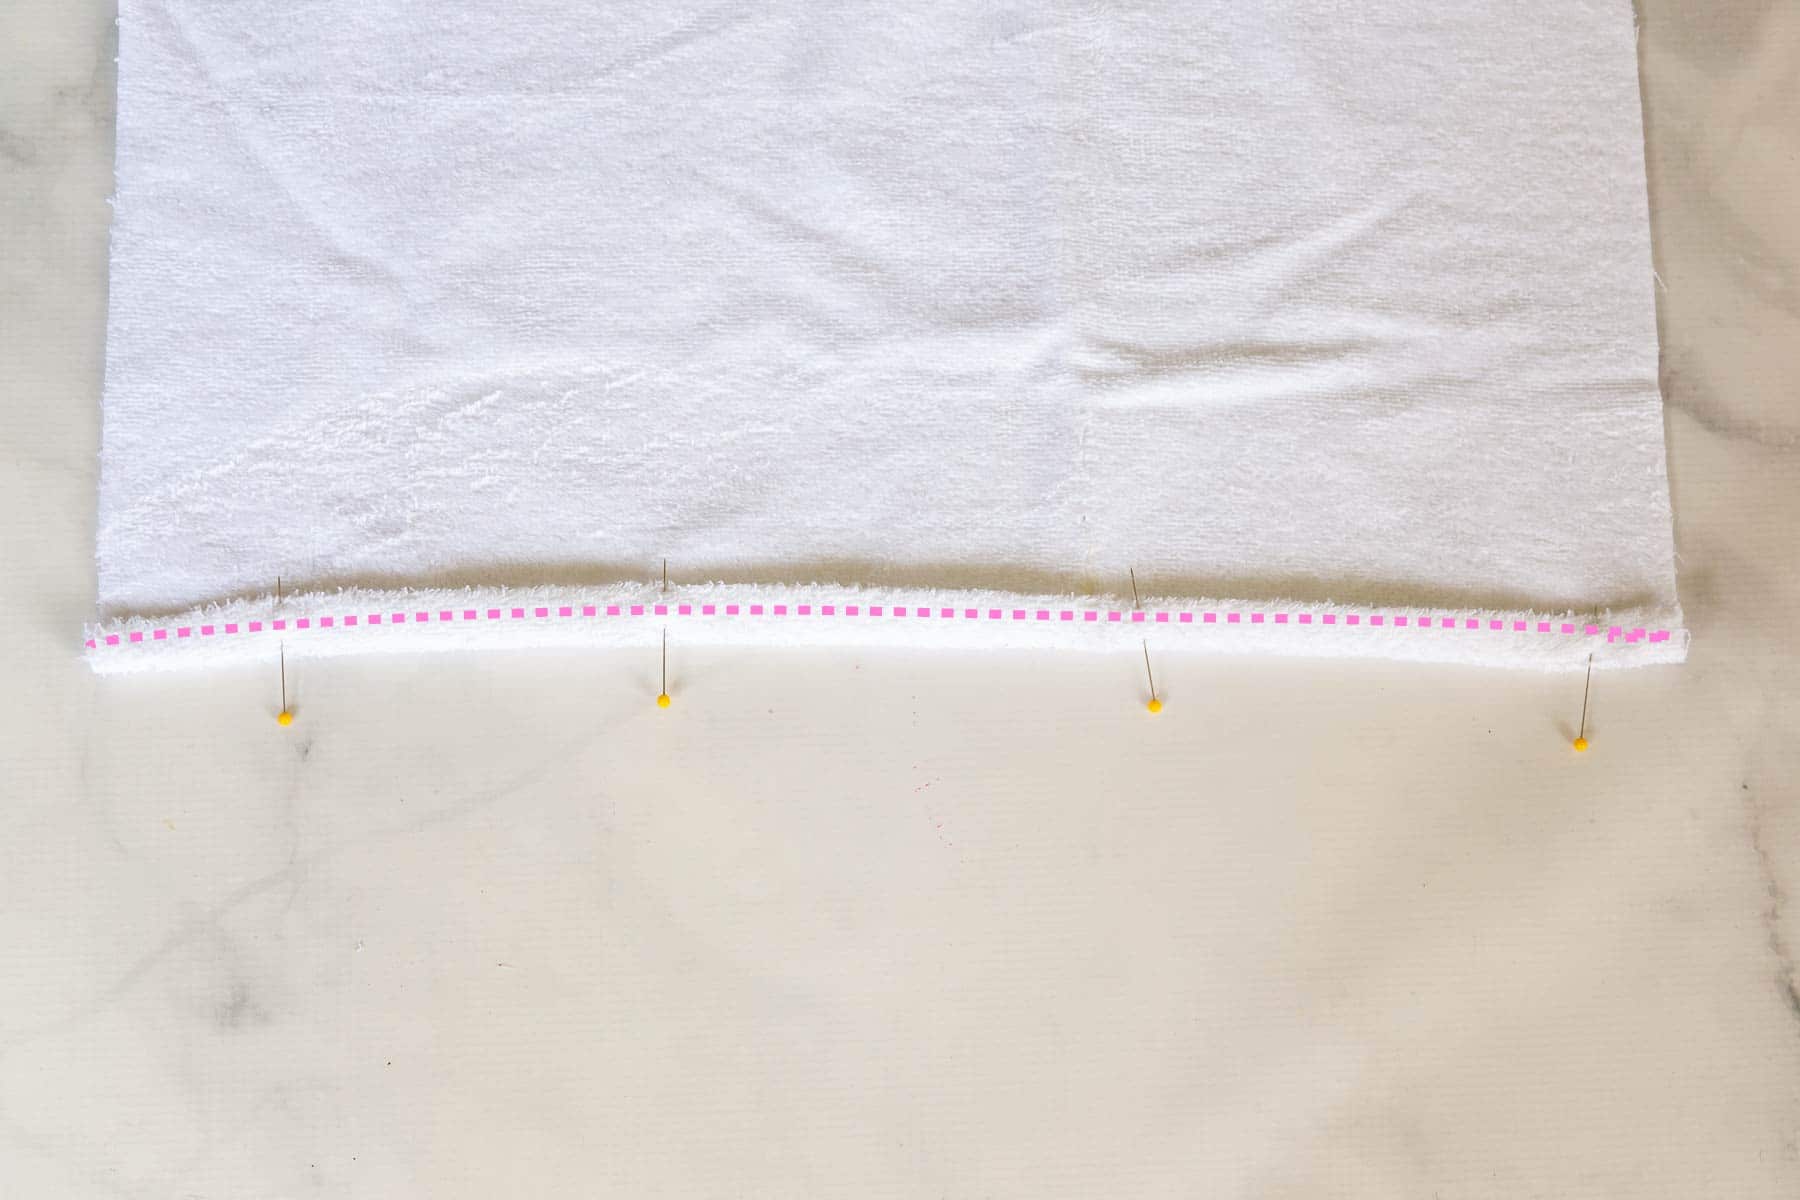
Fold the fabric rectangle in half right sides together with the short edges meeting ash shown below. Pin in Place.
Sew the Pouch Seams
Sew the side seams of the fabric pouch using 1/2″ seam allowance. Trim the bottom corners at the diagonal.
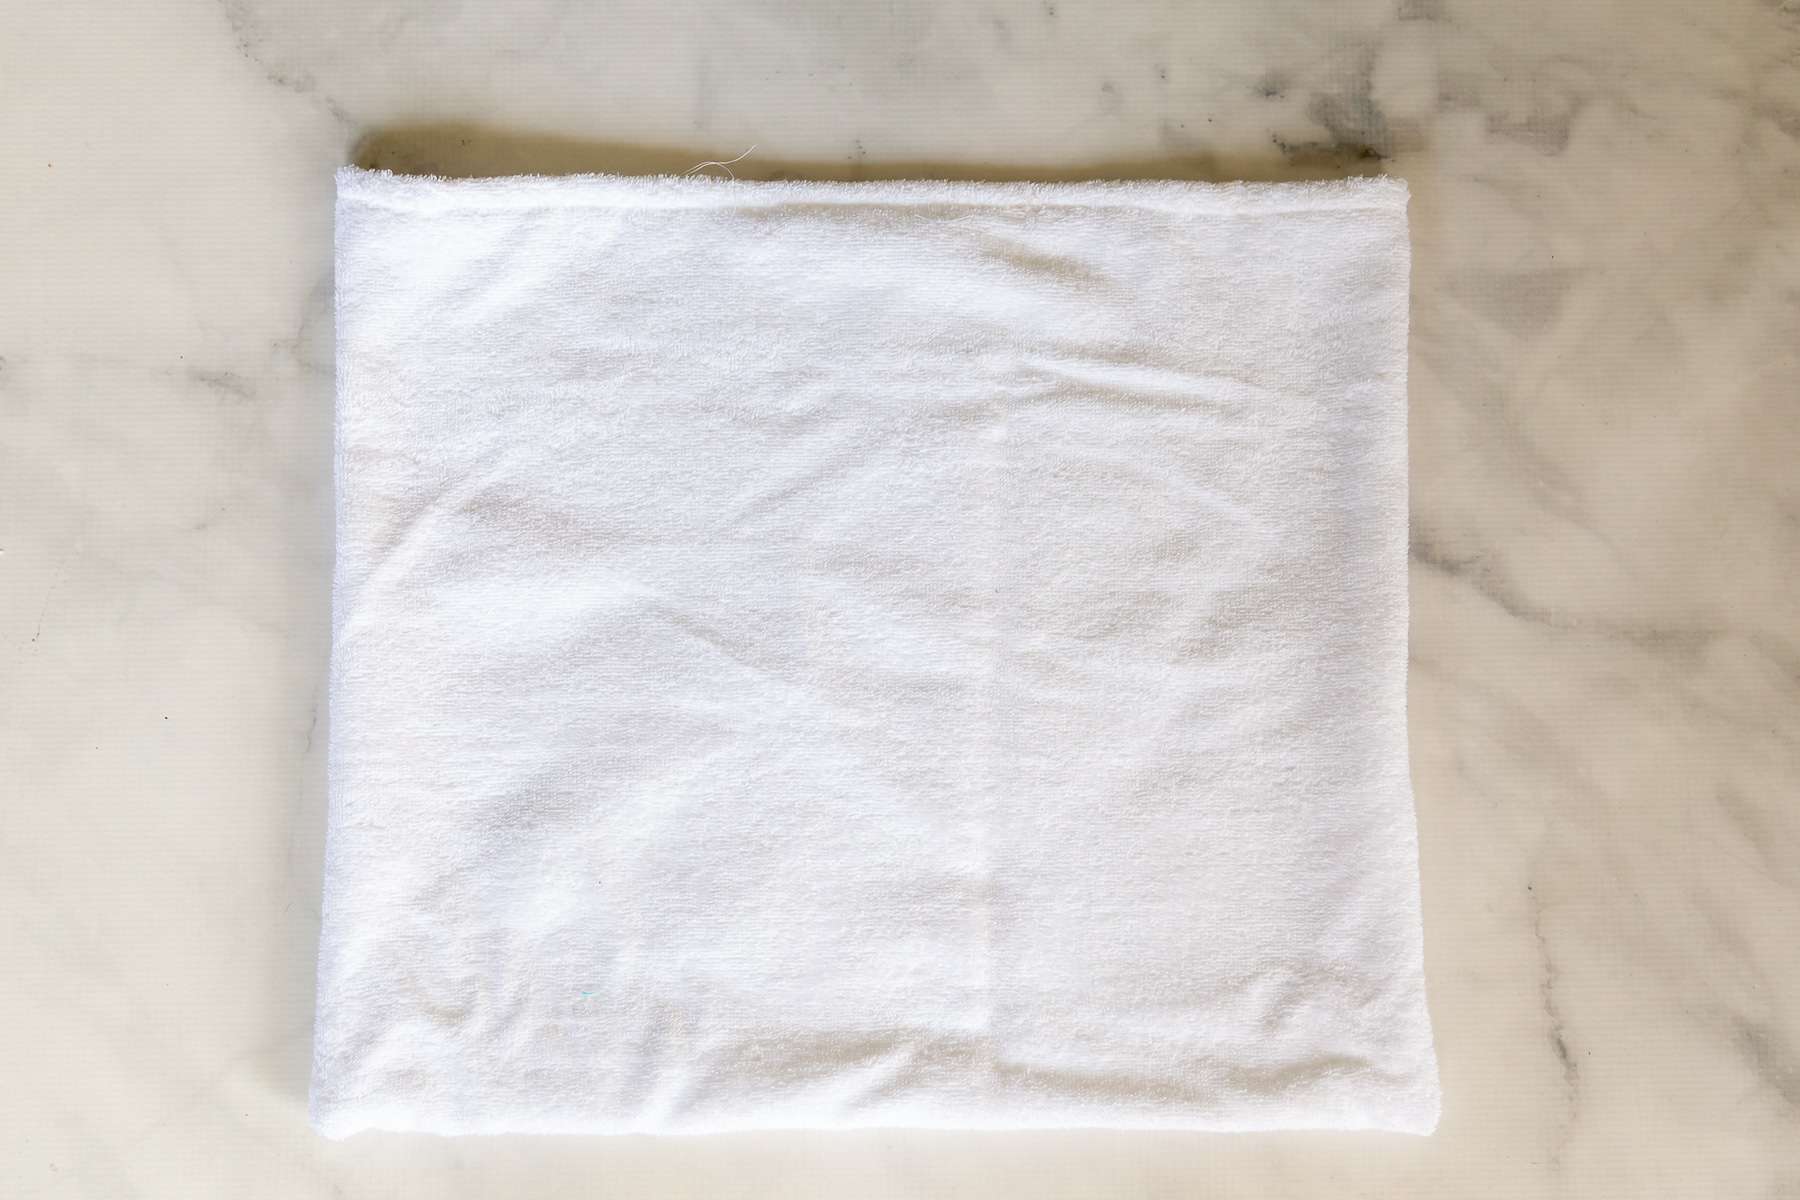
Turn Right Sides Out
Turn the pouch so it is facing right sides out. Push the corners of the seam allowance out.
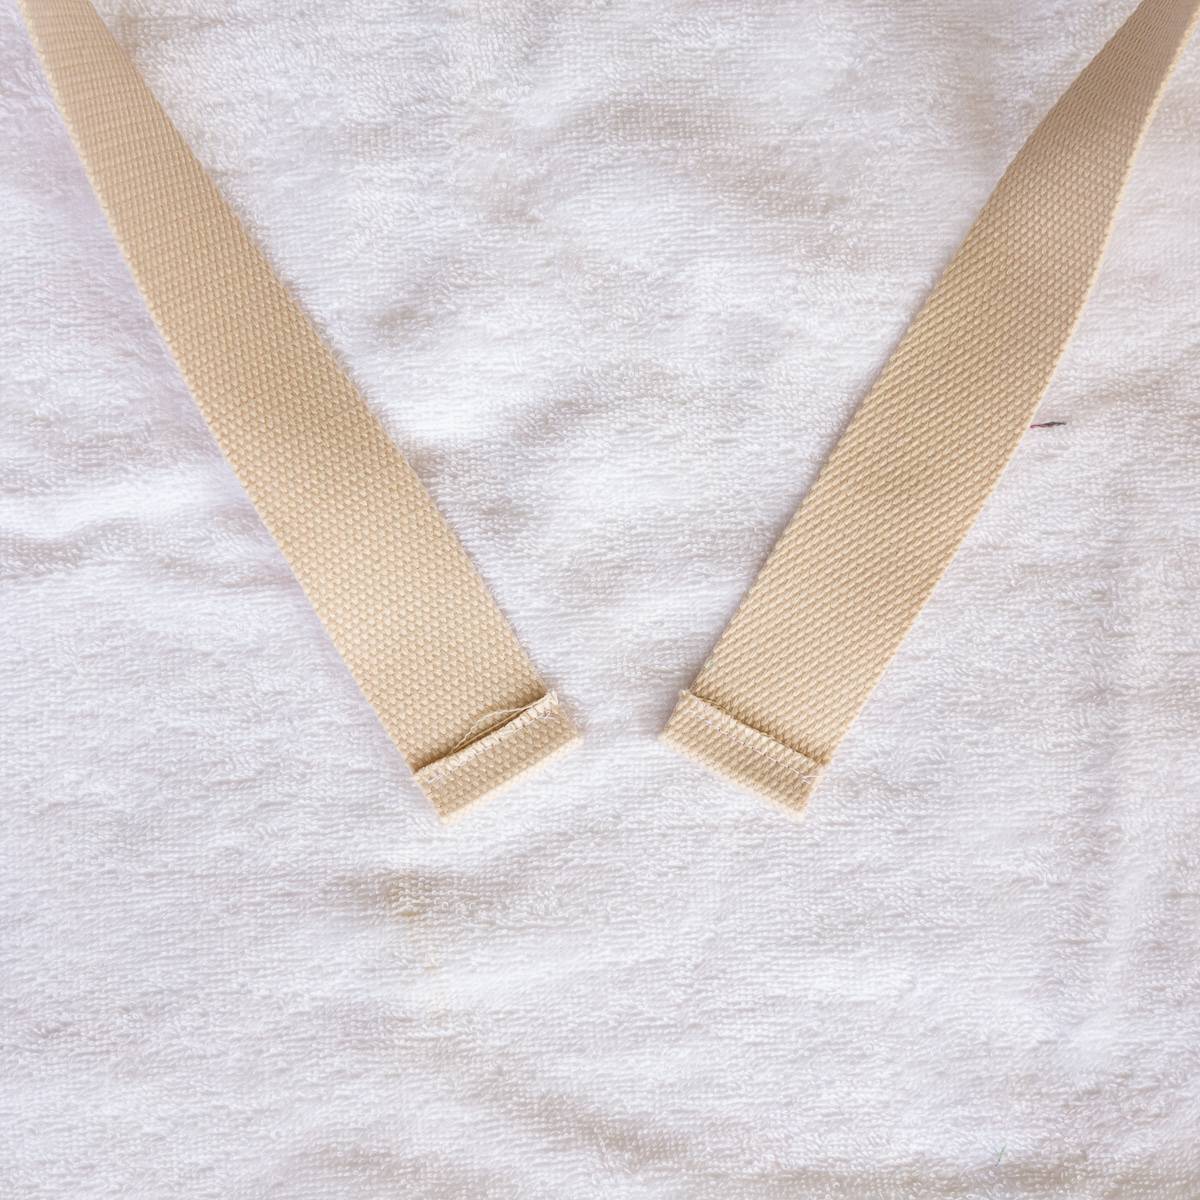
Make Straps
Turn the strap edges under 1/4″ and sew along the raw edge.
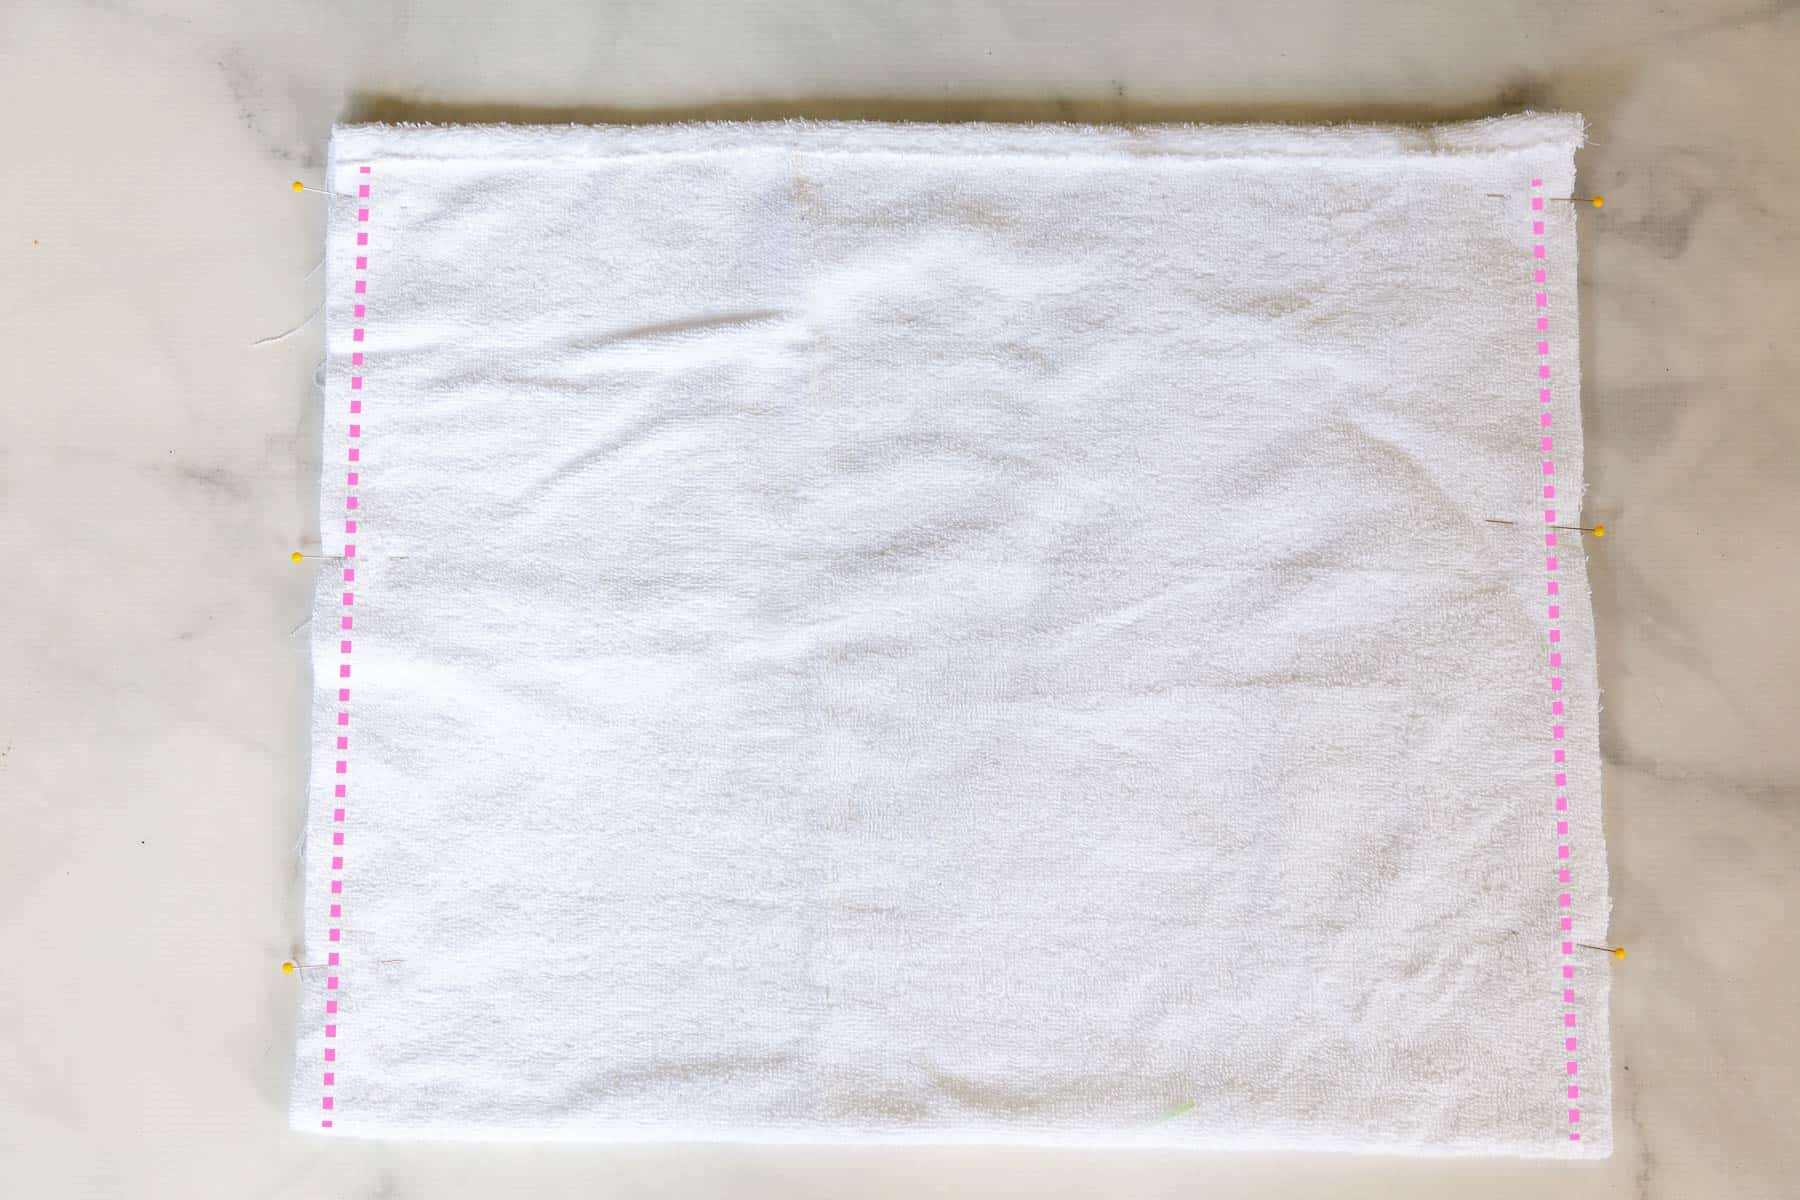
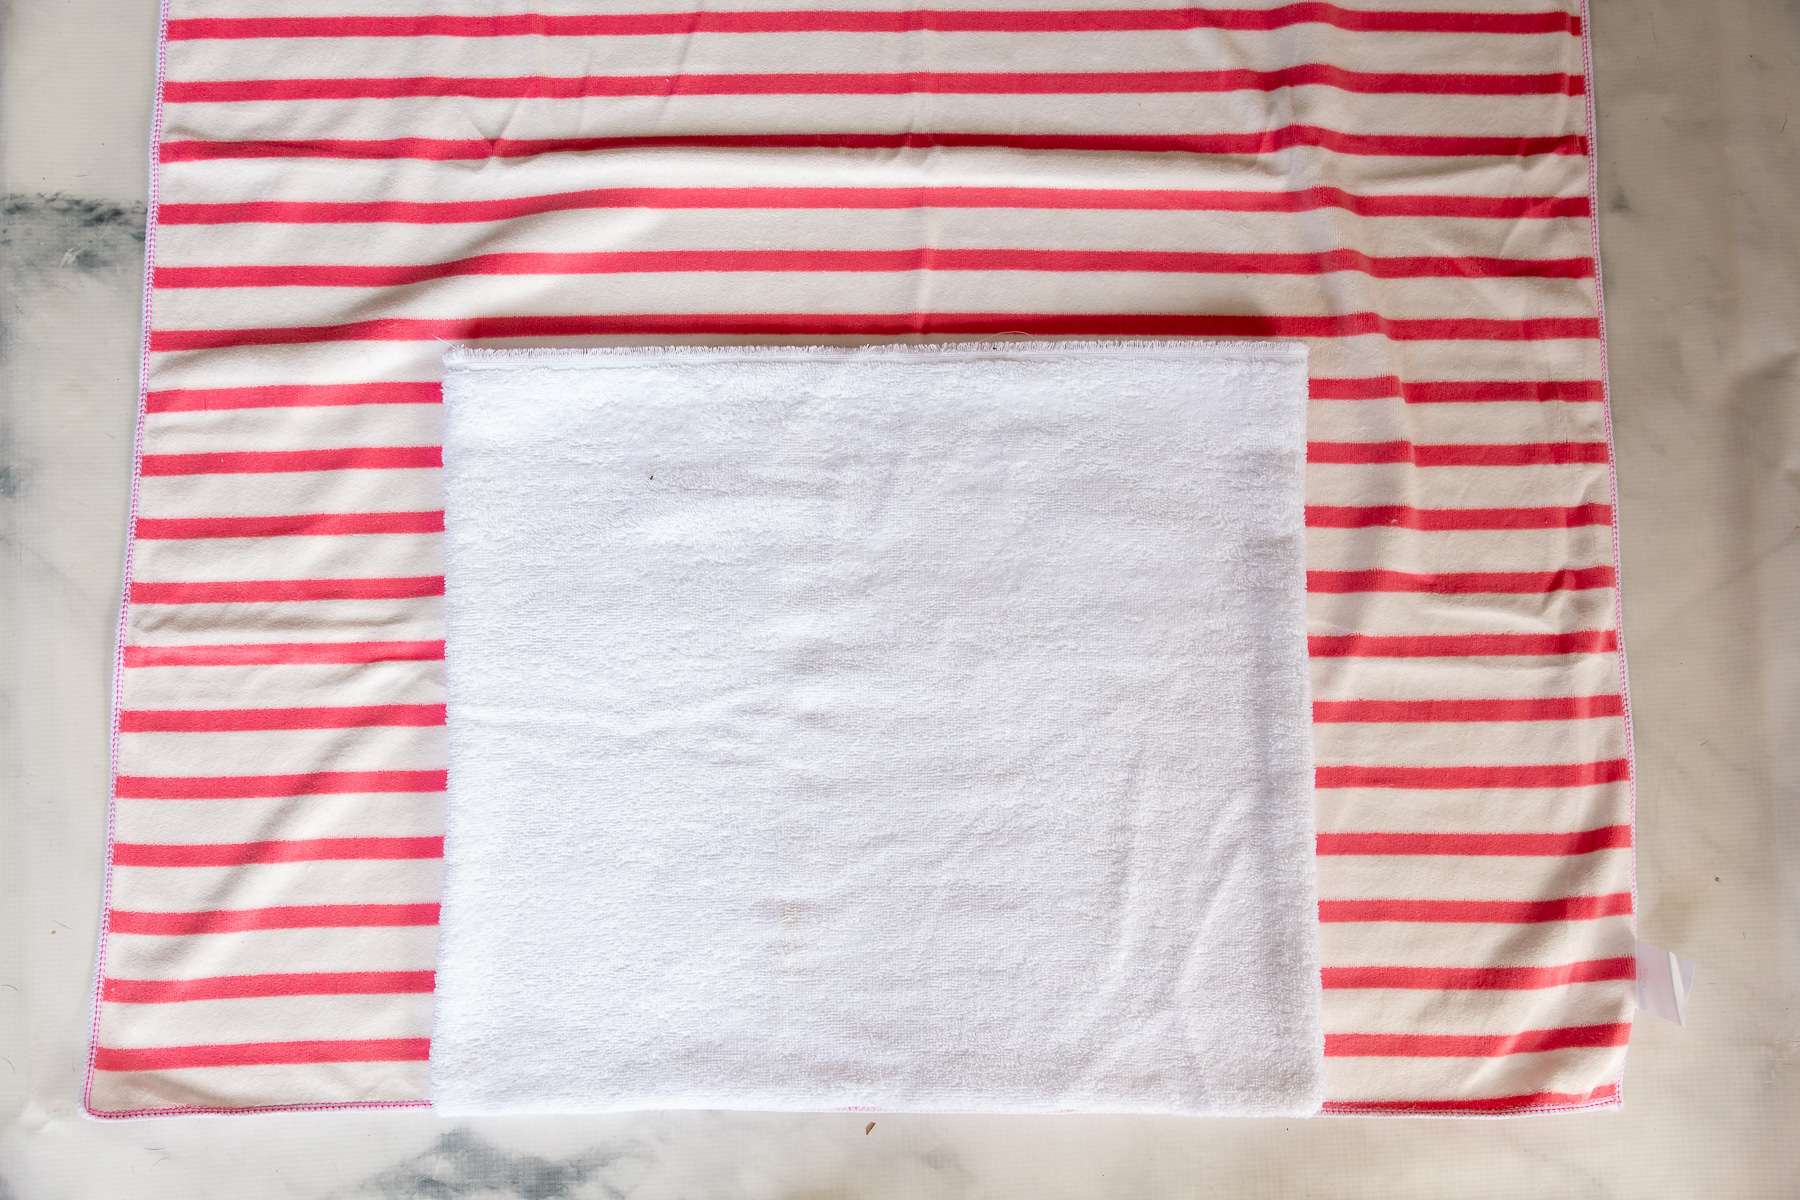
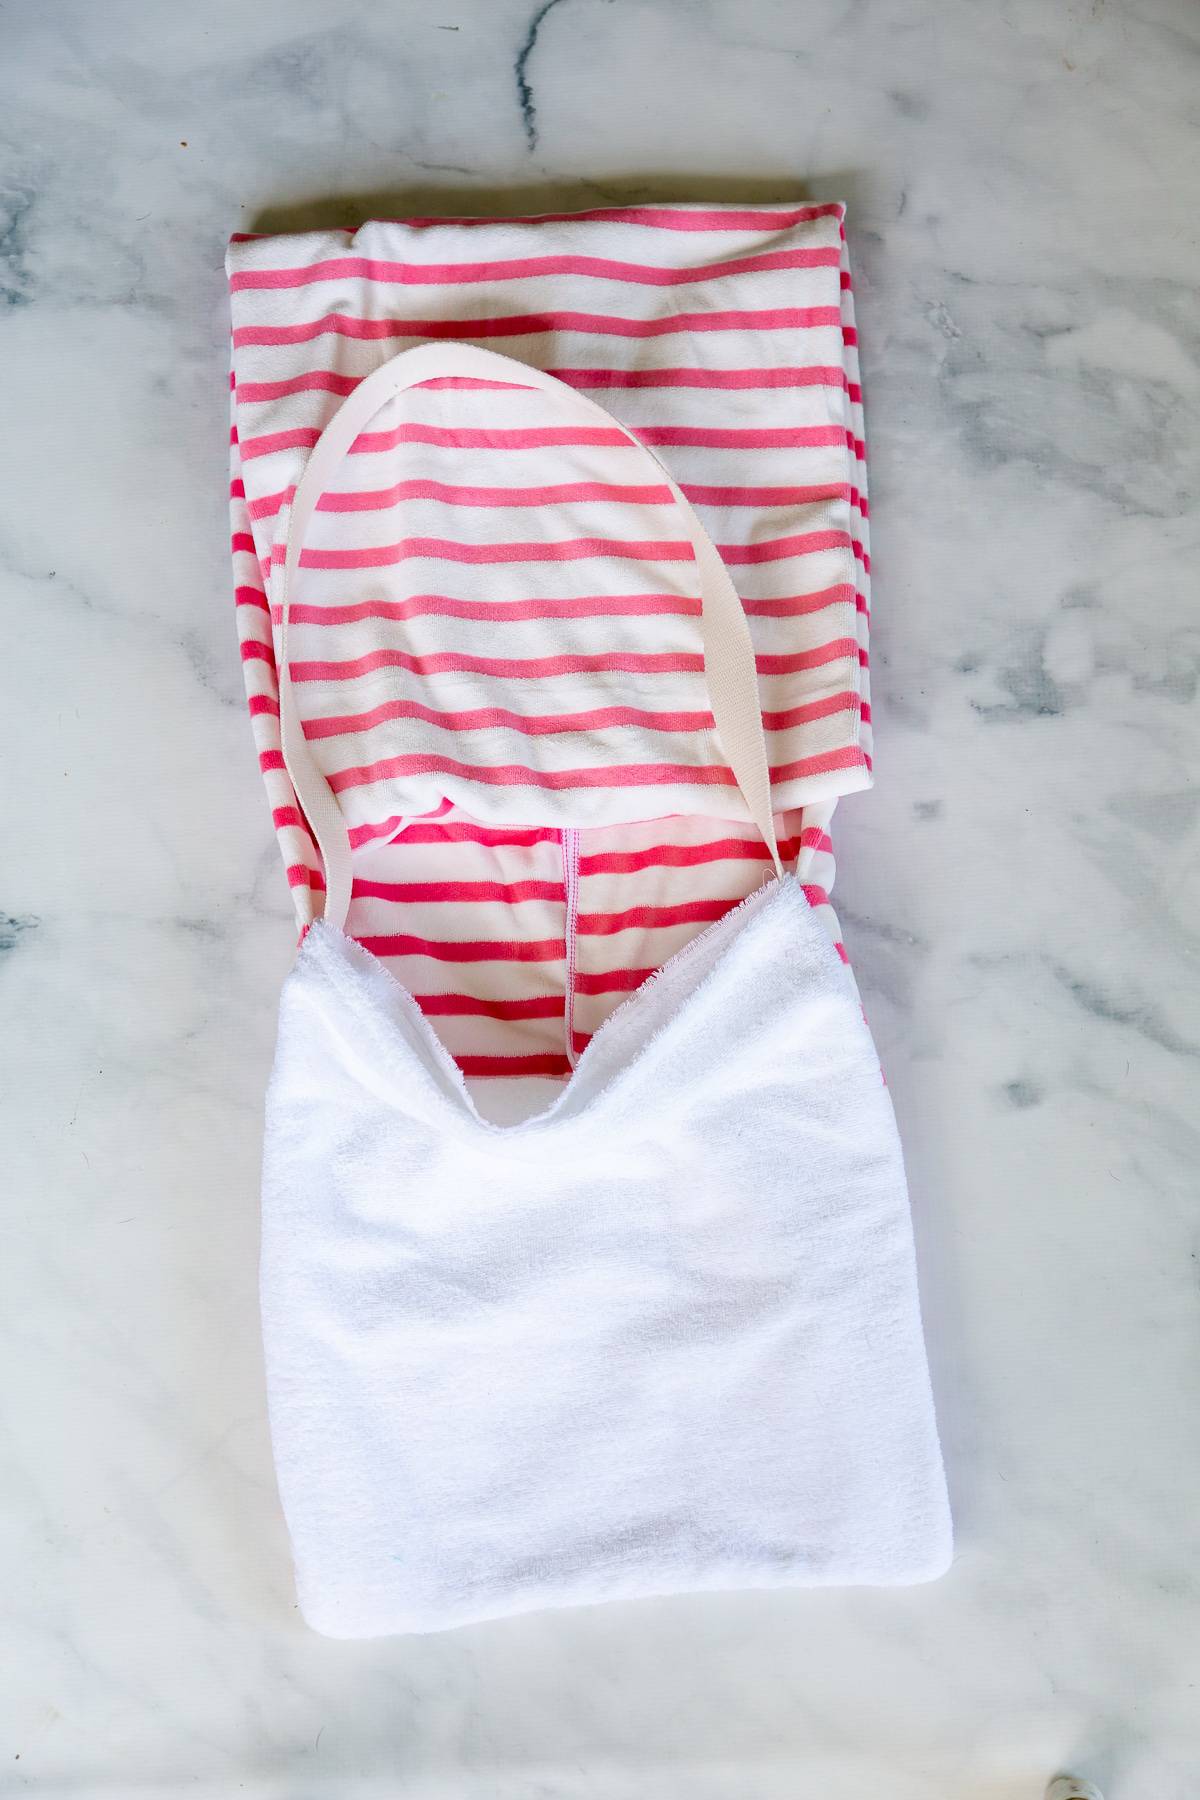
Pin Pouch and Strap to Towel
Place the pouch on the towel with the bottom of the pouch aligned with the bottom of the towel.
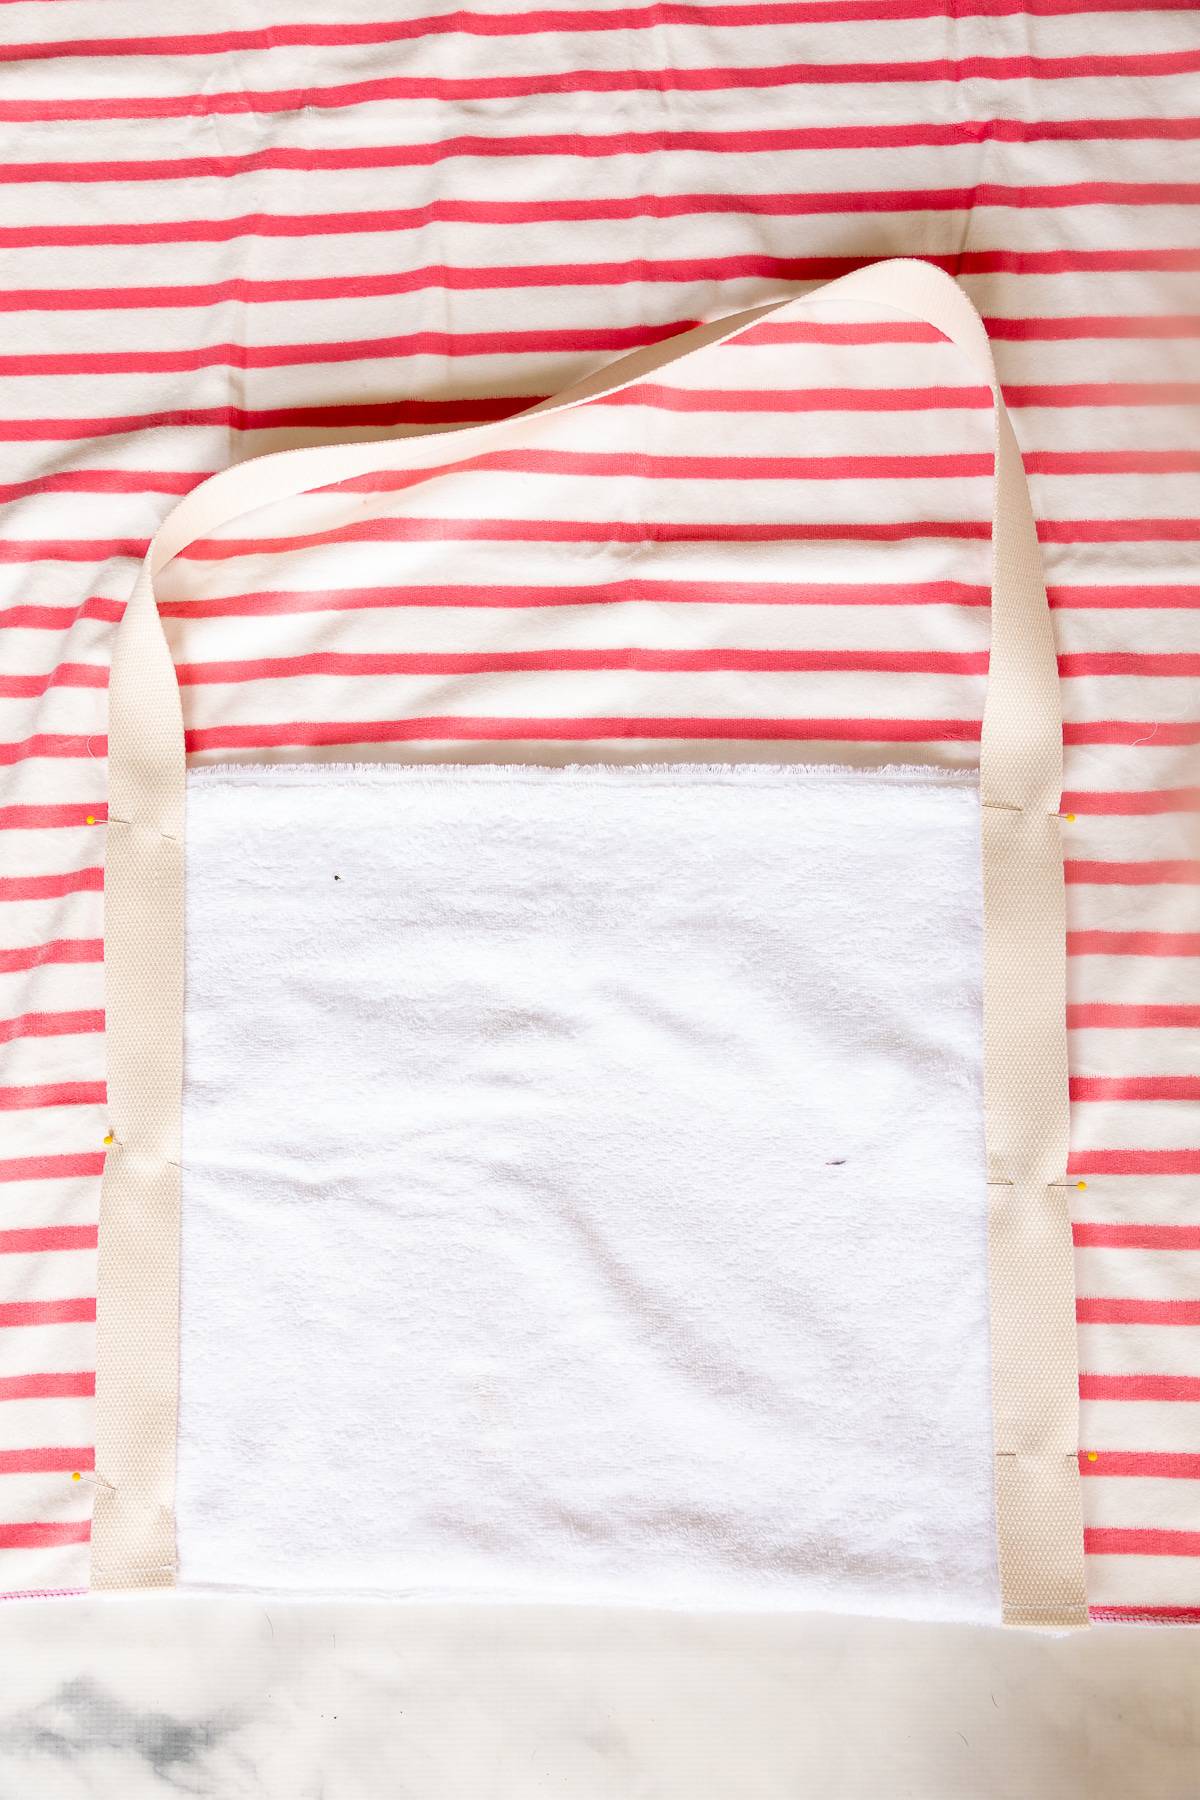
Add Straps
Add the strap to the top of the pouch. Line up the bottom edges of the straps, pouch, and towel making sure the straps are not twisted. Align the straps so the outside edge of the straps are lined up with the outside edge of the pouch and pin through all the layers.
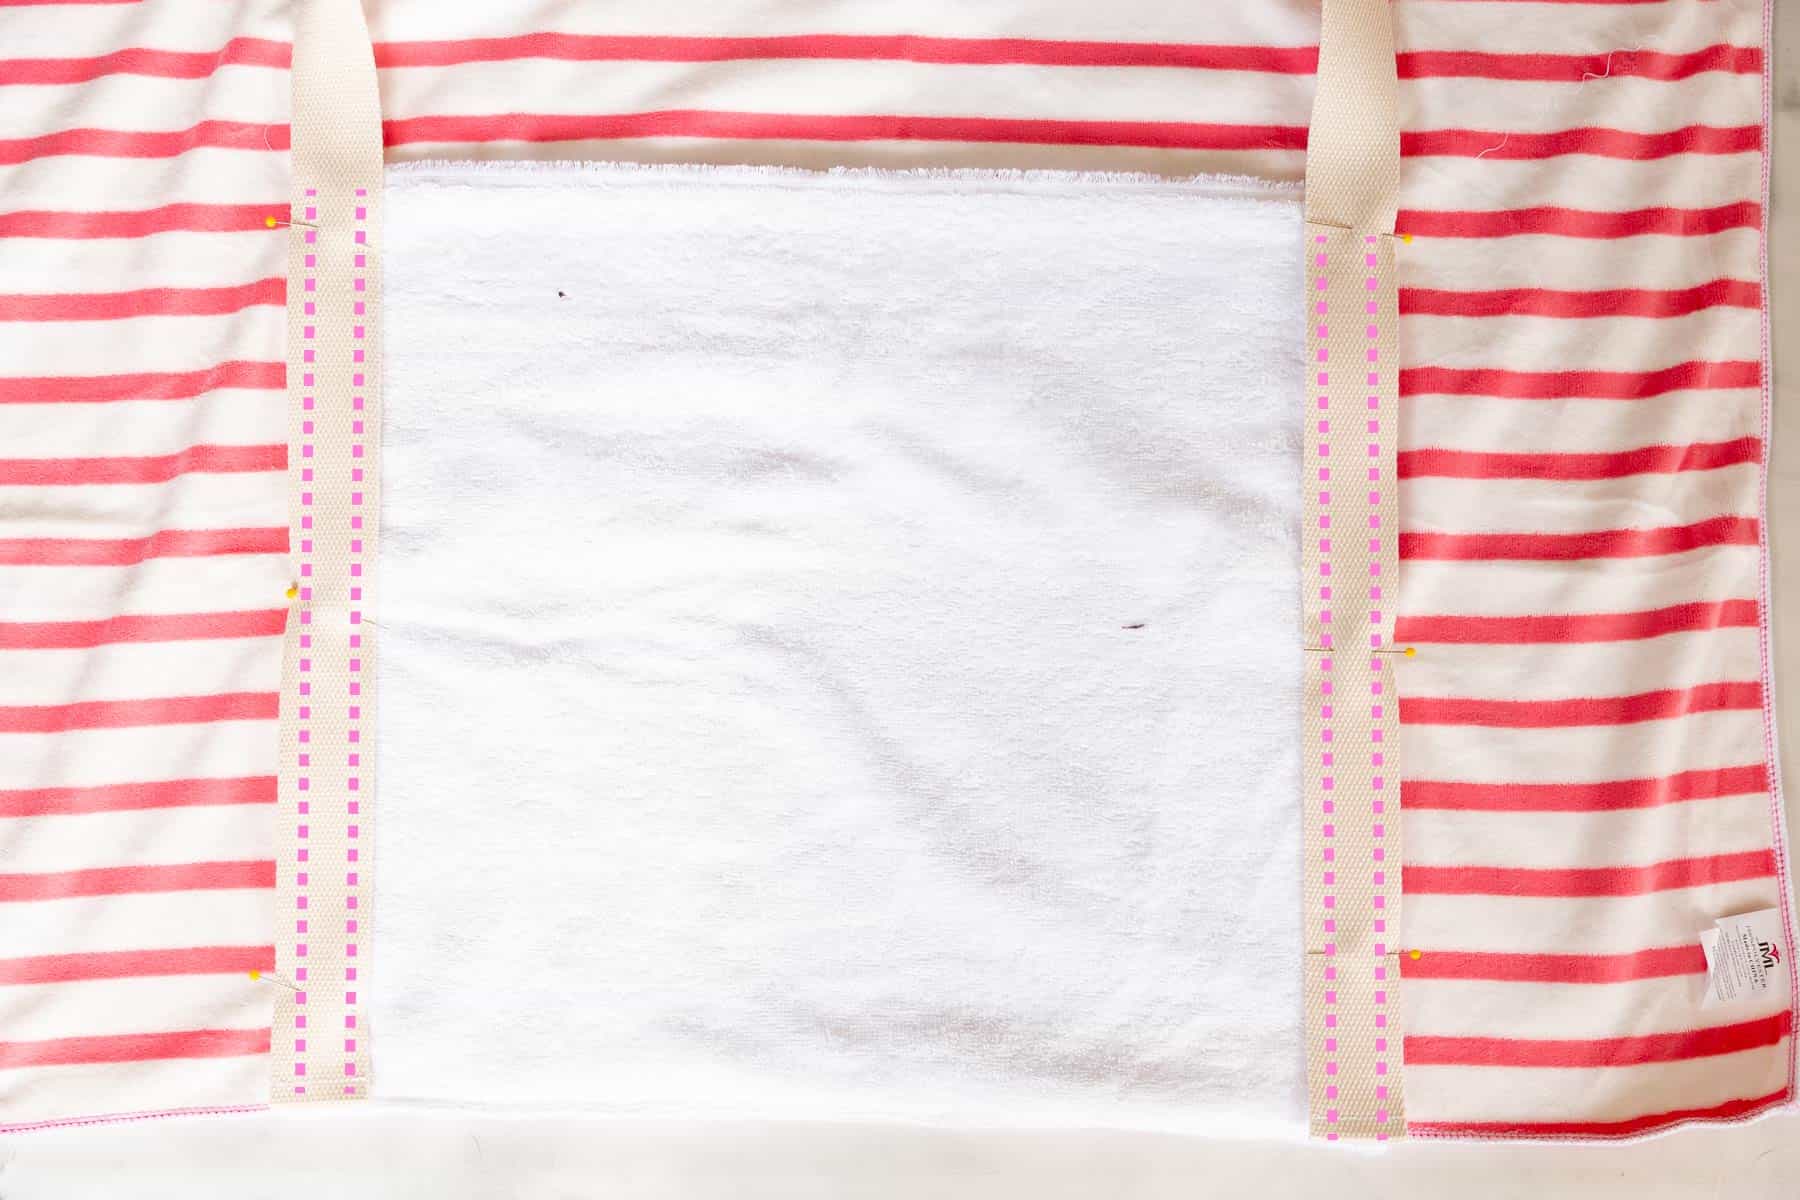
Sew the Strap and Pouch
Sew the strap and the pouch to the towel. Start at the top of the pouch on the outside edge of the strap and sew to the bottom of the strap, pouch, and towel. Sew a second seam along the inside edge of the strap. Repeat for the other side of the strap and pouch. Be sure to pull the towel taut as you sew to prevent it from bunching up between the seams.
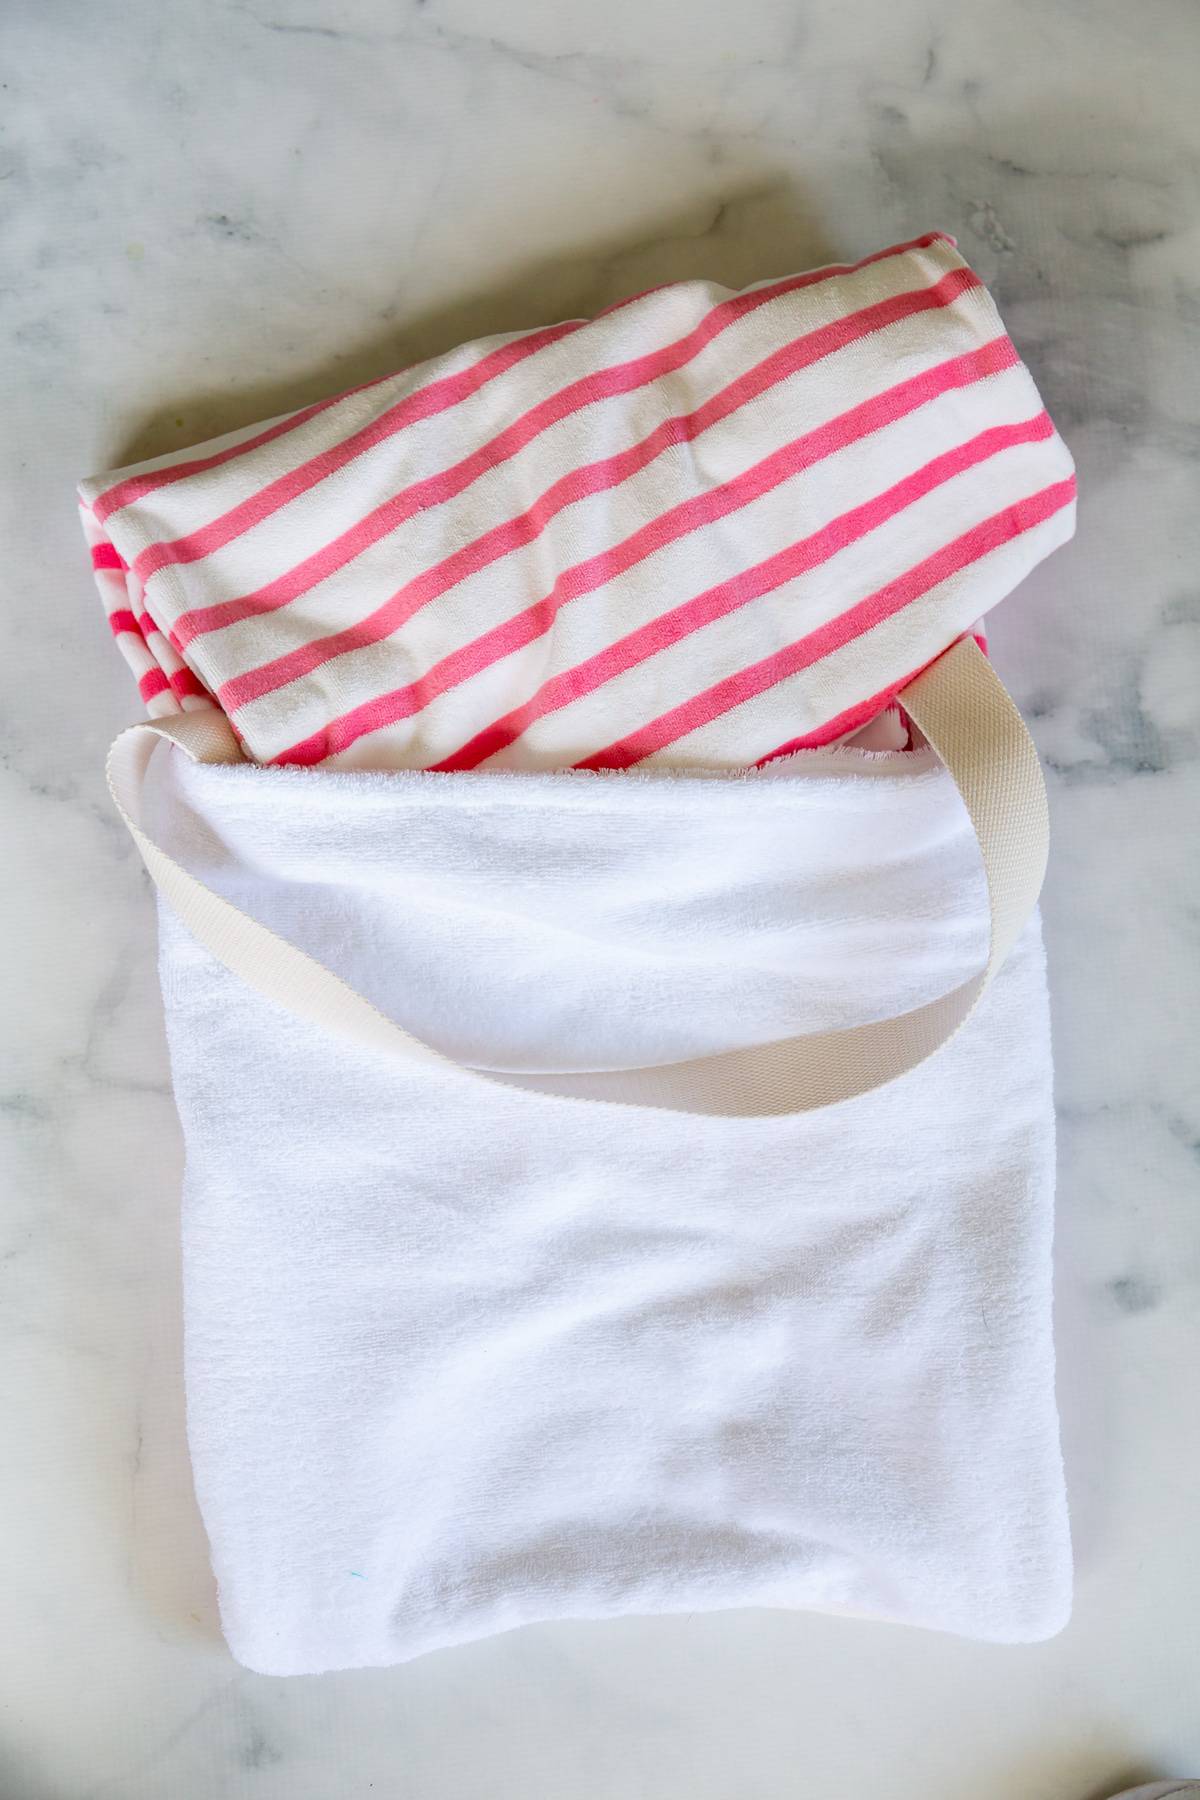
Fold the towel
Turn the towel over so the front the towel is facing up. Fold the flaps of the towel inward so the edges meet.
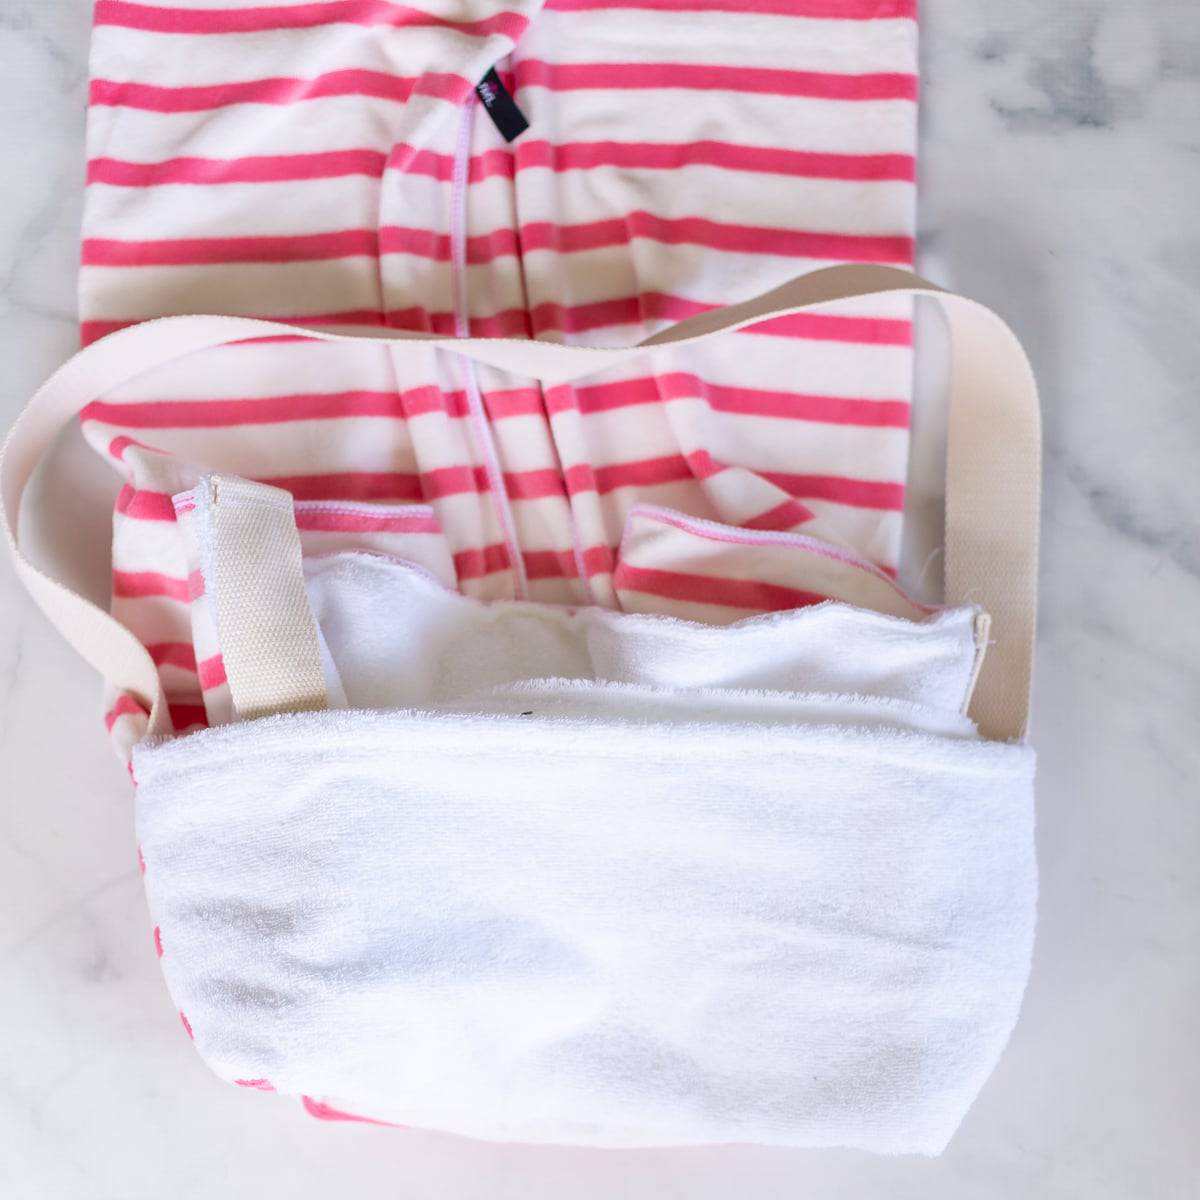
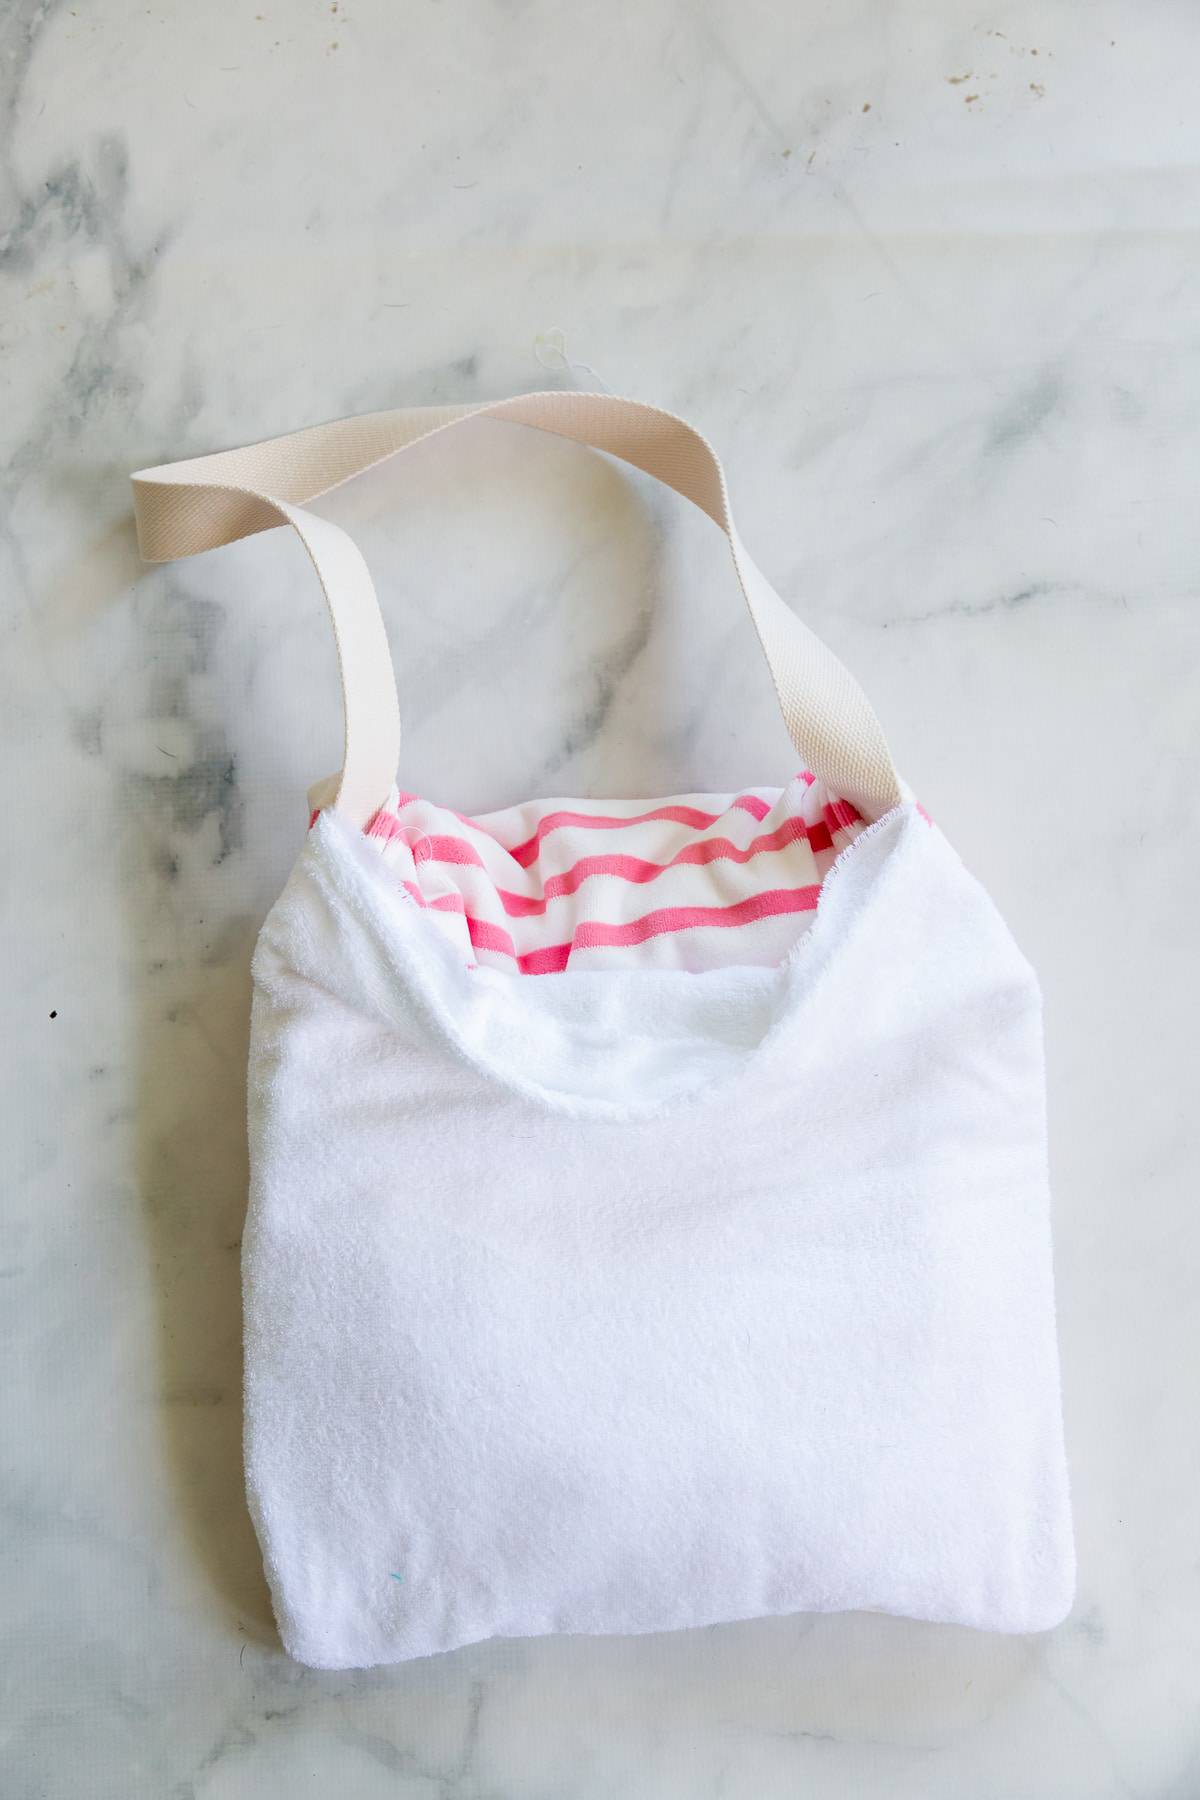
Turn the Pouch Right Sides Out
To make the bag for the towel to sit in you will first need to turn it right side out to form a bag. Turn the towel and pouch where the towel and pouch seam meet. The bottom of the straps will now be inside the bag. The towel will be the front the bag and the pouch will be the back.
Fold the Towel Inward
Fold the inward folded towel down a third of the way so the top of the towel meets the top of the bag.
Tuck the Towel Into the Bag
Bring the top folded edge of the towel into the the center of the bag and tuck all the way in to form the same size bag front and back.
Use your Beach Towel as a Tote
You will now have a beach bag tote bag that has a pocket on the back to put your extra gear in.
DON’T HAVE TIME TO SEW NOW? SAVE THIS IMAGE TO PINTEREST TO MAKE LATER.
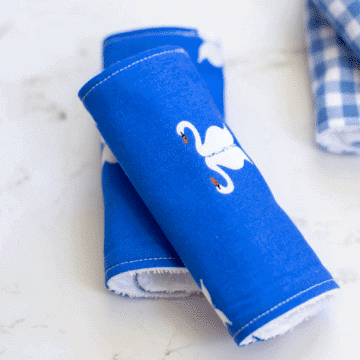
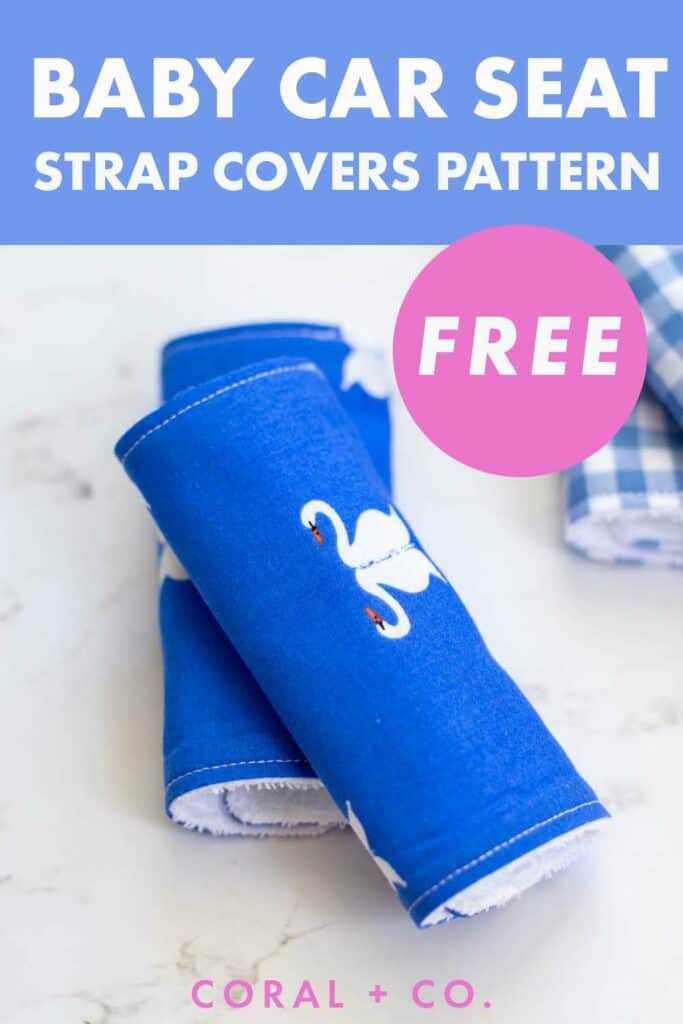
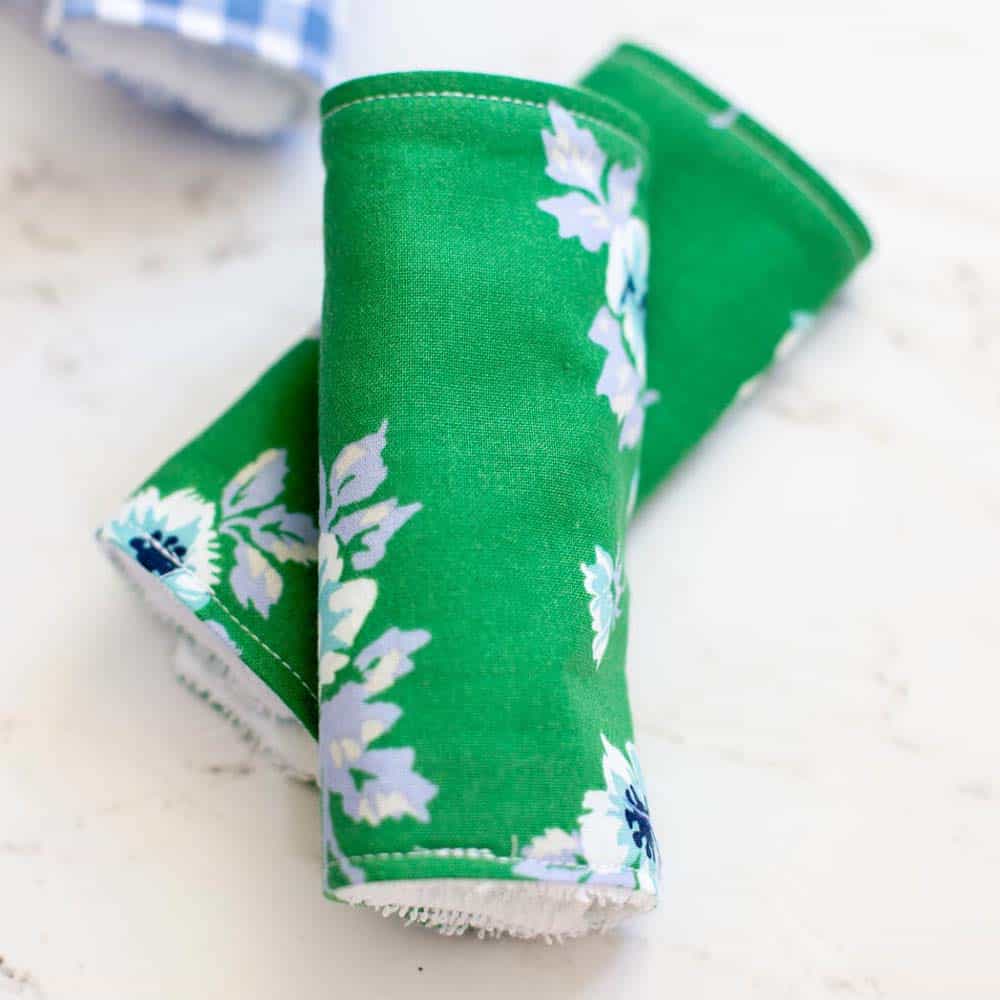
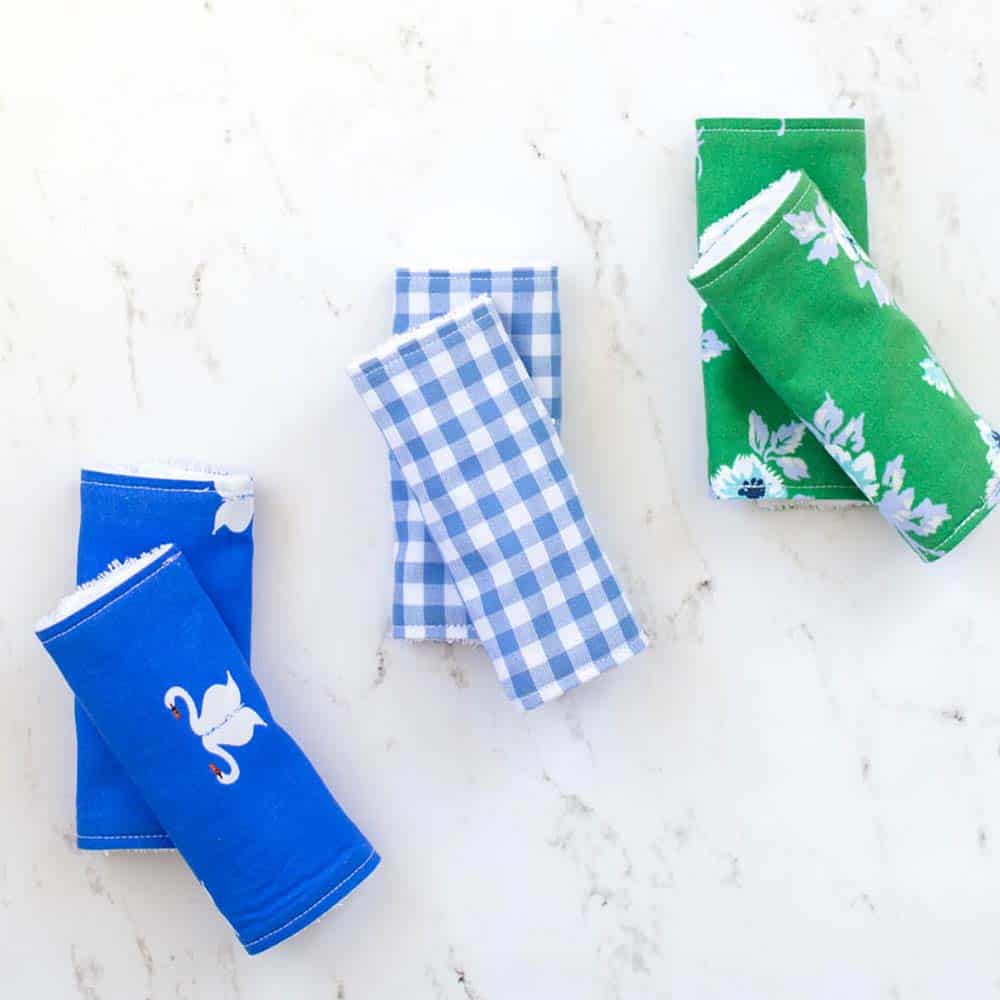
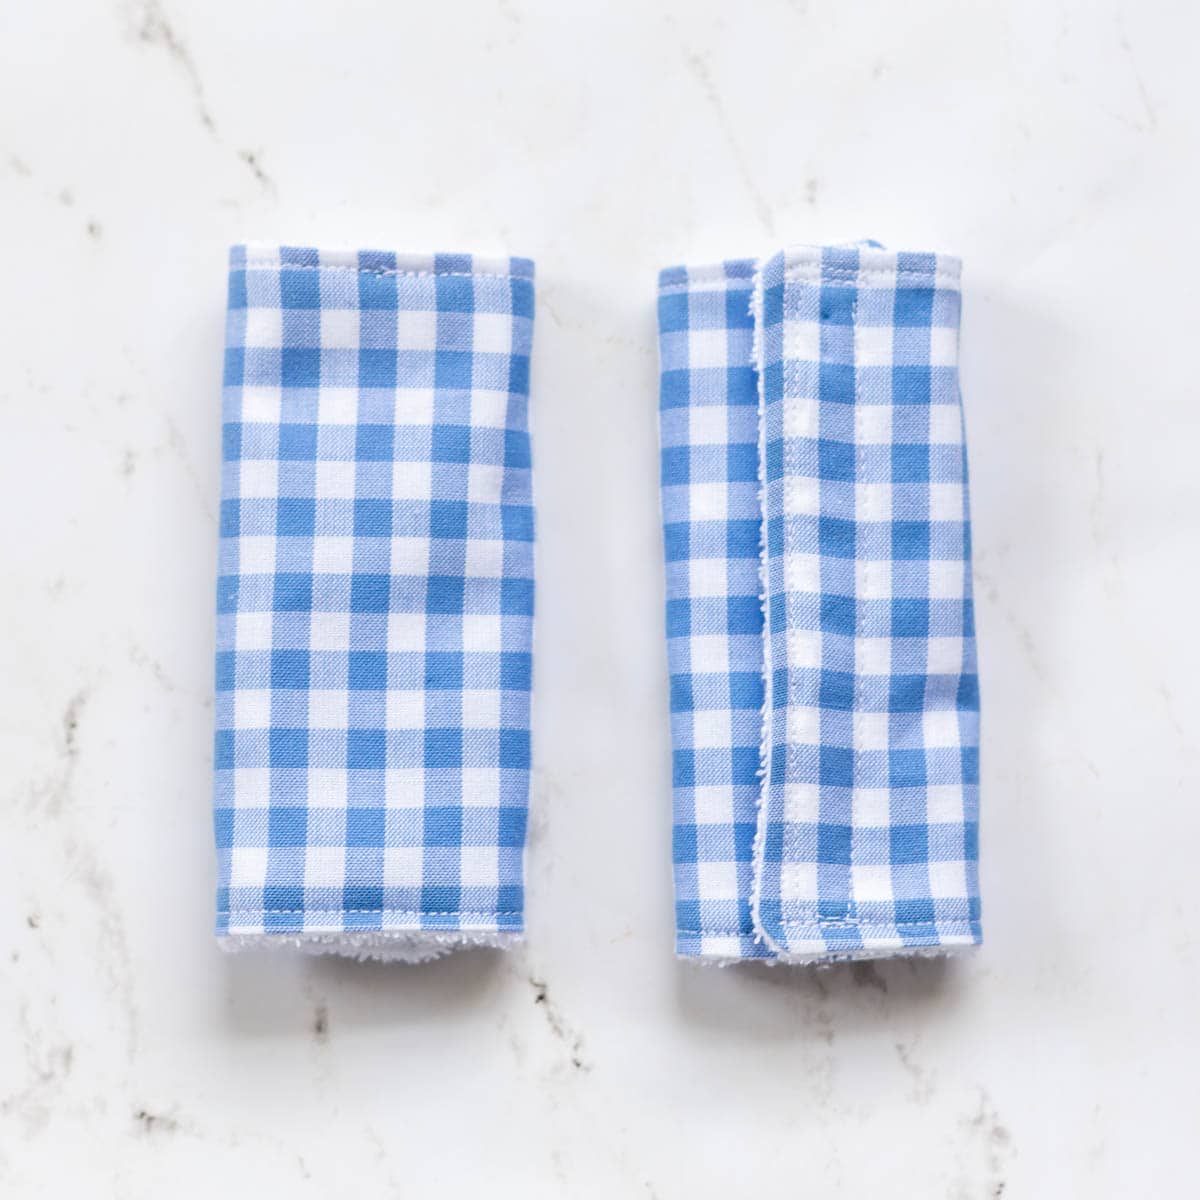
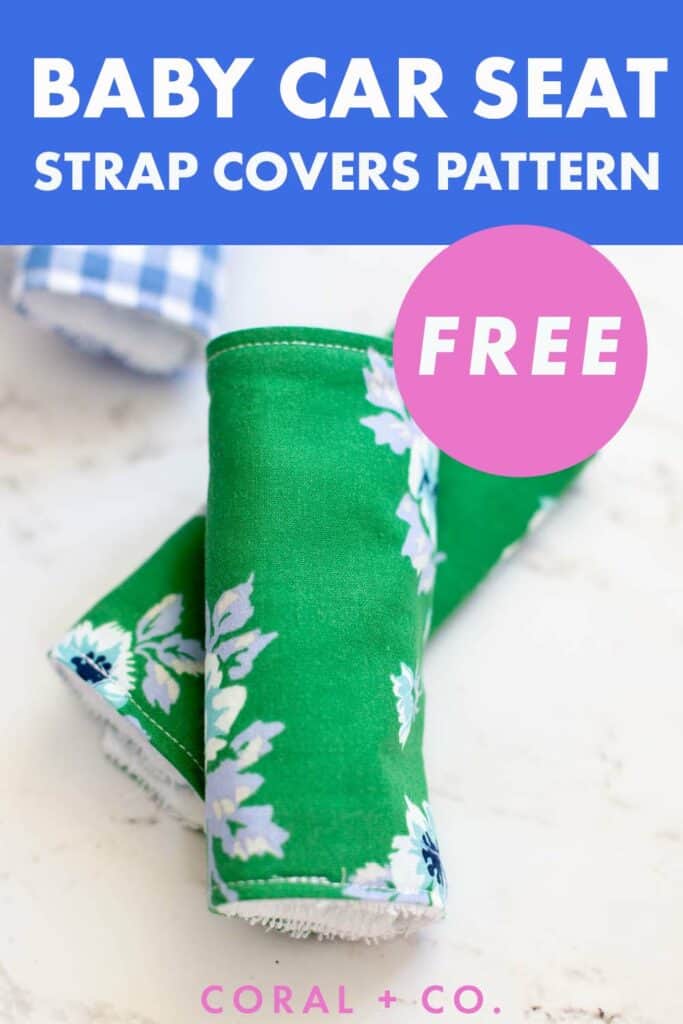
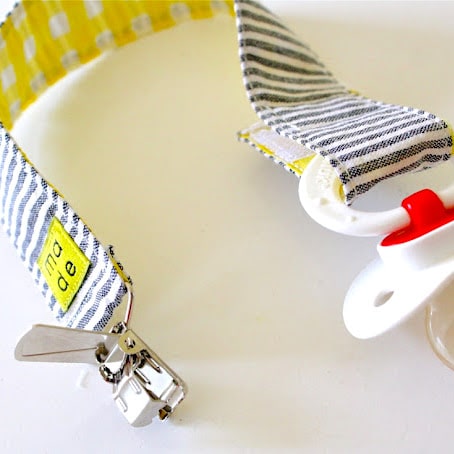
FREE DIY Baby Car Seat Strap Covers Pattern! Learn how to make Baby Car Seat Strap Covers with this easy pattern and tutorial. The car seat strap covers can be made with Terry cloth, flannel, quilting cotton, or minky fabric. Car seat strap covers will keep the baby nice and comfortable while in the car seat. They also make a fantastic baby shower gift for any new mother and can be made to coordinate with both the Baby Bib and Burp Cloth Patterns for a much loved gift.
The simple tutorial will show you step by step how to sew the easy car seat strap covers in 15 minutes.
Print out the pattern template. To print the file: Save File to Computer. Then open the file up and print. DO NOT check fit to page. You will want to print the actual size.
CUT OUT STRAP COVERS FROM FABRIC
Using the car seat strap covers pattern template as a guide, cut out two rectangular pieces. You can use coordinating fabrics for both the front and back or cotton on the front and a soft and absorbent Terry cloth on the back as shown above.
PLACE STRAP COVER PIECES RIGHT SIDES TOGETHER
Place the strap cover front and back pieces right sides together (RST) and pin or clip carefully in place. With the pins mark a 2 – 3 inch opening along the bottom. This will be where you pull it through to turn it right side out.
SEW AROUND THE CAR SEAT STRAP COVERS RECTANGLE
Using a 1/2″ seam allowance sew all the way around the raw edge of the rectangle, starting at the first pin marking the opening and ending at the pin marking the other side of the opening. Backstitch in place at both the beginning and end.
CLIP THE CORNERS
Clip the outer corners of fabric being sure not to clip the thread. This will help the strap covers to sit better when it is turned right side out.
TURN RIGTH SIDE OUT
Turn the rectangle right side out. Use your fingers to roll the seams flat and press.
TUCK THE OPENING UNDER
Fold and tuck the fabric in the opening under and press. Pin in place.
TOPSTITCH AROUND THE STRAP COVERS
Topstitch around the outside edge of the rectangle including over the opening. Top stitching should be about 1/8″ from the edge so that the fold in the opening is stitched close. Press the rectangle again to give it a nice finish.
ADD VELCRO TO MAKE CLOSURE
Place a strip of velcro on the outside front of the rectangle and pin in place. Place the other half of the velcro strip on the back of the opposite side of the rectangle and pin, so when it is folded closed the velcro meets up.
SEW THE VELCRO IN PLACE
Sew the velcro in place sewing along the outer edge of the velcro along the entire velcro rectangle. Do this for both velcro pieces.
FOLD THE CAR SEAT STRAP COVERS CLOSED
Simply fold the car seat strap covers over so the velcro pieces line up and you are finished.
***** YOU CAN FIND THE FREE BIB PATTERN IN THE RESOURCE LIBRARY. SIGN UP TO ACCESS.
DON’T HAVE TIME TO SEW NOW? SAVE THIS IMAGE TO PINTEREST TO MAKE LATER.
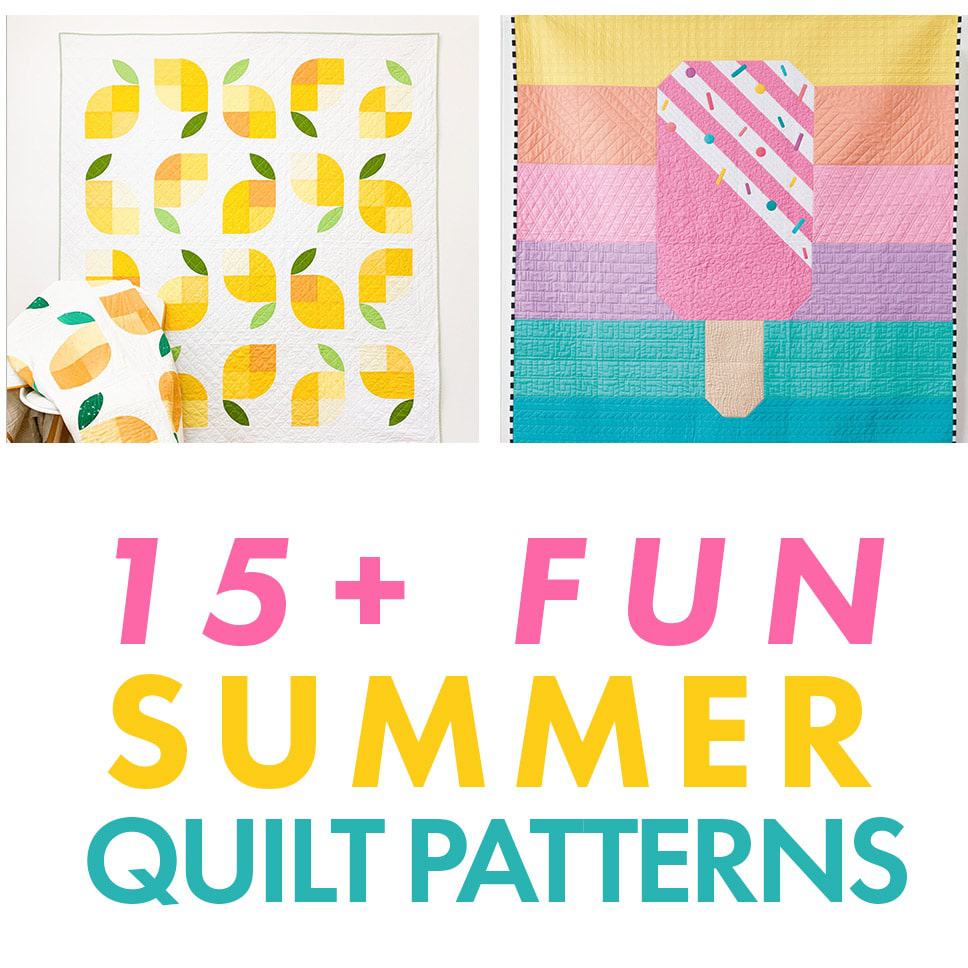
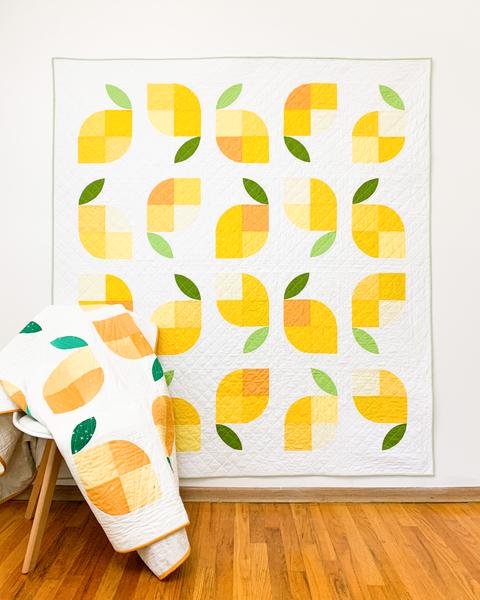
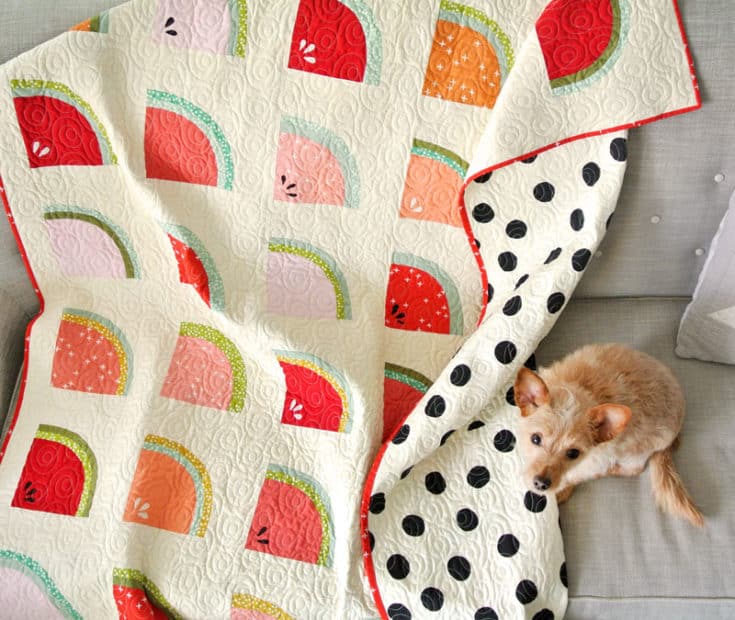
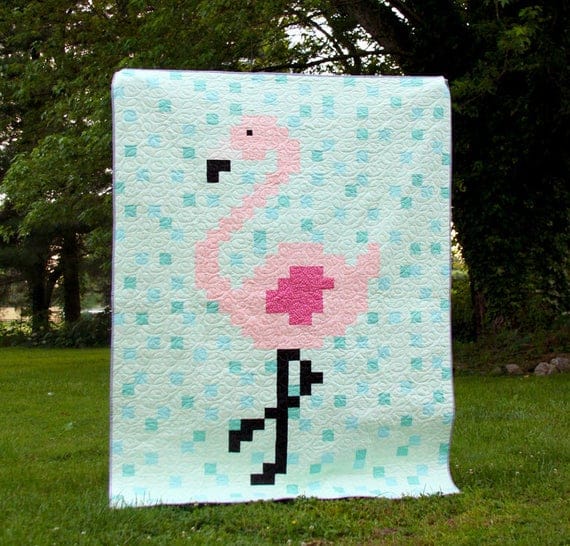
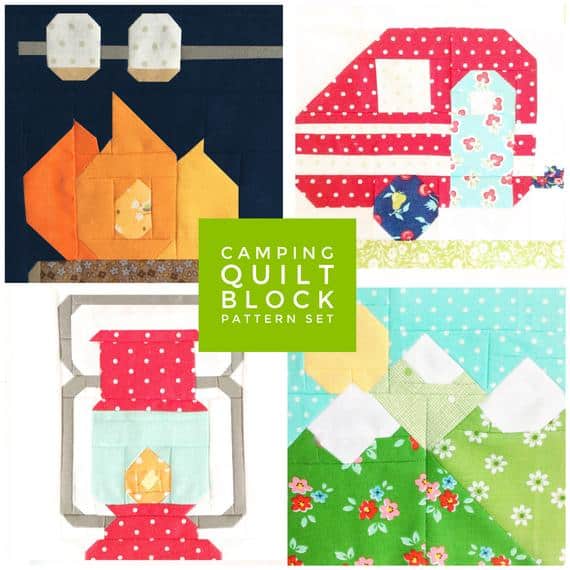
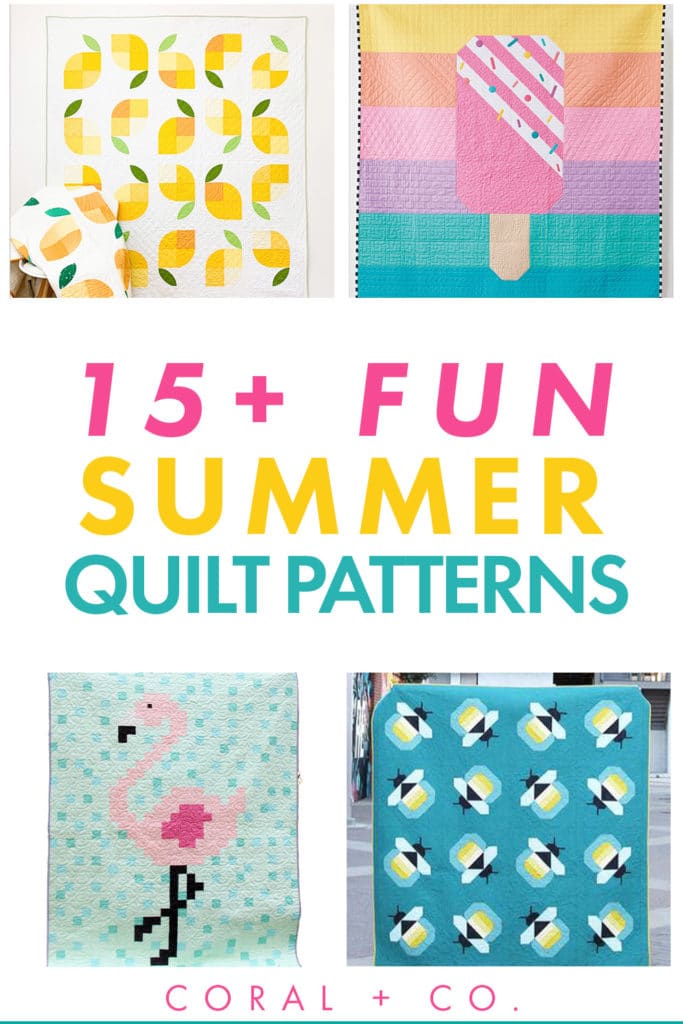
15+ Summer Quilt Patterns to take you to and from your favorite summer fun. Sew an easy beach quilt pattern, or the perfect summer porch quilt. Make a quilt to enjoy a summer picnic or lay by the campfire while you roast s’mores. This list of summertime quilt patterns has the perfect one to remind you of your funnest time of year.
15+ Summer Quilt Patterns
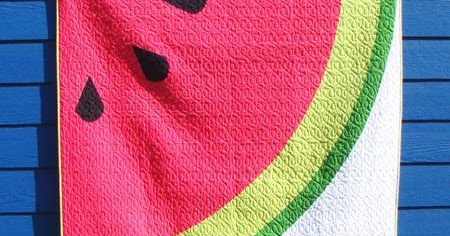
Let's face it, summer is probably the most fun season of the year. Splashing in pools, roadtripping, camping, and eating watermelon and smores. These summer quilt patterns will accompany you to your most favorite summer activities. Picnic quilts, sun bathing quilts, beach babing quilts, whatever you need, there is a pattern on this list for you to sew!
Gingham is quintessential summer, am I right? Whether it's classic red and white gigham or something else, gingham has a spot on any summer quilt pattern list.
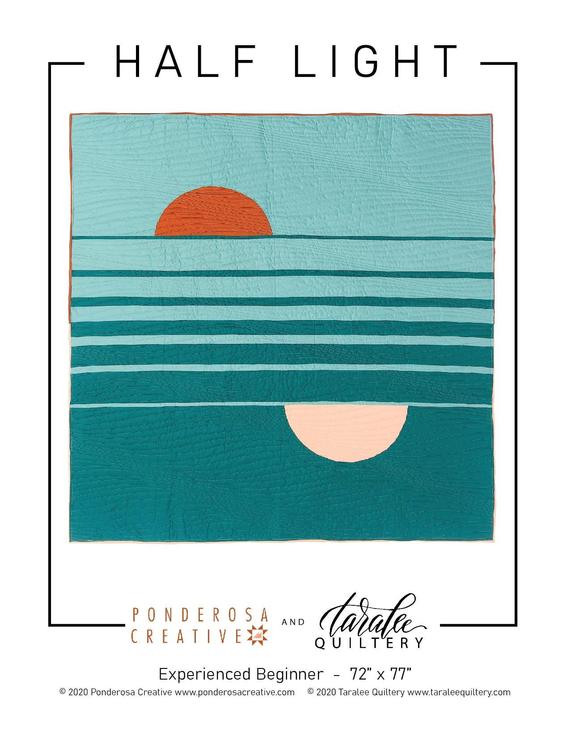
Summer definitely entails sunset at the beach. If your favorite summer spot is laying on the beach as the sun goes down, then this quilt pattern will bring back the memories year round.
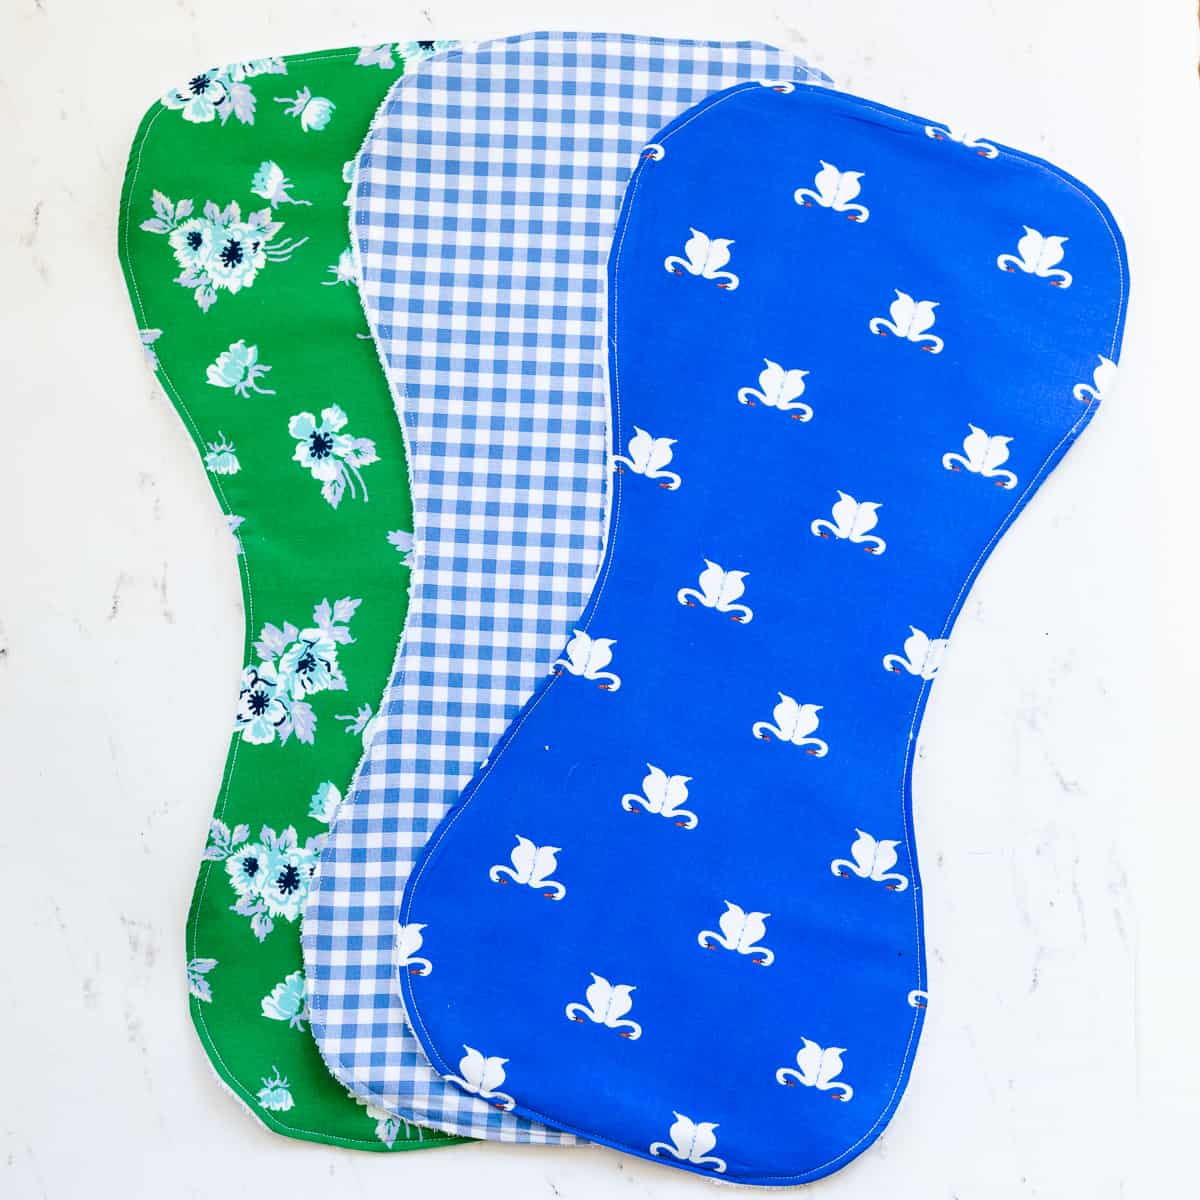
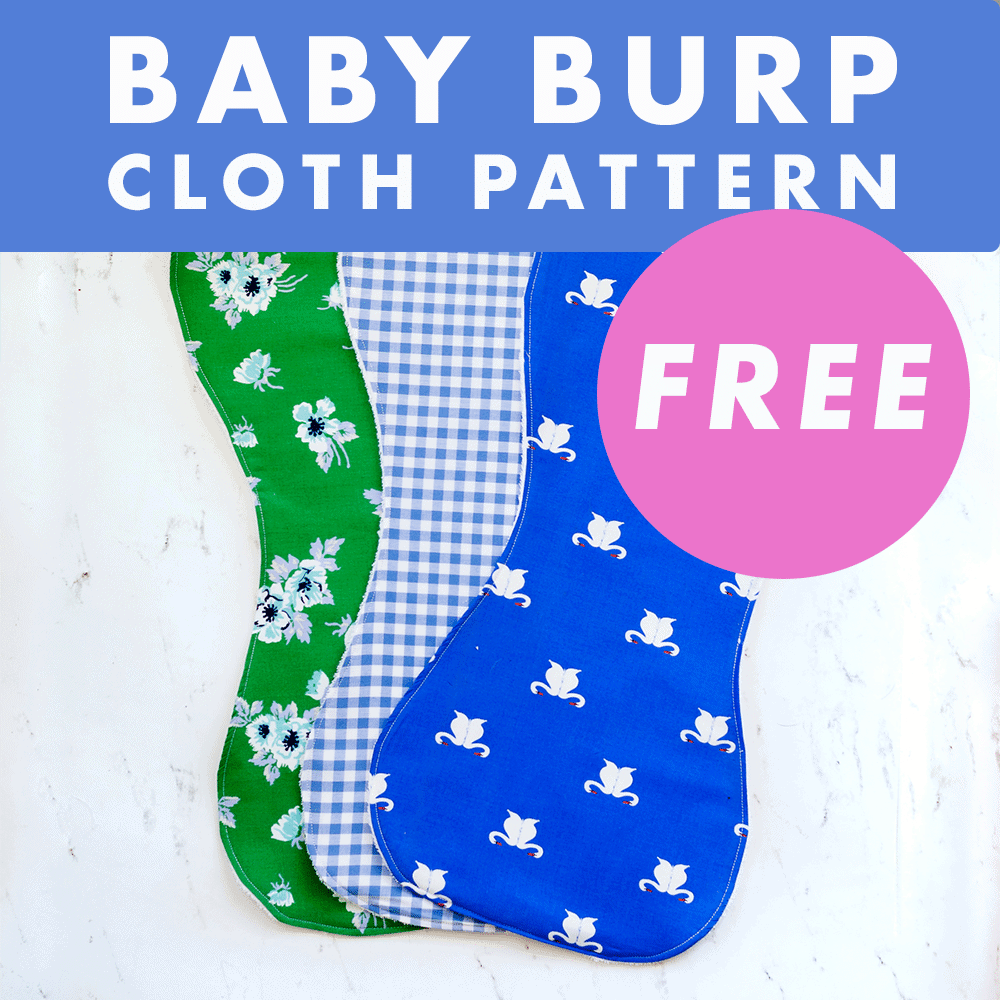
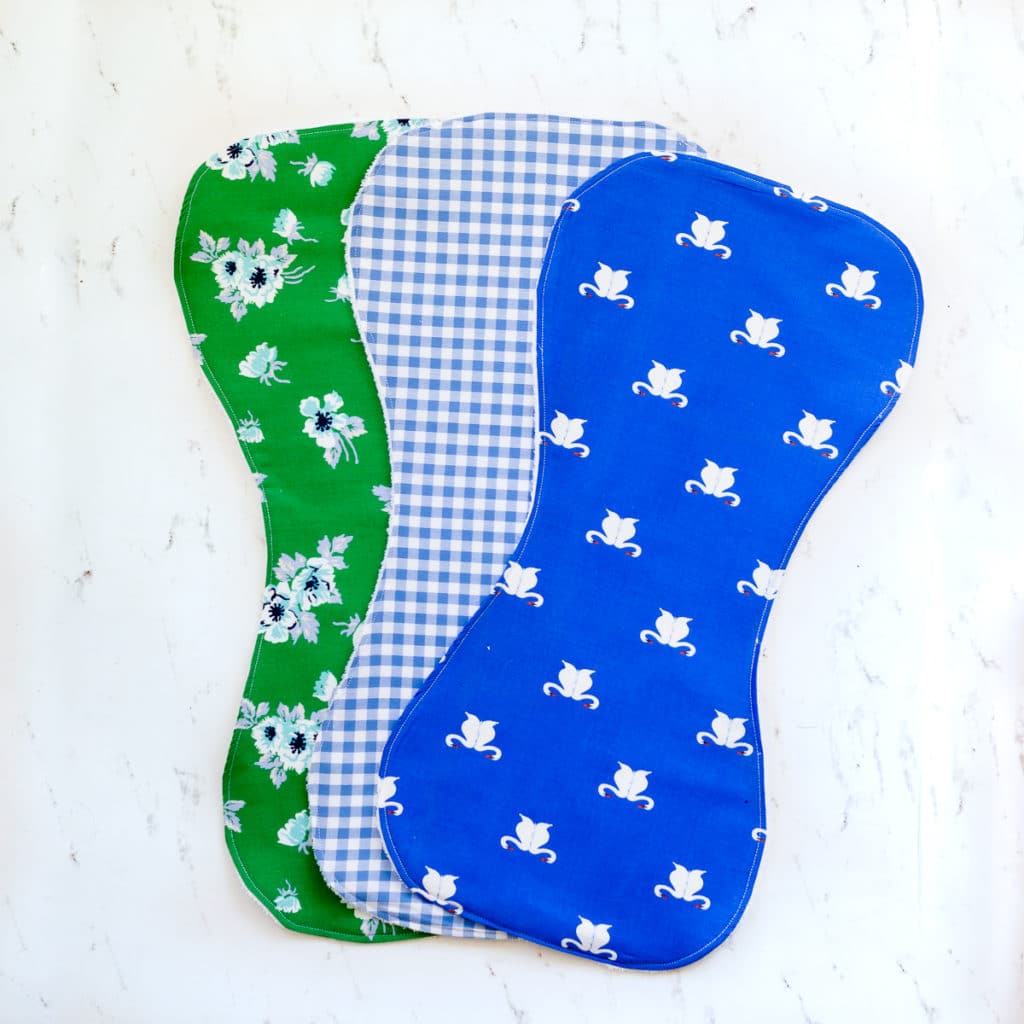
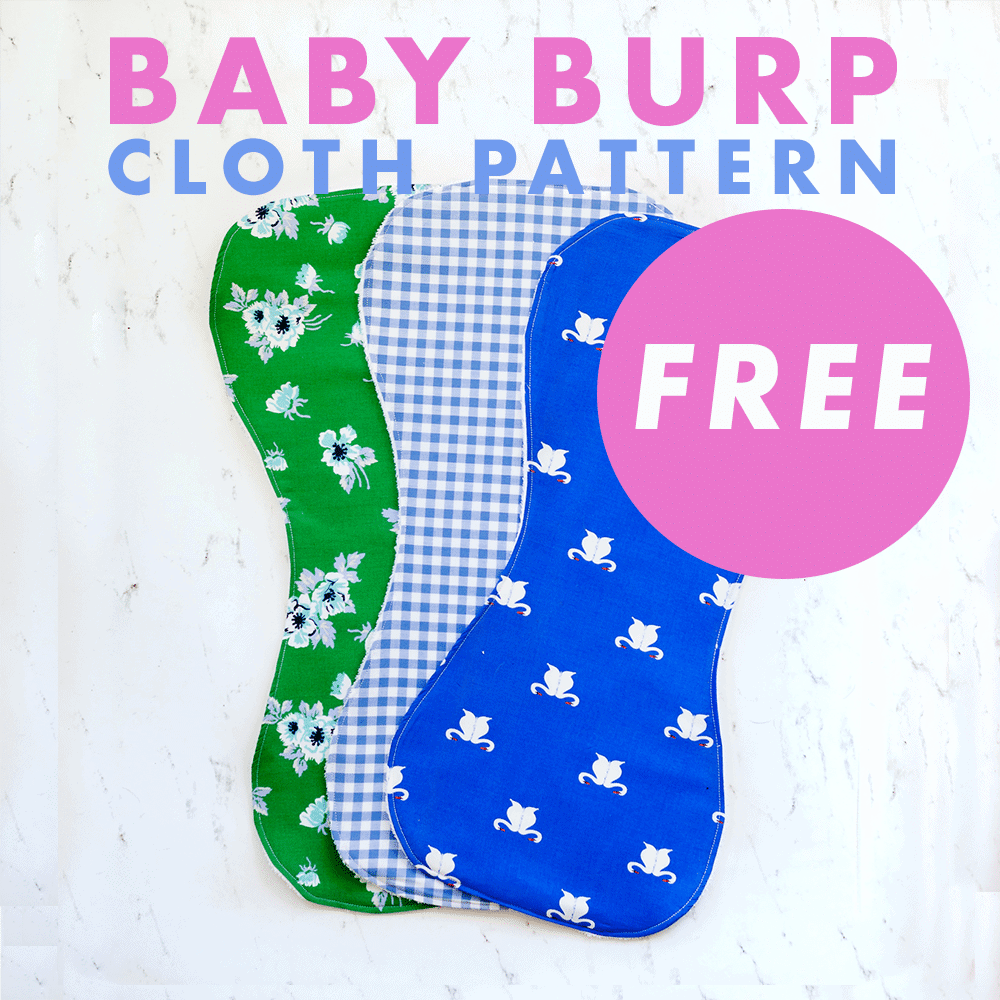
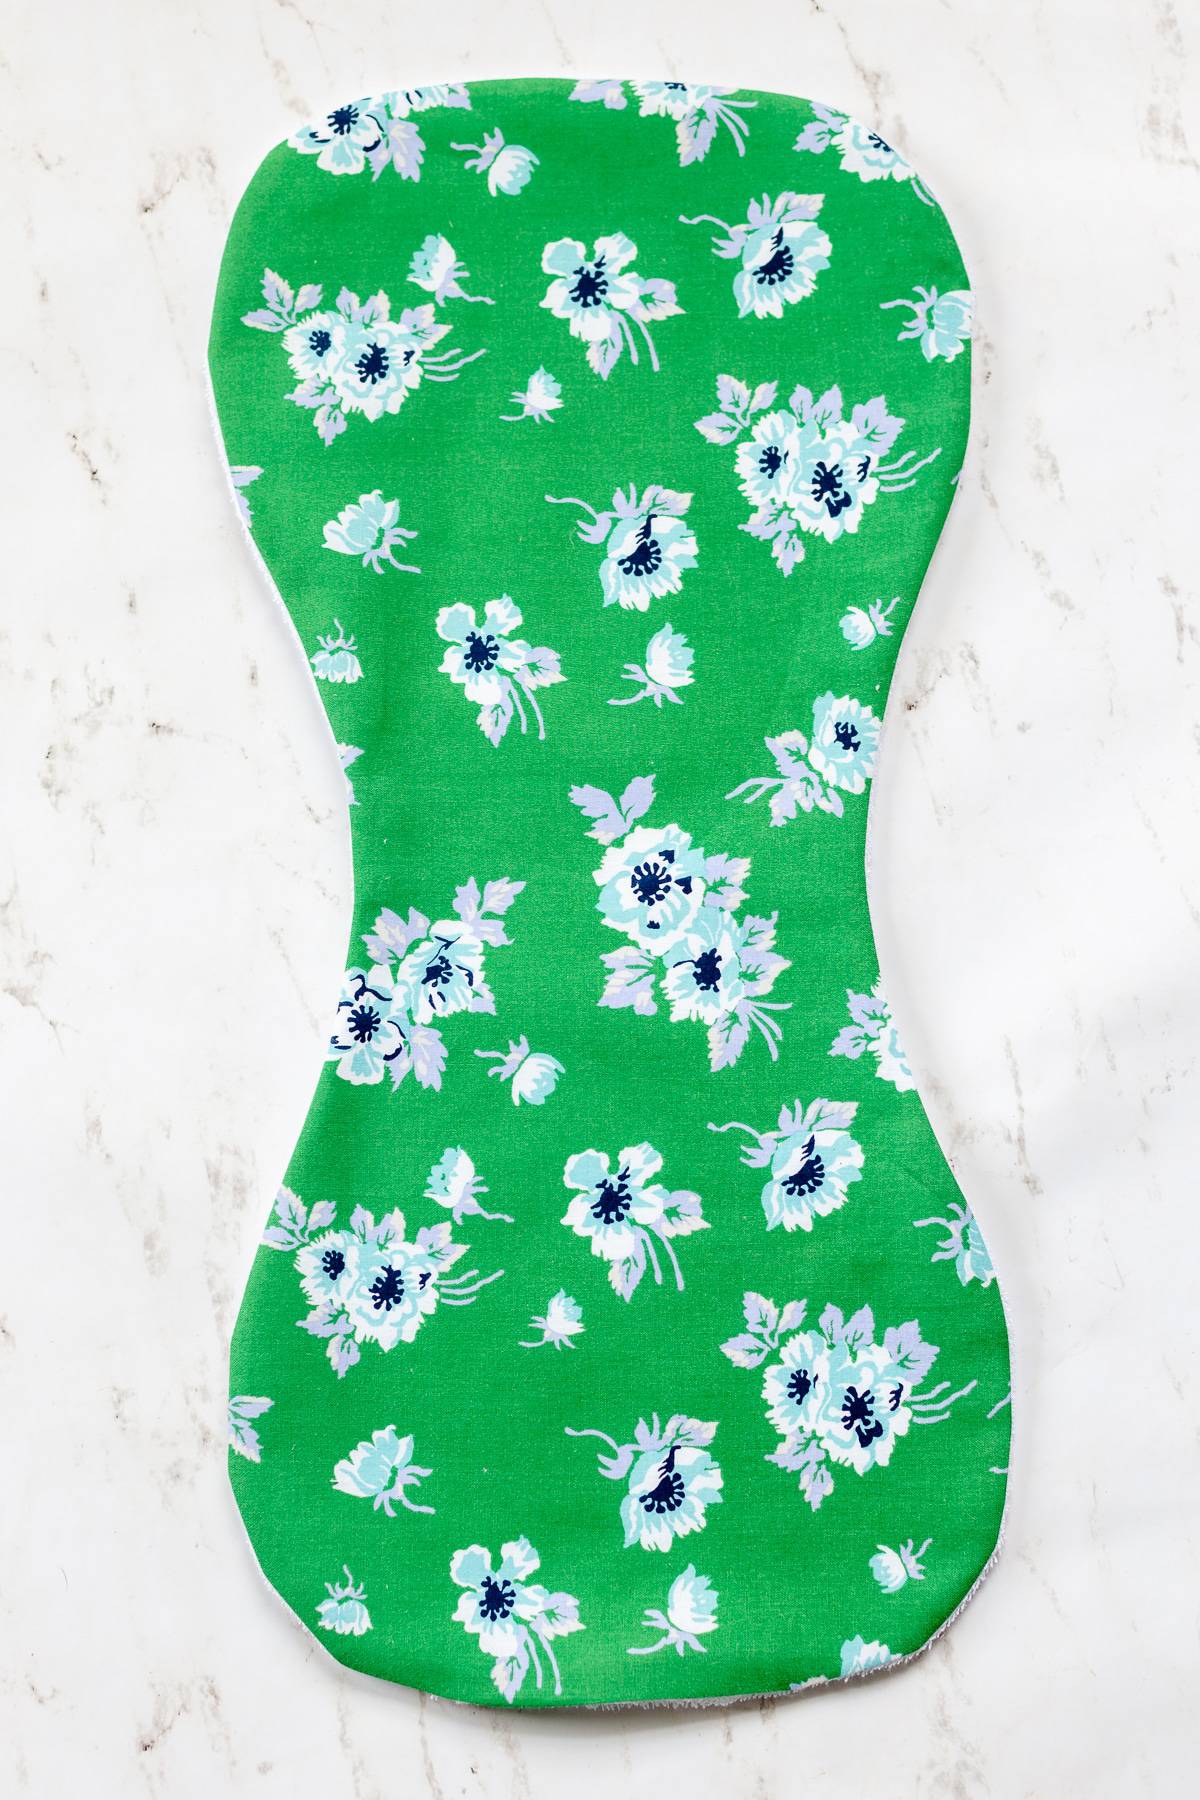
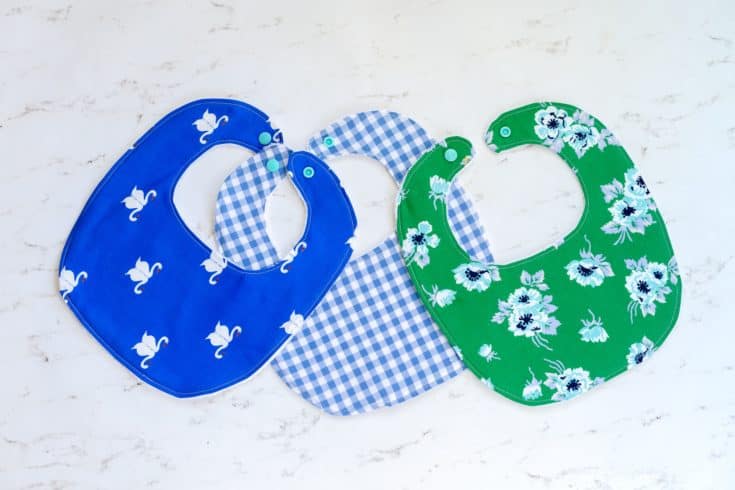
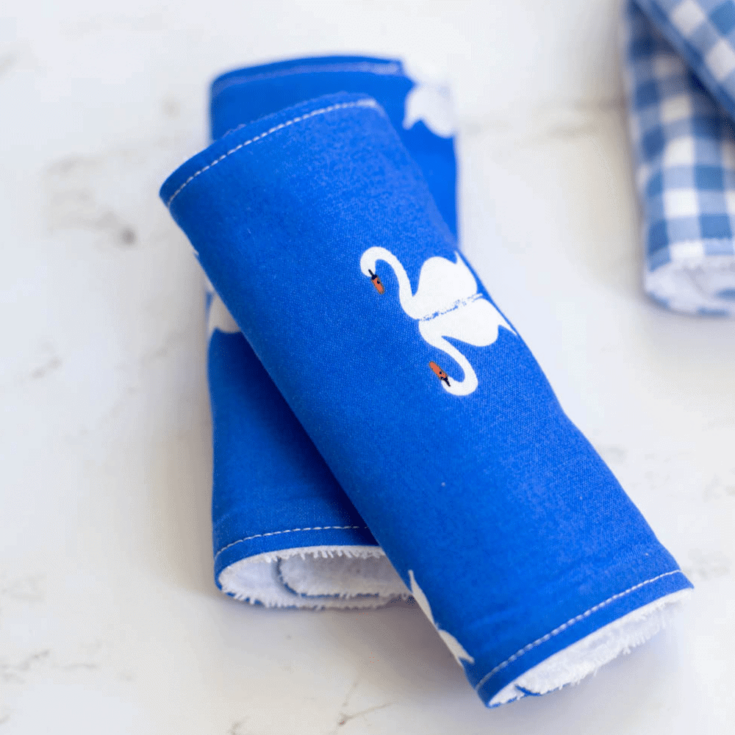
FREE Burp Cloth Pattern! The Baby Burp Cloth Pattern comes in three different styles and is so easy to make. The burp cloth can be made with Terry cloth, flannel, quilting cotton, or minky fabric. Or Upcycle old towels or t-shirts for a simple diy burp rag. Burp cloths make a fantastic baby shower gift for any new mother. Pair it with the Baby Bib Pattern for a much loved gift.
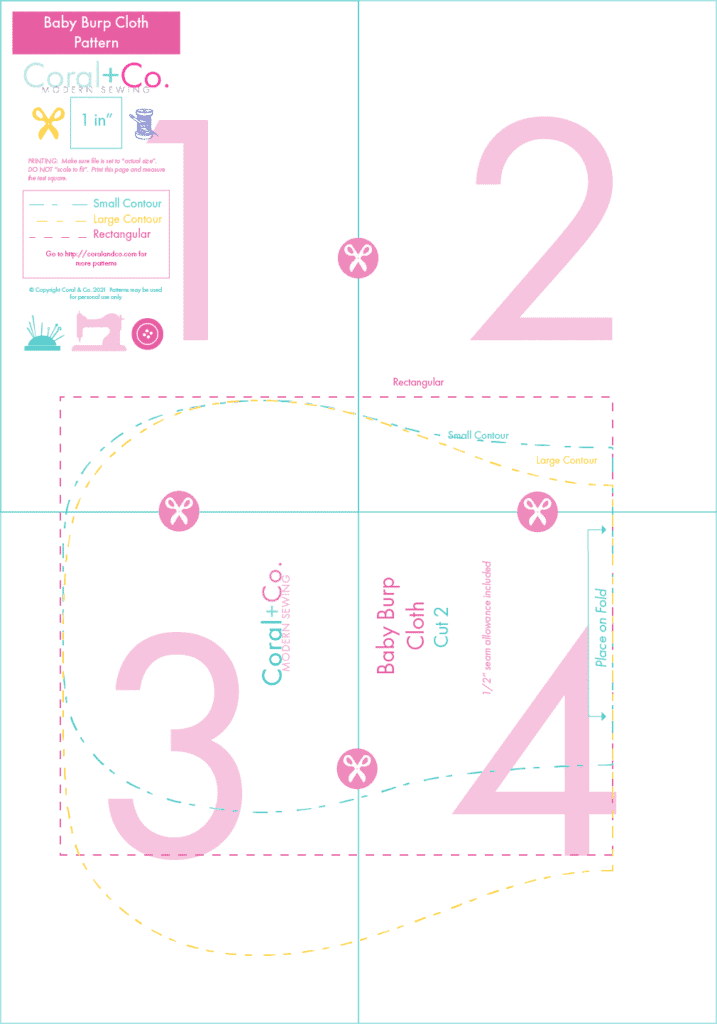
The simple tutorial will show you step by step how to sew the burp cloth in 10 minutes. The professional PDF Pattern Template comes color coded style options.
The burp cloth pattern comes in 3 available styles:
Rectangle
Slim Contoured
Full Contoured
Table of Contents
Be sure to sign up for the Blog Freebie Resource Library to access the baby burp cloth pattern in 3 styles. Scroll down to the bottom to sign up for the Resource Library.
BABY BURP CLOTH PATTERN AND TUTORIAL SEWING INSTRUCTIONS
Time needed: 15 minutes.
How to Sew a Baby Burp Cloth with FREE Pattern
PRINT OUT THE PATTERN TEMPLATE
Print out the pattern template. To print the file: Save File to Computer. Then open the file up and print. DO NOT check fit to page. You will want to print the actual size.
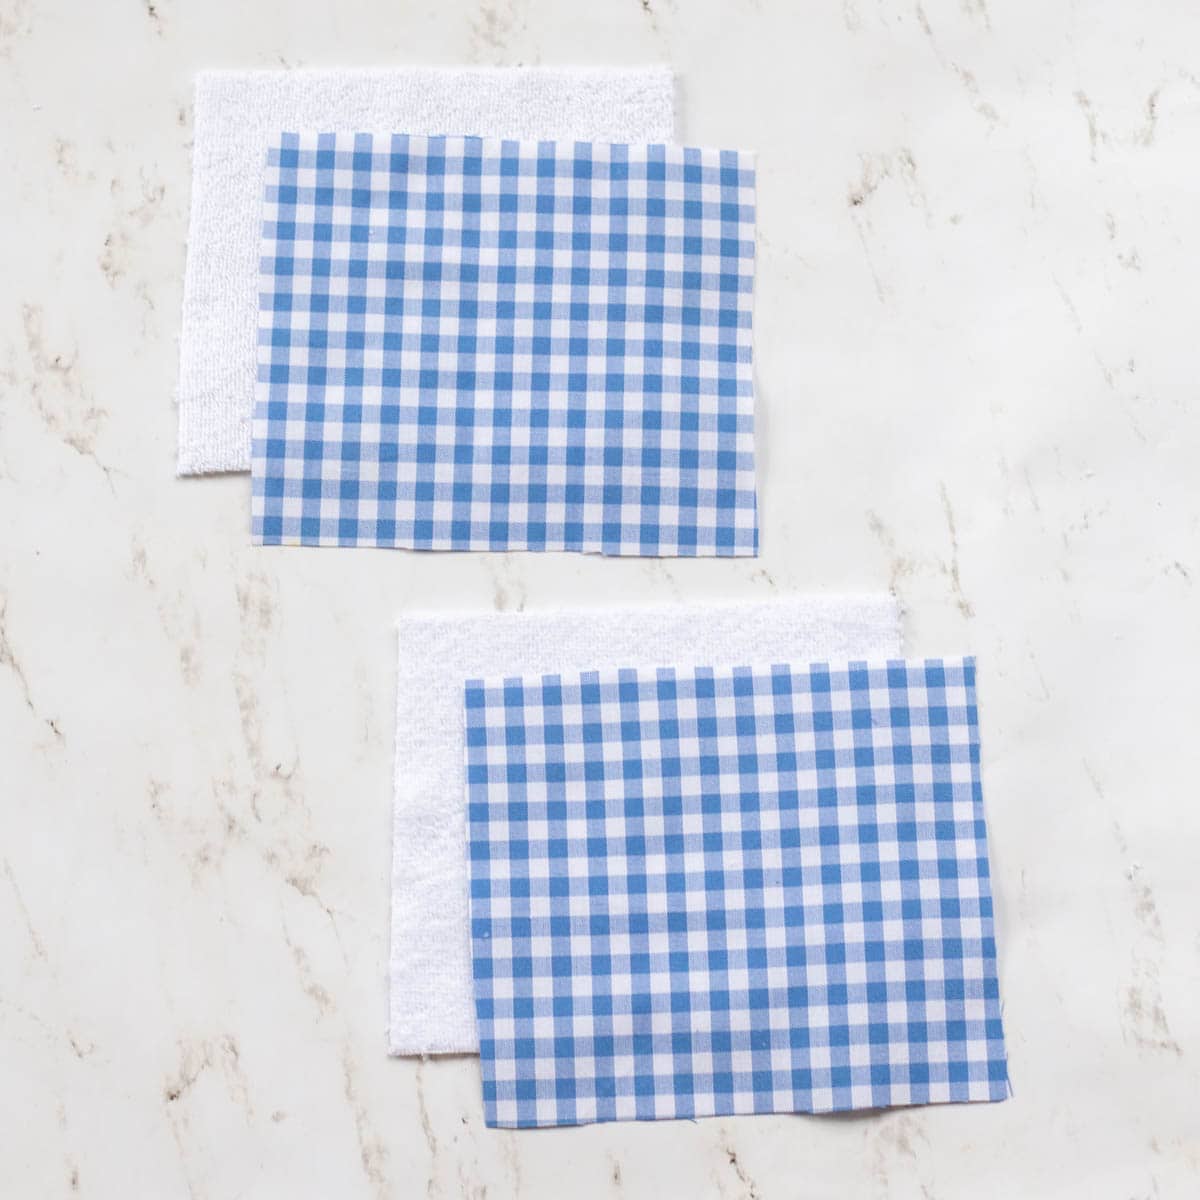
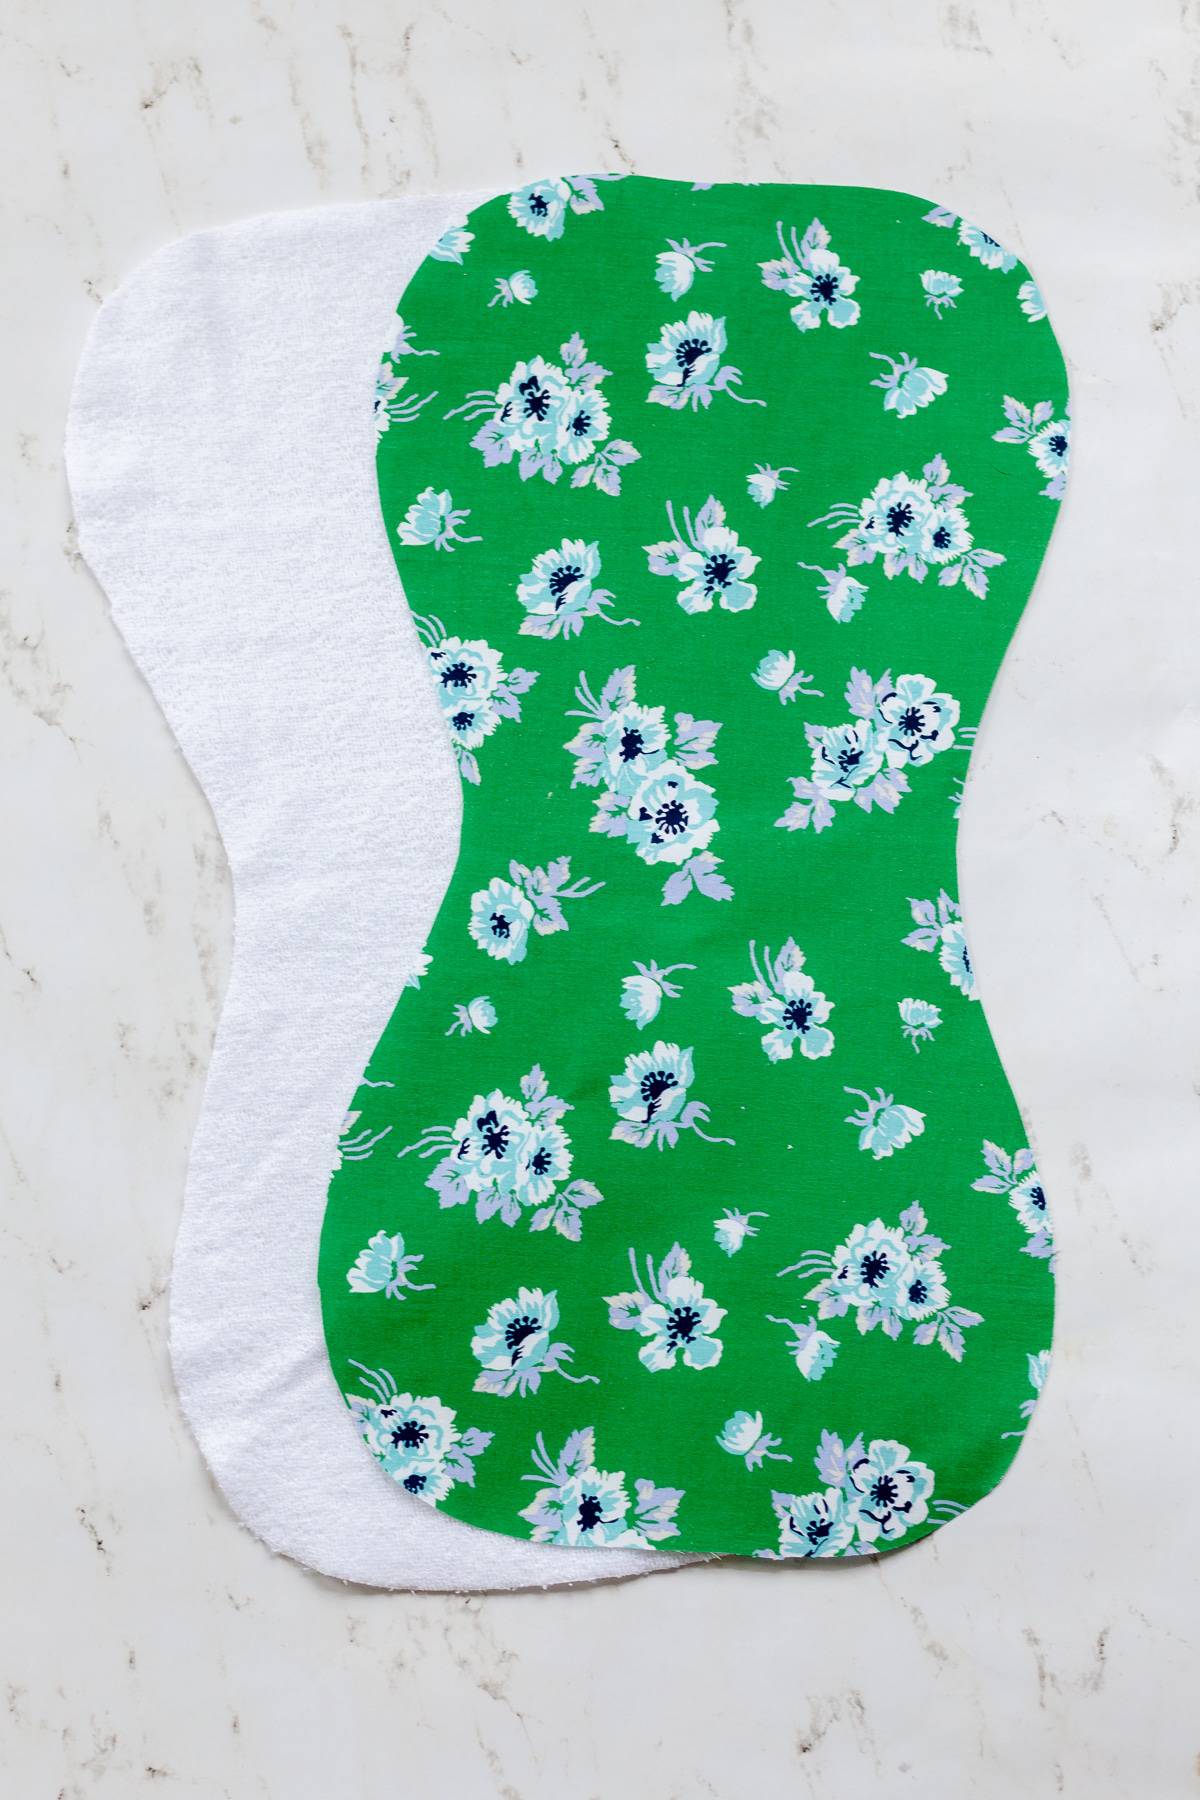
CUT OUT BURP CLOTH FROM FABRIC
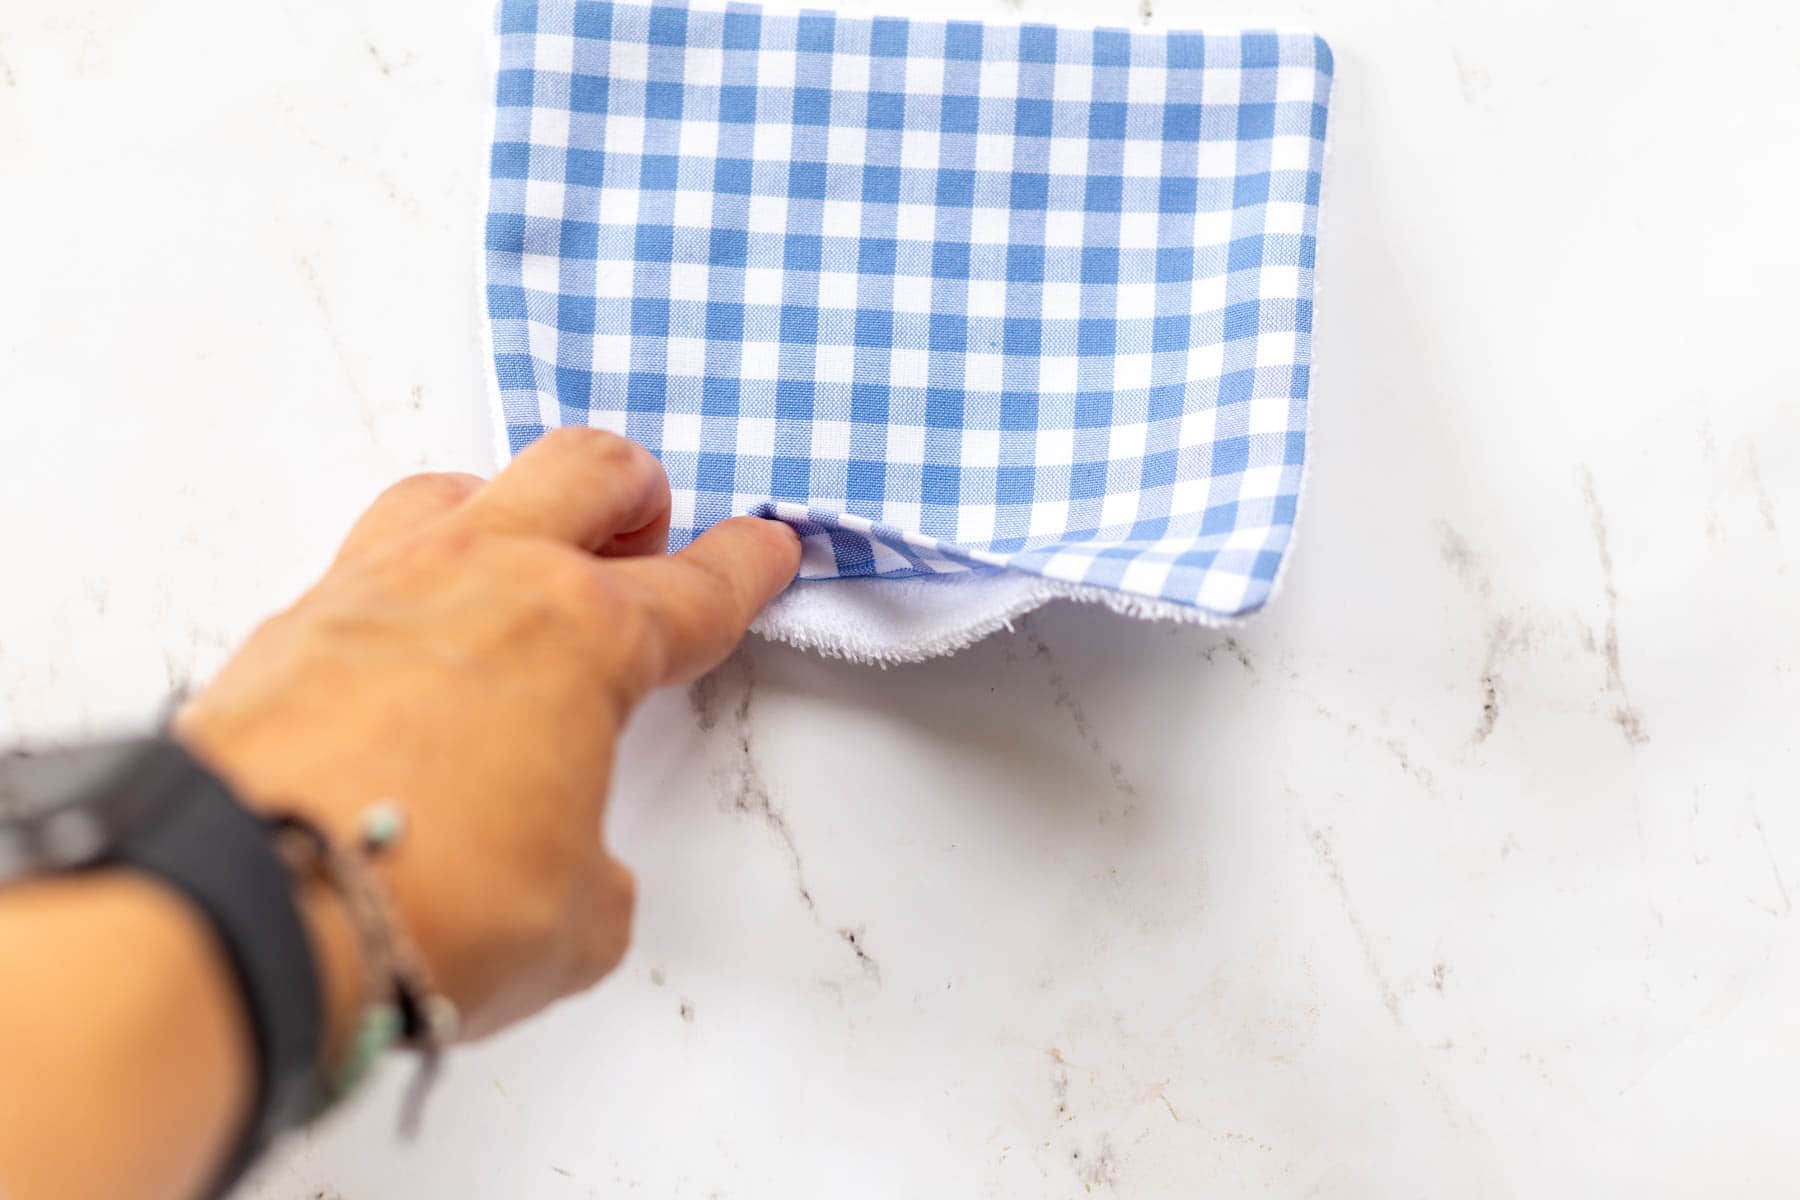
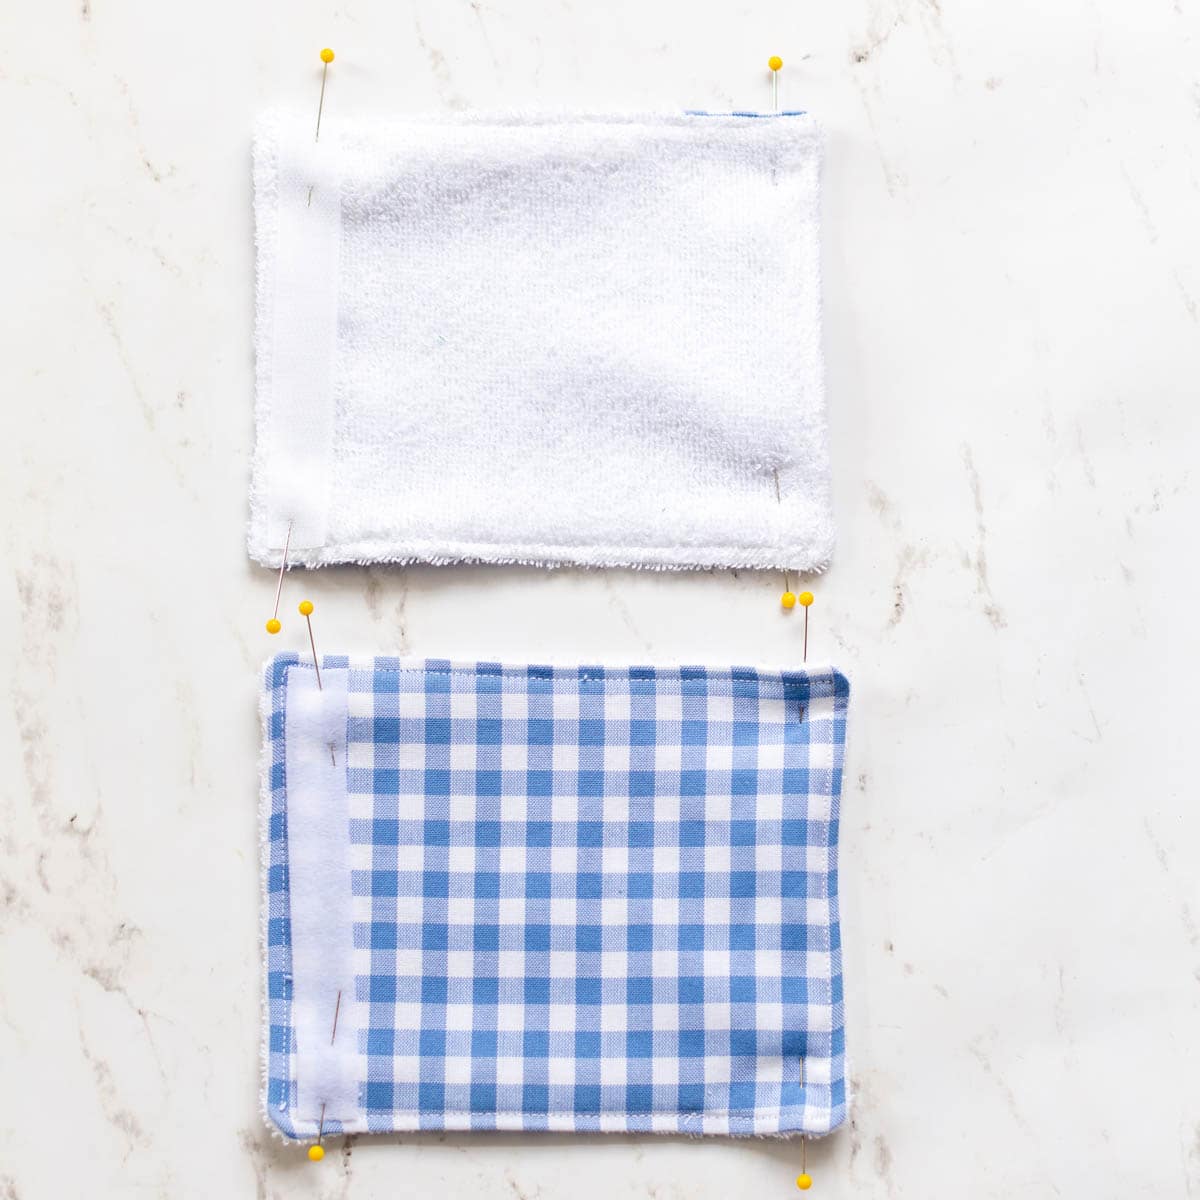
Using the burp cloth pattern template as a guide, cut out two burp cloth pieces. You will need to fold the fabric in half and place the pattern piece on the edge of the fold where it points to on the template. You can use coordinating fabrics for both the front and back or cotton on the front and a soft and absorbent Terry cloth on the back as shown above.
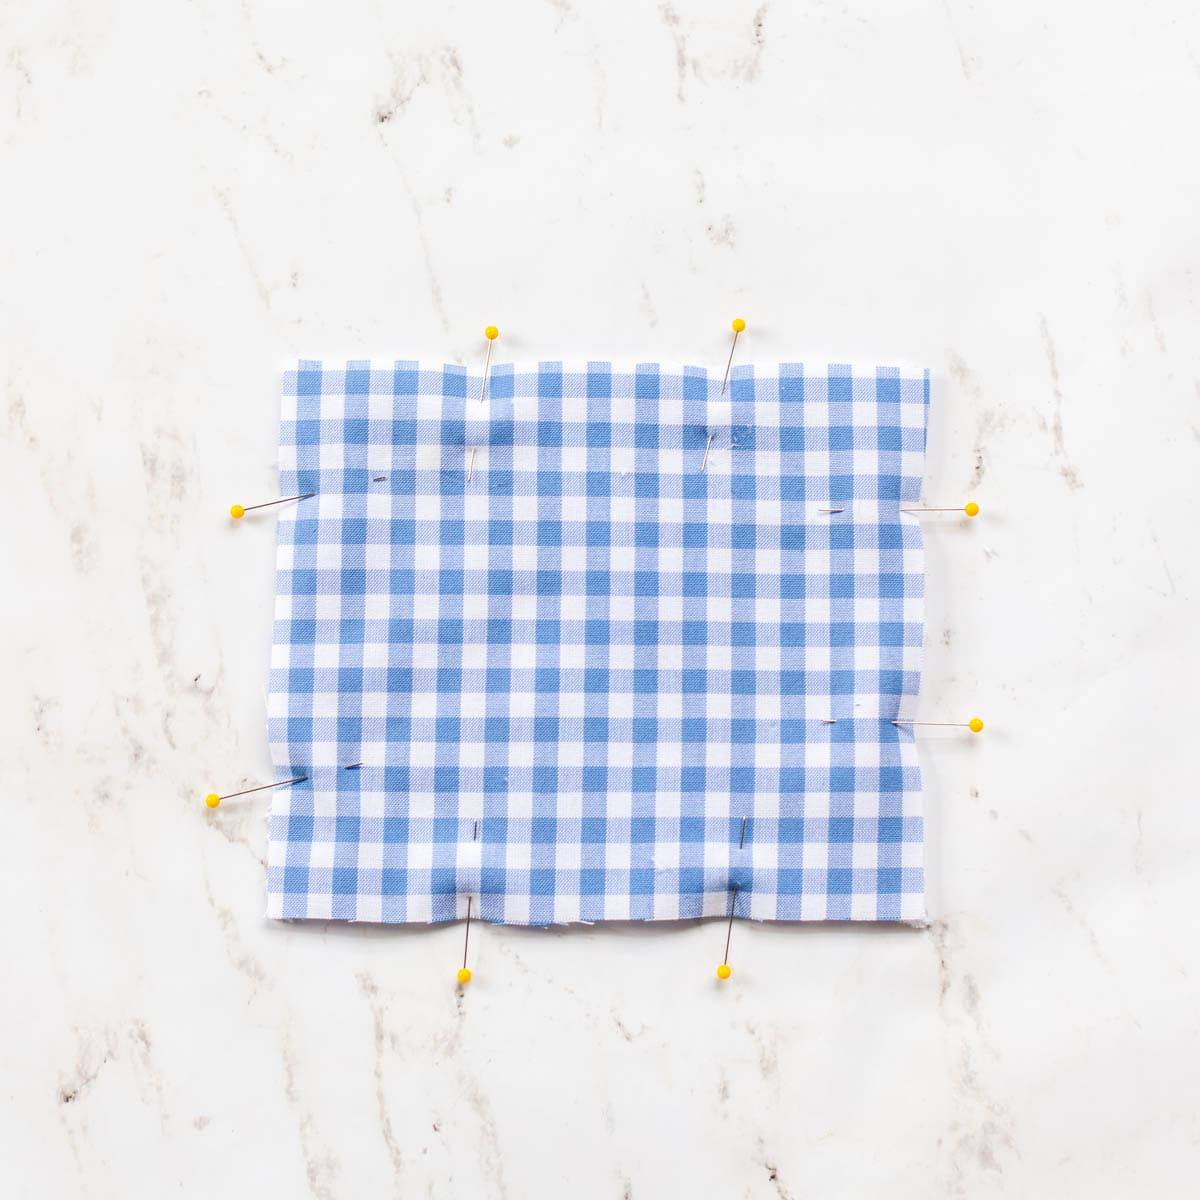
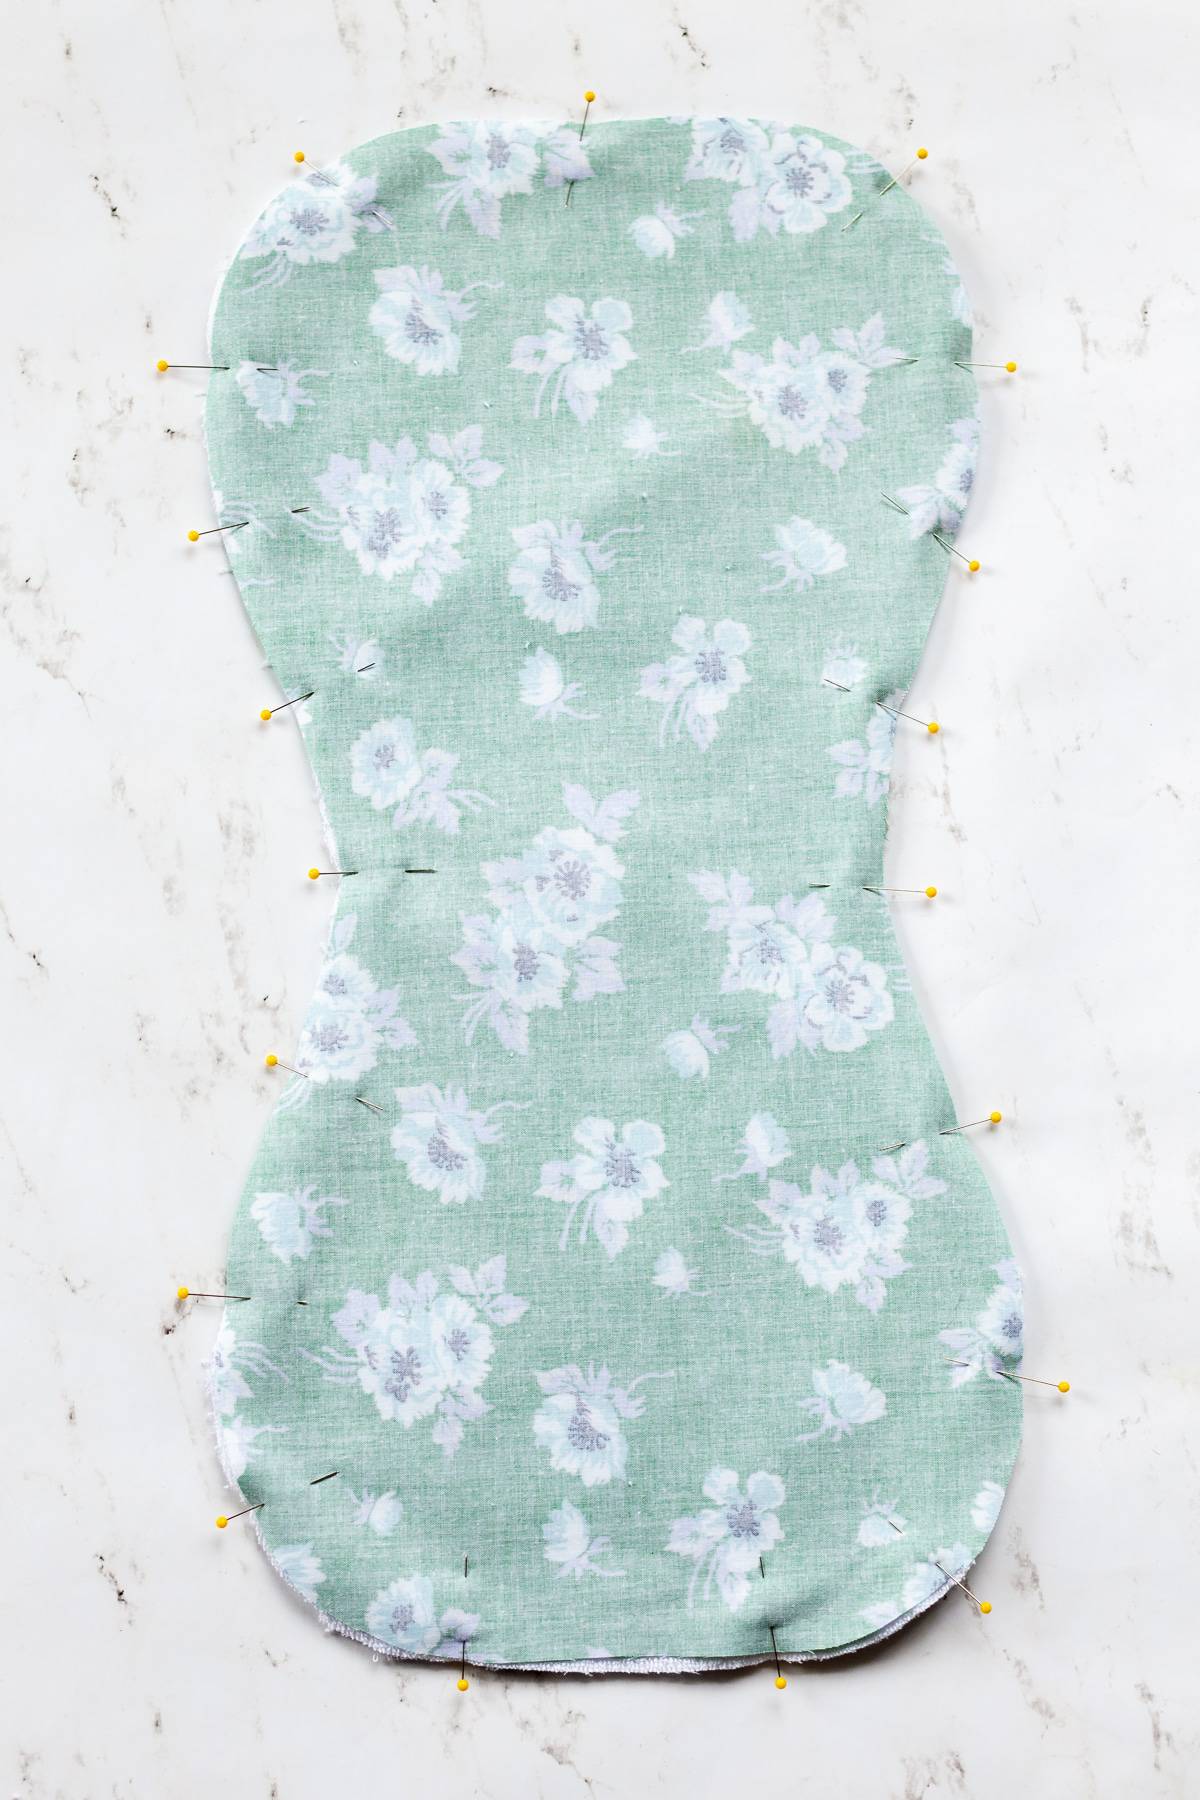
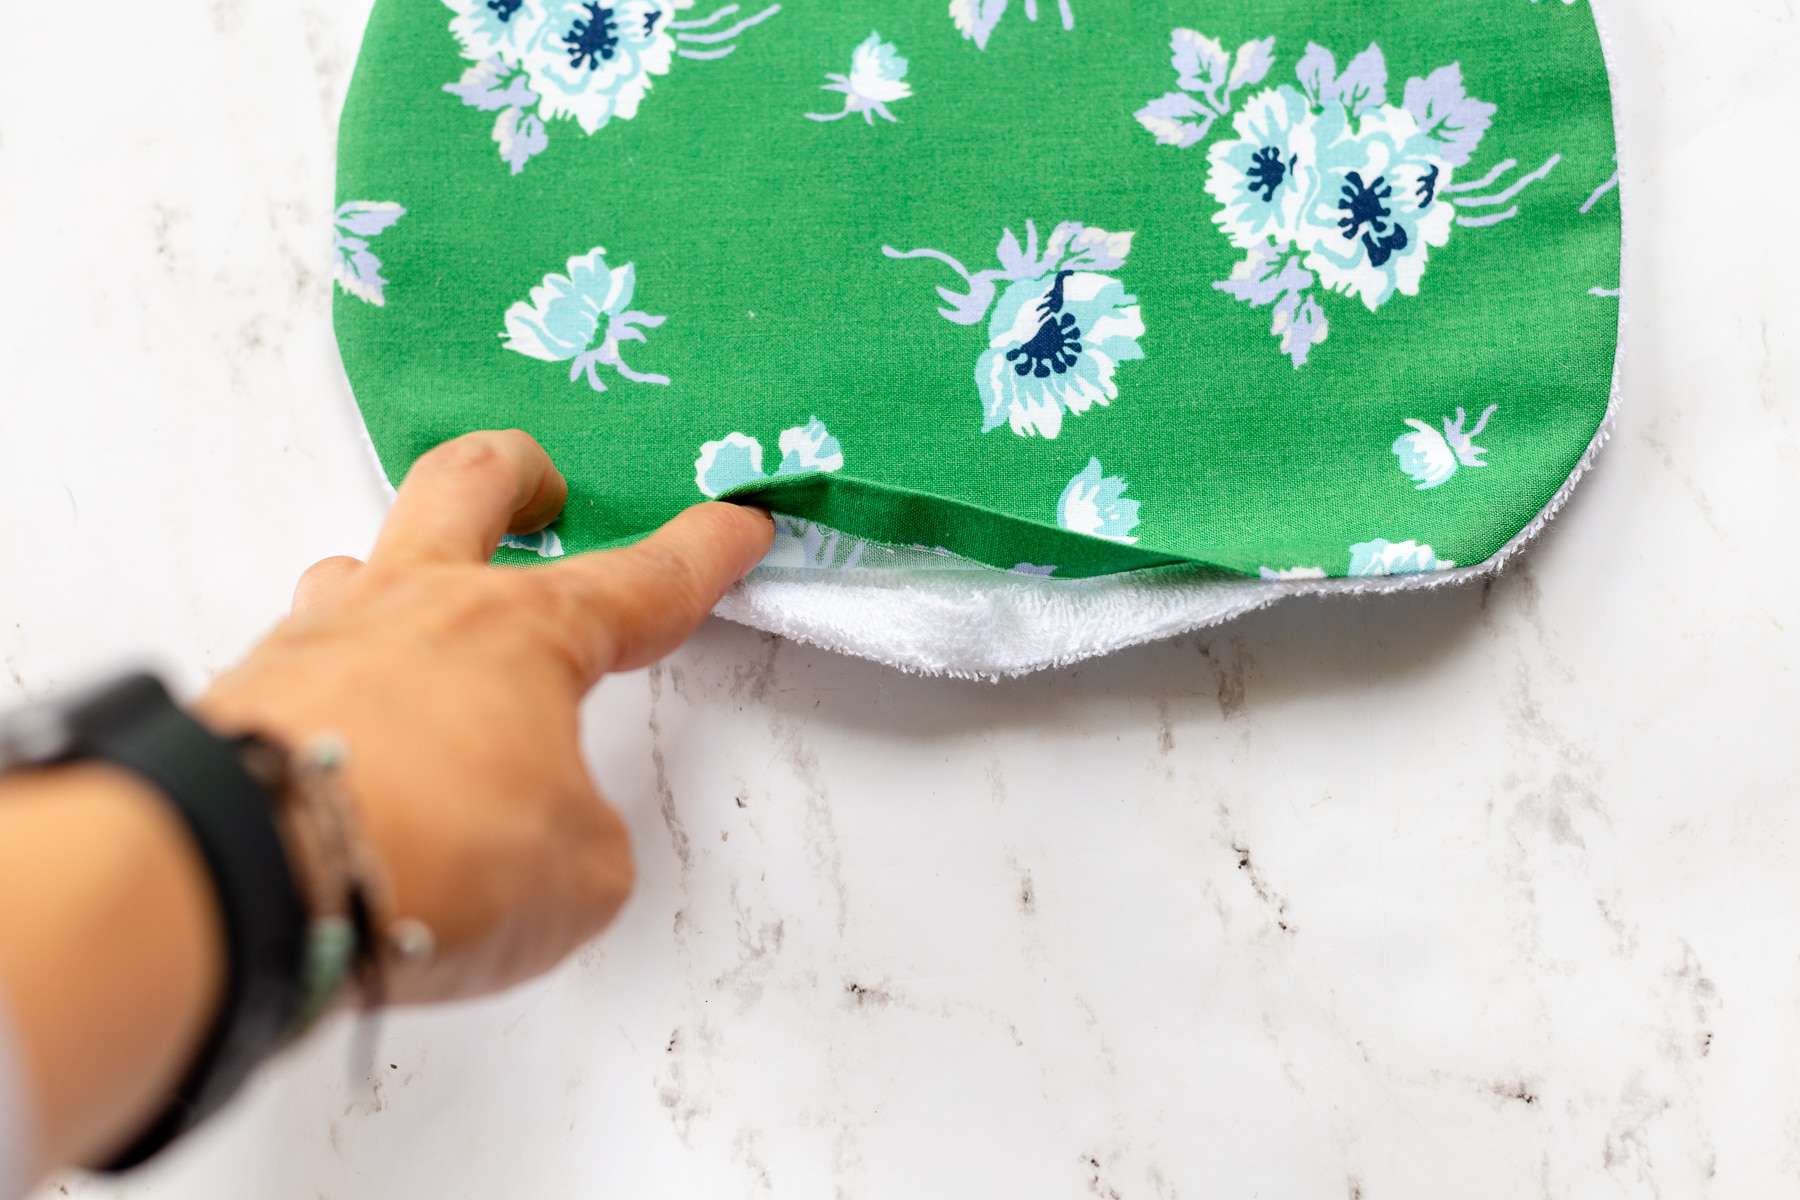
PLACE BURP CLOTH PIECES RIGHT SIDES TOGETHER
Place the burp cloth front and back pieces right sides together (RST) and pin or clip carefully in place, being sure to pin amply along the curves to prevent it from shifting while sewing. With the pins mark a 2 – 3 inch opening along the bottom. This will be where you pull it through to turn it right side out.
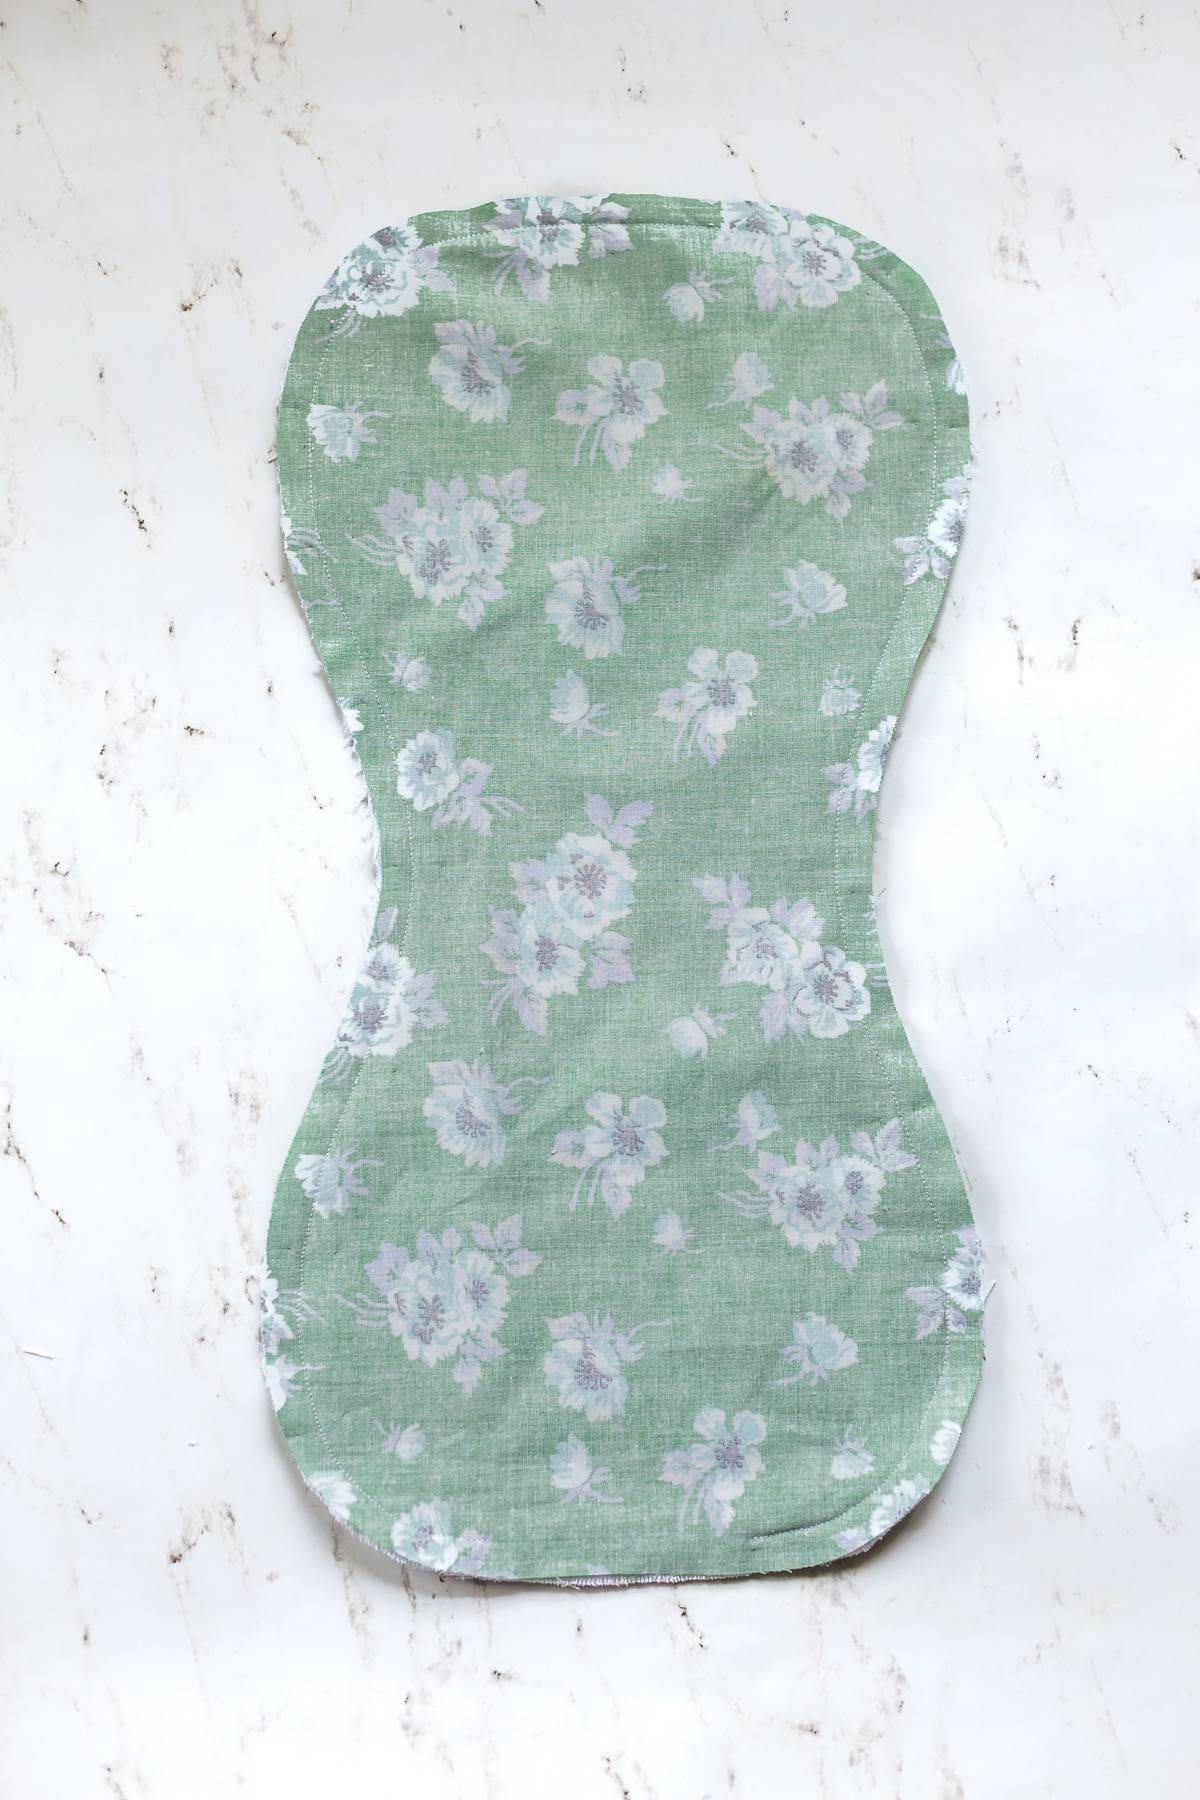
SEW AROUND THE BURP CLOTH
Using a 1/2″ seam allowance sew all the way around the raw edge of the burp cloth, starting at the first pin marking the opening and ending at the pin marking the other side of the opening. Backstitch in place at both the beginning and end.
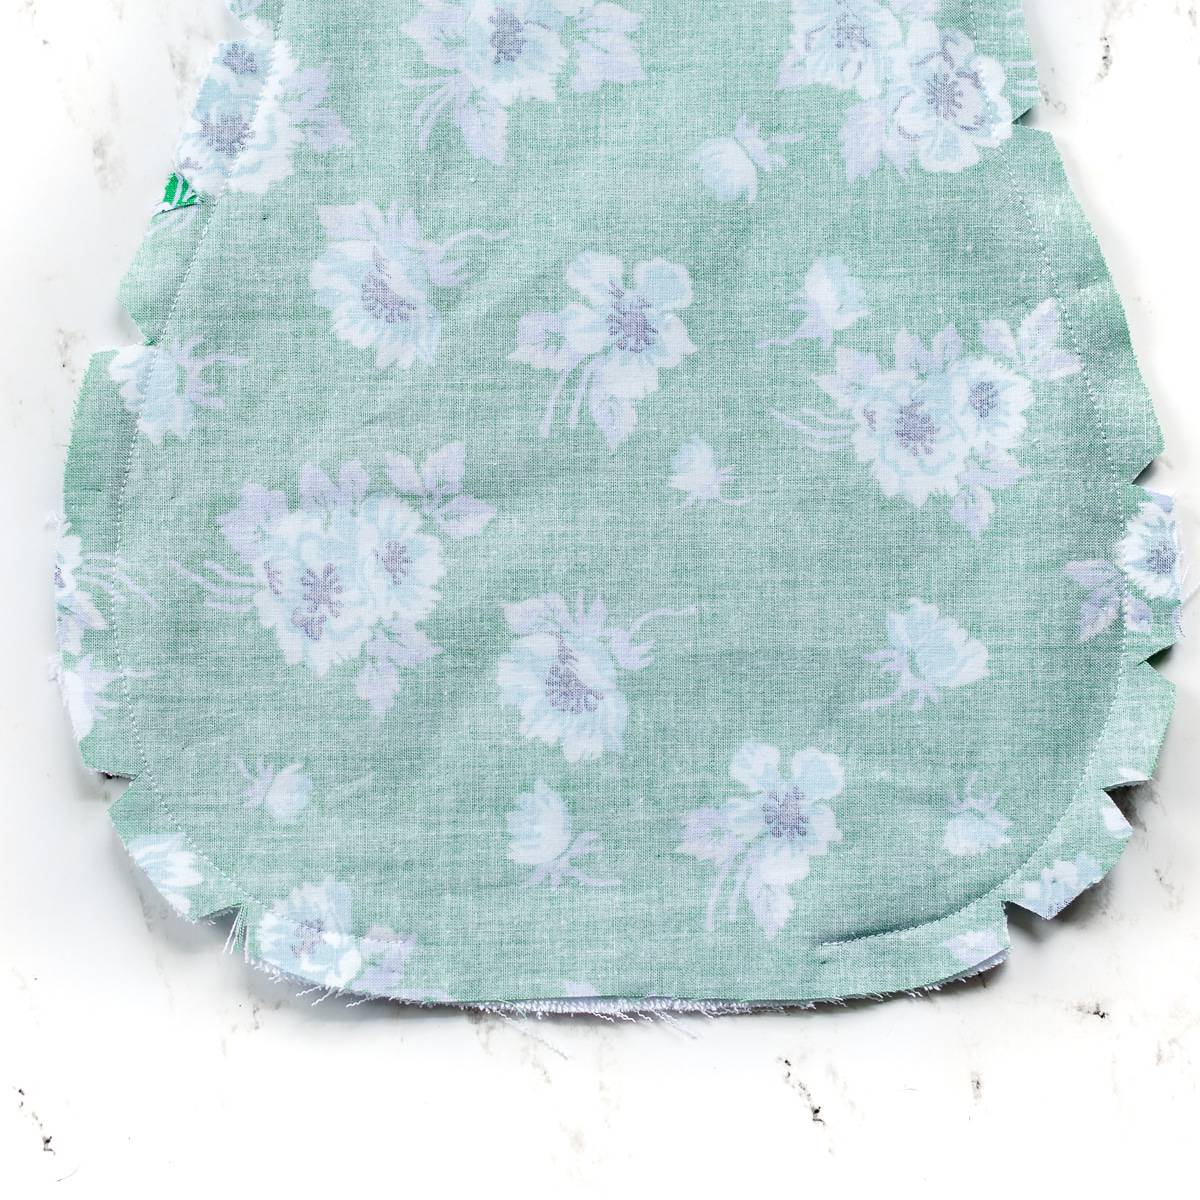
CLIP NOTCHES IN CURVES
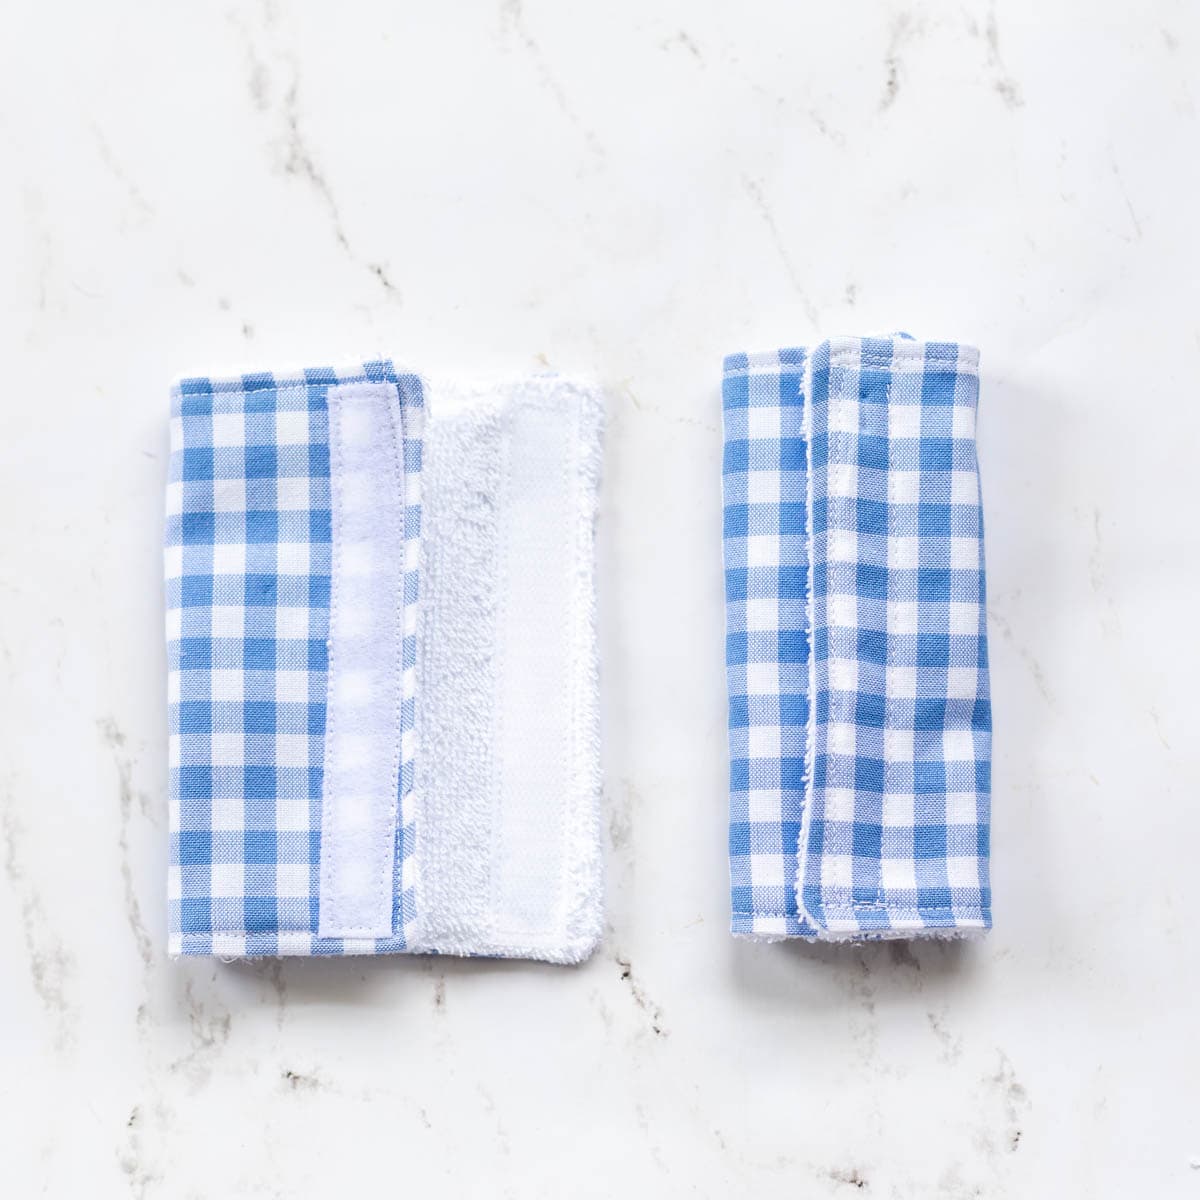
Clip notches in the outer curves of fabric being sure not to clip the thread. On the inner curves make straight line snips. This will help the burp cloth to sit better when it is turned right side out.
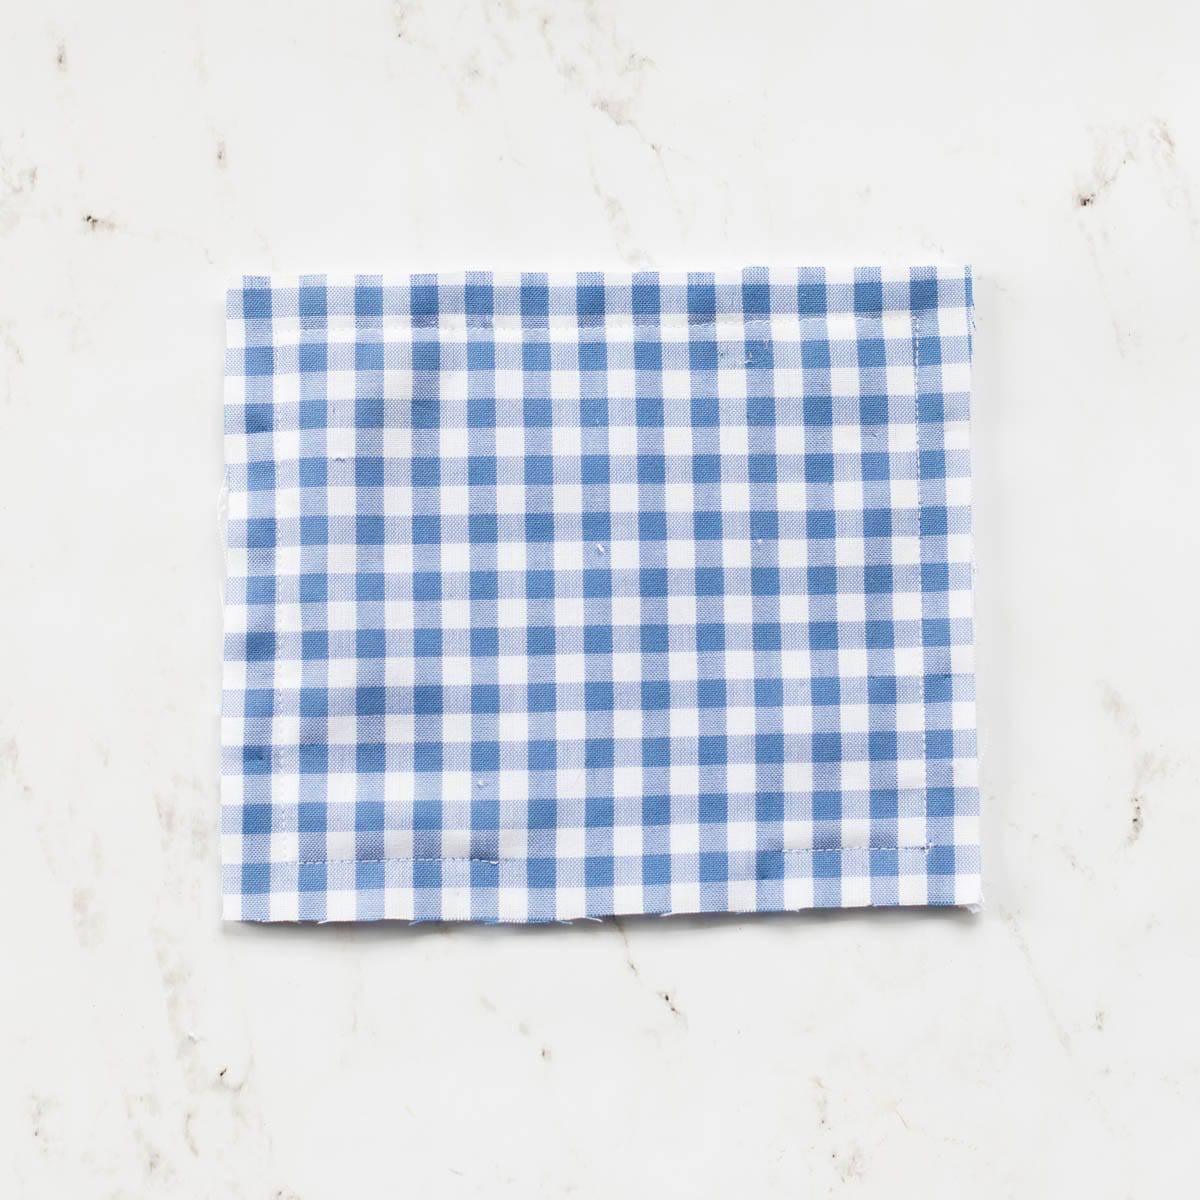
TURN RIGTH SIDE OUT
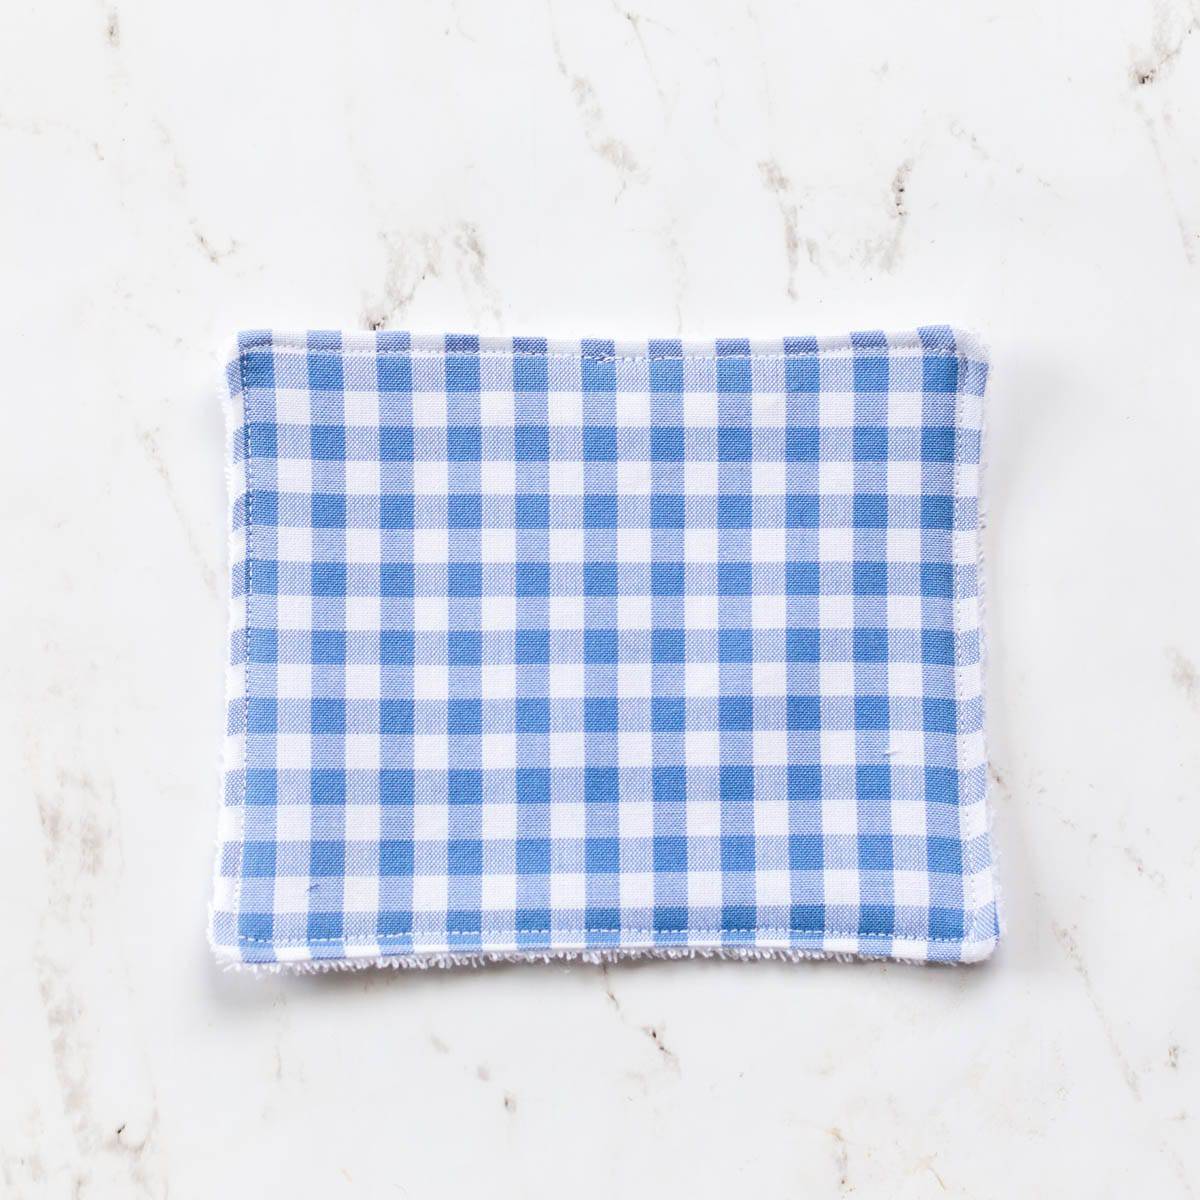
Turn the burp cloth right side out. Use your fingers to roll the seams flat and press.
TUCK THE OPENING UNDER
Fold and tuck the fabric in the opening under and press. Pin in place.
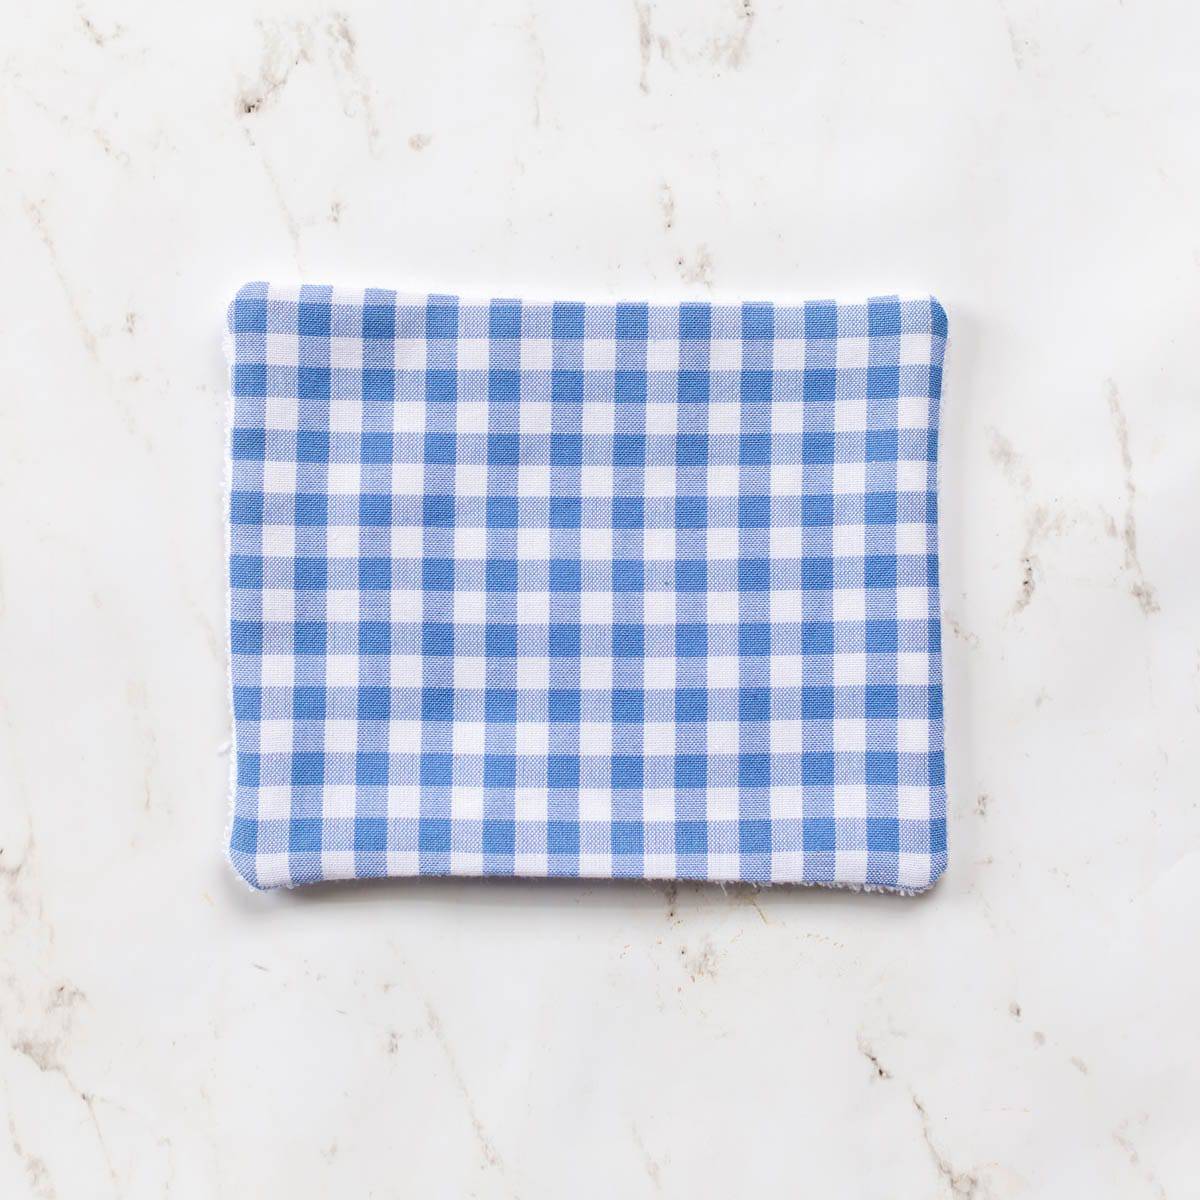
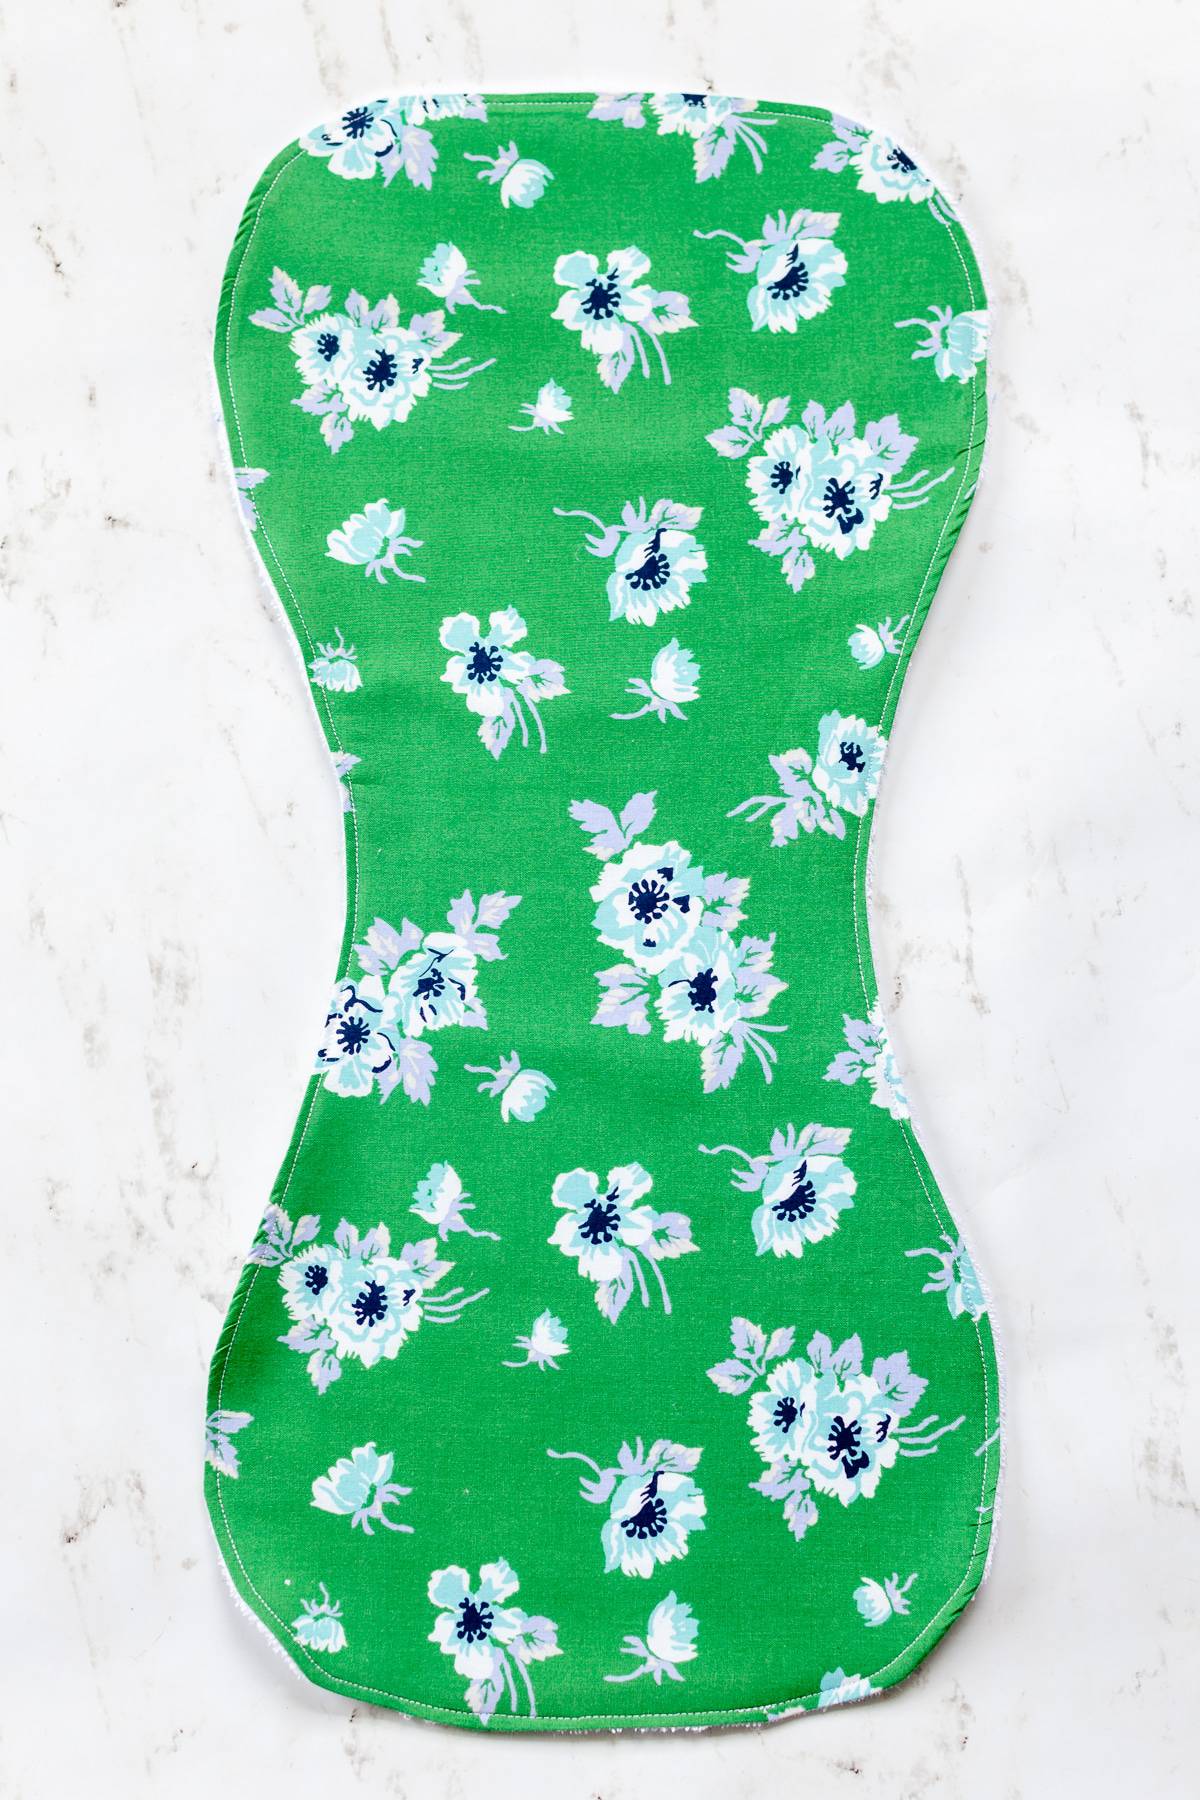
TOPSTITCH AROUND THE BURP CLOTH
Topstitch around the outside edge of the burp cloth including over the opening. Top stitching should be about 1/8″ from the edge so that the fold in the opening is stitched close. Press burp cloth again to give it a nice finish.
Watch the YouTube Video
***** You can find the Free Burp Cloth Pattern in the Resource Library.
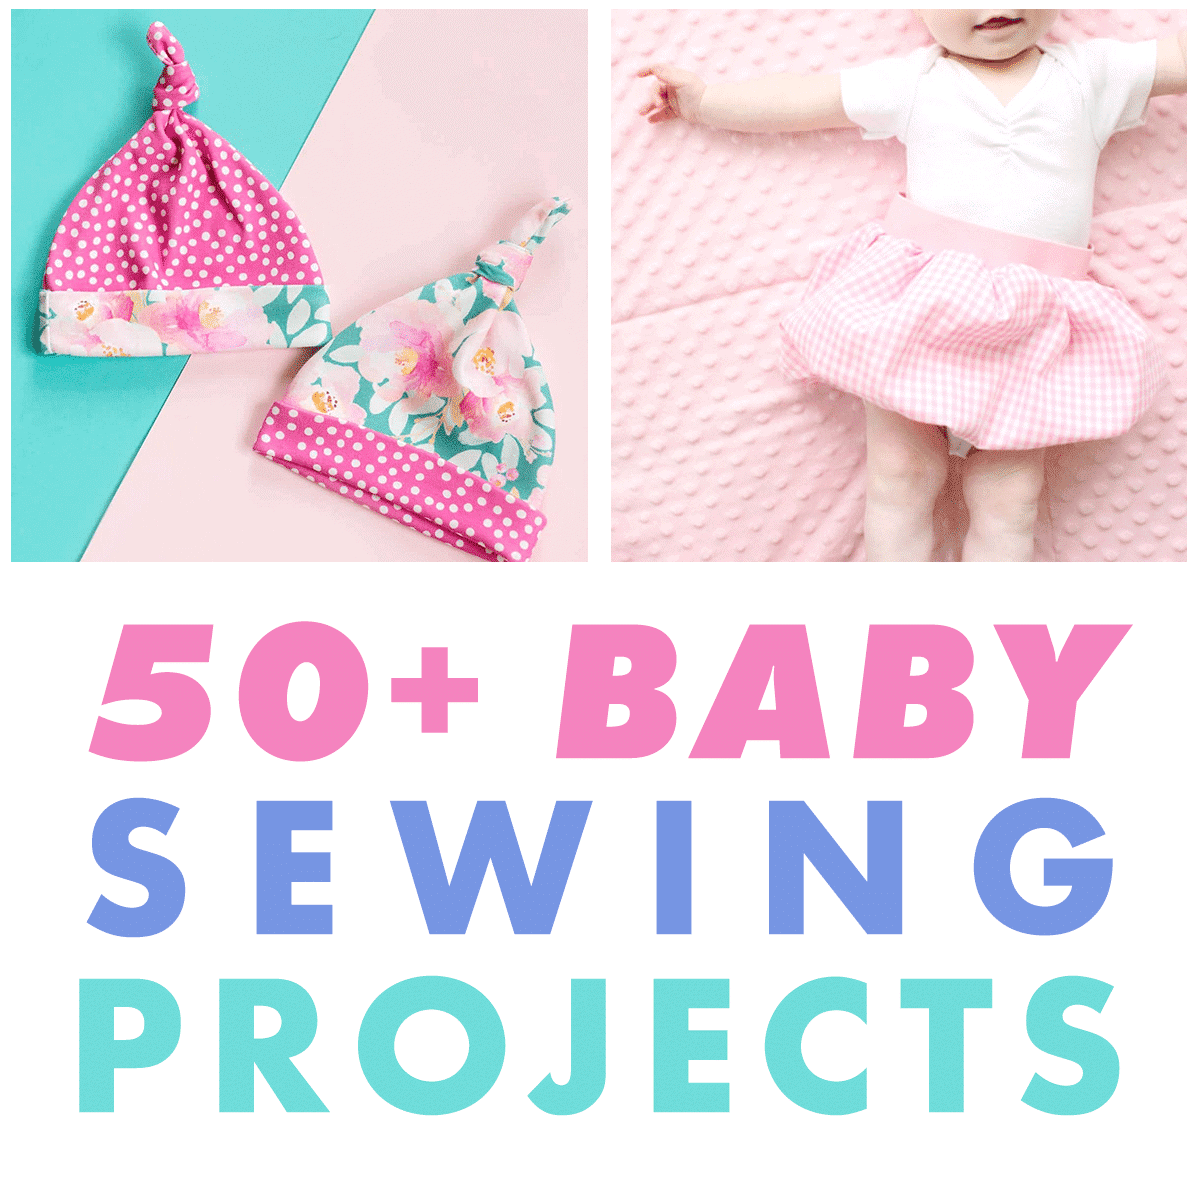
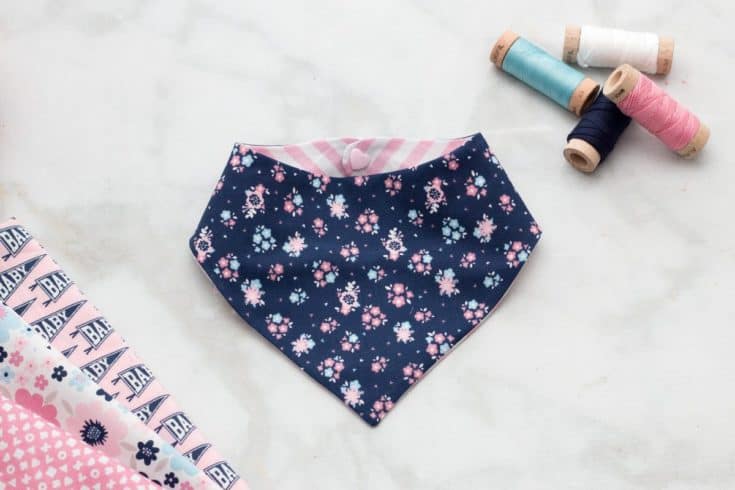
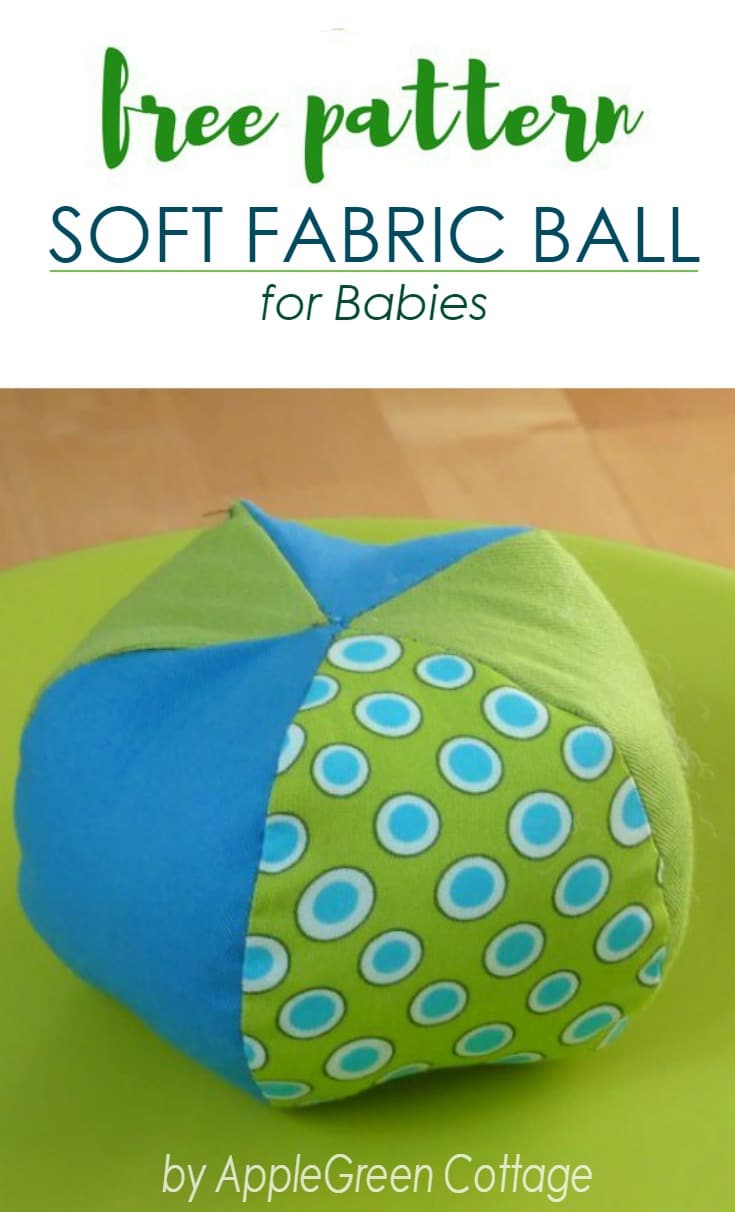
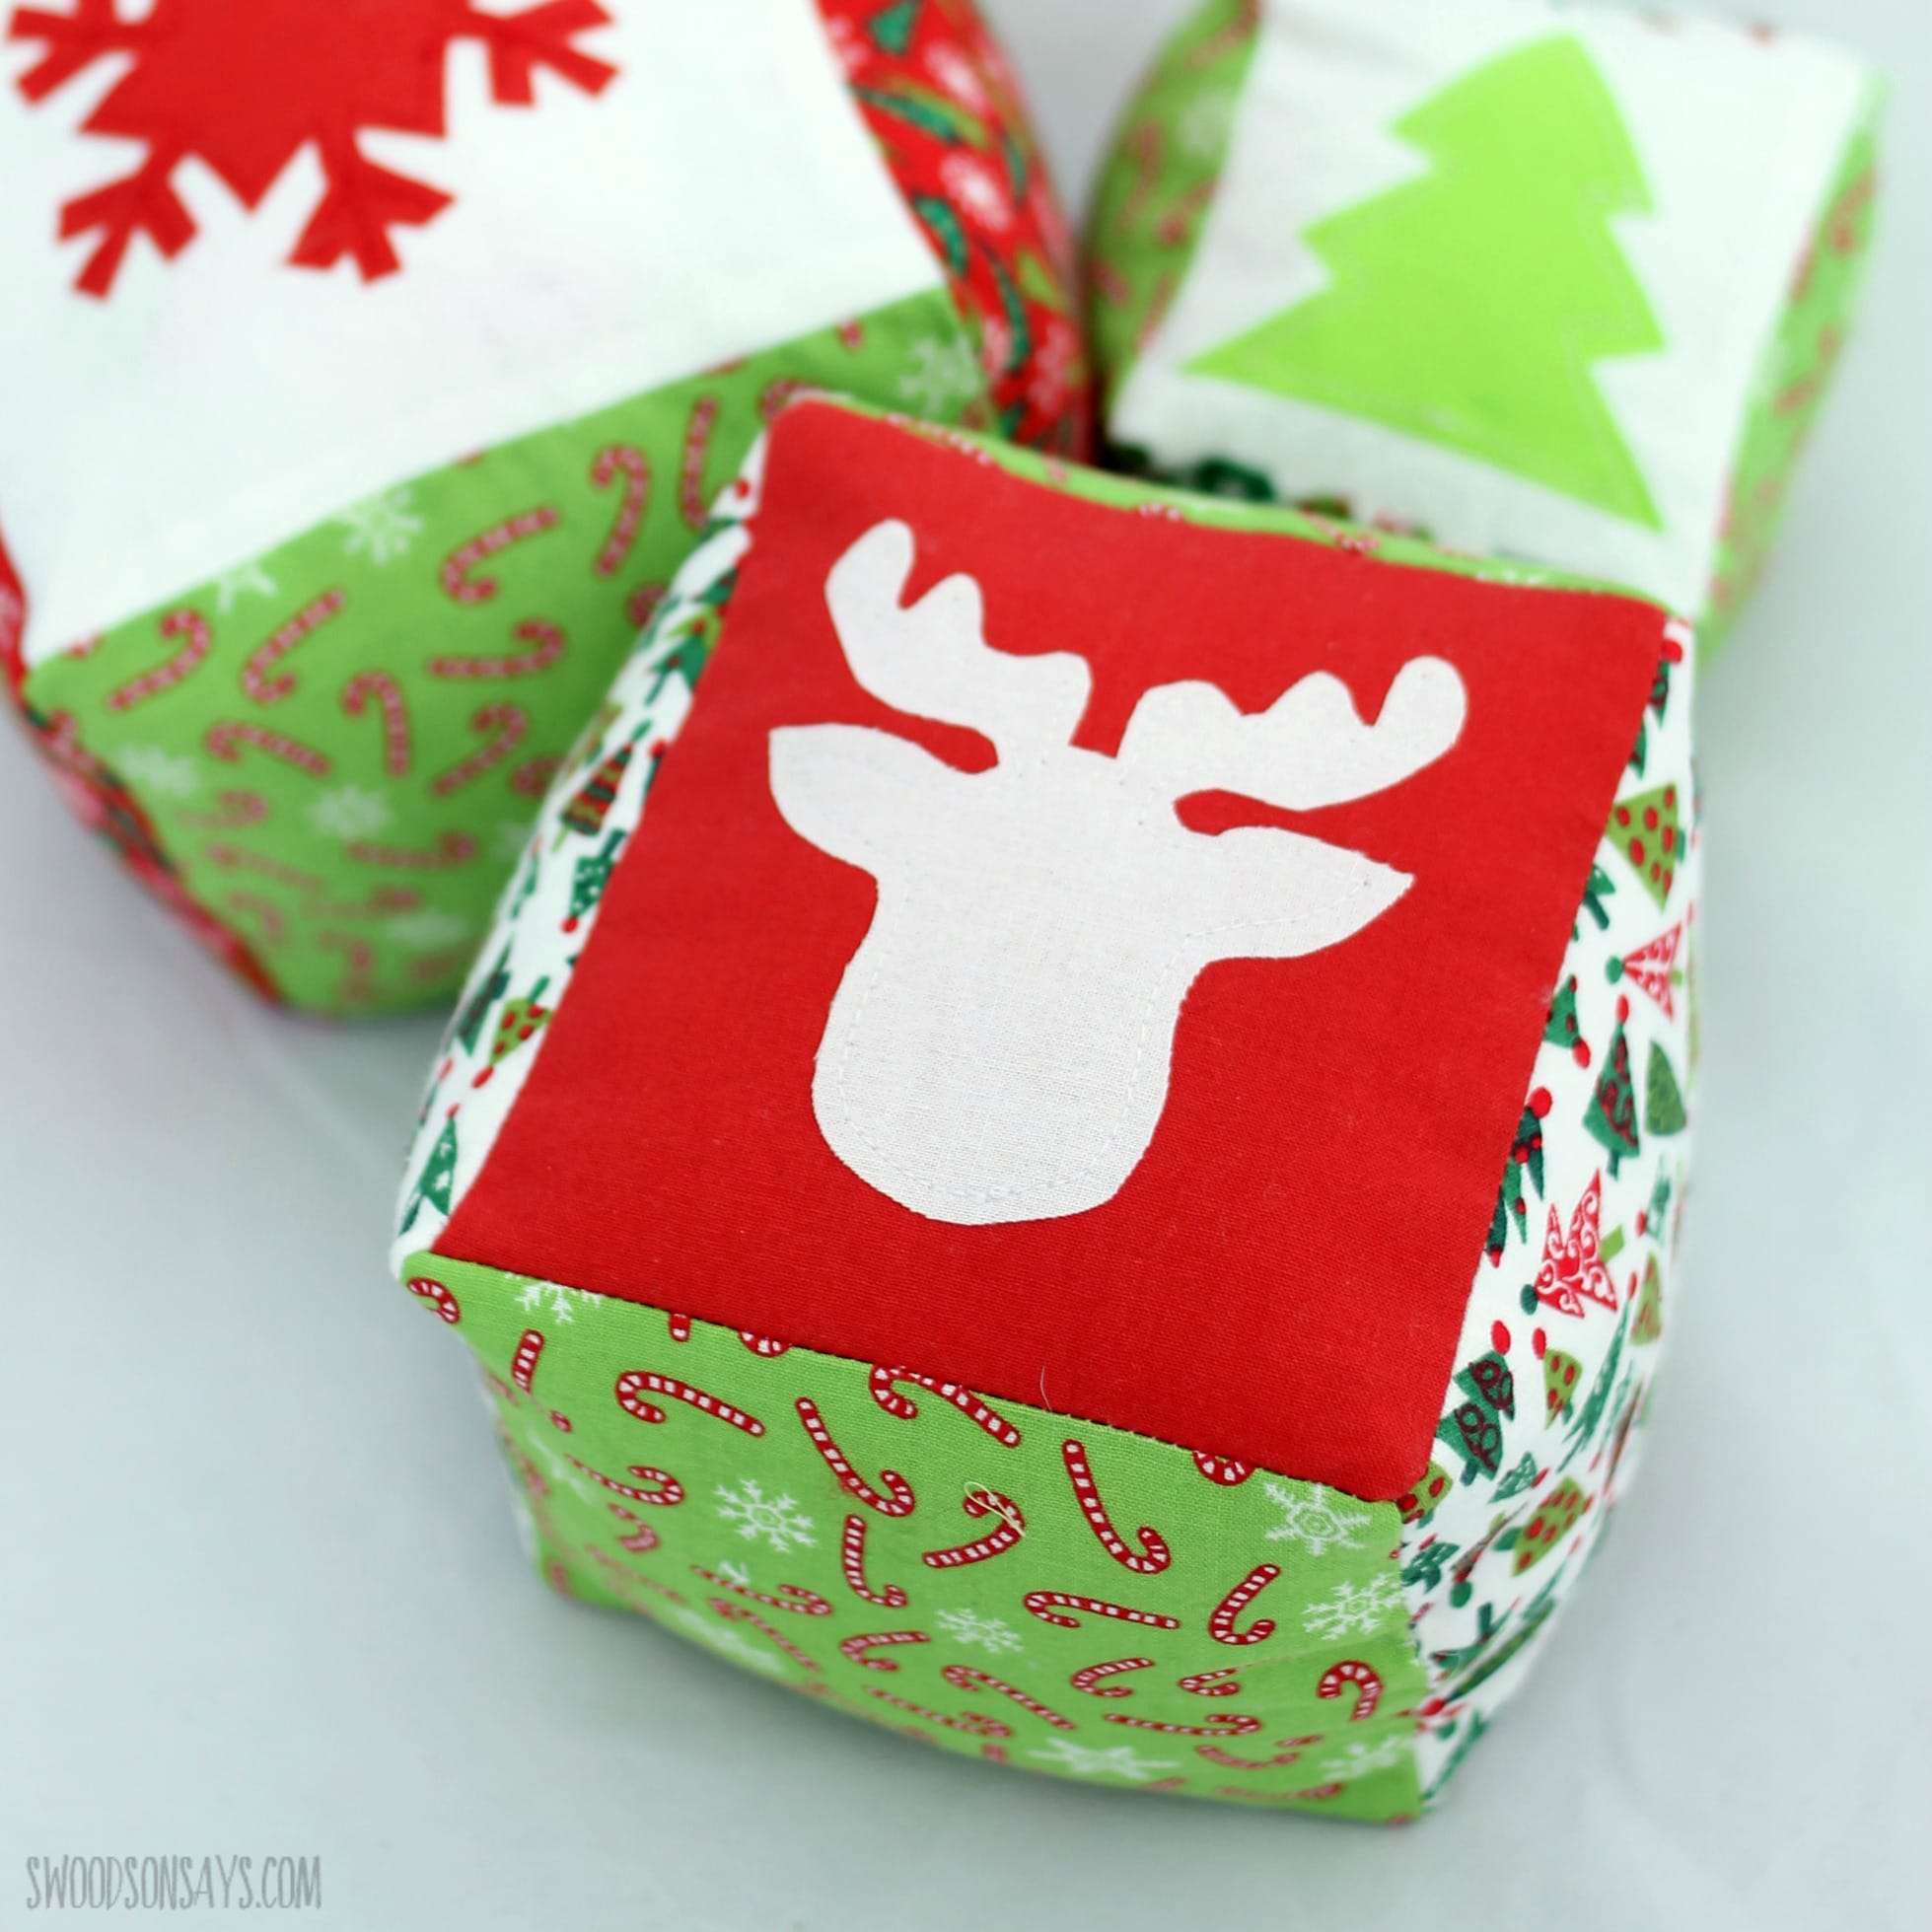
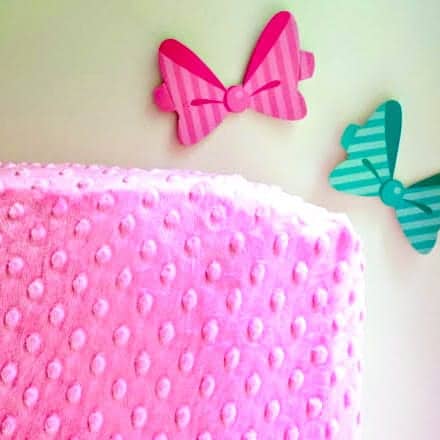
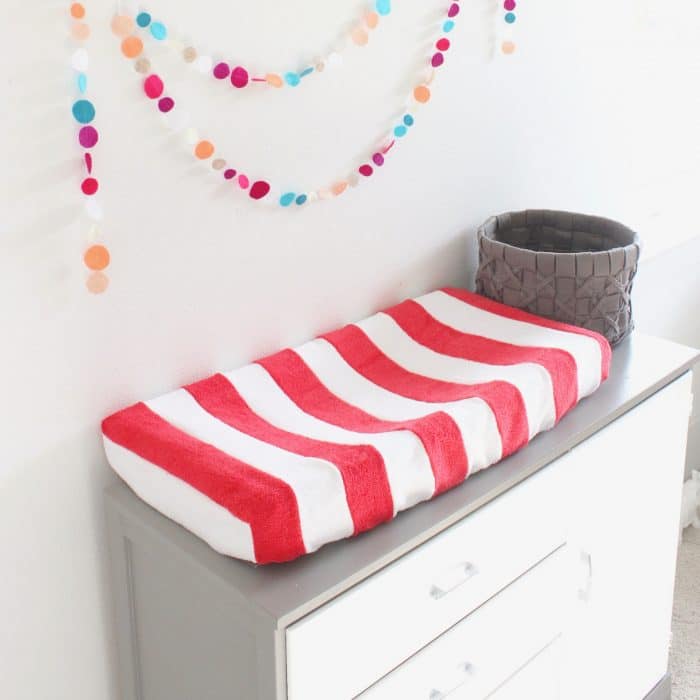
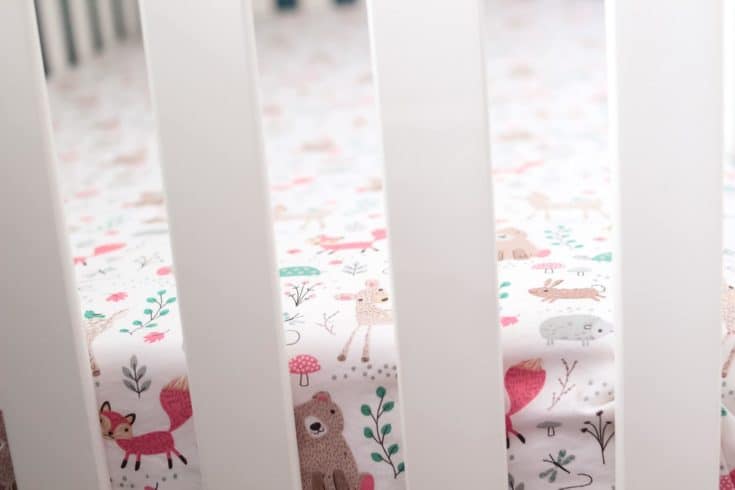
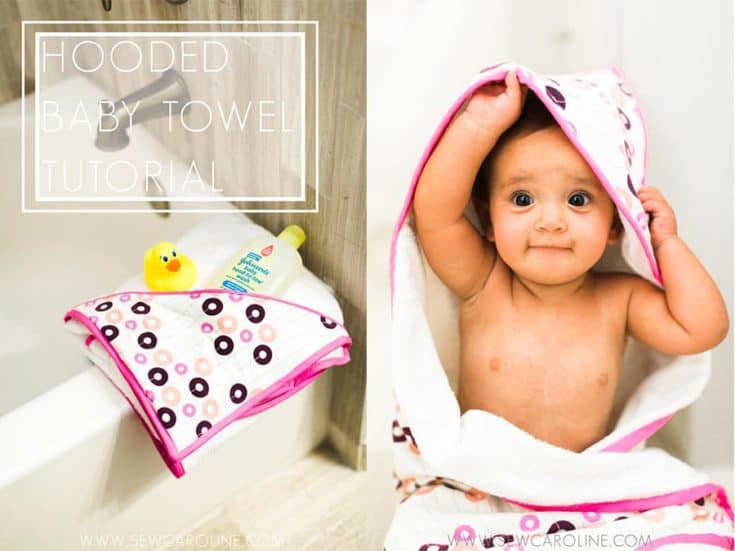
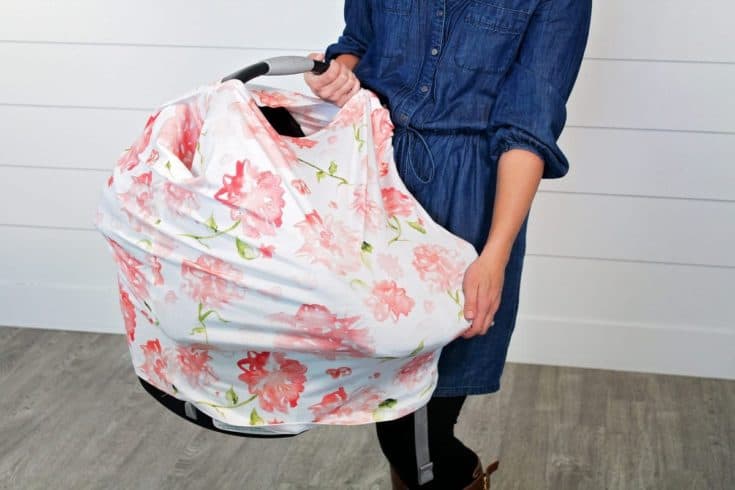
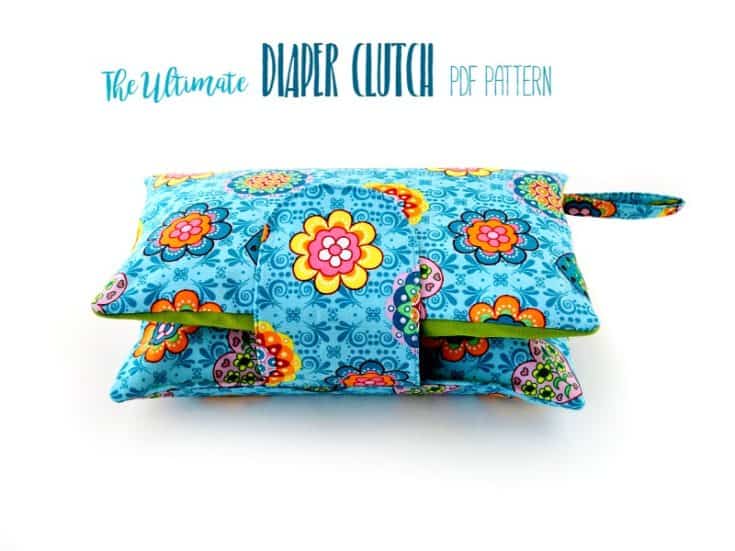
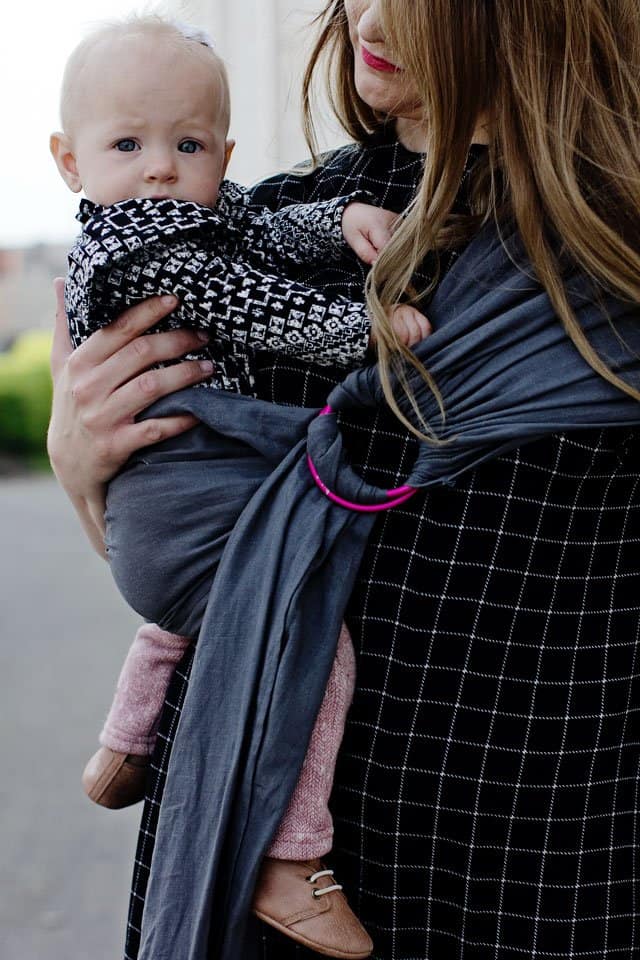
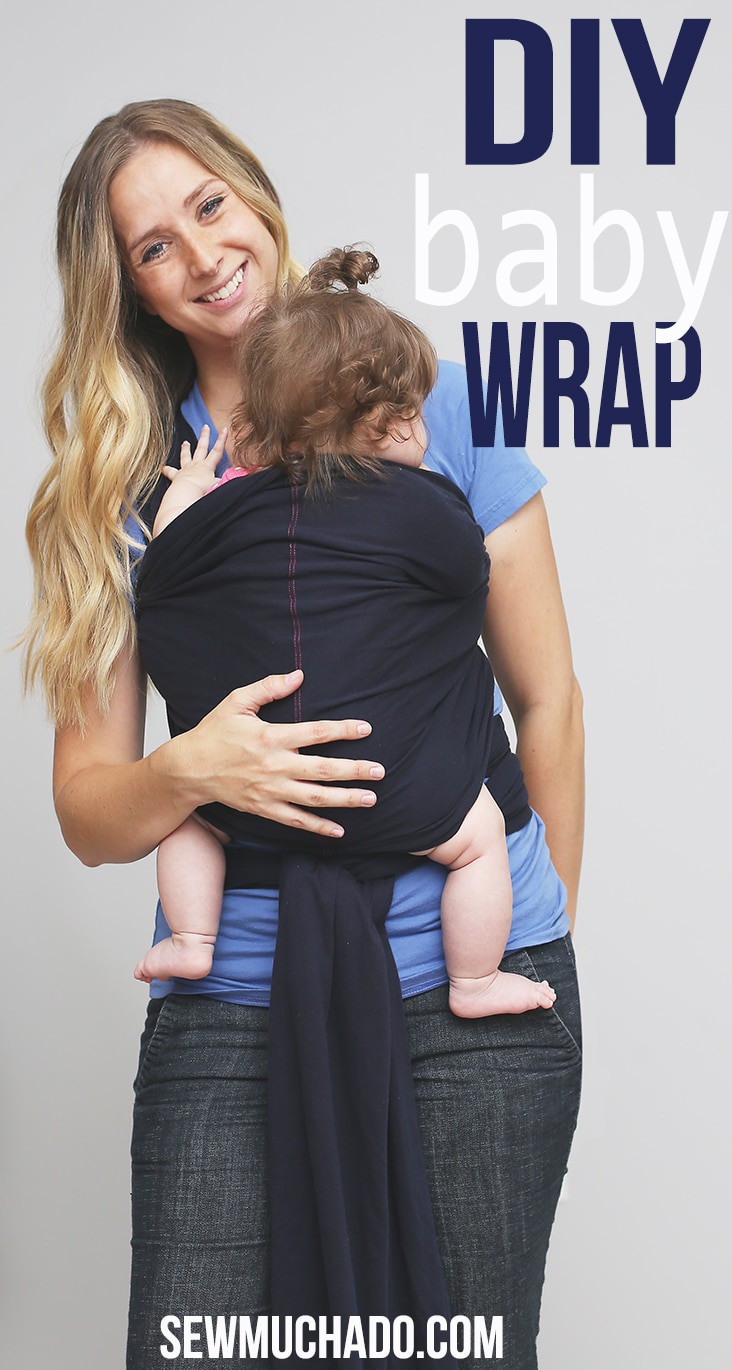
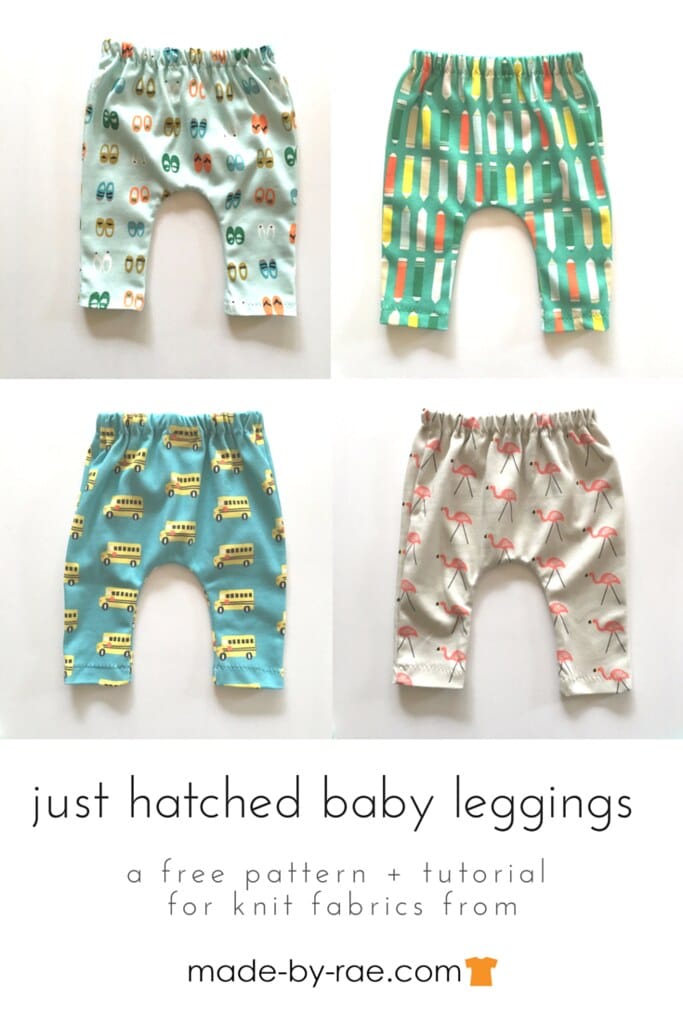
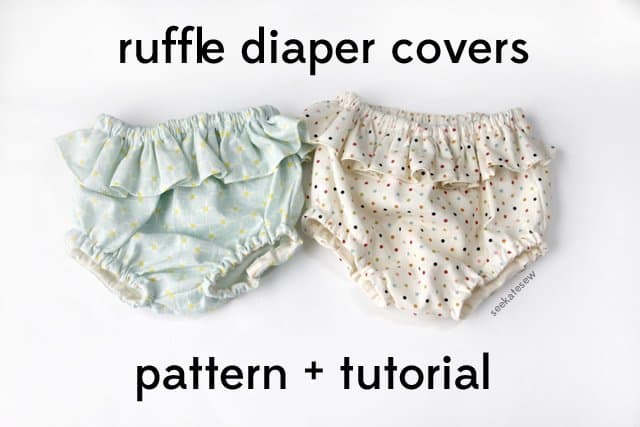
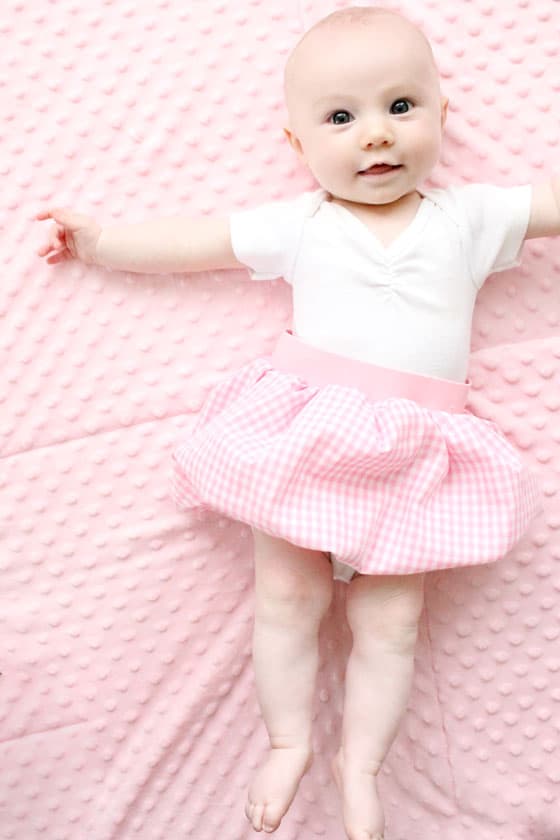
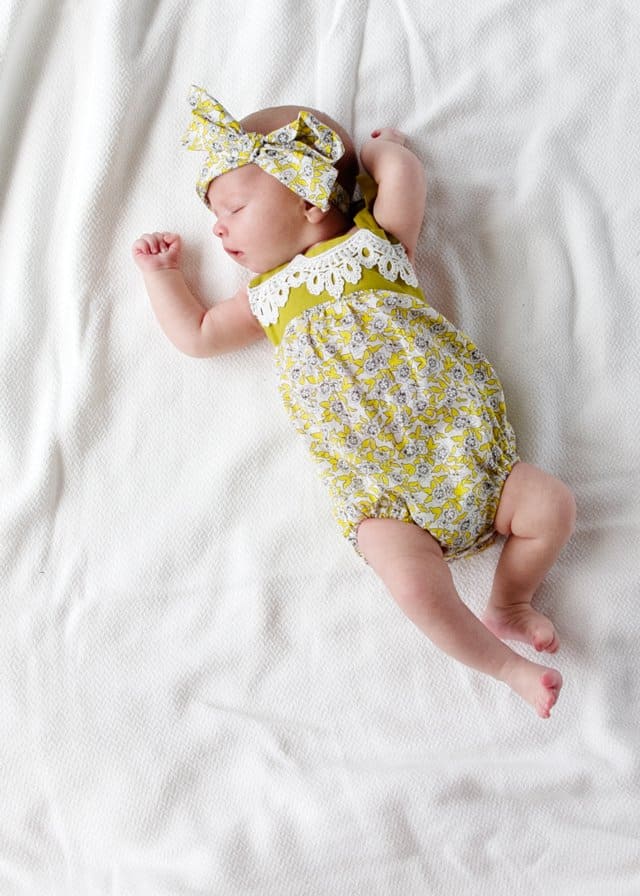
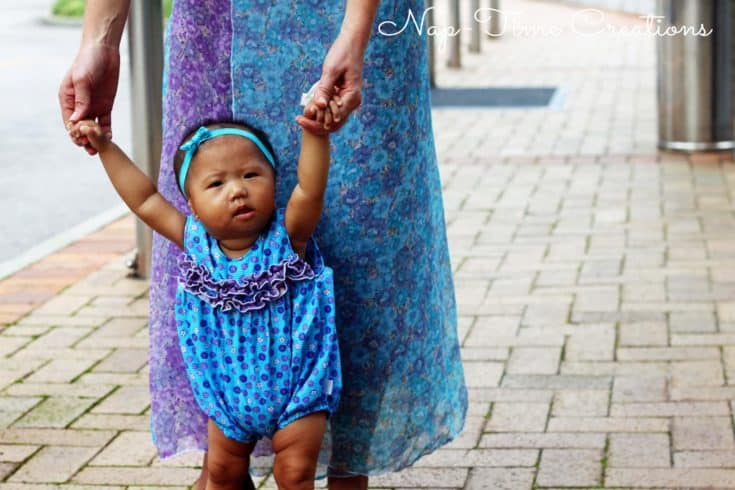
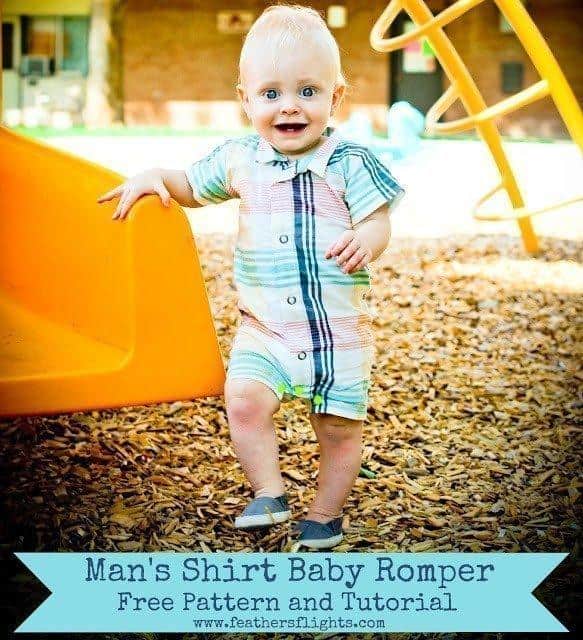
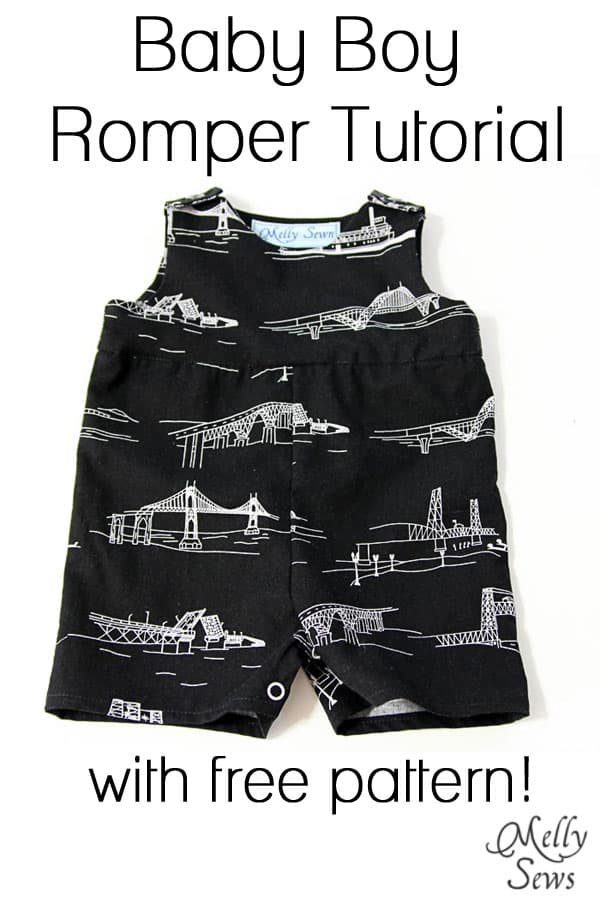
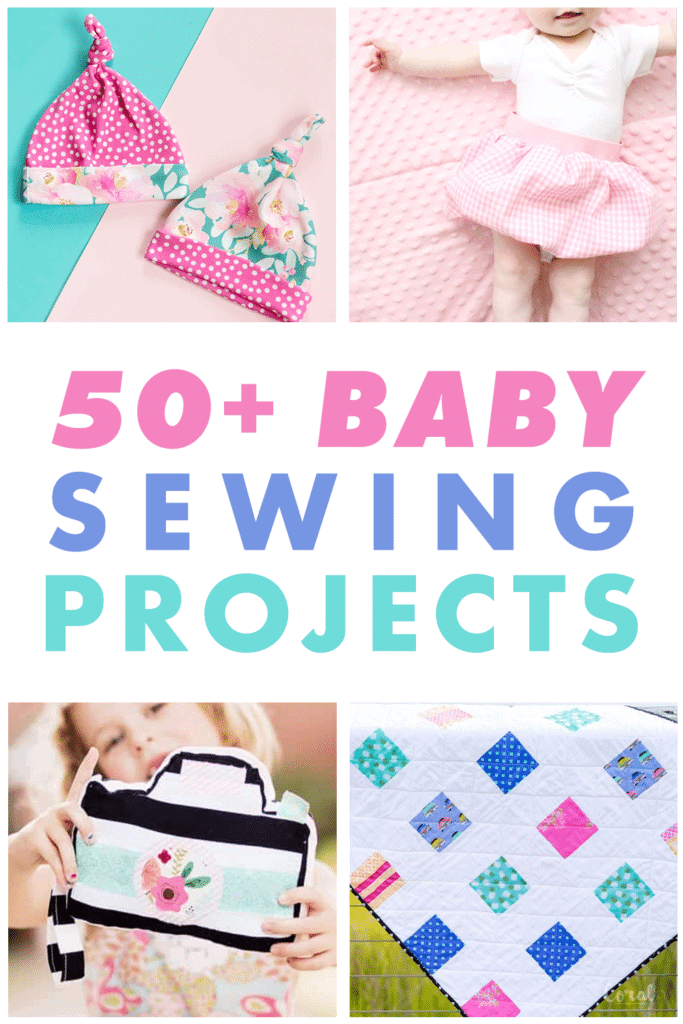
The BEST 50+ Baby Sewing Projects that will have you sewing all the cutest things for baby. This big list has baby bib and burp cloth patterns, baby toys, tons of baby blanket tutorials and quilts, as well as baby gear and bags. But this list wouldn’t be complete without all the adorable baby clothes patterns.
You will find every kind of baby sewing pattern and tutorial to make any baby project you can think of. Even if you don’t have a baby to sew for you will be making projects on this list because they are so darn cute!
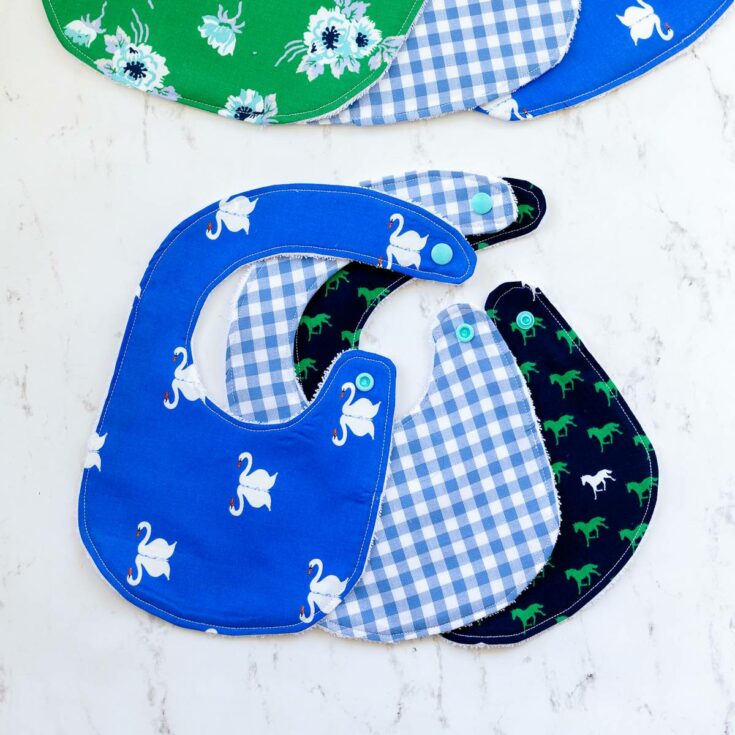
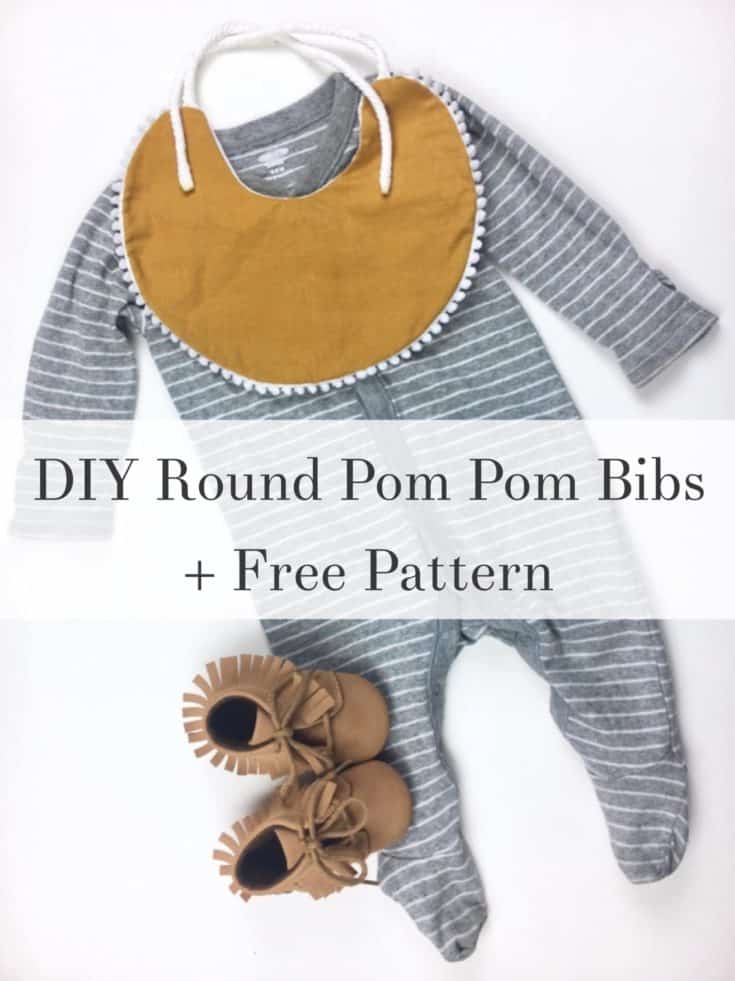
Free Baby Bib Pattern now available in Four Sizes! Learn how to sew a quick and easy baby bib. It will make a great baby shower gift for any new mama. Get the free printable pattern template.
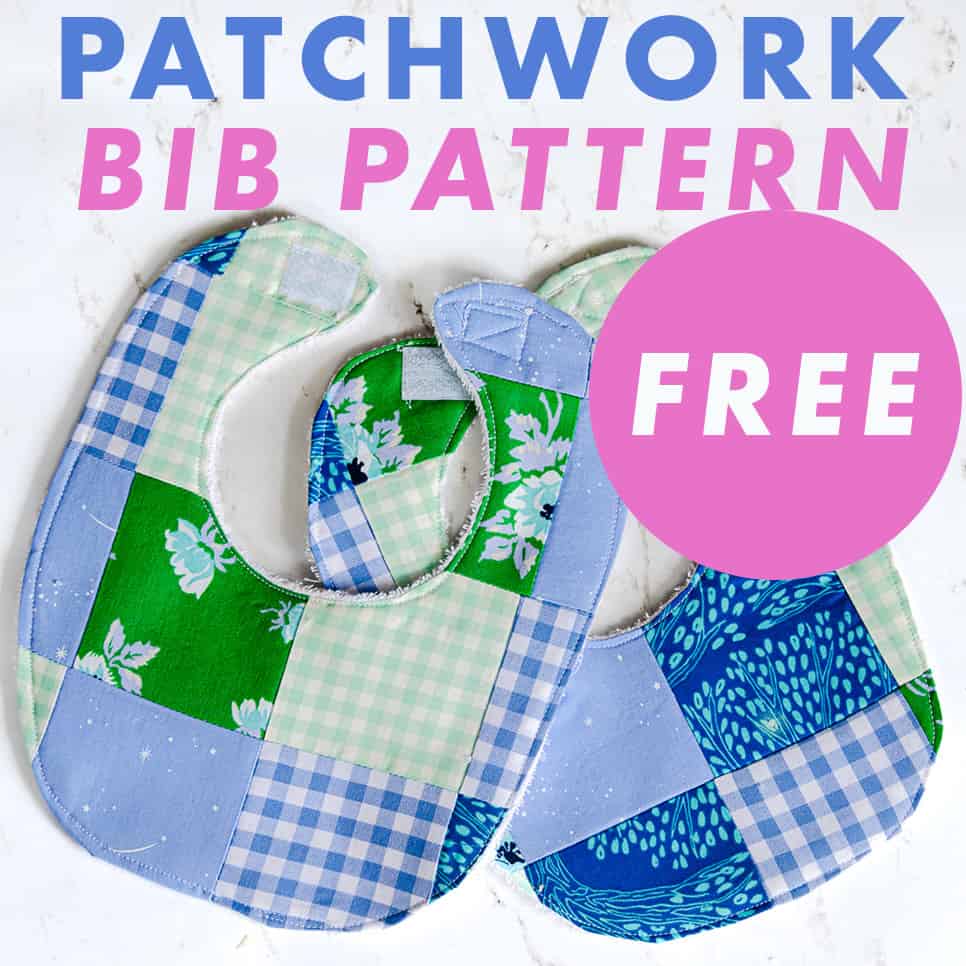
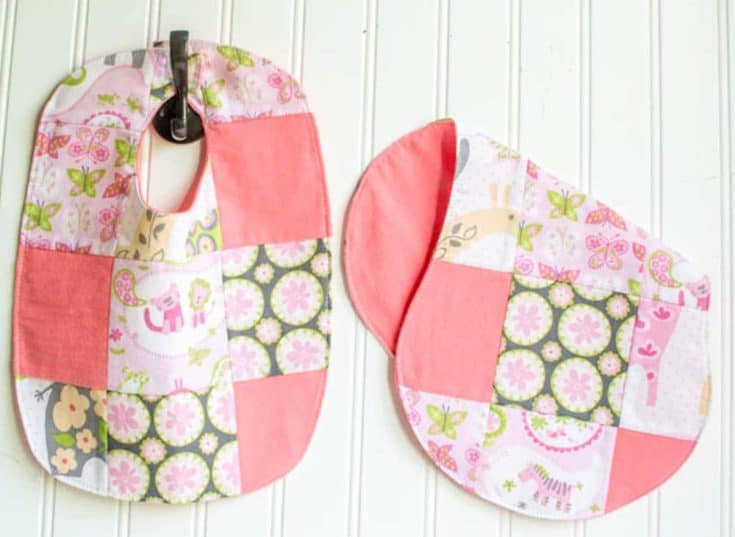
Make an easy Patchwork baby bib with the free pattern. Make it scrappy or use your favorite fabrics. Learn how to chain piece to quickly sew your patchwork squares together.


 . Using a 1/4" seam sew a dark square to the opposite sides of the white block. Make 2
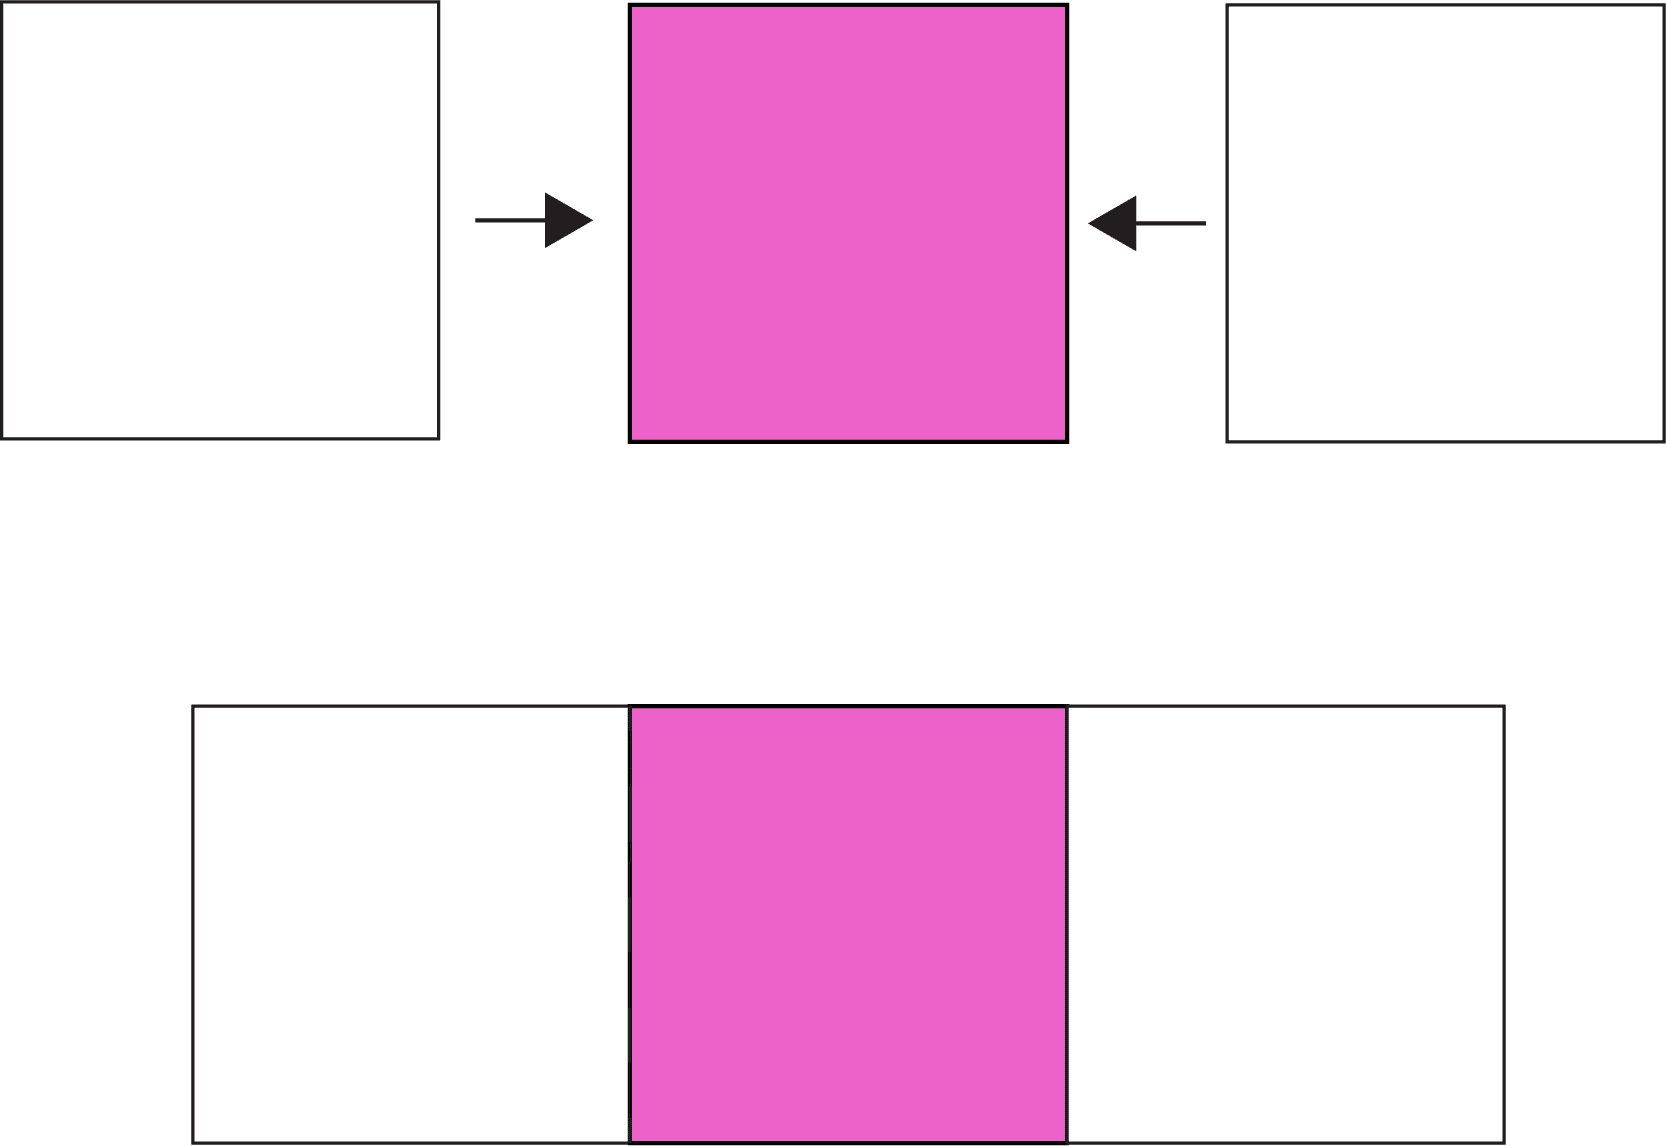 . Using a 1/4" seam sew a light square to the opposite sides of the color block.
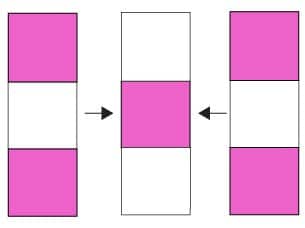 . Positve or A Block - Using a 1/4" seam sew a strip made in step 1 to the opposite sides of the strip made in step 2. Or alternatively make it with the opposite placement as shown in step 4.
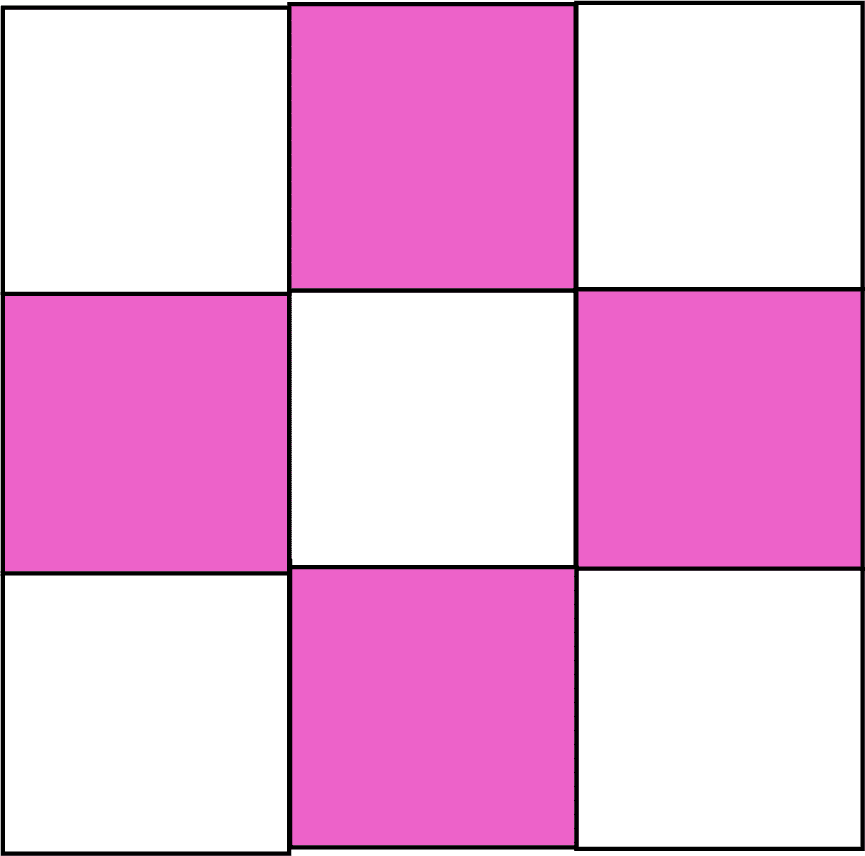 . Negative or B Block - Using a 1/4" seam sew a strip made in step 2 to the opposite sides of the strip made in step 1.
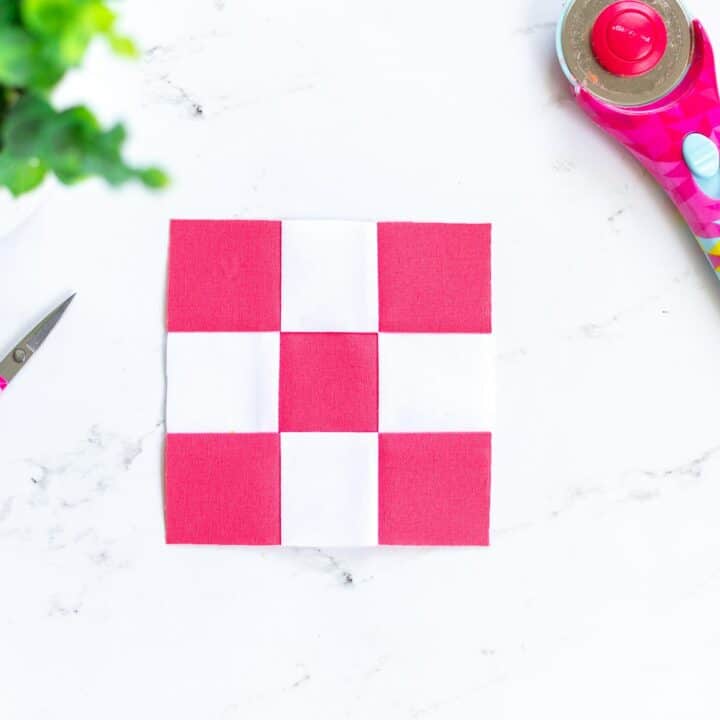
 . Using a 1/4" seam sew two dark strips to the opposite sides of the white strip.
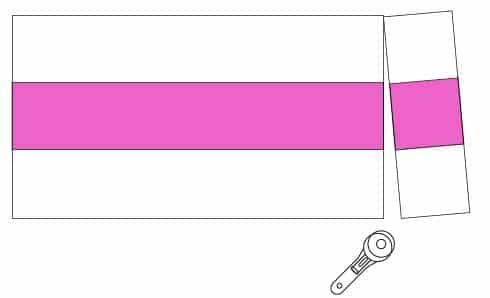 . Using a rotary cutter, cut the unit made in step 1 to the block width needed.
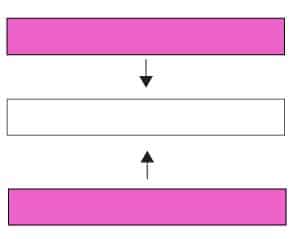 . Using a 1/4" seam sew two light strips to the opposite sides of the color strip.