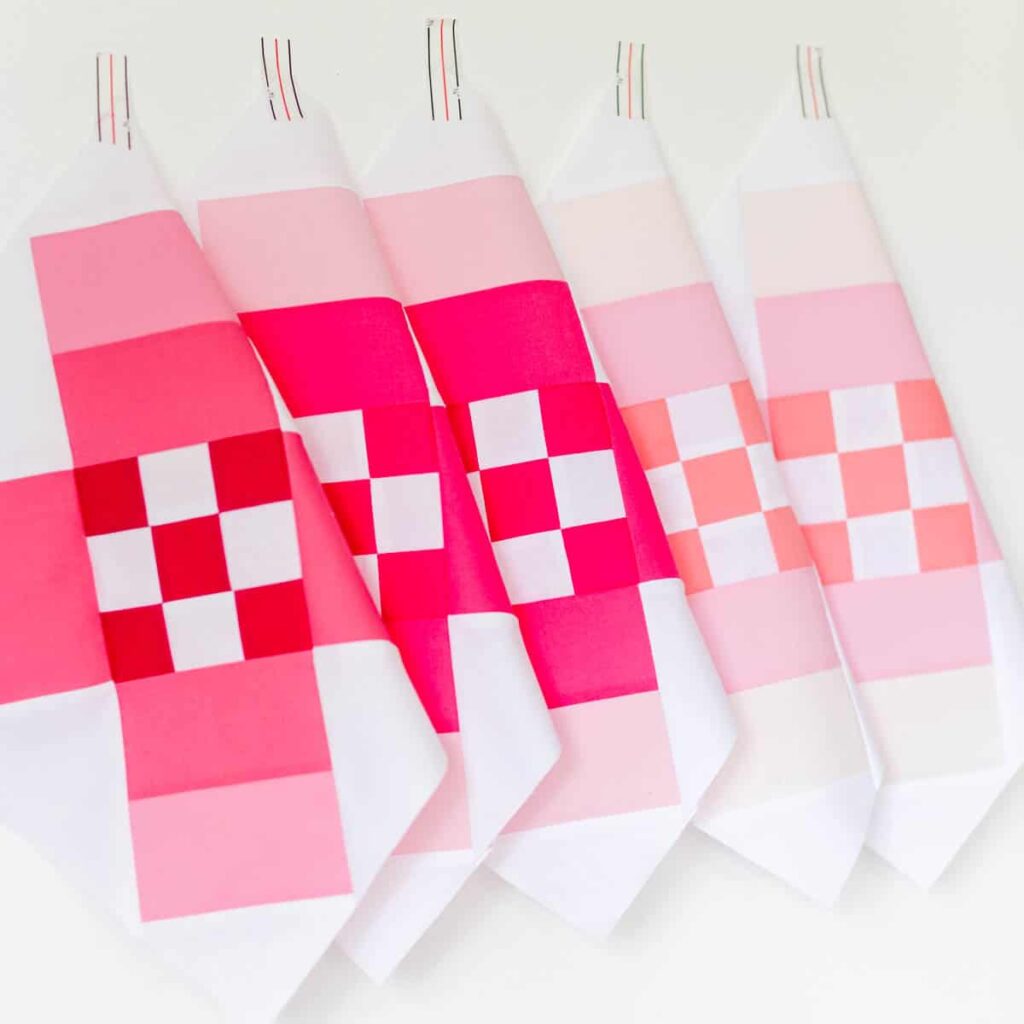
Weeks 4 – 7 Prompt
For each of the weeks 4 – 7 we will be assembling five quilt blocks each week to make a total of twenty blocks. The blocks should come together fairly quickly since you have done some of the block prep work in the last two weeks.
In this post, I am including some tips for how to perfectly square up your blocks.
The Schedule
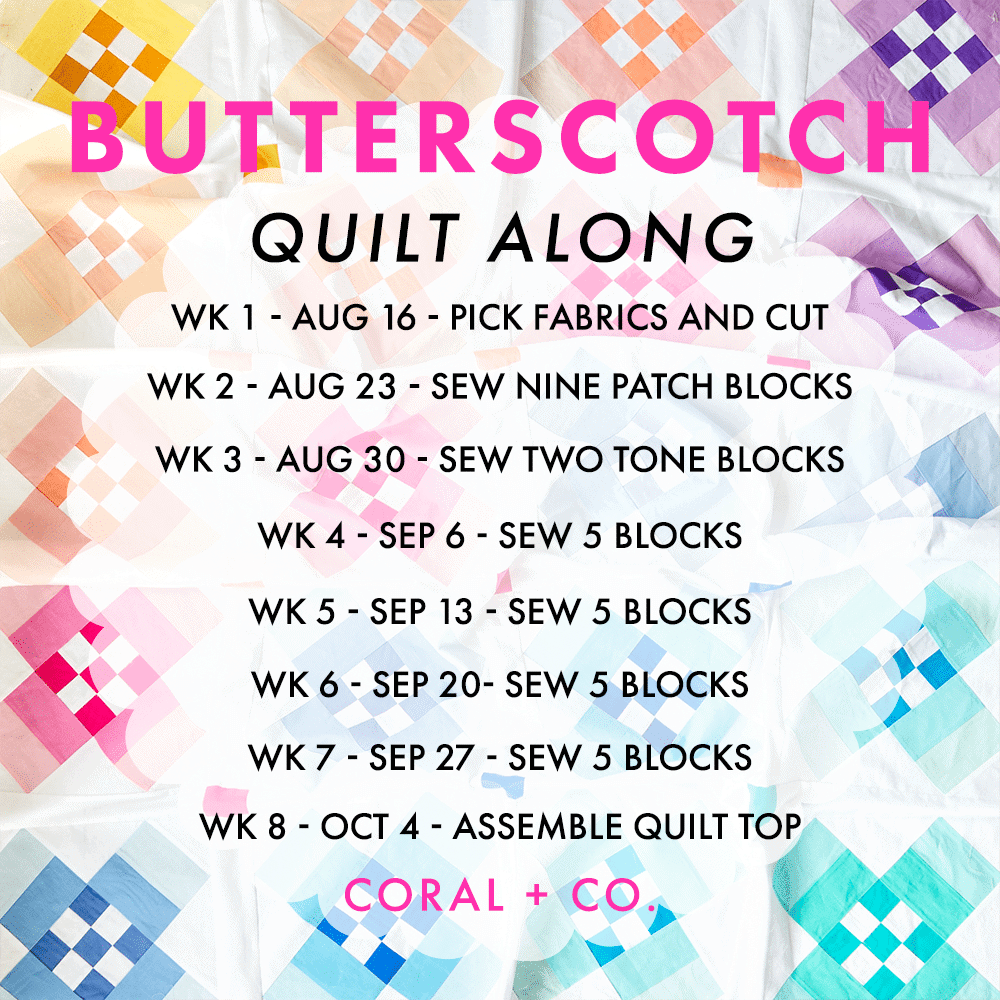
BUTTERSCOTCH QUILT ALONG POSTS
POST ON INSTAGRAM
The Quilt Along will be taking place on Instagram. At the end of each week I will announce that week’s winner. To enter you will post a photo sharing your progress with that weeks prompt. To enter the giveaway just use the hashtag #butterscotchqal so I can find all your lovely progress.
Tips For Squaring Up Your Blocks
Squaring up your quilt block can be made easier with a few simple quilting tools.
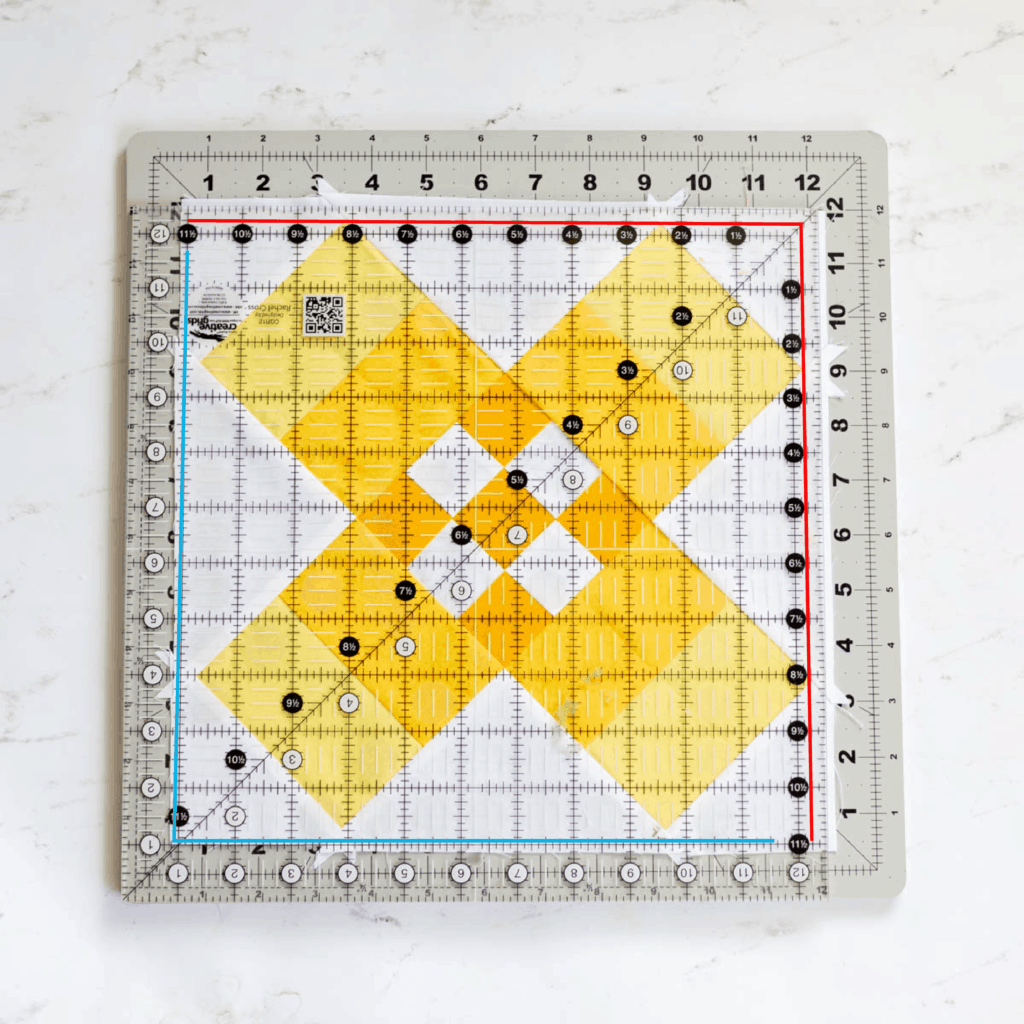
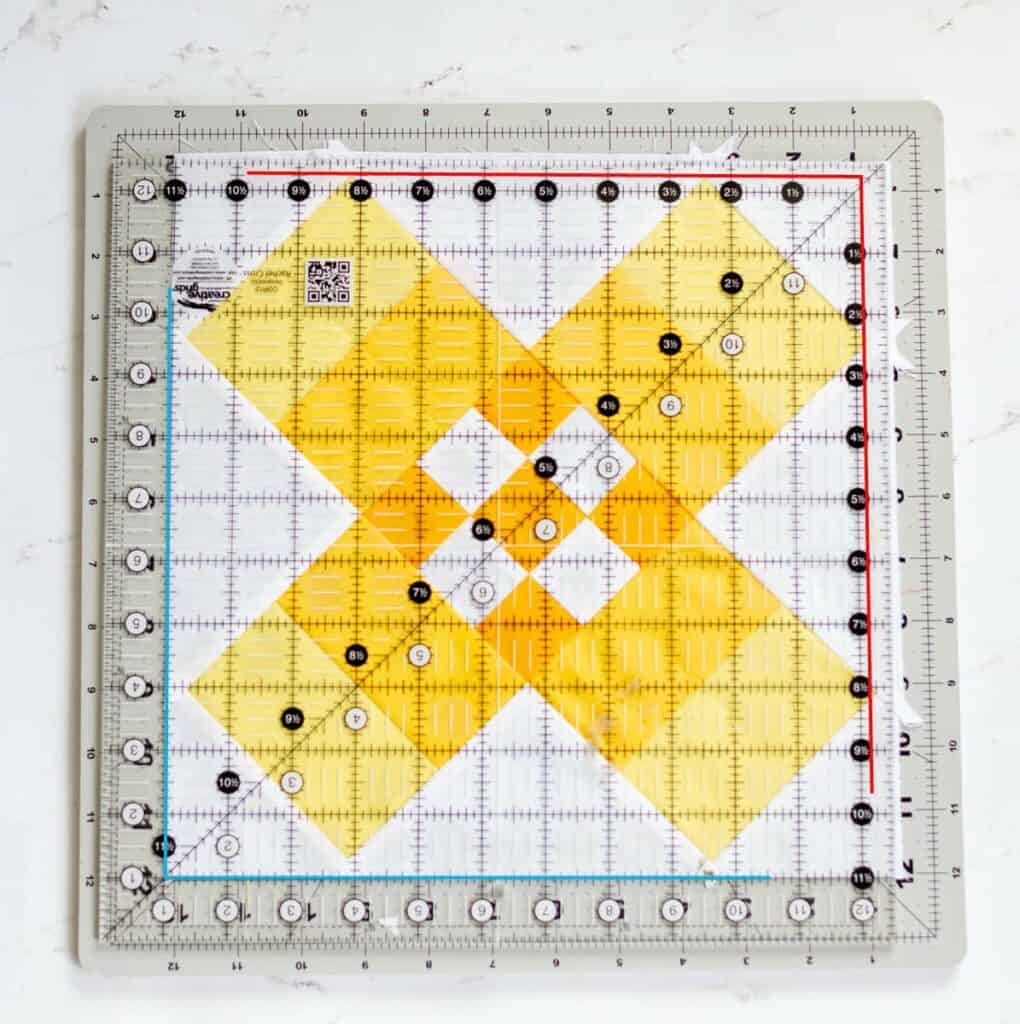
Using your 12.5″ square ruler, place it on the block so that the right and top sides have 1/4″ seam allowance. You will want to place the ruler so that the points of the color blocks are aligned with marks 1/4″ away from the edge of the ruler, as shown by the red line.
The blue line is placed on the 11.5″ line. You will want to make sure that the left and bottom edges of the block falls on or below this line. If it is above the blue line, your block will be too small.
Additionally the diagonal line of the ruler should run from the upper right hand corner, through the center of the two tone, and nine patch blocks, down to the lower left hand corner.
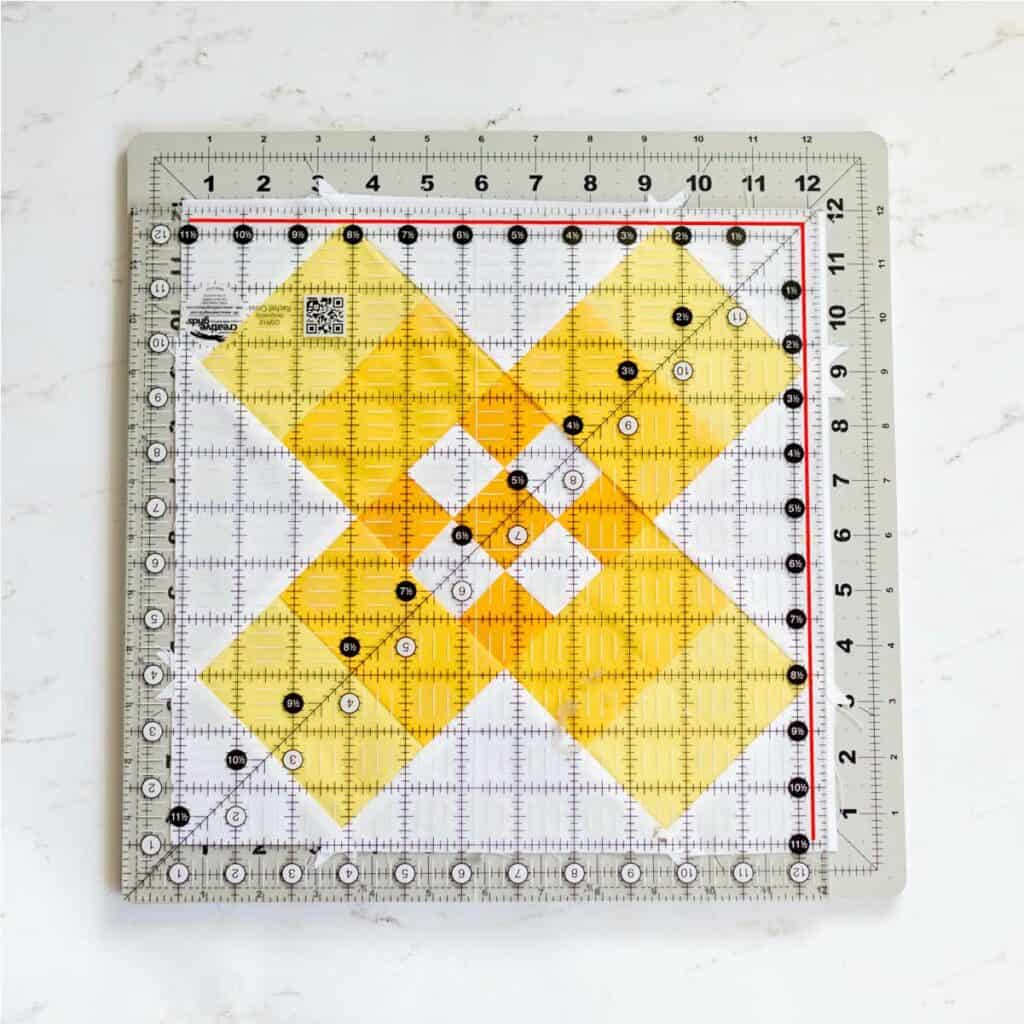
Turn your block 180 degrees and line up the ruler so that the color points on the top and right sides line up with the markings 1/4″ from the edge of the ruler, where the red line is shown. You may have a little extra on the left side of the block as I did in the photo above, where the block extends past the 11.5″ line. Squaring it up one more time will fix this.
Turn the block 180 degrees one more time. Line up the left and bottom sides with the 11.5″ lines on the ruler, shown by the blue line. Then once again line up the color points on the top and right with markings 1/4″ from the ruler edge on the right side, as shown by the red line.
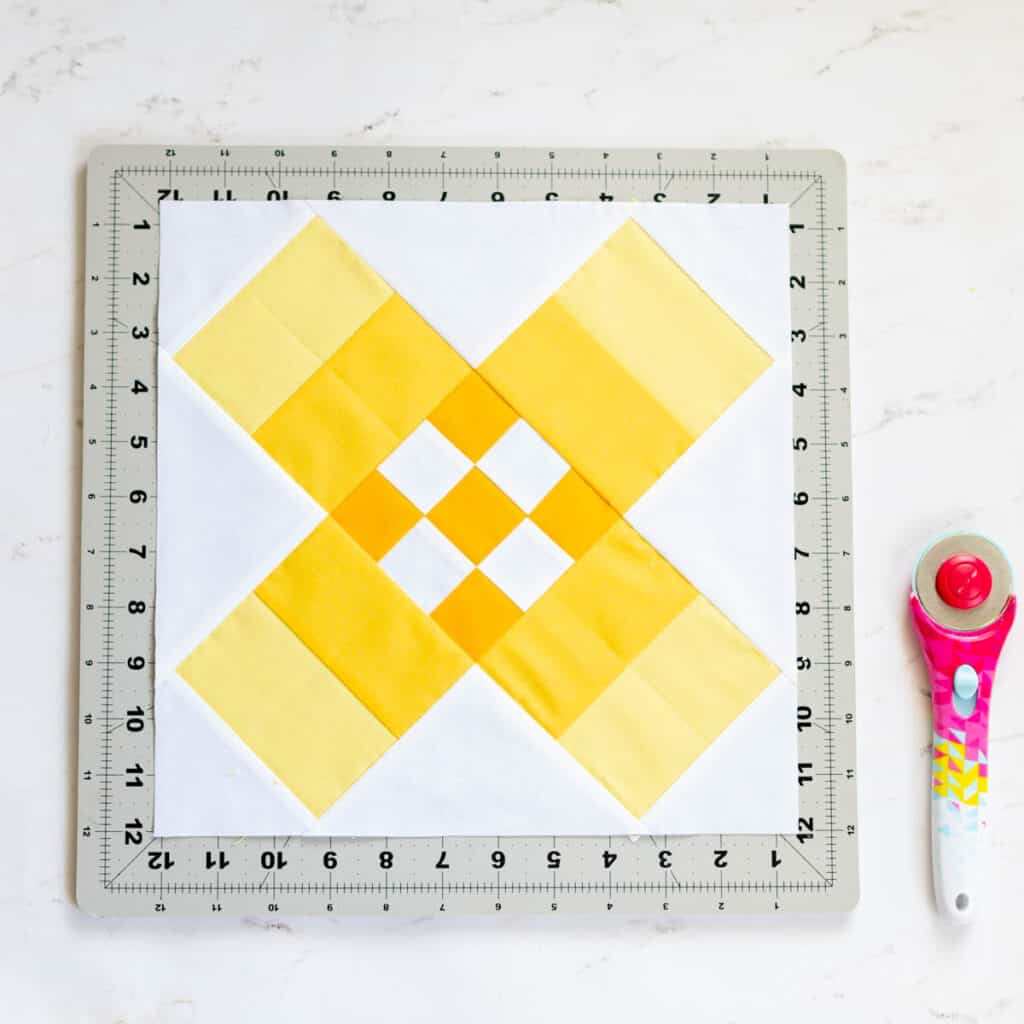
Your block should be 11.5″ square now, with 1/4″ seam allowance between the color points and edge on all sides. The blocks are now ready to add the sashing to.
Leave a Reply