• Skip to primary navigation
  • Skip to main content
  • Skip to primary sidebar

Coral + Co. logo

  • Sewing
    • Free Tutorials
    • Free Patterns
    • Accessories
    • Apparel
    • Baby Sewing
    • Beginner
    • Home Sewing
    • Kids
    • Minky Sewing Projects
    • Tips and Tricks
  • Quilting
    • Learn How To Quilt
    • Free Quilt Patterns
    • Quilt Blocks
    • Quilt Patterns
    • Quilt Alongs
    • Holiday
  • Crafts
    • Cricut
    • Holiday
    • Printables
  • Holiday
    • Valentines Day
    • Easter
    • Mother’s Day
    • Summer
    • Patriotic Sewing
    • Halloween
    • Christmas
  • FREEBIES
    • Coral + Co. Resource Library
  • Contact
  • Shop
  • Nav Social Menu

    • Bloglovin
    • Email
    • Facebook
    • Instagram
    • Pinterest
    • YouTube
You are here: Home / Sewing and Quilting Patterns and Tutorials

Aster Cardigan, Organic Knit Leggings and Knot Bow Headband

Jan 27, 2016 · 2 Comments

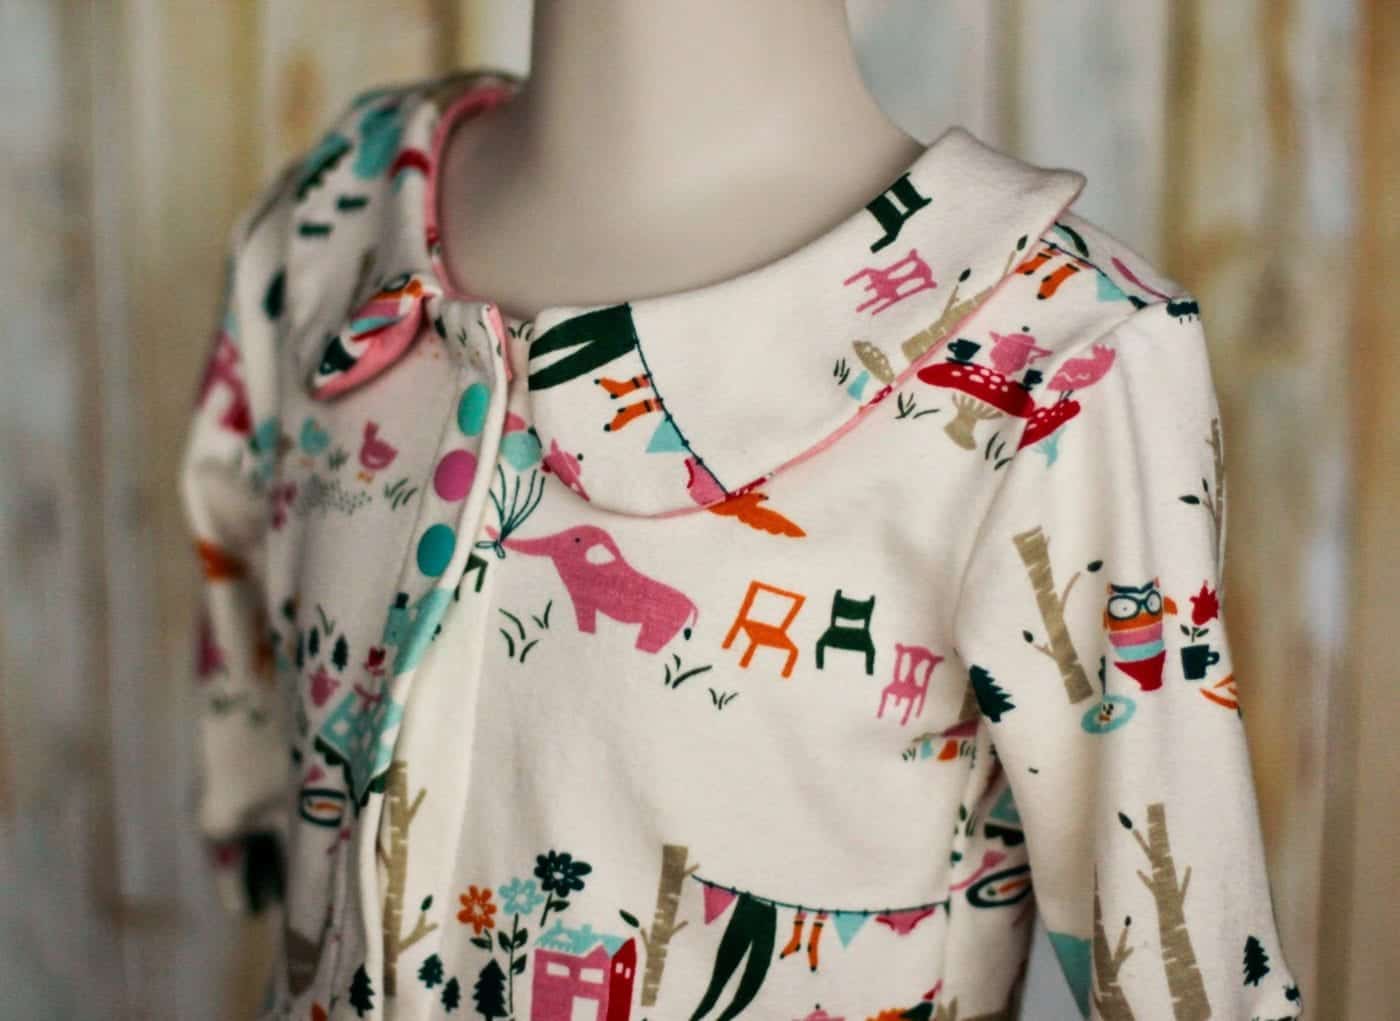
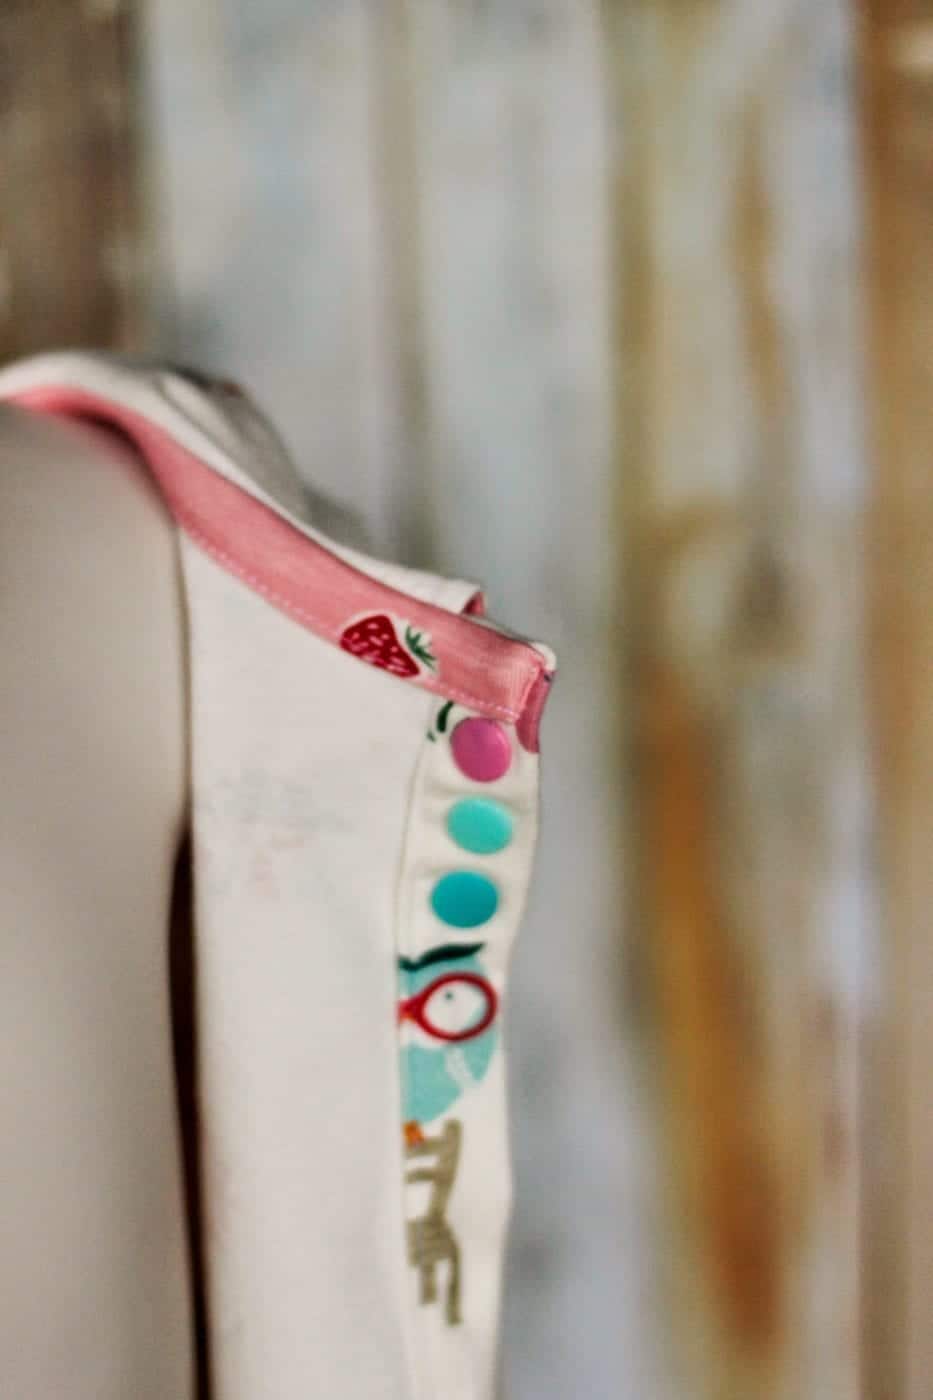
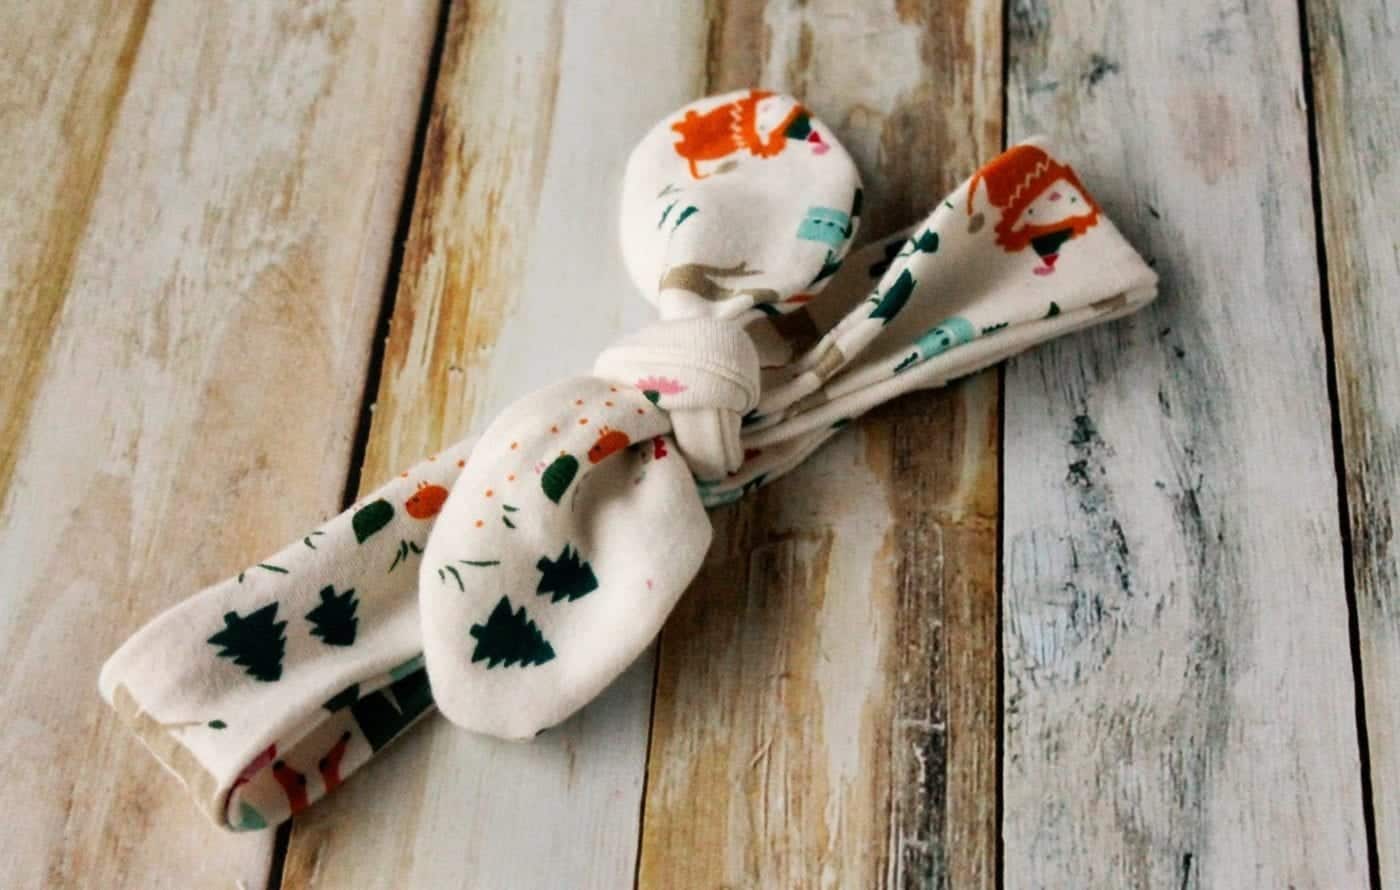
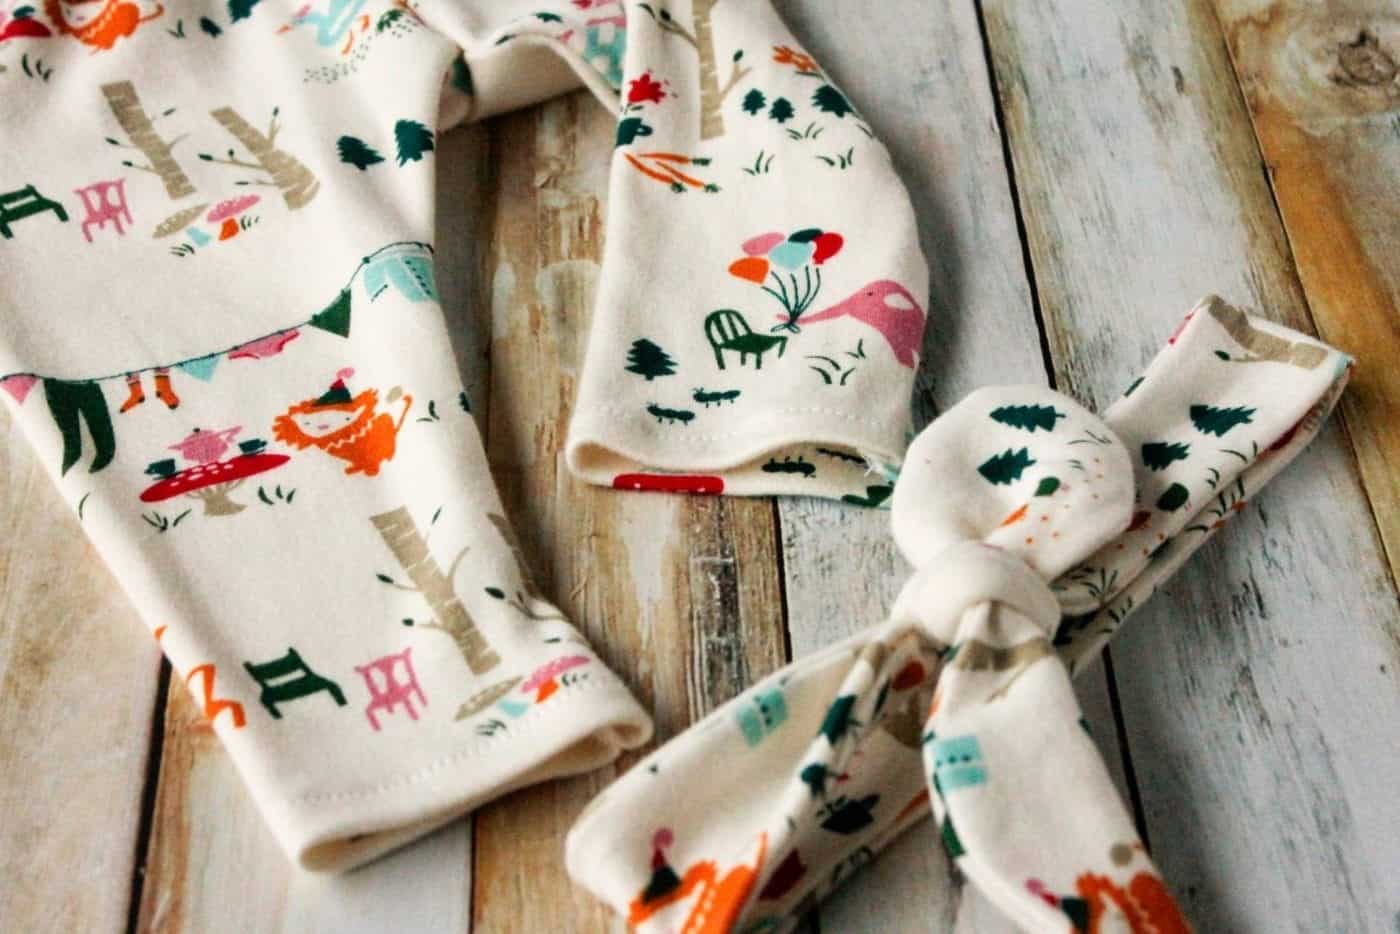
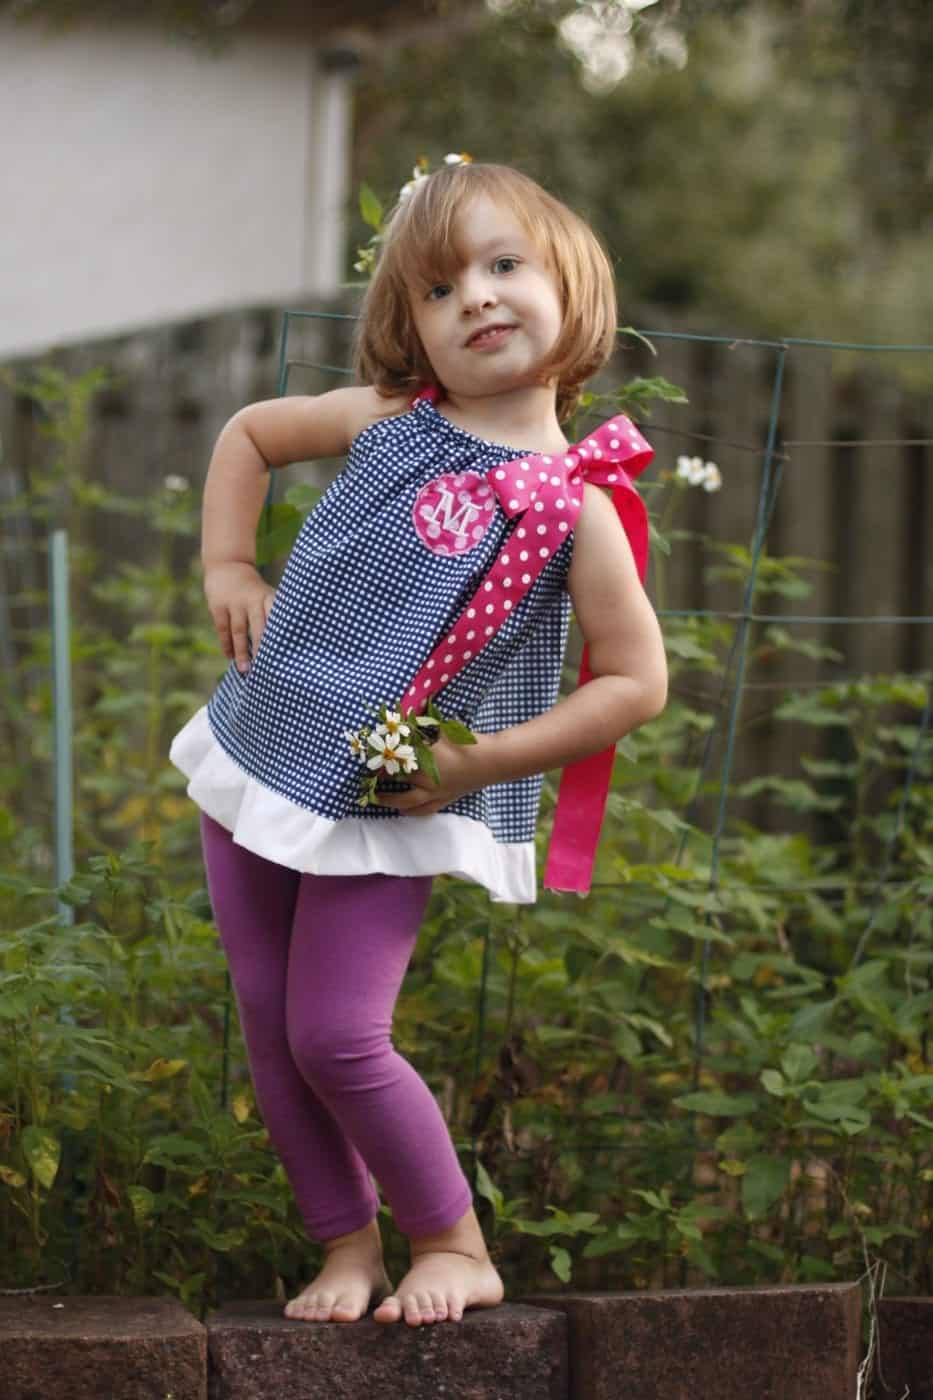
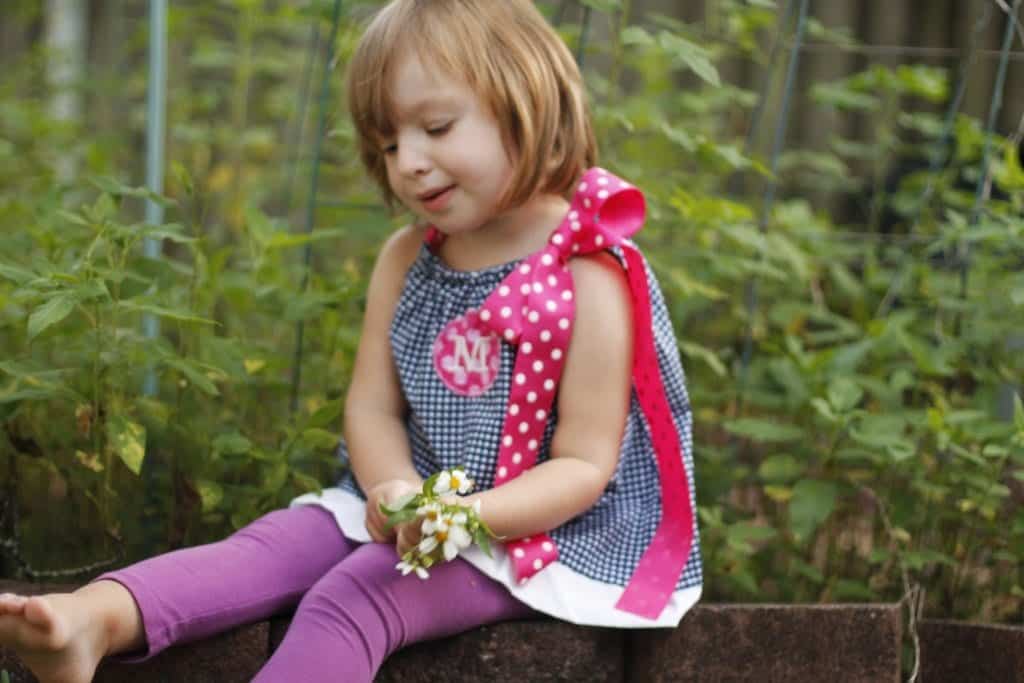
I am so in love with Fabricworm’s organic knit that I decided to make some cozy wear for my younger daughter Ava.  I the Aster Cardigan, some Organic Knit Leggings and Knot Bow Headband using the fabric Everyday Party which is sold out now.  It is so soft it is unreal.  The legging pattern is Go To Leggings, and the Aster Cardigan is from LBG Studios.  I used my Free Knot Bow Headband Pattern to accessorize.  I couldn’t decide what color Kam Snaps to use so I went with 3 different colors and it reminds me sherbet, which makes me think of summer, so that took me to my happy place 🙂organic knit aster cardigan made by coral and col
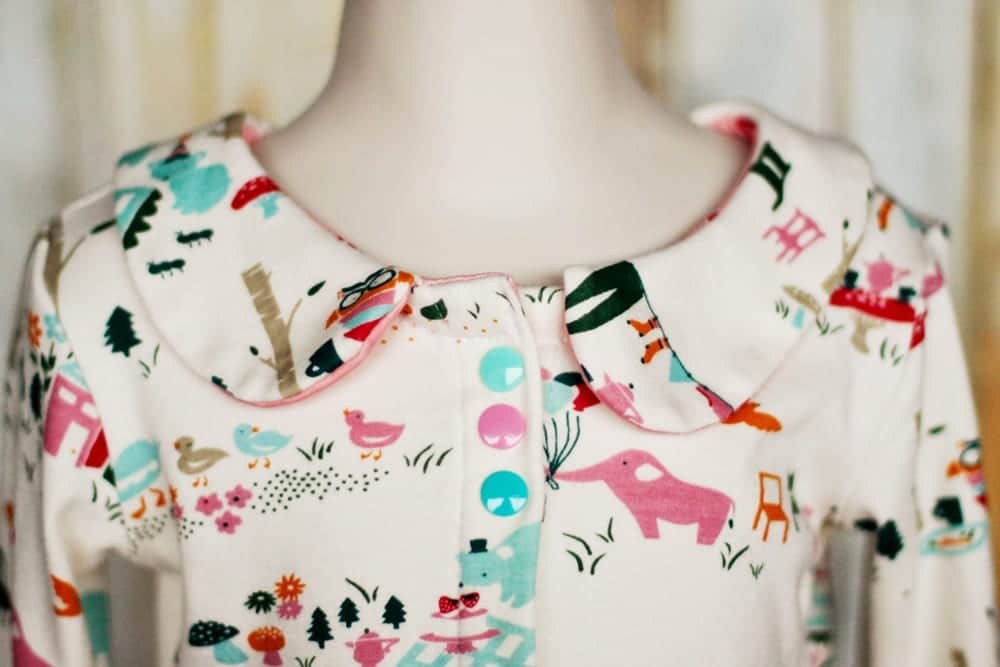
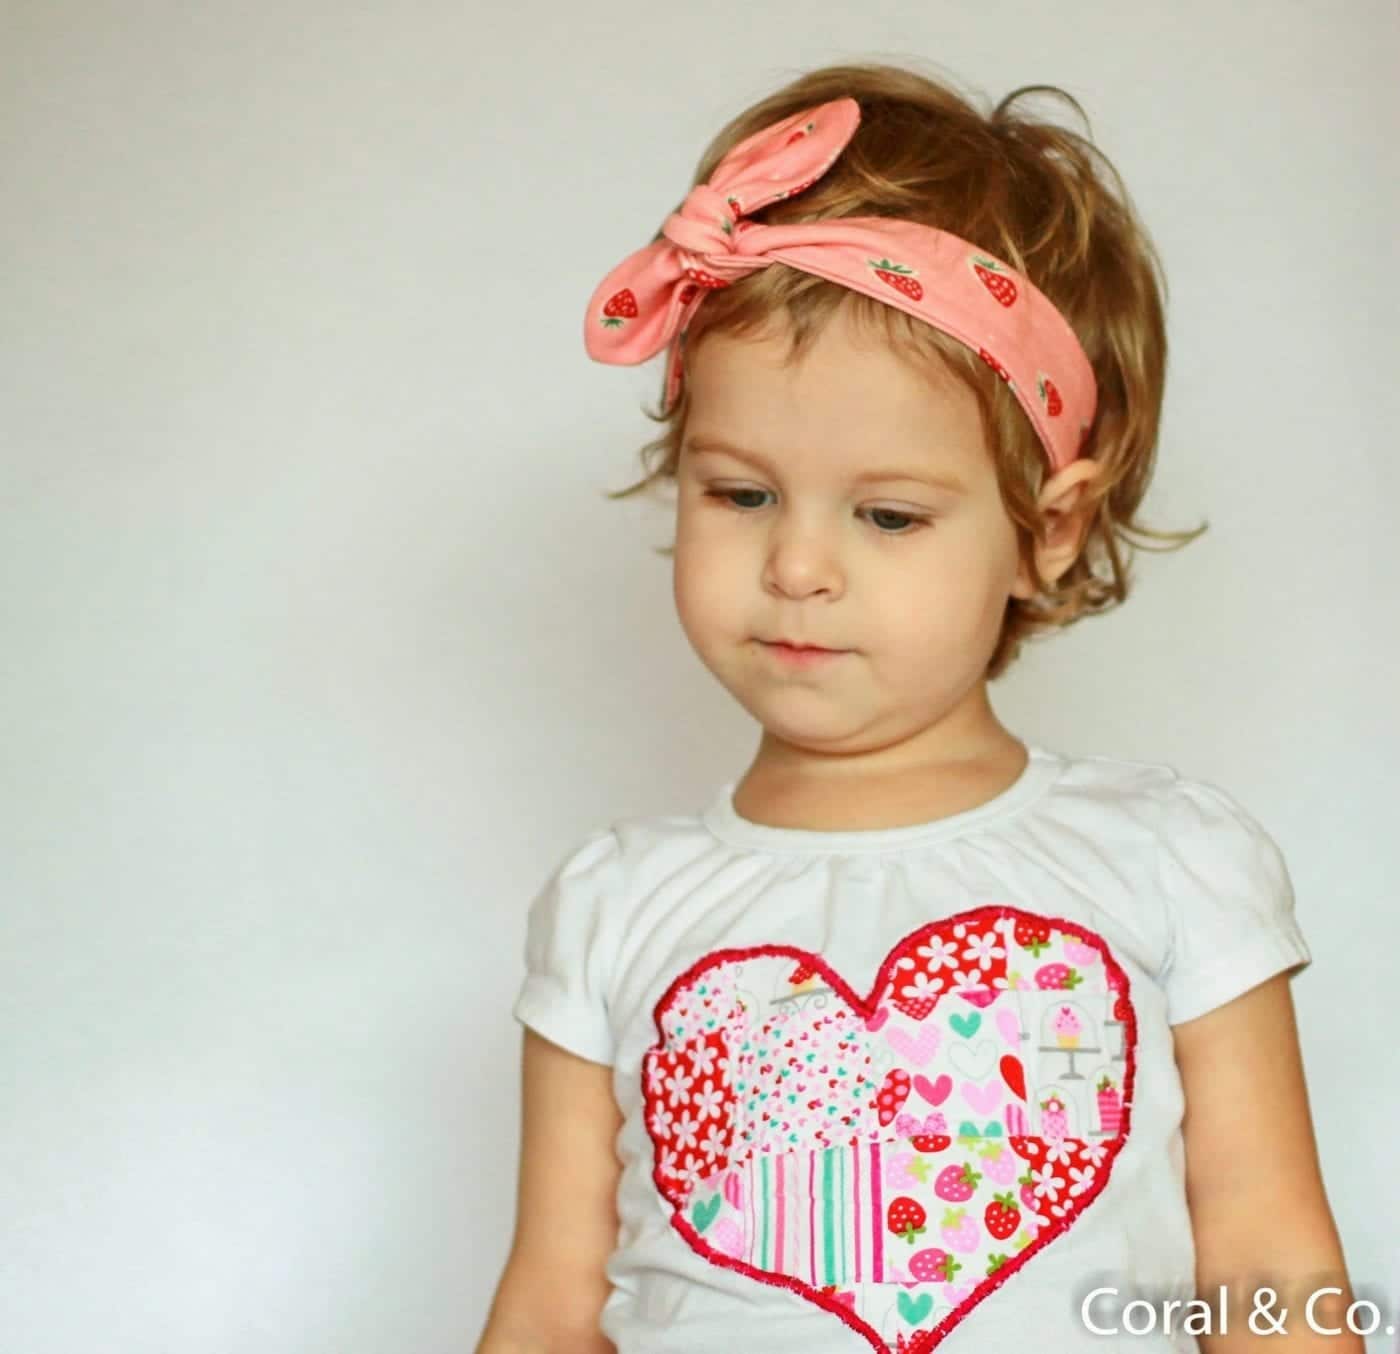
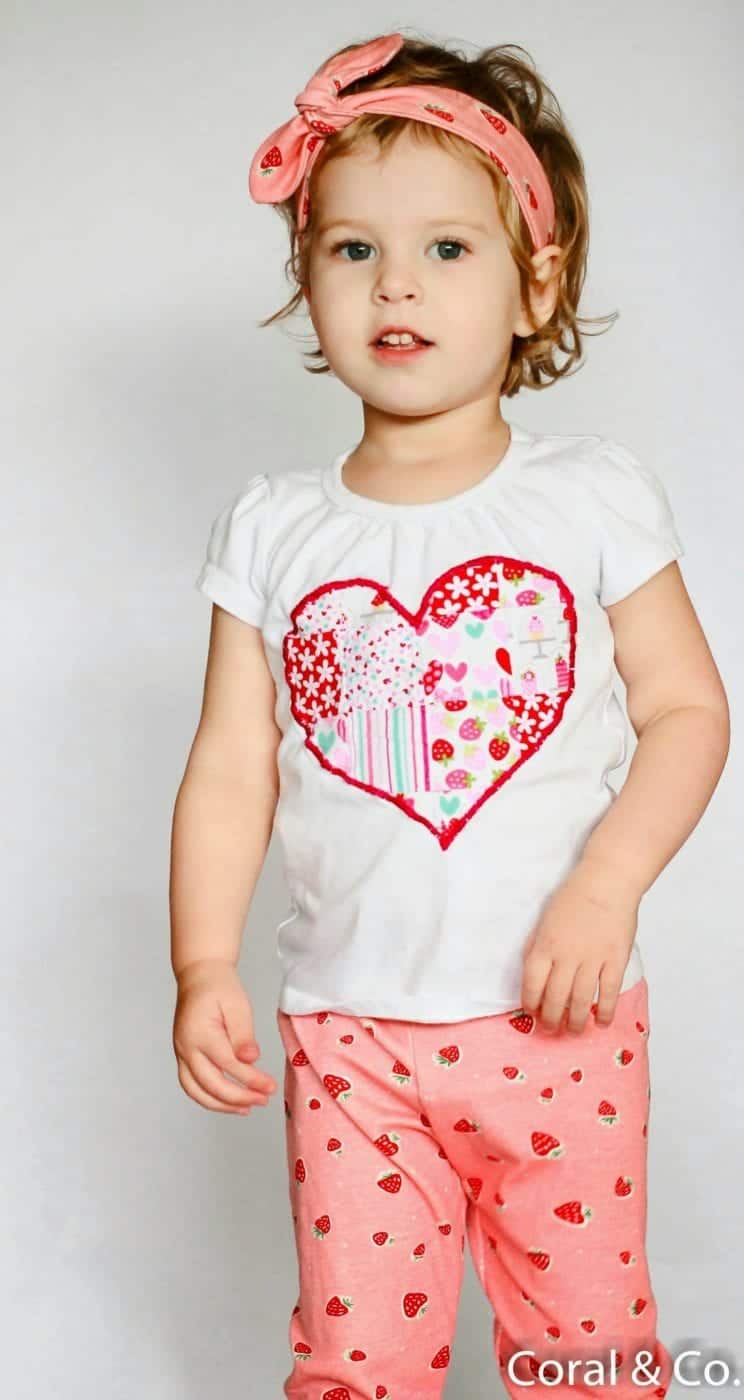
I used a little bit of the leftover strawberry knit I had from the Valentines Strawberry Leggings and Knot Bow Headband.  Ava loves this little set because it has elephants, and balloons, and all sorts of cute little animals on it, plus it is super comfy.  I am totally in love with Emily Isabella’s new line Homestead and feel some cute pajamas or t-shirts coming on.organic-knit-leggings-and-knot-bow-headband-coral-and-co cardigan 4 (1 of 1) cardigan 5 (1 of 1)aster cardigan with kam snapseveryday headband 1 (1 of 1)organic knit baby leggings and knot bow headband


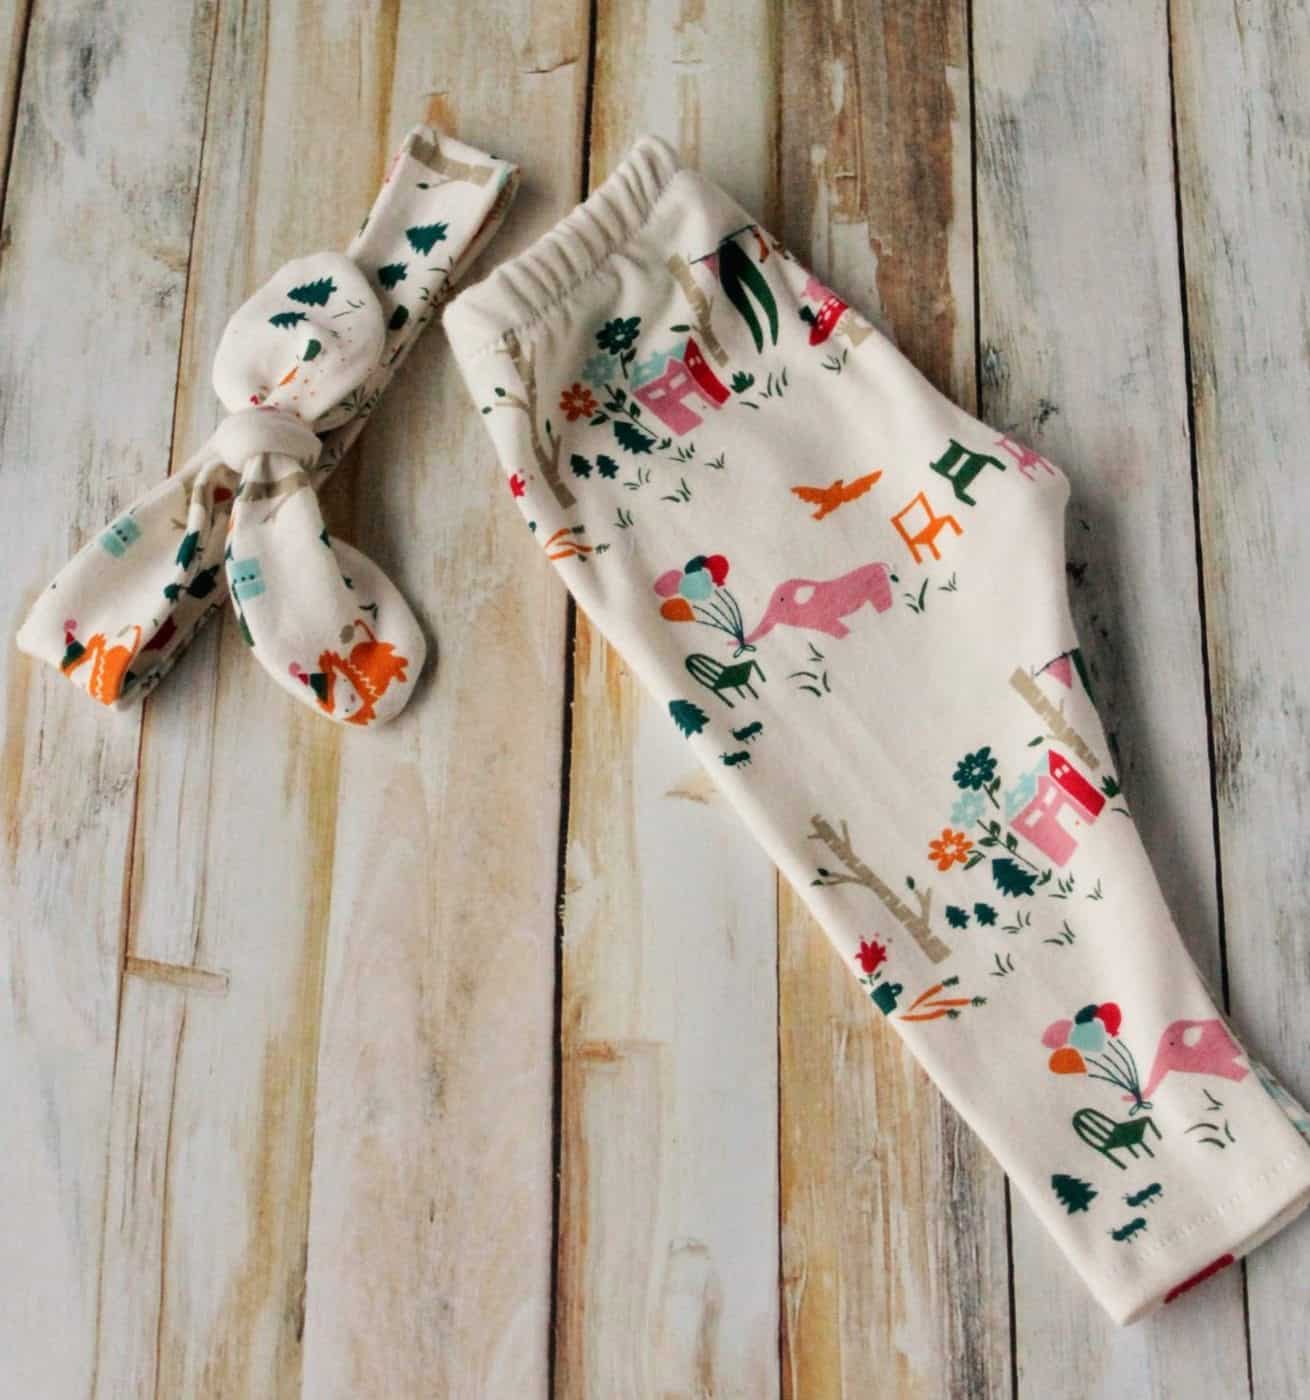
This post contains Affiliate Links but all opinions are my own 🙂

Kids baby, knits, summer

DIY Christmas Fabric Pennant Banner Tutorial – Easy pinked edges

Dec 17, 2015 · 1 Comment

DIY-Christmas-Fabric-Pennant-Banner-Tutorial

I have one more Christmas themed post for you!  A DIY Christmas Fabric Pennant Banner Tutorial: the QUICK way.  I used pinked edges instead of sewing and turning right side out.  This is a super easy project!  There are only a few steps and the funnest part is picking out the fabrics.  These sew up so quick, that you could make lots of these for Christmas gifts to give to family and friends.  I also made some coordinating Stuffed Christmas Ornaments that I posted about earlier this week.

You will need:

A few coordinating fat quarters

(Fabricworm has lots of Fat Quarter Bundles that are pretty cute.)

6 feet of matching ribbon

1 pair of pinking shears

Christmas-Flag-Banner-TutorialDIY Christmas Fabric Pennant Banner Tutorial 

  1.  Cut out your triangle pieces.  I made an 8 piece banner, so I cut 16 pieces.
  2. Place triangles wrong sides together and sew 1/4″ seam in a V-shape.  Starting at the top of the V, sew down the first side, pivot at the bottom and sew back up the second side.
  3. Using your pinking shears (*affliliate link), trim the sides of the V shape  This will be along the sides you have just sewn.  Just be sure not to cut into your seam and Do Not trim the top.
  4. Using a piece of ribbon, mine was 6 feet, line your triangles along the ribbon leaving 1 foot on either end for tying it up.  You will place your triangle pieces under the ribbon aligning the top edge of the triangle pieces with the top of the ribbon.  Pin in place.
  5. Then starting on one end, sew using a zig zag stitch down the length of the ribbon until you reach the last triangle.  At the end of the last triangle, backstitch in place and you are done!

DIY-Christmas-Decor

  Some of the fabrics I used for this project are from the Michael Miller Holiday Collection, I love how bright and cheery they are!

Ta Dot Confection

Nordic Holiday

Yule Trees

How-to-sew-a-Chirstmas-Banner
DIY-Christmas-Bunting-Tutorial

Merry Christmas and Happy Holidays!

Christmas, Free Tutorials, Holiday, Holidays, Sewing christmas

Best Girls Summer Sewing Patterns You Will Love to Sew

Aug 3, 2015 · 1 Comment

best-girls-summer-sewing-patterns

Girls Summer

Sewing Patterns for You!

School may be right around the corner, but it’s still sweltering here, so I compiled a list of the Best girls summer sewing patterns using both knits and wovens.   At the beginning of the summer, I realized it was time for a wardrobe update for the girls.  McKenna had absolutely no shorts that would fit her and t-shirts and tanks were slim pickings as well.best-girls-summer-sewing-patterns

It took me awhile between trips to the pool and lots of summer activities, but I finally got it together (its crazy hot here, so they will still get plenty of wear, yay!).


I really love sewing with knit fabric for the summer since they are comfy and cozy and easy to play in, although I do go with some wovens as well.   So I thought I would share some of the patterns I used for their summer wardrobe that are easy to sew, make fun basics, and are great for mix and match.

Nessie Top which I have sewn here and here.  I think this is a perfect staple summer shirt.  I like that it adds a little flair to a basic t-shirt.

Girls Knit Tank Top is easy to make, great with upcycled T-shirts, and of course is FREE!

Kid Shorts by Made great staple pattern with lots and lots of options.  Definitely some bang for your buck.

City Gym Shorts which I also made a few pairs here and here.  I love this pattern!  It is free and easy!  And turns out super cute with coordinating fabrics.

The Anywhere Dress has a simple shape and a few sleeve options.  I recently made this version, which is so perfect for slipping over swim suits during the hot summer.


Kids knits, roundup, summer

DIY Rag Quilt Tutorial with a Modern Touch

Apr 20, 2015 · 13 Comments

DIY Rag quilt tutorial with a modern touch. Quick and easy quilt made by coral and co.

Are you in a hurry to make a quilt?  If you answered YES then this DIY Rag Quilt Tutorial is for you!  It’s crazy simple and fail-free, they always come out cute and make the best gift for anyone of any age!  I made a baby sized quilt with a modern touch 35×26 inches, you can add more squares and make it as big as you want.

DIY Rag quilt tutorial with a modern touch. Quick and easy quilt made by coral and co.

WHAT YOU NEED:

12 – 10 inch squares of Heirloom Quilt Batting  (my favorite because it puckers)

12 – 10.5 inch squares of cotton fabric for the front

12 – 10.5 inch squares of cotton fabric for the back

Pencil

Glue Stick

Clear Ruler

Rotary Cutter

Self-healing Cutting Mat

Scissors

Here is the DIY Rag Quilt Tutorial:

Here are my squares!!!!  I used cotton fabric in Arizona by April Rhodes.

1)Now it’s time to sandwich your squares together.  I like to use stick glue on everything when I sew, it washes right out and does a great job at keeping your fabric from slipping while sewing.  Glue the front to your batting square then glue the back to your batting square.  You will be able to see the right side of your fabric, if you see the ugly side facing up try again.  Do this to all of your squares.

*Tip – You can also use flannel for batting on rag quilt.

*** Check out these MUST HAVE TIPS FOR SEWING WITH FLANNEL
How to quilt a rag quilt instructions and tutorial. This is the easiest DIY quilt ever! And sews up super fast!!!!

2)  I always draw a line to make sure I’m sewing straight.  Take your ruler and draw an X on all of your squares.

3) Sew right on top of your pencil lines.  Sew all 12 squares together.

4) Now figure out how you want your quilt to look.  Play around with your squares and put them in the order you want them in.

5) Start sewing your squares together using a 1/2 inch seam allowance.  Sew them together in rows until you have 3 rows.  See the picture below, you WANT the ugly seam to be on top of your quilt.  Notice the seam ripper in this shot?  🙂How to sew a rag quilt. Sew the seams together

6) Sew your 3 rows together.  It might be hard for your machine to sew through all of this fabric, it’ll make it easier if you open the seams while sewing so it ends up going through less fabric.  Using a new needle will help tremendously.

7) Now sew all the way around your entire quilt using a 1/2 inch seam allowance.

8) Now for the fun part!  Cut notches on all of the flipped up seams and the outer edges.  Cut a notch every 1/2 inch or so.  DO NOT cut into your stitches.  Be careful.  *

These are the BEST scissors ever!  They can cut through wire.

9) Inspect your quilt for loose strings and make sure all of the flipped up seams are not bunched up.How to sew a rag quilt. This is the easiest and fasted quilt you will ever make. I love this site

10)  Now for the best part.  WASH IT!!!!!!!  DRY IT!!!!  And now you have your Rag Quilt made from this easy DIY Rag Quilt Tutorial!

Let me know what you think!  Do you have any questions?  Just ask.

Thank you,

Jennie

Free Quilt Patterns, Learn How To Quilt, Quilt Patterns, Quilts baby blanket, free quilt

Classic Easter Style {Eyelet Lace + Splash of Pink}

Apr 17, 2015 · Leave a Comment

Happy Easter, a little late perhaps, but I still wanted to share with you our Easter fun.  This year I was just too busy to think about sewing Easter dresses.  This was the first year that I had bought Easter dresses and I really wanted to go with something simple and classic.Easter (1 of 1)We have several adorable children’s boutiques where we live, so I headed down to my favorite one and found these classic white eyelet dress on sale!  How perfect is that.  But of course the dress alone wasn’t enough.  I decided in true southern style to go with the whole she-bang.  Big pink bow, crocheted white cardigans, and patent pink bow sandals.  I just about couldn’t stand how sweet my girls looked in their Easter outfits.  eastersundaymommyandgirlsI took tons of photos since I have been working on my photography lately and really wanted to capture some great images.  I am pretty happy that I got some cute ones, but can I just tell you how hard it was to keep up with them while they were hunting eggs!  That’s why you don’t see too many of those.  Also it was pretty difficult to get them to stand together and pose like I had imagined in my mind before taking pictures, but I was able to get a few.  Patience and LOTS of pictures is definitely key when photographing kids.

Quick Sunday 2015 (37 of 38)

I think this might be my favorite one!Quick Sunday 2015 (25 of 38)

Quick Sunday 2015 (34 of 38) Quick Sunday 2015 (36 of 38)It was such a lovely Easter and it was so fun watching the girls discover all of its joy.  I felt truly blessed and just wanted to share.

block party easter

Liberty + Seersucker Spring Style

Apr 14, 2015 · Leave a Comment

Recently I have been seeing so many beautiful items made with Liberty of London fabric.  Everytime I see some beautiful project made with Liberty I just melt.  The patterns are so packed with vibrant color and timeless floral prints that always have a modern edge.  Not to mention how soft and dreamy the fabric itself is.Liberty-of-London-and-seersWhile browsing the internet I came across the Angelfish Liberty Boat Shoe which paired Liberty and Seersucker and I fell in love.  I am completely obsessed with seersucker (see this post) and what makes more sense than a classic seersucker with an awesome liberty print.  Bliss.  I see a Liberty and Seersucker project coming up in my near future!

So I rounded up some of my favorite items on the web from both of these worlds.  I found this gorgeous Liberty Book of Home Sewing that has some beautiful projects made with beautiful Liberty prints.  And who doesn’t want to add a pop of Liberty with the Elise Liberty Ballet Flat, perfect for summer.

In classic southern style I found this Monongrammed Seersucker Wristlet Key Fob on etsy.  Which would pair perfectly with the Liberty Belted Mini Bag.  I love the splash of floral of the sash, I will totally be making one for myself!

And this Liberty of London Bracelet definitely had me at hello!  What a perfect way to rock some Liberty.  So beautiful.

I headed over to browse Fabric.com and found awesome Liberty of London Amalfi Swim Knit Thorpe.  I L-U-V the colors in this print.  There are also some great new prints just in for the season.

Here are some more Liberty of London DIY projects from around the web.

DIY Liberty of London Blog sewing projects

Clockwise from top;

1.  Vintage Liberty Wrapping from Facil Y Sencillo

2.  Liberty Floral Geranium Dress from CINO

3.  Zipper Book Clutch Tutorial  from See Kate Sew

4.  DIY Fabric Headband from The Polka Dot Chair

5.  Pencil Case from Flossie Tea Cakes

6.  Sewing with Liberty Tips from Olivia Jane Handcrafted

7.  Book Bag from Bear, Dolly, and Moie

8.  Cloud Pillows from Filapi

9.  (Center)  Baby Romper from Un Samedi

You can tons more inspiration from this great board on Pinterest.

*Some affiliate links are included in this post, but this is all my favorite items and style!

block party

Star Flower Quilt Block Tutorial

Apr 7, 2015 · 7 Comments

How to sew a starflower quilt block tutorial from Coral and Co. Easy DIY Quilt Block.

This is a great quilt block pattern for your next quilt!  It’s very easy.

WHAT YOU’LL NEED:

This recipe will give you 2 – 12.5 inch quilt blocks!
 
-8 solid color squares  (I used light pink) 3.5″ x 3.5″
-8 solid color squares (I used light pink)  4″ x 4″
-16 Colorful patterned squares (8 colors, 2 of each color) 4″ x 4″
-rotary cutter & mat
-pencil
-iron
-ruler

Learn How to Quilt Series

  • How to Chain Piece Quilt Blocks
  • How to Use a Rotary Cutter and Mat
  • How to Choose the Right Machine Quilting Needle
  • How to Use Half Square Triangle Paper

Free Quilt Patterns

  • Swiss Cross Quilt Pattern
  • Simple Squares Quilt Pattern
  • Ribbons and Bows Quilt Pattern
  • Four Square Quilt Pattern
  • Safari Party Squared Quilt Pattern
  • Heart Block Mini Quilt
Starflower quilt block tutorial. How to make a starflower quilt block from Coral and Co.

1) Keep all of your colors together.  Place them in a circle to see how you’d like them to be on your quilt block.

coral12

2) Remember…you will have 2 sets (2 quilt blocks).  Separate your 8 patterned pieces.  Place them together in sets.  Honestly…you can’t mess this part up.  Trust me, it will all work out in the end!  Do the same with your solid squares and your 8 patterned 4 inch squares.

coral13

3) Draw a pencil line from point to point.  This line will be your guide for sewing!  I use this clear ruler for all of my cutting.

coral15

4) Sew on each side of your line always keeping the pencil line on the right side of your presser foot.5) Cut your square right on the pencil line.

6) Press open with a hot iron.

7) Cut off those little tips to keep it square.

coral16

8) Lay your Fabric pieces together to form a star!  TIP…your 4 pieces with NO solid fabric will all meet in the middle.

9) Starting with the top row.  Take the middle two blocks on the top row, place them right sides together and sew using a 1/4 inch seam allowance.  

Then sew the 3.5 inch solid squares onto each side.

10) PRESS all of your rows.  You will have 4.  I hope you have 4.  🙂

11) Lay your 2 center rows together being very careful matching your squares.  Then press open.  Do the same with the bottom and top rows.

How to sew a starflower quilt block tutorial from Coral and Co. Easy DIY Quilt Block.
Starflower quilt block tutorial. How to make a starflower quilt block from Coral and Co.

Have fun and do not be afraid to use your seam ripper!  You can make pillows with this block or make a bunch of blocks and make a pretty quilt.  Let me know if you have questions!

Learn How To Quilt, Quilt Blocks, Quilts HST

Valentines Day Outfit – Strawberry Leggings and Knot Headband

Mar 3, 2015 · 3 Comments

Valentines Day Outfit with Organic Strawberry Leggings and a Patchwork Heart T-shirt. Made by Coral & Co. (2 of 14)

What do you want for Valentines Day?  Strawberries of course!!!

Ok, so we are past Valentines Day but I love these strawberries so much and the photo’s were already shot so of course I had to show!Valentines Day Outfit with Organic Strawberry Leggings and a Patchwork Heart T-shirt. Made by Coral & Co. (9 of 14)
Yay, for knot headbands.  Paired with the strawberries it gives Ava a little more of a girly look and makes me want to kiss her little cheeks all over.  And the leggings are the one and only, Go To leggings (what else could they be???).

The strawberries are from Fabricworm (it looks like they are out of stock) and are the most ridiculous kind of soft.  They are organic knit and have just a little bit of stretch to them.  On a side note, I am uber excited to see some of the new knits prints they have coming out..  Dreamy.Valentines Day Outfit with Organic Strawberry Leggings and a Patchwork Heart T-shirt. Made by Coral & Co. (3 of 14)

You might recognize the T-shirt from my tutorial.  I thought I would take some better pictures of it since this is the last year the girls will be able to wear it.  sniff.Valentines Day Outfit with Organic Strawberry Leggings and a Patchwork Heart T-shirt. Made by Coral & Co. (2 of 14)

Fabric:  Organic Knit Strawberries from Fabricworm

Leggings:  Go To Leggings *Affiliate Link (but totally my fav)

Patchwork Heart T-shirt:  Tutorial and Template

Knot Headband:  Pattern Here

Kids spring, valentines day

KCW “Flashdance” DIY kids sweatshirt upcycle

Feb 7, 2015 · 3 Comments

kids-sweatshirt-upcycle-coral-and-co

KCW Dance Sweatshirt Upcycle (2 of 2) (1)

Do you remember the awesome 80’s movie Flashdance where she dances, kicks, and sweats her way through the whole movie in a ratty cutoff sweatshirt? Me too. And I loved it, so much that I had to do a DIY Kids Sweatshirt Upcycle.

KCW Dance Sweatshirt Upcycle (1 of 2) (1)

I know, I know its got about the cheesiest of plot lines but who doesn’t like cheesy dance movies (can you say “Save the Last Dance” anyone?)? I was totally the kid who was trying to imitate every step of “Dirty Dancing” as a tween. Only the dance steps, I swear.

DIY Sweatshirt Upcycle

Ok, so you get it. I love dance movies, and even though my kids only dance movie experience involves a certain mouse named Angelina in a ballet costume, I couldn’t help myself. I upcycled my husbands old sweatshirt into a kid friendly “Flashdance” outfit, added a cute pocket with a this trendy fabric from Spoonflower and styled it with a knot headband out of the same fabric.
I didn’t bother hemming any of it since this was the look I was going for.  Plus, it makes it that much quicker to sew.

I’m going to admit I was pretty geeked out seeing my kid rockin some 80’s style.  I may have to keep this up.  Next week I will add a pattern and tutorial for all of you to have fun creating this look.

Kids upcycle

Girls Free Knit Coat Pattern and Tutorial

Feb 5, 2015 · 3 Comments

girls-knit-coat-pattern-and-tutorial-by-coral-and-co

It is still Kids Clothes Week and I have my upcycled look to share with all of you.  PLUS a free pattern and tutorial.  I used a quilted knit fabric for this project, but it would be great with a fleece or french terry cloth, or even an old sweatshirt.  This project is pretty quick (which is really the only kind I like) and turned out adorable.

Here’s the upcyle:

girls-free-knit-coat-pattern-by-coral-and-co

I’ve included an image of the pattern for you to see.  You can find the pattern download at the bottom of the page.

free-knit-jacket-pattern-for-girls=by-coral-and-co
free-jacket-pattern-girls-coral-and-co

You might notice the jacket front opening has square edges in the picture.  I decided to change it to a rounded corner after I started sewing to make attaching the binding simpler.

Don’t pay attention to the binding around the jacket in this picture.  It should not be attached yet, I forgot to get a picture of sewing just the arm and side seam.

quilted-knit-coat-sewing-pattern-coral-and-co
how-to-attach-binding-to-knit-coat-coral-and-co
attach-binding-to-knit-coat-by-coral-and-co

You will need 2 pieces of binding 9″ by 2″.  Fold binding in half lengthwise and iron, then fold in edges in to meet the middle fold and iron.  Then sew using 1/4″ seam on short ends.For the jacket binding you will need approx. 65″ x 2″.  I was using fabric in my stash and had to piece together three strips.  Start sewing just like above at the back middle.  Sew around the edge of jacket and when you reach the starting point, sew both pieces of binding together and trim away extra fabric.

free-knit-jacket-pattern-and-tutorial-for-girls-coral-and-co

Find the Knit Coat Pattern Template in the Resource Library.

Free Patterns, Kids

Free Pillowcase Dress Top Pattern with PDF Download

Nov 21, 2014 · 8 Comments

free-pillowcase-dress-pattern-a-line-coral-and-co

Hey ya’ll!  I’ve been getting my pattern drafting groove on lately and I have one more FREE Sewing Pattern for you.  This time I have a sweet A-line pillowcase top.  I love how pillowcase tops are so easy to sew, but I am not a fan of how baggy and boxy they can be.

free-pillowcase-dress-pattern-a-line-coral-and-co

 So, I drafted an A-line to give it a little shape and added a sweet ruffle.  You can easily take this from a top to a dress by adding your desired length.  This dress is a quick sew and you can even personalize it by adding monogram like I did.

free-pillowcase-dress-pattern-with-pdf-download
pillowcase-dress-pattern-free-download

Free Pillowcase Dress Pattern Tutorial

  1. With Right Sides Together, straight stitch down the sides of the dress
  2. Sew ruffle strips together at the shorts with right sides facing each other.
  3. Fold joined ruffle strip together lengthwise with the wrong sides facing each other.
  4. Matching the side seams align the raw edges of the ruffle strip and the dress.  The right side of the dress will be facing the right side of the ruffle strip.  The form fold or ruffle strip about 1 inch in width.  Repeat every two inches or so.
  5. Using a 1/2″ seam ruffle strip to the bottom of the dress.  Overcast or zig-zag stitch if preferred.
  6. Using single fold bias strip tape, pin, and sew the bias tape to the armhole with a 1/4″ inch seam allowance.  Bias tape and dress will be right sides together at this point.
  7. Fold the bias tape to the inside of the dress (wrong sides together) so that there is not any bias tape showing on the outside.
  8. Using a 1/2″ seam allowance straight stitch along the armhole being sure to catch the bias tape in the seam.
  9. Fold the top of the dress over 1/4″ to the inside and press.
  10. Fold the top of the dress over another 1″ on the inside and press.  Straight stitch 7/8″ from the top edge of the dress to form the casing for the dress.  Repeat for both sides of the dress.
  11. Attach a pin to the ribbon and pull through the casing.
  12. Leave enough ribbon on the edge of the shoulder strap and cut the ribbon to the desired length.pillowcase-dress-pattern-free free-pillowcase-dress-pattern girls-pillowcase-dress-pattern


***** You can find the A-line Pillowcase Top Pattern in the Resource Library.


Apparel, Baby Sewing, Beginner, FREE Baby Sewing Projects, Free Patterns, Kids, Sewing kids

Serging with Cuddle Minky

Oct 7, 2014 ·

how to serge minky fabric

When a friend of mine called me last week to ask how in the world she was supposed to get minky to behave in the serger, she reminded the Cuddle Minky has a different set of rules in the serger then in the sewing machine.  I like to think of minky as having the properties of knits with a little added slipperiness of satin. 

How to serge with minky fabric

For the purpose of this tutorial I focused on Dimple Dot Cuddle Minky since it is the most often used.  For regular Cuddle Minky the same techniques can be applied although sometimes it has slightly less stretch.  If you would like to use Rose Swirl Minky I would recommend either trimming the nap where you are serging or loosening the presser foot a bit more.

  1.  Minky has LESS stretch on the grainline, or the direction of the Selvage (the self finished edge of the fabric running down two sides).

  2.  Minky has MORE stretch going cross ways or perpendicular to the grainline.  Also known as cross stretch.

  3.  Minky is a knit and will require a higher Differential Feed (DF) when sewing on a serger.  I use either 1.5 for sewing along the selvage and 2 for sewing on the cross stretch.

  4.  Since Minky is a thicker fabric, loosening the Presser Foot a bit will allow the minky to stretch less as it is feed through the machine.s

  5.  Use a longer stitch length.  Set on 3 for one layer or two layers with the nap on the inside and 4 for two or more or with the nap facing the outside.

  6.  Start with your knit settings and adjust from there.  I use my regular knit settings for sewing minky the selvage direction.

  7.  When sewing with cotton and minky place the minky fabric on the bottom layer allowing te feed dogs to “grab” the minky fabric to prevent excess stretching.

  8. To sew cotton and minky together you will need a slightly smaller size piece for minky then cotton because of the fabric stretching.


Below:  Single Layer Dimple Dot Cuddle Minkyon Selvage Direction  at Regular Knit Settings

Tension:  3.5 – 3 – 2 -2

DF 1.5 Stitch Length 3

serge-minky-selvage


  1.  Single Layer Dimple Dot Cuddle Minky on Cross Stretch at Regular Knit Settings

Tension:  3.5 – 3 – 2 -2

DF 1.5 Stitch Length 3

skipped-stitches-serging-cuddle

  1.  Single Layer Dimple Dot Cuddle Minky on Cross Stretch with increased needle and looper tensions

Tension:  3.5 – 4 – 3 -2.5

DF 1.5 Stitch Length 3

serging-correct-tension-minky

  1.  Double Layer Dimple Dot Cuddle Minky on Cross Stretch with nap facing together.

Tension:  3.5 – 4 – 3 – 2.5

DF 1.5 Stitch Length 3

  1.  Single Layer Dimple Dot Cuddle Minky on Cross Stretch with nap facing outward

Tension:  3.5 – 4 – 3 -2.5

DF 1.5 Stitch Length 4

serging-double-layers-minky

The picture below shows the difference between the cotton and the minky being on the bottom layer next to the feed dogs.  By placing the minky next to the feed dogs, it “grabs” more of the fabric, which allows it to stretch less.  When the minky is placed on top it is allowed to stretch more creating a curved “wonky” look.

minky-next-to-feed-dogs

The next picture shows how a lower differential feed setting can  make the cotton pucker when sewn with minky.  A higher DF setting can fix this.  Also you can see in this picture how the minky has stretched and pulls on the left and how on the right it is not pulling.

For all pictures below  except the bottom right. I cut the minky an inch shorter then the cotton fabric.  You can see on the bottom right how it still stretched when cut the same length.

minky-next-to-feed-dogs

correct-differential-feed-serging-minkyHere’s a great image for you to save on Pinterest 🙂  Now go sew some minky!

Pinterest-serging-with-minky

Beginner, Free Tutorials, Minky Sewing Projects, Tips and Tricks minky, serger

Girls 4th of July Sewing Patterns

Oct 2, 2014 ·

4th-of-july-sewing-patterns

The 4th of July will be here soon and there are some great Girls 4th of July Sewing Patterns that are perfect for sewing your red, white, and blue!4th-of-july-sewing-patterns  Starting at the top left going clockwise, here is the list of my 4th of July pattern roundup:

  1.  Anchors Aweigh Sailor Dress by Peek-a-boo Pattern Shop

  2.  Make it Yourself Beach Bag by 4 Girls Designs

  3.  Sailor Shorts by Peek-a-boo Pattern Shop

  4.  Seaside Sailor Hat by Tie Dye Diva

  5.  Gidget Bathing Suit by Ruby Jean’s Closet

  6.   Firecracker Dress by GYCT Designs

  7.  Anchors Aweigh Sailor Romper by Peek-a-boo Pattern Shop

  8.  Sailor Skirt by Amelie Clothing

  9.  Junebug Dress and Top by CINO

  10.  Sailor Pants by Dans La Lune

  11.  Sweet Cheeks Peasant Top Pattern by Ruby Jean’s Closet

12.  Seaside Sailor Dress by Tie Dye Diva
You can also check out my Free 4th of July skirt pattern and 4th of July t-shirt SVG!
girls-4th-of-july-sewing-pattern
Fourth-pf-july-free-svg-fileYou can also check


4th of July, Apparel, Holiday, Holidays, Kids, Patriotic Sewing 4th of july, roundup

How to Sew Blanket Binding on a Flannel Baby Blanket Tutorial

Oct 2, 2014 ·

How-to-sew-blanket-binding-tutorial-easy-diy-baby-blanket-tutorial-sewing-for-baby-coral-and-co

Did you ever wonder How to Sew Blanket Binding on a Flannel Baby Blanket?

how-to-sew-blanket-binding

Well, I have the answer!  Today’s tutorial is not just How to Sew Blanket Binding on a Flannel Baby Blanket Tutorial but also how to make my very favorite kind of diy flannel receiving blanket.

how-to-sew-satin-blanket-binding

Flannel is awesome.  It doesn’t wrinkle as much as regular quilting cotton, it is super soft, a natural fiber, and just awesome.  Oh yeah, I said that before.  And adding Satin Blanket Binding to a baby blanket makes it super awesome!  And super chic.  So win-win.  Plus all your friends will be super impressed that you made your sew your own baby blanket.

sew-blanket-binding-tutorial

Did I mention that my almost 4 year old still carries around her baby blanket?  Yes, it’s because of the satin edge.  There is something so soothing about satin to both babies and toddlers.  *Edit – my daughter is now 7 years old and is STILL carrying around this blanket!!!!  Plus I love the pop of color it adds!

how-to-sew-satin-blanket-binding

You can also make a matching baby bib that any new mama would love to have!

So here’s how to sew blanket binding to a baby blanket, a super easy tutorial:

Supplies for Satin Blanket Binding Flannel Receiving Blanket

  • 1 Package Wrights Satin Blanket Binding
  • 1 Yard Flannel Fabric for the Front
  • 1 Yard Flannel Fabric for Back

** You may also find These MUST HAVE TIPS FOR SEWING WITH FLANNEL FABRIC helpful

***I used fabric from Riley Blake Designs for this project.  I think they have some of the cutest fabrics for babies.  This print is sold out now but there are still lots of great prints you can see here.

sew-flannel-baby-blanket

How to Sew Satin Blanket Binding:

  1.  Lay one layer of fabric over the other with Wrong Sides Together (WST) with the outer edges aligned.
  2. Open the blanket binding and lay flat next to the raw edge of the fabric.
  3. Slide blanket binding under the raw edge of the fabric until the raw edge meets the middle of the satin.
  4. Fold blanket binding in half and pin in place to secure.
  5. Place last pin 1/4″ from the corner.  This will help with marking your mitered corner.lay-flannel-fabric-wrong-sides-togetherhow-to-fold-satin-blanket-binding-on-fabric

How to Sew Blanket Binding and Miter the Corner

  1. On the next side of the fabric, place the raw edge of fabric in the middle fold of blanket binding so that a triangle forms on the corner of the blanket binding.
  2. Press right side of the blanket binding triangle down into the satin binding fold or crease.
  3. The satin blanket binding should now form an arrow or point with the edge of fabric against the fold.
  4. Fold bottom of the satin blanket binding under and pin securely in place to form a mitered corner.
  5. Repeat the above steps for the remaining 3 sides, stopping at the last corner.

How to Make Corners on a Blanket Tip

*** Tip – The mitered corners of blanket binding can seem a bit tricky, so make sure to really tuck the inside fold all the way down to the crease.  I also look on the underside to make sure that the corner folds are lined up on both top and bottom so I don’t miss one of them when I zig-zag stitch the corner.  I also like to pin a lot and take them out slowly as I sew near them.  It just helps me to keep everything in place.  Repeat for the remaining 3 sides, stopping at the last corner.

how-to-make-a-mitered-corner-on-blanket-binding
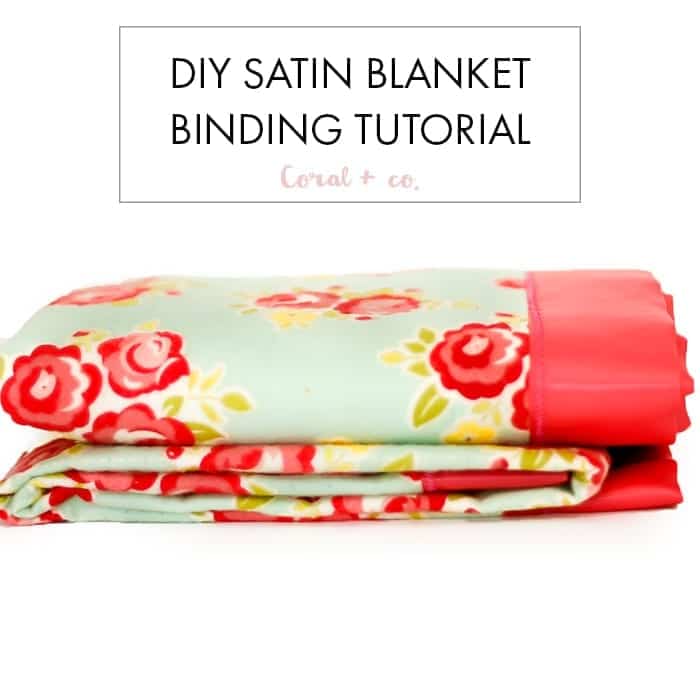
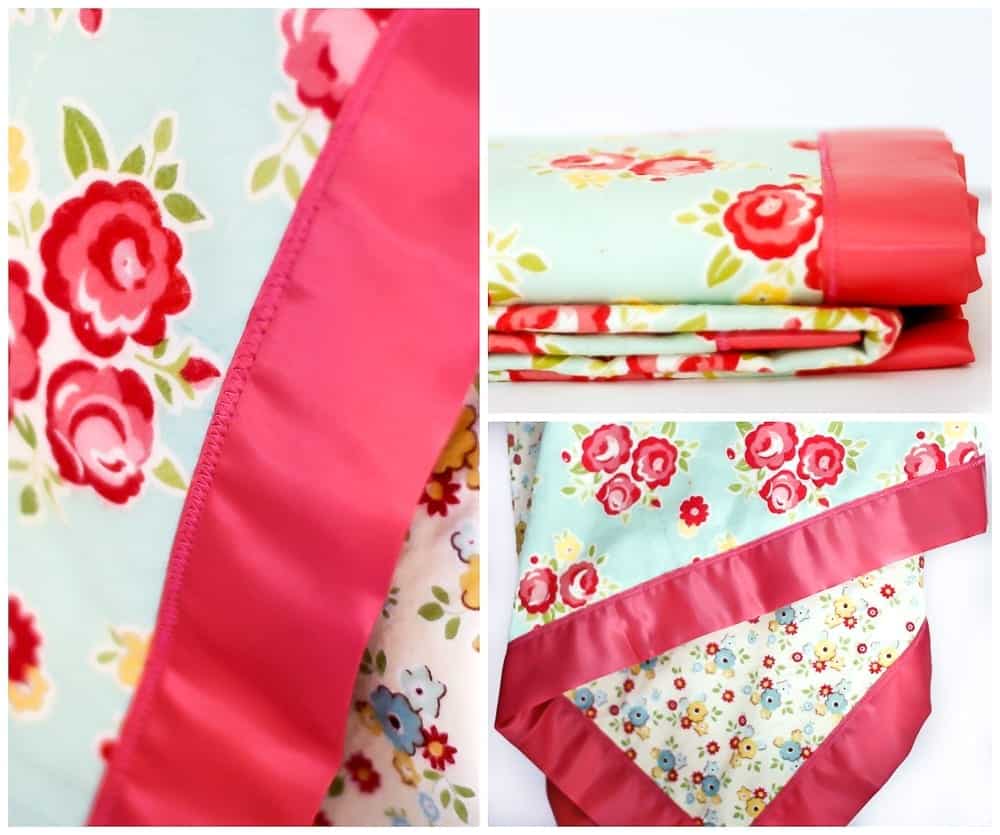
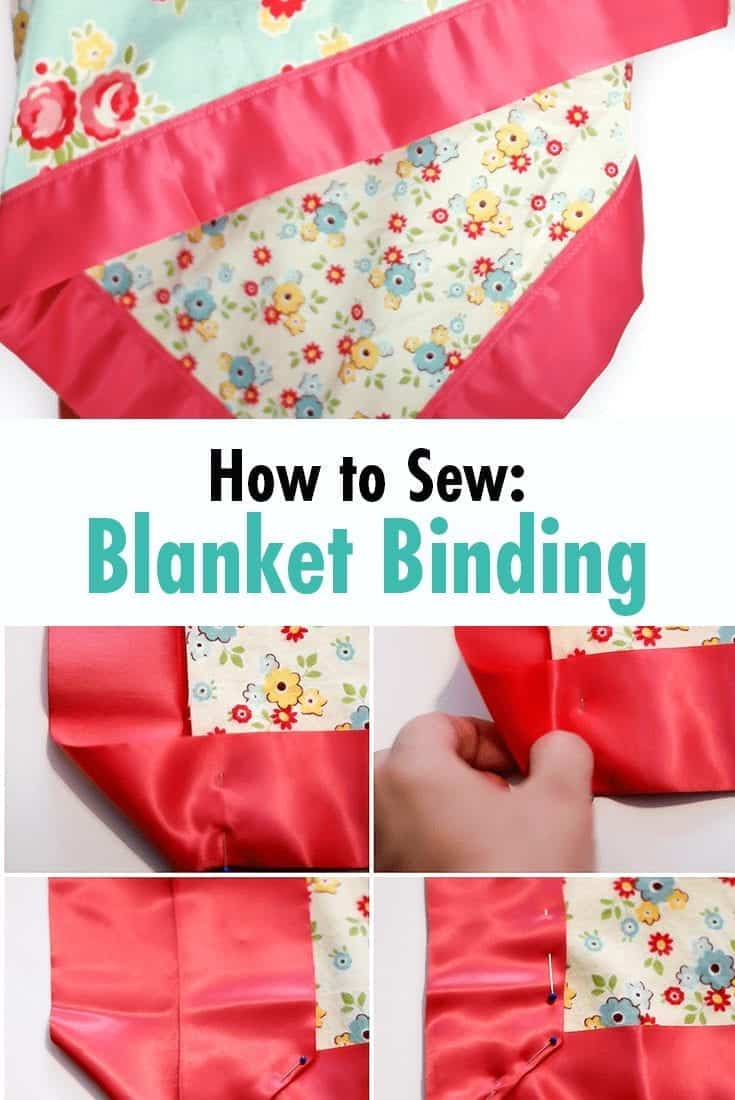
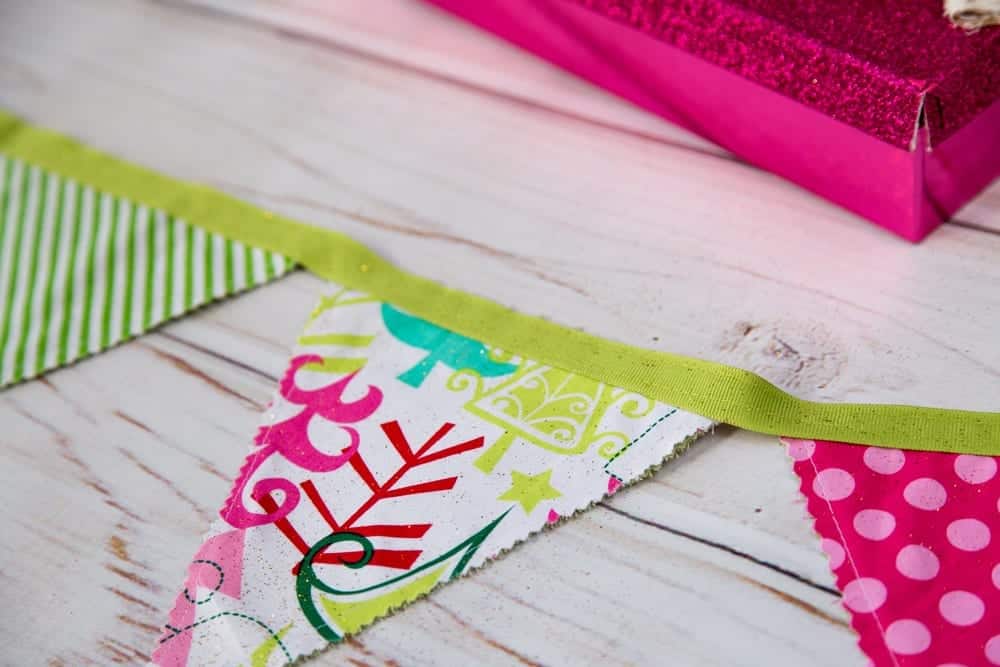
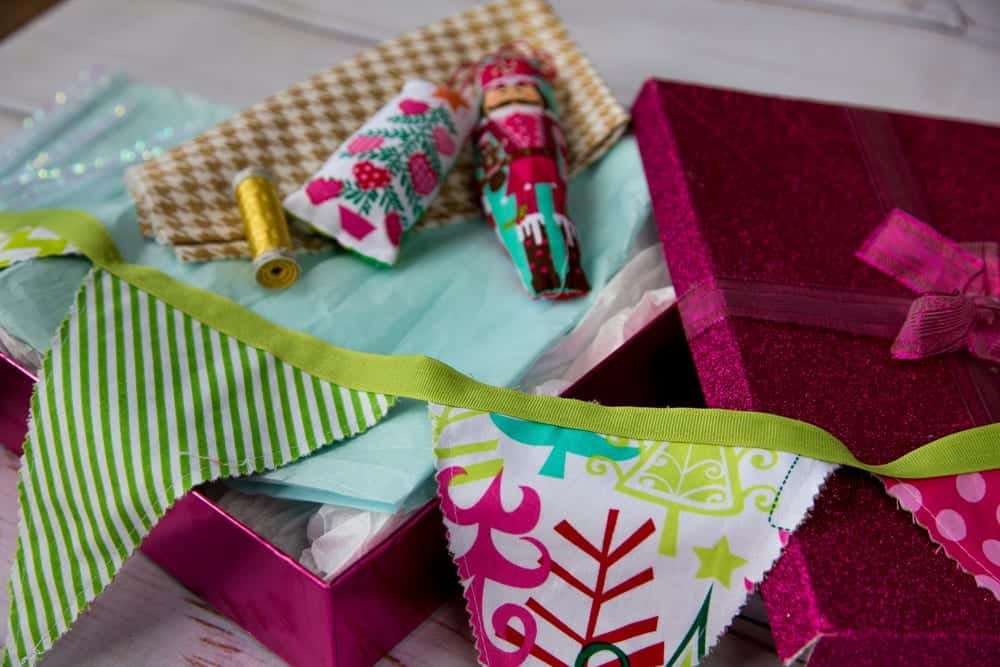
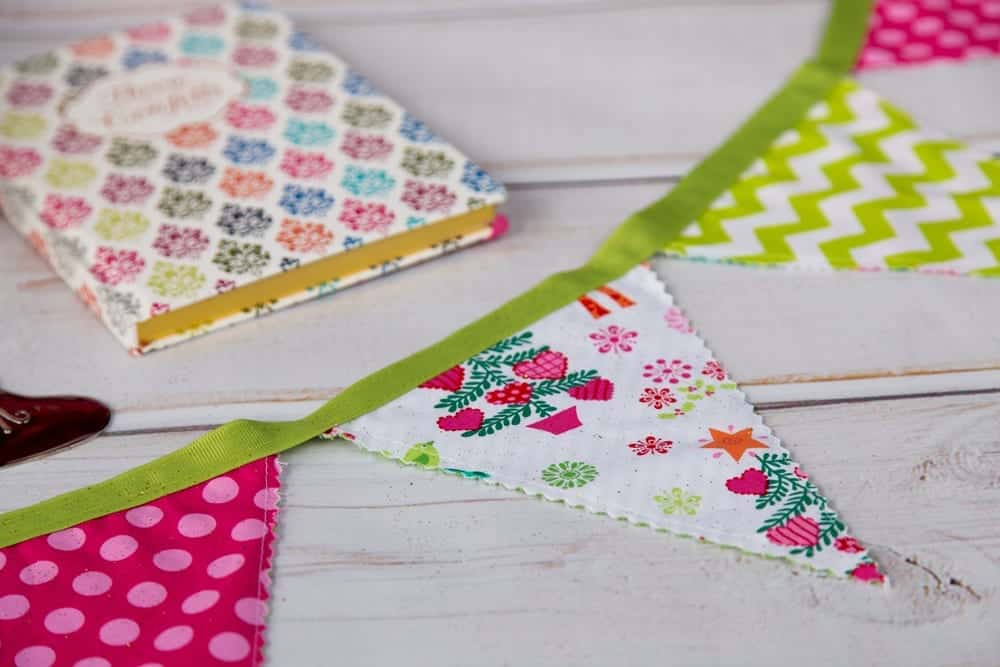
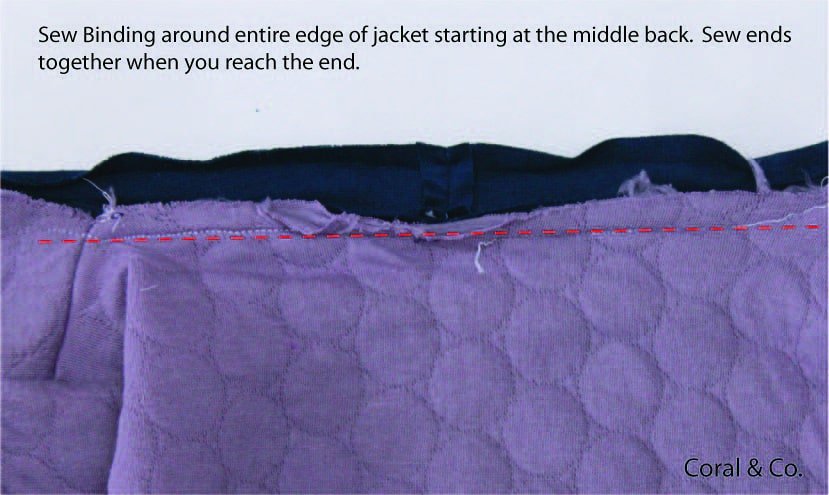
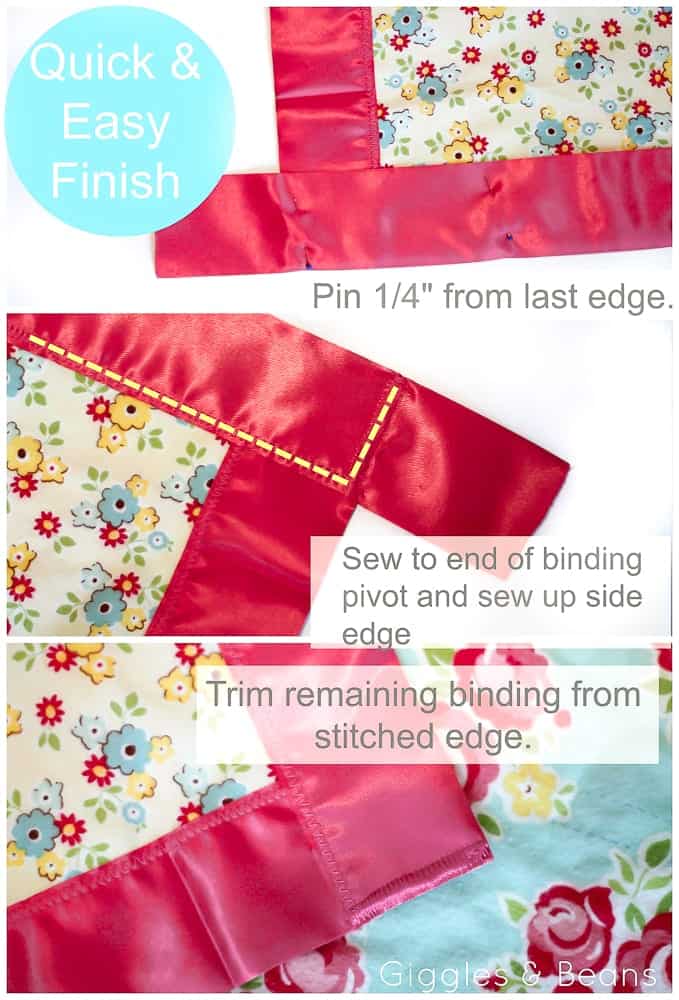
How to Sew Zig Zag Stitch on Blanket Binding
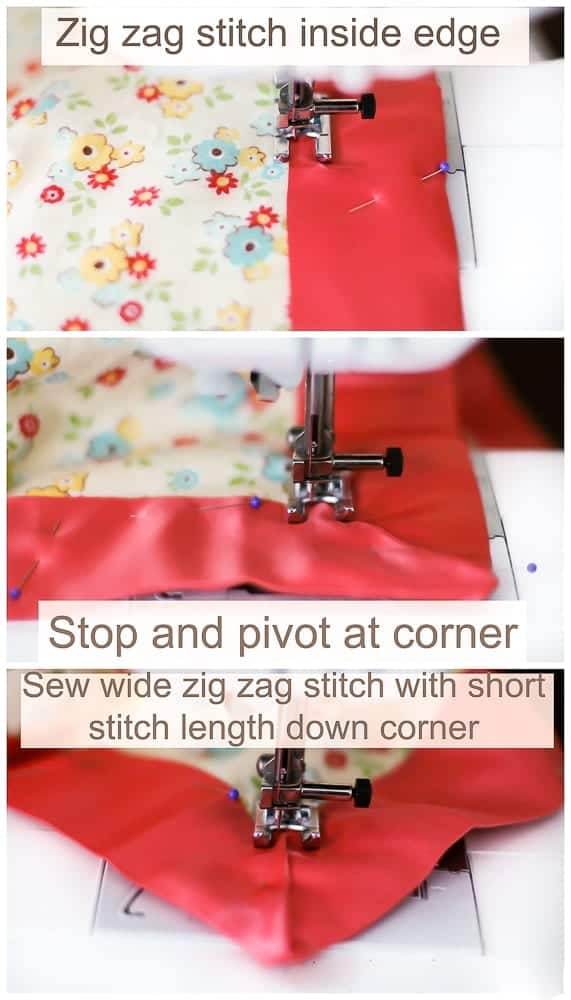
  1.  Sew a wide zig-zag stitch down the inside edge of the satin blanket binding, so the stitch catches both the blanket binding and the flannel fabric.
  2.  Stop and pivot at the corner.
  3. Sew a wide zigzag stitch with a narrow length down the fold of the mitered corner.
how-to-sew-mitered-corner-on-blanket-binding

***Tip – Going down the sides  I use a wide zig zag stitch with a medium to long stitch length (between 3 and 5).  For the corners, I narrow the stitch length to .05 or 1.  I also like to backstitch on a straight stitch setting to lock it in place.  I cut the threads after each corner and start again down the side.  You can also just pivot it and sew back down the corner to the inside, but I like how it looks just going over the corner once.  Repeat for the rest of the blanket binding until the last corner.

How to Sew the last edge of Satin Blanket Binding

  1. When you reach the last corner of the satin blanket binding pin 1/4″ from the edge of the corner.
  2. Sew to the pin and pivot at the pin.
  3. Sew up the edge of the blanket binding with a narrow and wide zigzag stitch.
  4. Trim the remaining blanket binding from the edge being sure not to cut through stitching.  Extra satin fibers will come off in the wash.
how-to-finish-blanket-binding-corner

DIY Baby Blanket with Satin Trim

how-to-sew-blanket-binding

There are other ways how to sew blanket binding edges, but I like how quickly this finishes up with no math or measuring involved!  Be sure to cut just to the side of the stitches and not on the stitches 🙂  I also lock stitch here with a straight stitch to secure in place.

how-to-sew-mitered-corners-with-blanket-binding

And there you have it!  Satin edge baby blankets and receiving blankets with flannel make a quick and easy baby shower gift that is classic yet chic.

Here are some other DIY baby gifts ideas that would make the perfect present for any new baby.

  1. 50+ Cutest Baby Sewing Projects
  2. Basic Baby Hat Sewing Pattern
  3. Sherpa Fleece Baby Blanket Tutorial
  4. Minky Fitted Crib Sheet Tutorial
  5. DIY Baby Leggings
  6. Free Baby Bib Pattern
  7. Knot Bow Headband
  8. DIY Fabric Diaper Caddy
  9. Top Knot Baby Hat Pattern

Some other great diy baby blankets and baby quilt ideas and patterns –

  1. Simple Minky Baby Blanket
  2. Ruffle Baby Blanket
  3. Swiss Cross Baby Quilt Pattern
  4. DIY Knit Swaddle Blanket
  5. Simple Squares Baby Quilt Pattern

Baby Sewing, Beginner, FREE Baby Sewing Projects, Free Tutorials, Sewing, Tips and Tricks baby, baby blanket

  • « Go to Previous Page
  • Page 1
  • Interim pages omitted …
  • Page 15
  • Page 16
  • Page 17
  • Page 18
  • Go to Next Page »

Primary Sidebar

  • Home
  • Blog
  • About
  • Featured Elsewhere
  • Contact

Copyright © 2026 Coral + Co. on the Seasoned Pro Theme