• Skip to primary navigation
  • Skip to main content
  • Skip to primary sidebar

Coral + Co. logo

  • Sewing
    • Free Tutorials
    • Free Patterns
    • Accessories
    • Apparel
    • Baby Sewing
    • Beginner
    • Home Sewing
    • Kids
    • Minky Sewing Projects
    • Tips and Tricks
  • Quilting
    • Learn How To Quilt
    • Free Quilt Patterns
    • Quilt Blocks
    • Quilt Patterns
    • Quilt Alongs
    • Holiday
  • Crafts
    • Cricut
    • Holiday
    • Printables
  • Holiday
    • Valentines Day
    • Easter
    • Mother’s Day
    • Summer
    • Patriotic Sewing
    • Halloween
    • Christmas
  • FREEBIES
    • Coral + Co. Resource Library
  • Contact
  • Shop
  • Nav Social Menu

    • Bloglovin
    • Email
    • Facebook
    • Instagram
    • Pinterest
    • YouTube
You are here: Home / Sewing and Quilting Patterns and Tutorials

Horse Shoe Pattern and Tutorial: Featured at Sew Mama Sew

Jul 19, 2016 · Leave a Comment

Horse-shoe-pillow-pattern

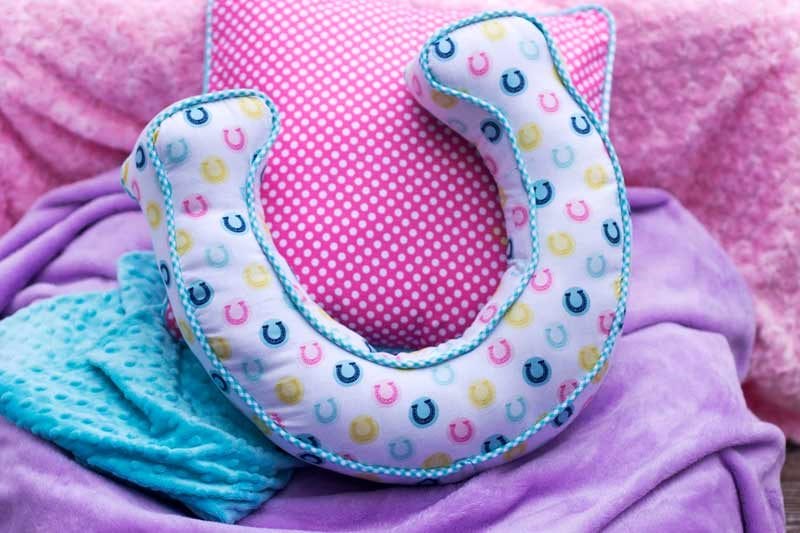
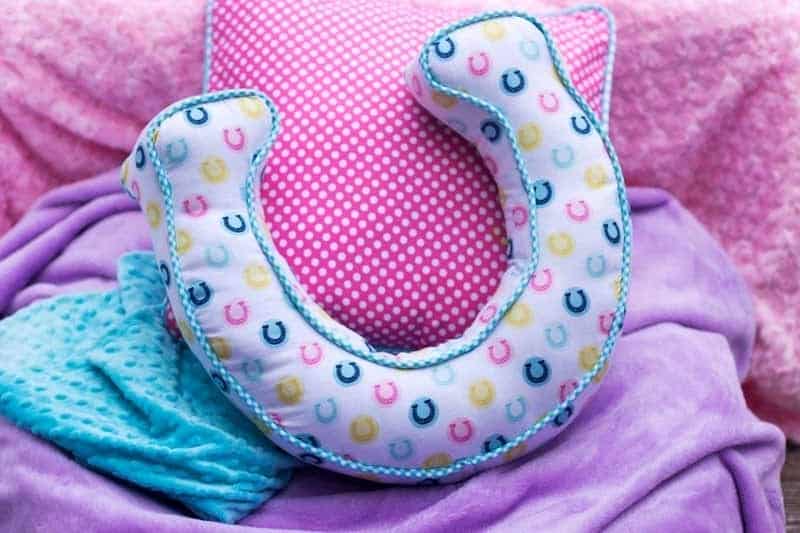
To celebrate Derby Day last year my Horse Shoe Pillow Pattern was featured over at Sew Mama Sew.  This was super exciting since Sew Mama Sew is such a great sewing industry resource.  I used one of my favorite lines called Derby Style by The Polkadot Chair.

Sew Mama Sew also did an introduction of me you can read here.

Free Patterns

Introducing Acorn Valley from MODKID

Jul 15, 2016 · Leave a Comment

acorn-valley-fabric-dress-modkid

Patty Young from MODKID is back with another vibrant and colorful line for Riley Blake Designs.  It is called Acorn Valley and is full of colorful hues and whimsical motifs.   There are friendly foxes, beautiful butterflies, and sweet forests.  I absolutely love the blues used in this collection.  The fabric is available in both flannel and knit.  When the MODKID team reached out to me to so if I was interested in participating in this tour, I took one look at the butterflies and said YES!  My girls are wild about butterflies and I really had fun using this print.

They were also kind enough to provide me with a pattern from MODKID.  I choose the Penny dress because it looked like a simple dress that would get a lot of wear in my house.  And even better, was what a fast sew it was.  I didn’t realize it at the time I picked it out, but there are no set in sleeves to put in, just a simple dolmen style sleeve.  I added the ruffle to the bottom with a rolled hem because what little girl doesn’t like ruffles, for real?

The kiddo was more than happy to model the dress but wouldn’t let go of the blow pop.  Whatev’s its totally a photo prop 😉  And I finally got to stop off at this little trail near out house with the most lovely little bridge to take pictures.  I drive by it everyday and have been wanting to use the lovely symmetrical lines of the bridge in pictures but never seem to time it right with the sun.

As I was shooting a storm was just passing overhead so I was trying to get some nice pictures before the harsh sun came back out.   I managed to get some cute ones and then I took her for a quick bike ride while the clouds were still providing shade.  I love exploring new spots to take pictures and the kids love to collect rocks and whatever else when I find one which makes for a fun outing (and they don’t complain that I’m always taking pictures, hehe).

To celebrate the release of her new line there is an Acorn Valley Fabric Blog tour with some great bloggers.  You can see a list below with links to their site.  There is also a Giveaway and discount code for 25% off the MODKID Etsy shop.  Scroll down to the bottom to see all the goodies!

Coupon code: AcornValley2016 gets 25% off your entire purchase in the Modkid Etsy Store  Valid July 11th through July 22nd at midnight EST.


Monday 7/11: Riley Blake & Modkid
Tuesday 7/12: Sweeter Than Cupcakes & That’s Sew Kari
Wednesday 7/13: Beri Bee Design & Falafel and the Bee
Thursday 7/14: Sew and Tell Project & Handmade Martini
Friday 7/15: Coral & Co. & Pearberry Lane
Monday 7/18: Sweet KM & 2 Little Hooligans
Tuesday 7/19: Highered Hands & Sue O’Very Designs
Wednesday 7/20: Smashed Peas and Carrots & Gingham Girls
Thursday 7/21: Flamingo Toes & Quilting Gallery
Friday 7/22: Ameroonie Designs

a Rafflecopter giveaway

Kids kids, knits, summer

Free Girls Romper Pattern – Easy Knit Romper for toddlers and girls

Jul 7, 2016 · 8 Comments

knot-bow-romper-free-pattern-girls-knit-romper-sewing-pattern-coral-and-co

It’s still summer and I have a Knot Bow Free Girls Romper Pattern made with knit fabric so it is comfy and cozy and can stretch with an active child.

knot-bow-romper-free-pattern

I am super-de-dupity excited to share this Free Girls Romper pattern with you.  You might remember the Knot Bow Headband Pattern I released last year.  I was playing with some of these headbands and realized how cute it would be as a romper!

And when Fabricworm reached out to me and asked if I would be interested in working with their new line Swan Lake, I knew that these would be a perfect combo.  Their organic interlock knit is one of my favorite fabrics to work with, you can see them here and here.

 My kids are now getting a little bit picky about what they wear so when I show Ava the options she quickly picked out the “pink” one with swans, also known as Bevy Shell.

The Knot Bow Romper Free Girls Romper Pattern comes in sizes 2-8 for girls, although one of my testers did the cutest little boys version (pics to come later)!  It uses a variety of knits including jersey knit, interlock knit, french terry, and cotton lycra.  There is no stretch requirement on the fabric since it fits pretty loose.

 Sizing is based on the standard American sizing.  And it should be pretty easy to grade up or down a size if your kiddo is tall or short.  AND, probably my favorite aspect is it is a quick sew.  Like one hour from cutting to finish!  Whoop-whoop!

Give this girl a song and she will dance it out for ya!  This was a serious T-Swift jam!

And…now we conversate.  Ha!  This kid is a hoot!

I think this might have been her whip-nah-nah.  Hehe.

free-girls-romper-pattern

Find the Knot Bow Romper Pattern in Resource Library and head to the tutorial for the instructions on how to assemble.


Free Patterns, Kids, Sewing knits, summer

25 DIY Watermelon Craft Ideas To Make Or Sew

Jun 27, 2016 · Leave a Comment

25-watermelon-diy-crafts-and-sewing-project-ideas

25 DIY Watermelon Craft Ideas that you NEED to make!

diy-watermelon-craft-ideas

Its officially summer!  And that means sun, and swimming, and of course juicy watermelon!  So here are 25 DIY Watermelon Craft Ideas.  It just so happens that my older daughter McKenna is a summer baby.  Which means summer fun party!  We spent a little while brainstorming for co-ed friendly party themes, since the boys weren’t going to be digging unicorns and mermaids and landed on watermelon.  I went to town scouring the internet for party inspiration and found so many great watermelon ideas and DIY sewing and crafts that I wanted to round them up and share all these gorgeous projects with you!

DIY Watermelon Mini Pinata by Shoes Off Please

MOD Melons FREE Quilt Pattern by Suzy Quilts

Watermelon Baby Blanket DIY by The Sewing Rabbit

Watermelon Garland Bunting from Minieco

Watermelon Pencil Case

Felt DIY Watermelon Cake Toppers from A Subtle Revelry

DIY Watermelon Headband from Stylefrizz

Watermelon Wreath from The Scrap Shoppe Blog

Watermelon Pinata DIY from Minted.

Watermelon Umbrella DIY from Stephanie White

Watermelon Party Hats from Project Nursery

Mini Watermelon Bags from Delineate Your Dwelling

Watermelon Stamped Door Mat DIY from Ehow

DIY Watermelon Shorts from The Science of Happy

DIY Watermelon Coasters from Kittenhood

DIY Watermelon Gift Wrap from Jillson Roberts

Felt DIY Watermelon Pincushion Pattern and Kit from The Make Arcade

DIY Watermelon Skirt from Delightfully Tacky

Watermelon Coin Purse Tutorial from Just Between Friends

Watermelon Peter Pan Collar for The House That Lars Built

Watermelon Free Cross Stitch Pattern from Country Living

DIY Watermelon Poms from Mr. Printables

DIY Hand Painted Watermelon Wall Art from A Charming Project

DIY Watermelon Paper Garland from Dear LIzzy

DIY Fabric Marker Watermelon Pillow from I Love to Create Blog

So Juicy!

If your Watermelon Craft Idea involves sewing, here some of my favorite watermelon fabrics from Spoonflower.

I am just dying over the watermelon and mint together.  Yum. 

Click on the picture to be taken to the link.

Crafts, Free Tutorials, Sewing DIY, summer

Forget the chores – Make Laundry, Don’t Do Laundry

Jun 6, 2016 · 1 Comment

Oliver-++-S-Badminton-Top-and-skort-sewing-pattern

The idea of course is to sew something that takes less time to sew than it does to do a load of laundry.  I really, thought about sewing up a few new knit tank tops.  But….my green eyed monster WIP progress pile kept staring me down across the room.  Sitting on top was the from Oliver + S.  All finished except that it had no matching bottoms.  So feeling rather guilty that I had this project halfway done, I decided no matter how quick the project I couldn’t start a new one.   for this fun tour.  So instead of worrying about that, I am joining Cassandra, Karly, and Jen  to Make Laundry, Don’t Do Laundry!  When I heard Cassandra mention this idea I thought it was so fun, and wanted IN!

The idea of course is to sew something that takes less time to sew than it does to do a load of laundry.  I really, really thought about sewing up a few new knit tank tops.  But….my green eyed monster WIP progress pile kept staring me down across the room.  Sitting on top was the Badminton Top from Oliver + S.  All finished except that it had no matching bottoms.  So feeling rather guilty that I had one piece done, I decided no matter how quick the project I couldn’t start a new one.  Even for this fun tour (i’m on a consume less kick).

So I decided to make the shorts as my Less than 2 hour project.  Shorts after all are a quick sew.  Instead of adding the skirt in the pattern to the top to make a skort, I decided the shorts alone would be much more useful.

I really love Oliver + S patterns.  They are notorious for taking a little longer to sew, and for having many steps.  But the finished garment quality is seriously outstanding.  The back of the shorts have the cutest yoke, that makes them just a little more profesh.

And the lace detail.  Ahhhhhh!  My fav!  I had this vintage lace hanging around that I really love, but haven’t had very many projects to use it on.  But this one was perfect.  I just hemmed the bottom like normal and added the lace trim to the inside.  Easy peasy!

The kiddo has decided that this is a pretty cute outfit and wearable in her book – which has NOT been the case lately with quite a few things I make.  5 going on 13.  Sheesh!  She mind modeling as long as she got to show me her cool dance moves  I’m pretty sure she thinks photo shoots are for us to pay homage to her cool tricks and swag style (see ninja moves here).  Wink.

And lets talk about the perfect shade of mint!  This color is sooo my jam!  The fabric for the top is from Bari J.  It is all sold out now, but she has so many lovely prints.    It’s made by Art Gallery and has such a nice drape for a quilting cotton.  The mint fabric is from Joann’s in the solid quilting cotton section.

And there is a GIVEAWAY with 3 different prize packages.  So check out the links below to enter!

6/6 Creative Counsilor / Phat Quarters / Call Ajaire / Friends Stitched Together / The Wholesome Mama / Wild & Wanderful
6/7 Blaverry / The Inspired Wren / Sew Sophie Lynn / Sprouting Jube Jube / Coral & Co / Once Upon A Sewing Machine
6/8 Paisley Roots / Sew Happily Ever After / Randoms By Rydz / Elegantine / Rebel & Malice / Fabulous Home Sewn / Candice Ayla
6/9 Create 3.5 / Muse Of The Morning / Sew & Tell Project / Gracious Threads / Beatnik Kids / Everything Your Mama Made
6/10 Sweeter Than Cupcakes / Pear Berry Lane / All Things Katy! / Sew Starly / Handcrafted By RED / Adventures of Bubba & Bug / Sew & Tell Project

Link up your projects & enter for Prize package 1!

Visit Paisley Roots, Pear Berry Lane, or The Crafting Fiend to link up,

Or enter the Rafflecopter Giveaway below for both of these prize packages.

Prize Package 2

Prize package 3

a Rafflecopter giveaway

Kids summer

DIY Kids Reversible Apron Pattern and Tutorial + Canvas Sharpie Art

May 30, 2016 · Leave a Comment

DIY-kids-apron-fat-quarter-pattern

DIY-kids-apron-fat-quarter-pattern

This weeks DIY Kids Reversible Apron Pattern and Tutorial is so fun and says summer all over!  Yaaaay!  I am loving all the bright colors!  My kids really had a great time getting to paint and draw their little hearts out.  I love little art aprons for kids.  They are so adorable painting away in their little cover-ups.  But since inevitable paint WILL get all over, I thought it would be really great if it looked like it was actually supposed to be there!

So we used some lemons to hand stamp fabric paint to make color art smocks.  And we added some cute signs made with canvas squares and Sharpie oil paint markers I got from Michaels Craft Stores to hang in their art space.

The signs were super simple and add a bright effect.  Taking 6″ canvas squares I placed cut out letters on top.  I used glue sticks to hold them in place.  Then using three different colors of Sharpie oil-based paint markers I made dots around the letters.  I like how the oil paint markers have a nice shine to them which makes the colors kind of pop off the canvas and seem a little brighter.  Then I hot glued ribbon to the back of the canvas panel.

A few cool things about Sharpie Oil Paint Markers:

Marks opaque and glossy on light and dark surfaces.

Use on virtually any surface: metal, pottery, wood, rubber, glass, plastic, stone, and more – Quick-drying. Resistant to water, fading, and abrasion

AP Certified  and Xylene free

We even experimented with all kinds of different shapes like mermaid tails and butterflies.

Supplies for the project:

2 fat quarters of fabric

1 lemon (Optional)

fabric paint (Optional)

Sharpie oil based paint markers

6″ x 6″ Canvas boards

Several yards of ribbon

DIY Kids Reversible Apron Pattern and Tutorial:

Cut 2 of each pattern piece.

Fold and press 1/2″ on the bottom edge of the pocket and 1/4″ on the top edge of the pocket.

Fold top edge over 1/2″ and press.  Topstitch.

Fold side edges over 1/2″ and press.  To keep the pocket from wiggling while sewing I like to use washaway wonder tape.  Otherwise pin pocket to apron front where you would like to place.  For each apron I did them differently, one at the center front and one at the side waist.

Top stitch pocket in place using 1/4″ seam around edge.

Cut ribbon into 3 lengths:

1 neck: 17″ or 18″

2 side ties: 21″

Then pin or clip them 1/2″ from edges as pictured above.  All of the ribbon should be facing the inside of the apron.

Place the back of the apron RST and pin or clip.

Starting at the bottom sew all the way around the apron using a 1/2″ seam..  Stop 6″ from where you started.  Trim the corners.

Trim arm curve seam to 1/8″ of an inch.  Clip notches as shown above.

Turn apron right side out and press.  Top stitch 1/4′ around the edge of the apron enclosing the bottom.

Download the DIY Kids Reversable Apron Pattern:


Apparel, Crafts, Free Patterns, Kids, Sewing kids

Kollabora Meet the Maker Series

May 26, 2016 · Leave a Comment

meet-shelly-from-coral-and-co-kollabora-meet-the-maker

Have you visited Kollabora yet?  Its a great site that is all about makers and what they are working on.  The site has a beautiful layout and is easy to find new people to inspire you.  I was super excited last week when they contacted me about being featured in their Meet the Maker series!  So this week You can find me over at Kollabora talking about what inspires me, the process of making, and all kinds of other silly stuff!


block party

How to sew ruching to ANYTHING – a quick elastic gathering tutorial

May 24, 2016 · 1 Comment

how-to-add-ruching-to-anything

Welcome to the super easy peasy tutorial on how to sew ruching to ANYTHING!  Its an easy way to add an accent to your favorite shirt or shorts, and works especially well with knits!  Which leads me to the super awesome cozy knit capris that I sewed up with ruched sides.  I am going to be honest, that I am a little jealous that these belong to my daughter and not me.  haha.

how-to-sew-ruching-to-anything-tutorial-shorts-pants

Ok, so the capris!  Sofilanjes, a cool Scandanavean indie mod pattern company whose aesthetic I really like is celebrating their second anniversary.  So I thought it would be fun to sew up one of their patterns I had been admiring.  I choose the Domi Sweats, which come as shorts, capris, and pants.  I totally meant to sew some shorts but certain people who overlook details like which is the shorts cutting line and which is the capris got their hands on pattern (okay I’m just talking about myself in third person).

So anyways.  They are capris.  And, they are ADORABLE.  I mean, the geometric pockets.  I love.

And sewing ruching with this tutorial seriously only takes 5 minutes!

For fabric I choose a suuuuper soft french terry (yum), and my most favorite double knit, and aqua jersey knit for the contrast.

how-to-sew-ruching-to-pants

Seriously, I need a pair!

gathered-elastic-tutorial

Supercalifragilisticexpealidocious!

McKenna was convinced that this photoshoot was about her super cool, somewhat hilarious ninja poses.  Thankfully, I was able to talk her out of all ninja poses, otherwise I might have an blog post that looked like an old Kung Fu flick.

How to Sew Ruching to Anything + Gathered Elastic Tutorial

I chose to do this tutorial with a pair off capris, but this applies to any ruching you will sew.  Before adding the ruching, fold and iron hem that will be sewn later.

Measure the length that you would like to be ruched.  For the capris, I chose 4 inches.  Divide that number in half and add an inch.  Now cut your elastic this length.  Mine was 3 inches.

Because the french terry was already a bit thick and I had thread that would blend, I went ahead and sewed my elastic just in front of the seam.  But if you have a normal knit fabric, you would sew the elastic in the seam allowance.

Pin your elastic just above the hem and back stitch.  Using a medium – long stitch length, stretch the elastic and sew to the end.  back stitch to secure.

how-to-add-rucning-to-shorts

Then finish sewing hem  You are done!

Like it?  Pin it for later!

How-to-sew-ruching-to-anything

And to celebrate there is a HUGE Giveaway!  Everyday this week Sofilantjes will be giving away lots of patterns!

And this week:  With code CELEBRATE you get 25% off all patterns

Day 2: 11 patterns to give away. Will run untill May 26, 12 AM (GMT+1) (Amsterdam time)
a Rafflecopter giveaway

Beginner, Free Tutorials, Kids, Tips and Tricks 101, kids, knits

DIY Fabric Basket Tutorial + Nightime Diaper Caddy

May 16, 2016 · 2 Comments

Need a special place for your young one’s diapers?  Today I am sharing how to make a DIY Fabric Basket Tutorial and Fabric Diaper Caddy.  I made this one, especially for my daughter and hand, embroidered a whimsical cloud and words to make it magically hers.  I love sewing all the things for babies and toddlers because everything is just so sweet, you can see all my baby and toddler projects for more ideas.

diy-diaper-caddy-tutorial

My youngest daughter Ava has mastered the daytime potty training but still wets the bed at night.  

how-to-make-a-fabric-diaper-caddy

And to make putting on a diaper on at night time a little more special I decided to make her a fun Nite Nite Fabric Diaper Caddy.  By adding a sweet cloud motif and letting her know that this was her special diaper basket just for her, getting ready for bed is a lot more fun (and tantrum-free)!  She actually gets excited to go get her night time diaper on!  Now for that much excitement when brushing teeth!

diy-fabric-diaper-caddy-tutorial

I wanted to include something that would remind me of how wonderful being a child is to I hand embroidered ‘dream big” on the front.  When I look at it every night, I remember how blessed I am to be raising such lovely girls.

diy-fabric-basket-tutorial

More Baby Sewing Projects:

  • 50+ Cutest Baby Sewing Projects
  • Basic Baby Hat Sewing Pattern
  • Top Knot Baby Hat Sewing Pattern
  • Sherpa Fleece Baby Blanket Tutorial
  • Minky Fitted Crib Sheet Tutorial
  • DIY Baby Leggings
  • Free Baby Bib Pattern

DIY Fabric Basket Tutorial + Fabric Diaper Caddy Tutorial

diy-fabric-basket-tutorial
  1. Cut 2 Outside pieces 19″ wide x 11″ tall
  2. Cut 2 Liner pieces 18.5″wide x 10.5″ tall
  3. Cut 2 Fusible pieces using pellon 71 one sided fusible 18″ wide x 10″ tall
  4. for handles cut 4 pieces 2″ x 6.5″ from fabric and 2 1″ x 5.5″ from pellon fusible 71.diy-diaper-caddy-tutorial
  5. Iron interfacing to the outside fabric pieces.  Leaving 1/2″ from edge of the fabric.
  6. Mark 4 1/2″ line from the bottom, right, and left.dream-bib-baby-diaper-caddy
  7. Draw Cloud on fabric using a removable fabric penhow-to-make-cloud-applique
  8. place steam a seam on the back and cut out the cloud shapemake-embroidered-diaper-caddy
  9. Mark eyes and mouth on cloud
  10. Iron cloud on to the front of the basket
  11. Draw words on to the front of the basket with a removable fabric pen.
  12. Using embroidery floss, hand embroider cloud and letters with a back stitch.  Outline cloud with a running stitch.sew-hand-embroidery-on-fabric-basket
  13. When done embroidering, place both outside pieces RST (right sides together).  Sew starting at top edge of one side and continue around the bottom until you reach the top edge of the other side using a 1/2″ seam.  Leave top open.  Repeat with inside liner pieces.how-to-make-diy-diaper-caddy
  14. Fold corner flat so the horizontal line on the side becomes a square edge.  Stitch across line making sure to back stitch to reinforce seam.  Repeat on other side and for inside liner pieces.how-to-make-square-diy-fabric-basket
  15. Trim edge to 1/4″how-to-make-square-fabric-basket
  16. Seams should line up on the insidehand-embroidered-cloud-fabric-basket
  17. Turn basket right side out and fold top seams over 1/2″ and iron.  Iron inside corners to make more shape a little more square if necessary.how-to-sew-square-fabric-basket
  18. Repeat for inside liner.  Then insert in the basket so wrong sides are facing.how-to-sew-diy-fabric-basket-with-hand-embroidery-cloud-applique
  19. Fuse interfacing to the wrong side of one side of handle fabric.  Sew starting at the top of one side around to the top of the other side using a 1/2″ seam.  Trim fabric down to 1/4 and clip cornershow-to-make-handle-for-fabric-basket
  20. diy-diaper-caddy-fabric-basket-tutoria

    Turn right side out.  Fold top edge over to the inside 1/2″ and press.  Topstitch around edges.  Attach to the fabric basket.


And there you have your DIY Fabric Basket Tutorial + Nighttime Fabric Diaper Caddy Tutorial

how-to-make-a-fabric-diaper-caddy

PIN TO MAKE DIY FABRIC BASKET LATER!


Accessories, Baby Sewing, FREE Baby Sewing Projects, Free Tutorials, Home Sewing, Sewing baby

Modern Baby Quilt Pattern – A Modern Ombre Quilt

May 13, 2016 · 4 Comments

modern-ombre-baby-quilt-by-coral-and-co

Today I have my favorite ever Modern Baby Quilt Pattern!   I am totally lovin’ how the modern ombre quilt came out!  It is one of those items that you get a totally hair-brained idea of something that migggght work, but really might not.  The pattern originally called for rugby stripes which is what I really liked about it, since it had fresh clean lines.  But as I combed Pinterest for color combinations that might work, I just kept seeing ombre!  Ok, maybe I just kept clicking on ombre….everything!

modern-baby-quilt-pattern

Modern Baby Quilt Pattern

I love all ombre quilt patterns, they have so many ways that you can mix the colors and shades.  But combining a modern baby quilt with so many gorgeous ombre colors just made me giddy!

bunny-quilt-pattern

And then!  I started looking for those awesome little color swatch inspiration cards, and I just couldn’t get this color combo out of my head!

baby-bunny-quilt-pattern

I had no idea if it would really work since the bunny quilt pattern was rugby stripes and I was doing not just ombre, but multi-colored ombre.

ombre-quilt-pattern

And then I knew that it was too cool not to take it a step farther and go totally modern with the bunny!  Which I just adore.  I mean, embroidered eyelashes and pink circle cheeks!  I. Can’t. Even.

modern-bunny-quilt-pattern

I stopped by my local quilt shop to see how the colors stacked together for the ombre quilt pattern and because it was much easier to buy 1/4 yard of each of the stripes there instead of full yards online like I usually do.  The shop didn’t have much selection in black in white except this opposite black and white hashtag fabric from Dear Stella which I totally LOVE together with the pink and yellow!

Sometimes sewing is serendipitous and comes together exactly as it should just like it did with this modern baby quilt pattern!  I so love those moments!

The solids are Kona Cottons from Robert Kaufman as is the white backing.  My favorite place to buy Kona Cotton Solids is Stash Fabrics because you can buy them all by the quarter of a yard which is so useful for testing out colors.   I use 100% cotton batting to make it crinkle up and look all guilty.  And then I topstitched in the ditch and through the middle of each stripe.

PIN AND SEW MODERN QUILT PATTERN FOR LATER!!!

modern-baby-quilt-pattern

This Modern Ombre Baby Quilt Pattern is so fun and comes with 4 different animal varieties so you can sew it up again and again and each time it will different!  Also, check out my Flutterby Kite which I made for OneThimble Magazine.

You can find the Bear and Bunny Quilt Pattern on Etsy.

50+ Cutest Baby Sewing Projects


One Thimble Issue 11 Release + Blog Tour

5/12  Pattern Revolution, Lily Shine Boutique, Call Ajaire
5/13 Once Upon a Sewing Machine, Beri Bee Designs, House of Estrela
5/14 Coral + Co, Stubbornly Crafty
5/15 Stitches by Laura, Candice Ayala, Made by Sara
5/16 Sprouting Jube Jube, Lulu & Celeste, Create 3.5, Adventures with Bubba and Bug
5/17 Pear Berry Lane, Beatnik Kids
5/18 Rebel & Malice, Threading Rainbows, Just Add Fabric,, Finn’s Door, Bee Quilted & More, Snickerdoodle Stew

Baby Sewing, FREE Baby Sewing Projects, Quilt Patterns, Quilts baby, modern, quilting

Mommy and Me Leggings for Mother’s Day

May 5, 2016 · Leave a Comment

mommy-and-me-leggings-pattern-made-by-coral-and-co

Happy Mother’s Day to all the lovely mother’s out there!  This year for Mother’s Day I really wanted to get it together and do something fun with the kids.  I thought making a mommy and me outfit would be super fun, espcially while the kids are young enough to still think its cool!

mommy-and-me-leggings-pattern-made-by-coral-and-co


I picked something simple because I didn’t want to spend all day sewing two of the same thing.  And I wanted to make something that we would both actually wear.  And who doesn’t wear leggings?!  Like ALL the time!!!  Seriously, they are my slap’em on and get the kids to school uniform.  haha.

mommy-and-me-leggings-pattern-made-by-coral-and-co

I had a ton of leftover Riley Blake polka dot knit (even though the pattern only used 1 yard each) and wanted to do something coordinated,  but not super cheese.  And who doesn’t love bright colors and polka dots!  Me, me, meeeeee!

mommy-and-me-leggings-pattern-made-by-coral-and-co


The pattern is from Everything Your Mama Made and More (EYMM) and comes as a mommy and me bundle.  It comes in a couple of different lengths and has a fold over waistband which I really like a lot (and so does my mommy tummy, wink.).


mommy-and-me-leggings-pattern-made-by-coral-and-co

You might have noticed that I don’t usually appear on the blog that often (the kids are way cuter – duh), but I actually had a ton of fun finding poses and taking pictures with McKenna.  We tried handstands, yoga poses, and even had a dance party.  Crawling through my legs was her idea, which she thought was so funny – if you can’t tell by her smile.

And….the cat photobombed us!

mommy-and-me-leggings-pattern-made-by-coral-and-co

Namaste ya’ll!  (hehe)

mommy-and-me-leggings-pattern-made-by-coral-and-co


These pictures turned out so well and I just love how blogging allows me to take such memorable pictures of my girls.  I know that I will love looking back at these.

mommy-and-me-leggings-pattern-made-by-coral-and-co


This might be my favorite <3

EYMM is also celebrating their 2nd Anniversary and having a sale to celebrate!

Mommy-&-Me-web

Make sure to check out all the stops on the EYMM Mommy & Me Blog Tour! (Note: the direct links below won’t work until their scheduled day, but feel free to click through and check out their blogs any time!)

May 6

The Wholesome Mama, Wally and Grace, Call Ajaire

May 7

Rebel & Malice, Blessed x Five, Coral + co.

May 8

Welcome to Our World, Analog Bytes, Pear Berry Lane

May 9

Sewing by Ti, Pretty and Precious, Creative Counselor

During the tour, all Mommy & Me Bundles are on sale!  Use coupon code MOMMYANDME2016 on the EYMM site to save 25% on any Women and Youth Size Pattern Bundles until May 10 at 11:59pm PST (note: build your own bundles are excluded from this sale).


Kids mother's day

DIY Reusable Snack Bag Tutorial & Happy Earth Day!

Apr 18, 2016 · 2 Comments

diy-reusable-snack-bag-sewing-tutorial-for-earth-day-coral-and-co
diy-reusable-snack-bag-pattern-and-tutorial-coral-and-co

To celebrate Earth Day this year, I made some DIY Reusable Snack Bags and a tutorial (for you), that can be washed and reused for my kids snacks at lunch.  I feel guilty each day when I pack their lunches and I use plastic bags.  All I can think of is all the plastic clogging the landfills so I decided that reusable snack bags were needed stat.

And, I also joined in on the Earth Day Blog Hop hosted by Lulu & Celeste.  It gave me a nudge to finally make some snack bags.  You can find the rest of the blog hop at the end of the post.

To make the snack bags I used some scraps of cotton by Tasha Noel and for the outside pieces and waterproof nylon for the lining so things don’t get too yucky if grapes get smushed or sat on.  Bleck.  But hey, they are washable!  For the trim I used one strip I had left over from a jelly roll which came out to be 2.5″ x 42″.  I didn’t have quite enough to finish the binding the correct way so I just sewed a straight seam down the middle at the bottom.  Which totally works for me since they will get dirty anyways.

DIY Reusable Snack Bag Tutorial with Pattern Template

Bag finished measurements are 5.5″ x 9″.

  • Cut 1 outside piece and 1 lining piece for both the front and back pieces.  If you prefer not to waste paper the front template measurement is 5.5″ x 5.5″ and the back piece is 5.5″ x 9″
  • Stack the front pieces Wrong Sides Together (I used wondertape, which I pretty much swear by to keep the nylon from slipping).  Clip or pin and sew the inside raw edge of a 5.5″ piece of bias tape to the right side of fabric.  Then fold the tape over to the back side so the outside of the tape is on top and sew along the edge.   I like this tutorial for learning how to make and sew bias tape.
  • Stack the back piece with the Wrong Side facing up and the nylon on top with the waterproof or Right Side facing up.  Stack the front piece on top with the Right Side facing up.
  • Starting at the bottom middle attach the bias tape and sew to the first corner, stopping at 1/4″ before the end.  Make a mitered corner and continue to the next corner.  Repeat until you reach the bottom middle.  Leave a 3″ gap to be able connect the binding.  I like this easy method here.
  • After joining the two ends, fold the binding over to the back side so the right side is of the binding is face up and stitch along the inner edge.
  • Then attach velcro on the front and inside top.
  • You can find the bag template at the end of the post.  To print you will click actual size.  Do Not fit to page.

DIY Reusable Snack Bag Pattern Template Can Be Found in the Resource Library

Pin it to make later!

Check out all the stops on the Earth Day Blog hop round up:

April 18:
Vicky Myers Creations – Coral and Co.

April 19:
Seam of My Pants

April 20:
EYMM – Create 3.5

April 21:
PenSeb&Rox – Candice Ayala

April 22:
Lulu & Celeste (Round Up post)


Accessories, Free Patterns, Free Tutorials, Sewing

Easy DIY Baby Swaddle Blanket Pattern and Tutorial

Mar 22, 2016 · 11 Comments

Easy-DIY-Baby-Swaddle-Blanket-Pattern-Tutorial
Easy-DIY-Baby-Swaddle-Blanket-Pattern-and-Tutorial

Today I have another great baby project: Easy DIY Baby Swaddle Blanket Pattern and Tutorial which sews up quickly in 10 minutes..  This is perfect for anyone who wants to make a quick gift for a new baby!  Often many store bought swaddle blankets are never quite big enough to get a good swaddle, by making your own you can make one large enough for baby to grow and still wrap them up tight.  Also by using a knit, the fabric can breathe so baby doesn’t get too hot and has a slight stretch to it to help keep them snug.

For this project, you will need 1 yard of Knit fabric. You can use Jersey Knit or Interlock (not as stretchy) for this project.  I used an organic interlock knit from Spoonflower, which is fun because your choice of prints is nearly endless.  When the fabric arrives it is a little bit stiff but once you wash it, it softens right up.  My other go-to for making items for baby is Fabricworm’s Organic knit fabrics.  They have lots of great prints and are not quite as pricey.  They are also the softest fabric I have ever felt!  I really like the Wildland Collection they have right now and have been counting down the months until Tall Tales comes in (hurry up April)!

More Baby Sewing Projects:

  • 50+ Cutest Baby Sewing Projects
  • Basic Baby Hat Sewing Pattern
  • Top Knot Baby Hat Sewing Pattern
  • Sherpa Fleece Baby Blanket Tutorial
  • Minky Fitted Crib Sheet Tutorial
  • DIY Baby Leggings
  • Free Baby Bib Pattern

The prints I used for the blankets in the pictures are Moose Trot from Ivie Cloth Co. and You Look Fancy Deer from Mint Peony Designs.

Find the fabrics used for blankets:

  • Ivie Cloth Company
  • Mint Peony Designs
  • Charlotte Winter

You can follow the instructions on the screen or find the link to the Resource Library below to download the pattern and instructions.

Easy DIY Baby Swaddle Blanket Pattern and Tutorial

**** If using a regular sewing machine, be sure to use a ball point needle for the knit fabric to make sure you don’t have any skipped stitches.

You can find the swaddle blanket pattern and template in the Resource Library

DIY -10-minute-knit-swaddler-coral-and-co


Baby Sewing, Beginner, FREE Baby Sewing Projects, Free Patterns, Free Tutorials, Sewing baby blanket, knits, organic fabric

My New Camera and Gear – Canon 6D Review

Mar 1, 2016 · Leave a Comment

One of my favorite parts of blogging is photography, so I wanted to share with you my new Camera, the EOS Canon 6D and gear.  I have come to love beautiful pictures of DIY projects (hello craftgawker)  and I really enjoy trying capture a pretty picture.  I am in L.O.V.E. with this camera.  I upgraded from my starter DSLR EOS Canon T3 and It has taken my photography to a whole new level.  I bought the T3 and kit lens used and it was a great starter camera to learn how to shoot in manual and took some great pictures, but I really wanted a more professional look and knew it was time to take the plunge.  And it was well worth it!  The quality of the pictures is UH-MAZING!  And the ISO capability is unreal.  It can easily handle a 1000 ISO with out any noise and can go up to 10000 ISO.  Hello, low light. And since it is a full frame camera I can use Canon’s L series lenses with it.

My go to lens is the Canon 85mm 1.8, I love how close up it gets and how it compacts the background and gives such great bokah (you know that blurry background look).  Although sometimes I think I get carried away shooting wide open at 1.8.  I think this lens also gives you the best bang for your buck.  I also have the Canon 50mm 1.4 which was the first lens I purchased and was a great investment.  The 50mm is a pretty standard lens and give you a little more room for your picture, and since it can go down to 1.4 it is pretty easy to take a picture in lower light.  Both the 85mm and the 50mm are great quality lenses without the hefty pricetag and I highly recommend either one of them to anybody getting started with a DSLR.  The other lens I use is the Canon 24-105mm 4.0L series.  I was pretty excited when I first got it to finally get an “L” series lens which are known as Canon’s premium lenses that professional’s use.  This is a great outdoor/walking around lens.  It is a zoom lens which makes it nice to not have to change out lenses but since the aperture  only goes down to 4.0 it is not ideal for indoors.  However I use it often when I am outdoors or at the beach since the kids are usually running around and I can zoom in and out without having to move around too much.

  <img src="http://static1.squarespace.com/static/56c5fed77c65e45e2d0cc7e6/56c5ffcee6515968572ed850/56d5c6ae859fd0f49e4249ec/1456850615644//img.jpg" alt=""/>

Although I prefer to shoot in natural light, sometimes it is not always possible and a flash is required (and can make a huge difference shooting indoors).  I am currently using a Canon Speedlight 580EX flash bought second hand from a photographer friend.  But I also have this speedlight flash which was a great budget flash.

  <img src="http://static1.squarespace.com/static/56c5fed77c65e45e2d0cc7e6/56c5ffcee6515968572ed850/56d5c6c3859fd0f49e424abd/1456850657856//img.jpg" alt=""/>

Since I was getting a pretty new Camera I needed a pretty new bag to carry all my gear.  I wanted a bag that had enough room but didn’t actually look like a camera bag.  Kelly Moore Bags are known for their amazing style and well thought out features.  I went with the Kelly Moore 2 Sues bag in raspberry which is vinyl so it is water resistant and is small enough that I can carry it around like a handbag.

  <img src="http://static1.squarespace.com/static/56c5fed77c65e45e2d0cc7e6/56c5ffcee6515968572ed850/56d5c69560b5e93dca4a64c2/1456850592197//img.jpg" alt=""/>

I’m always curious what kind of photography gear other bloggers and DIY’ers use to take their photographs and love it when they share.  So if you are a craft/DIY blogger feel free to let us know what kind of gear you use and what resources you use to learn photography.  I will be doing some post in the future on my go to resources for blogging and photography and would love to hear from you!  You can also join the facebook group I moderate:   DIY Craft Sewing Blogger Photography Group

***Affiliate links: all opinions belong to this chick!

You can also Subscribe to see whats new!

Subscribe

Sign up with your email address to receive news and updates.


We respect your privacy.

Thank you!

Featured


DIY Fabric Basket Tutorial + Nightime Diaper Caddy


May 16, 2016


Tutorials, Baby


everything else


shelly morgan


Comment


May 16, 2016


Tutorials, Baby


everything else


shelly morgan


Comment

DIY Fabric Basket Tutorial + Nightime Diaper Caddy


May 16, 2016


Tutorials, Baby


everything else


shelly morgan


Comment


May 16, 2016


Tutorials, Baby


everything else


shelly morgan


Comment


May 16, 2016


Tutorials, Baby


everything else


shelly morgan


Comment


May 16, 2016


Tutorials, Baby


everything else


shelly morgan


Comment


Modern Ombre Baby Quilt + One Thimble Issue 11


May 13, 2016


Baby, Sewing {Inspiration)


baby, quilting, quilt, modern


shelly morgan


Comment


May 13, 2016


Baby, Sewing {Inspiration)


baby, quilting, quilt, modern


shelly morgan


Comment

Modern Ombre Baby Quilt + One Thimble Issue 11


May 13, 2016


Baby, Sewing {Inspiration)


baby, quilting, quilt, modern


shelly morgan


Comment


May 13, 2016


Baby, Sewing {Inspiration)


baby, quilting, quilt, modern


shelly morgan


Comment


May 13, 2016


Baby, Sewing {Inspiration)


baby, quilting, quilt, modern


shelly morgan


Comment


May 13, 2016


Baby, Sewing {Inspiration)


baby, quilting, quilt, modern


shelly morgan


Comment


DIY Baby Hat Sewing Pattern and Tutorial in sizes Preemie - 12 Months.


Apr 6, 2016


Free Patterns, Baby


baby, baby clothes


shelly morgan


Comment


Apr 6, 2016


Free Patterns, Baby


baby, baby clothes


shelly morgan


Comment

DIY Baby Hat Sewing Pattern and Tutorial in sizes Preemie – 12 Months.


Apr 6, 2016


Free Patterns, Baby


baby, baby clothes


shelly morgan


Comment


Apr 6, 2016


Free Patterns, Baby


baby, baby clothes


shelly morgan


Comment


Apr 6, 2016


Free Patterns, Baby


baby, baby clothes


shelly morgan


Comment


Apr 6, 2016


Free Patterns, Baby


baby, baby clothes


shelly morgan


Comment

block party

  • « Go to Previous Page
  • Page 1
  • Interim pages omitted …
  • Page 14
  • Page 15
  • Page 16
  • Page 17
  • Page 18
  • Go to Next Page »

Primary Sidebar

  • Home
  • Blog
  • About
  • Featured Elsewhere
  • Contact

Copyright © 2026 Coral + Co. on the Seasoned Pro Theme