• Skip to primary navigation
  • Skip to main content
  • Skip to primary sidebar

Coral + Co. logo

  • Sewing
    • Free Tutorials
    • Free Patterns
    • Accessories
    • Apparel
    • Baby Sewing
    • Beginner
    • Home Sewing
    • Kids
    • Minky Sewing Projects
    • Tips and Tricks
  • Quilting
    • Learn How To Quilt
    • Free Quilt Patterns
    • Quilt Blocks
    • Quilt Patterns
    • Quilt Alongs
    • Holiday
  • Crafts
    • Cricut
    • Holiday
    • Printables
  • Holiday
    • Valentines Day
    • Easter
    • Mother’s Day
    • Summer
    • Patriotic Sewing
    • Halloween
    • Christmas
  • FREEBIES
    • Coral + Co. Resource Library
  • Contact
  • Shop
  • Nav Social Menu

    • Bloglovin
    • Email
    • Facebook
    • Instagram
    • Pinterest
    • YouTube
You are here: Home / Sewing and Quilting Patterns and Tutorials

How to Make a Perfect DIY Chrysanthemum Felt Flower Tutorial Video with Cricut Maker and Simplicity Patterns

May 23, 2018 · Leave a Comment

how-to-make-perfect-felt-flowers

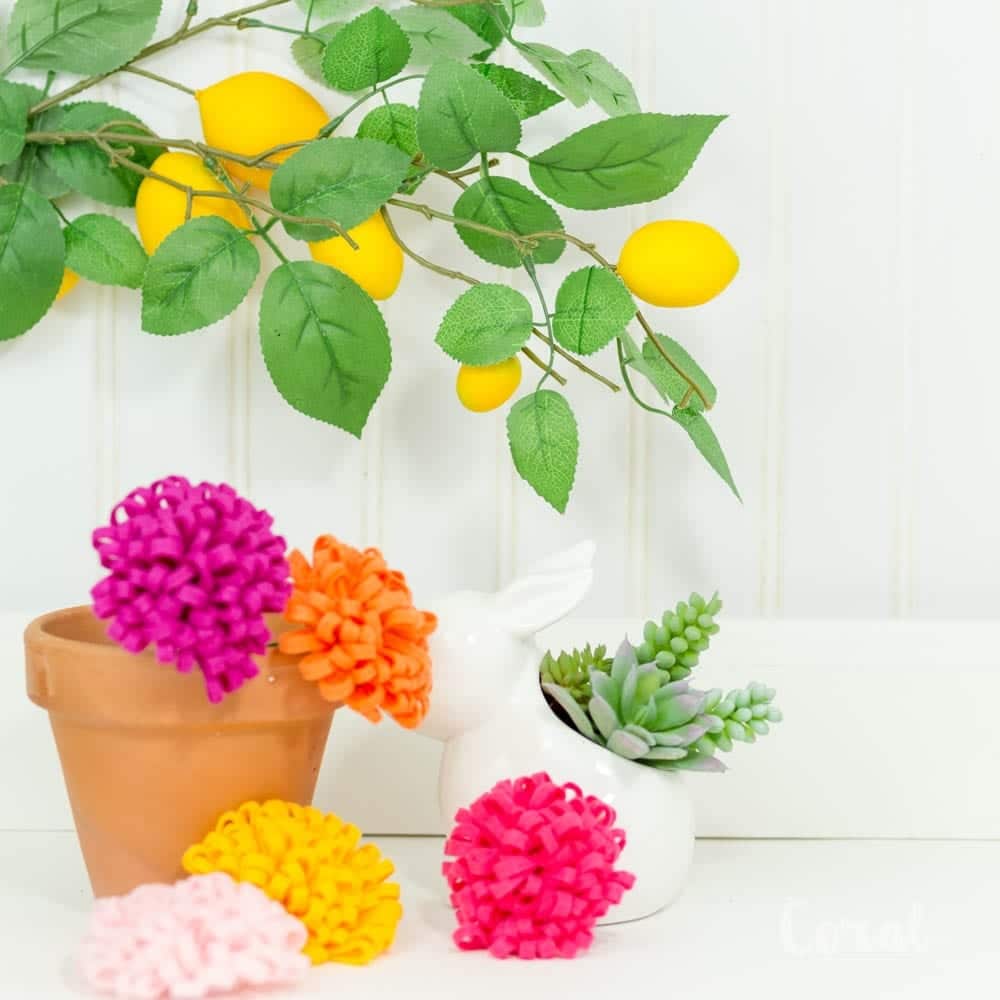
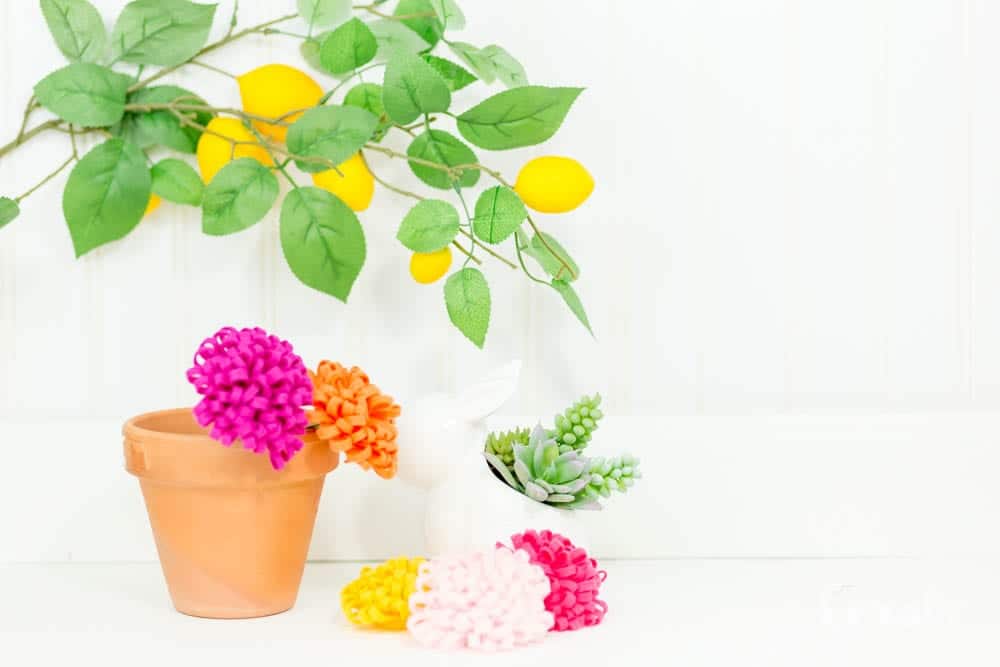
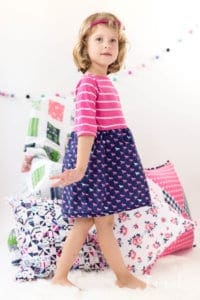
Are you ready to adorn everything around you with some really fun felt flowers?  Then I have the perfect DIY Chrysanthemum Felt Flower Tutorial to show you.  Using the Cricut Maker and Simplicity Patterns I will show you how to make the perfect DIY Chrysanthemum Felt Flower every time.  You can skip all the way to the bottom to watch the video version of the tutorial.

how-to-make-perfect-felt-flowers=tutorial

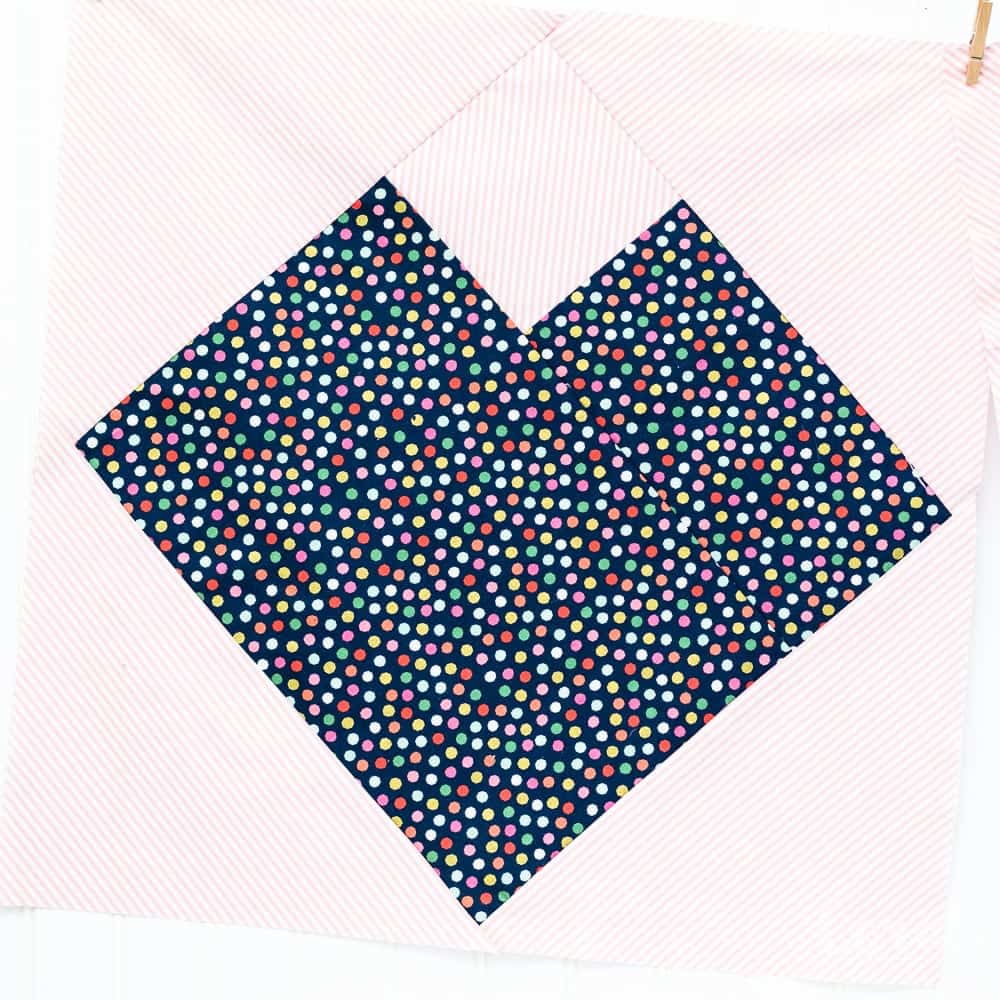
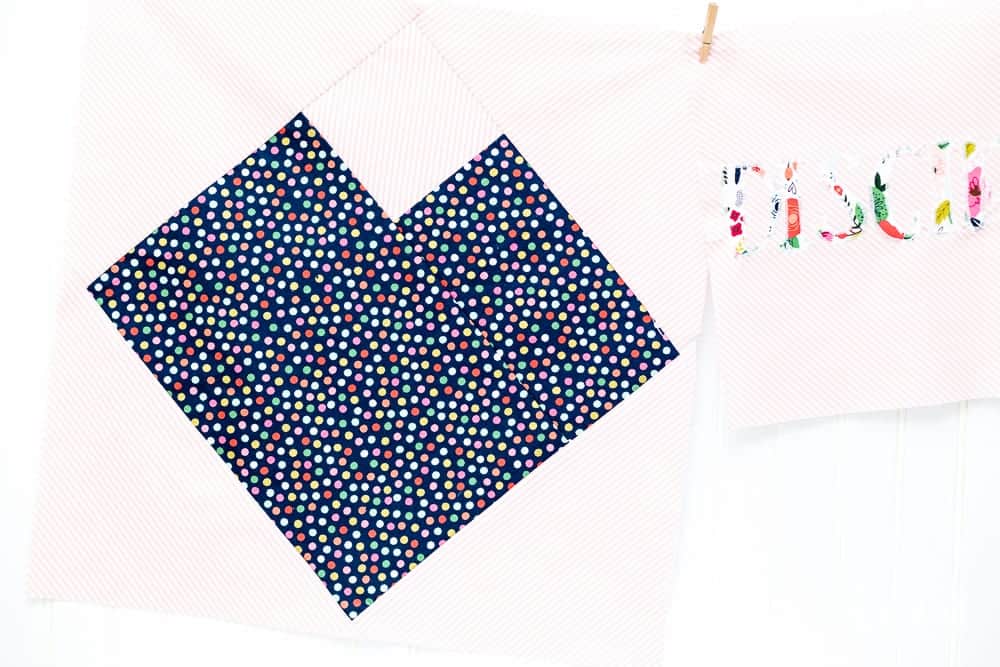
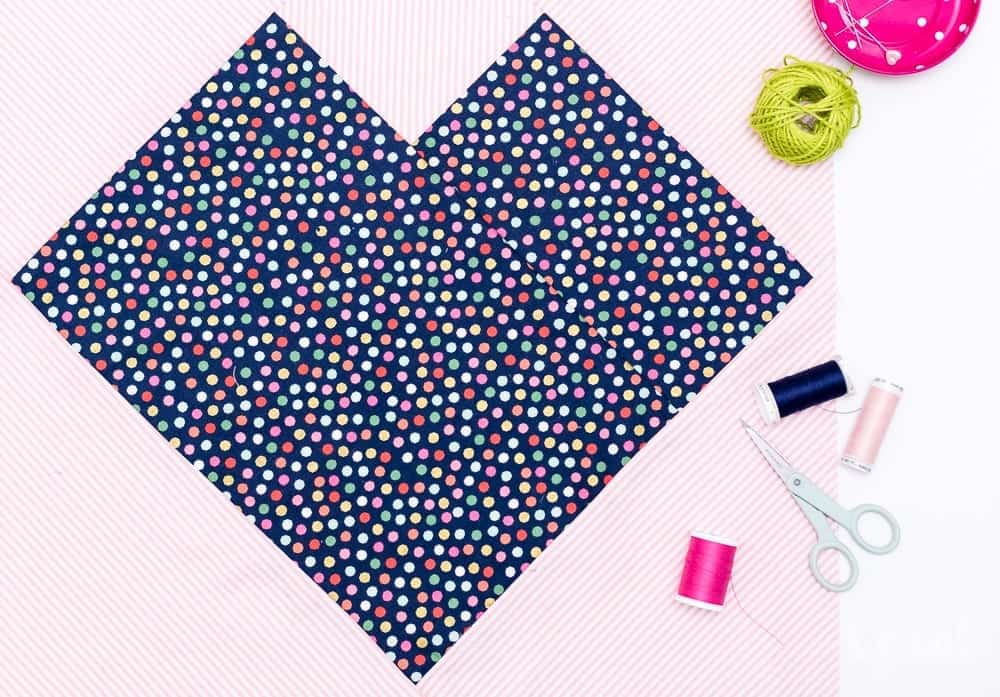
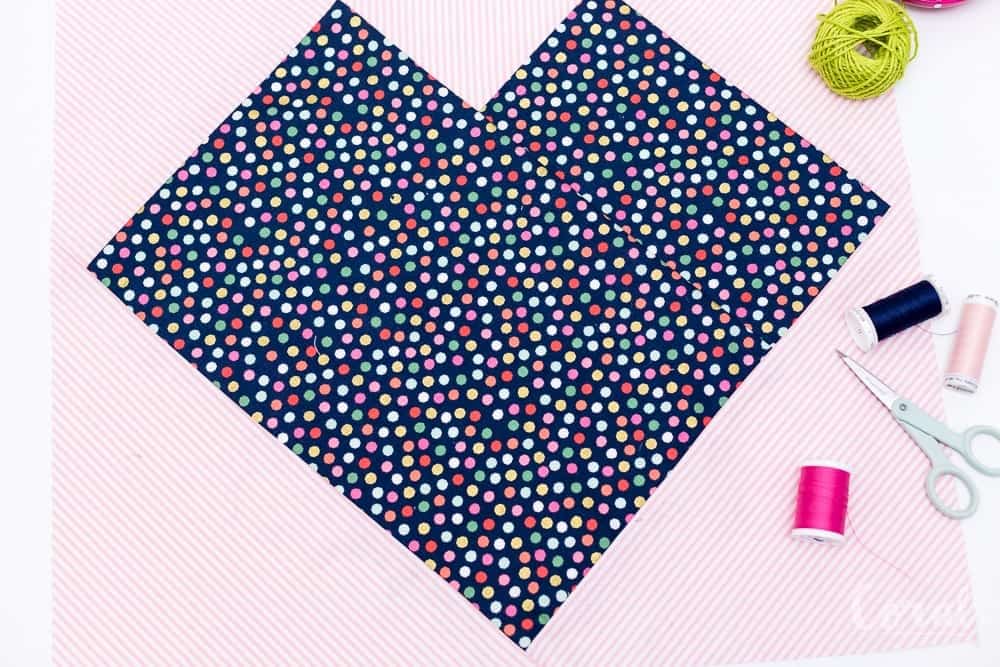
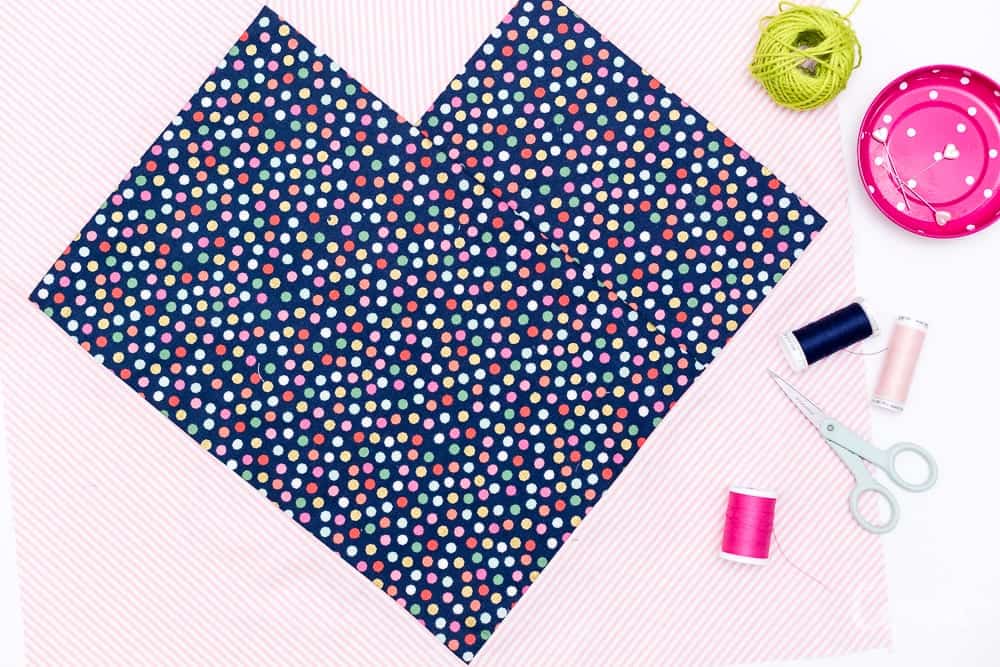
Little known fact: mums are my favorite flower.  I know, weird right?!  Everyone else likes roses and tulips.  Gorgeously petaled peonies and hydrangeas.  But me?  Nope, I like the pretty mums that come into season every fall as it cools down.  Ok, so it might be because I am a November baby and that is my birthday month flower.  But honestly, there is just something about  Chrysanthemums and their many colors that just makes me love them.diy-felt-chrysanthemum-flower-tutorial 
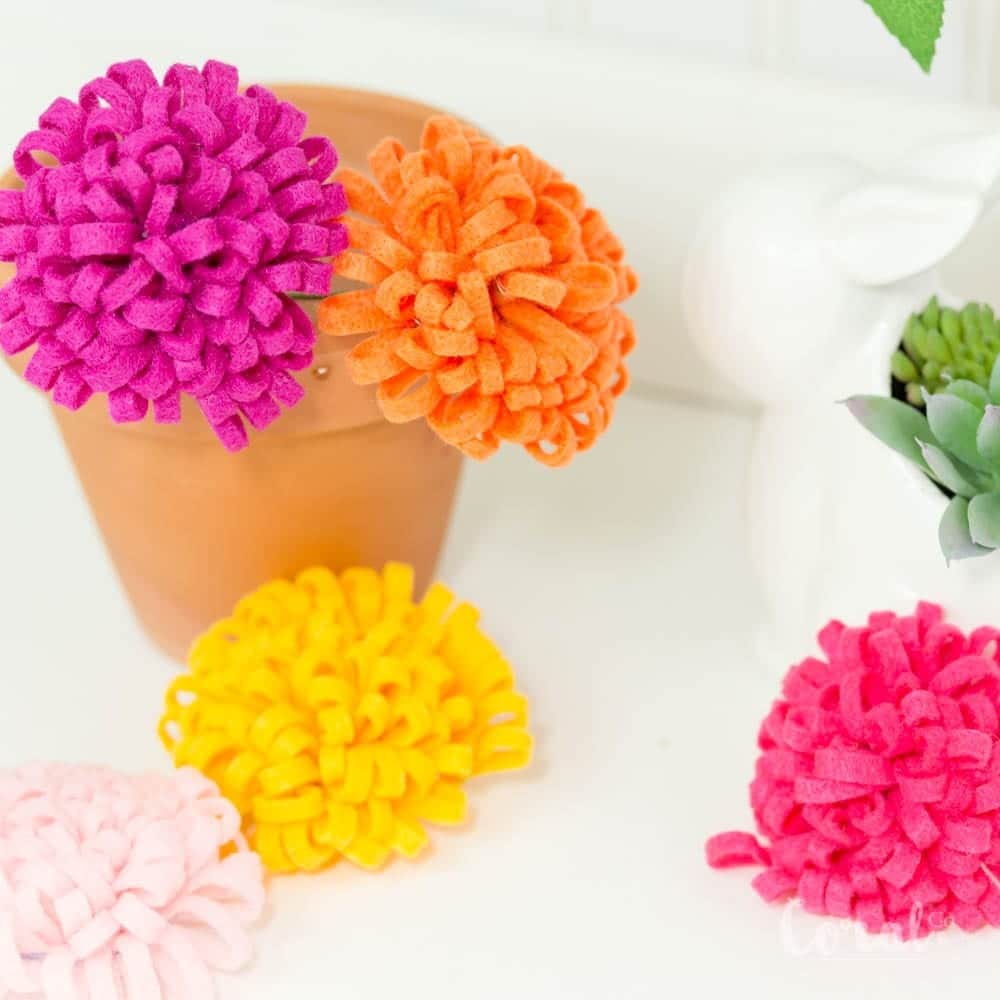
If you’ve been hanging around for awhile you may have noticed that I have become a complete Cricut convert since Cricut came out with the new Maker machine.  It cut’s fabric so enough said!  You can see some of my favorite Cricut projects including this heart mini quilt and this knot bow headband.how-to-make-mum-felt-flowers-tutorial

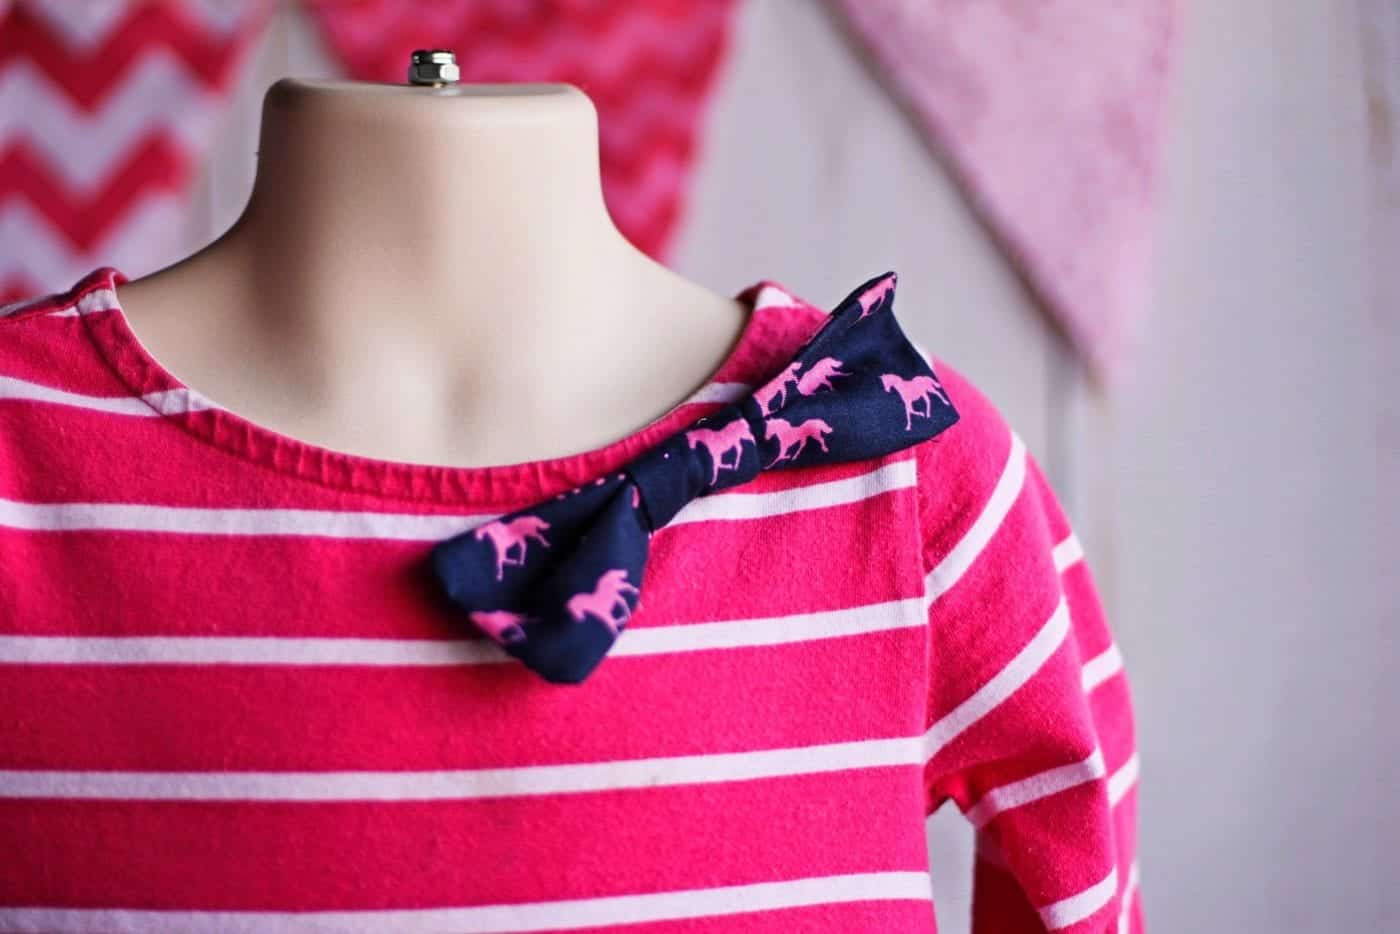
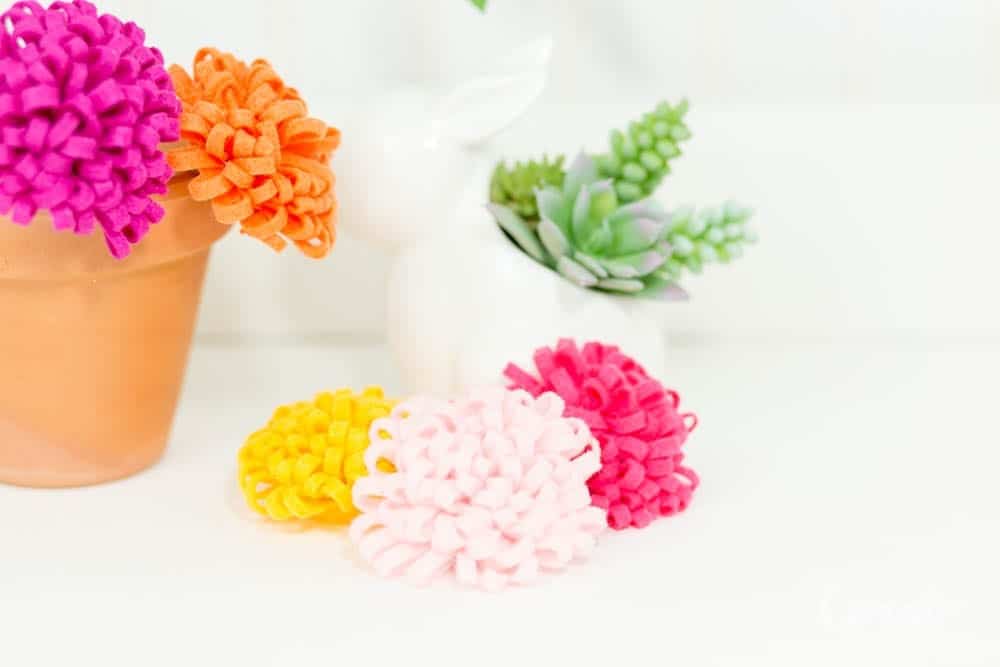
One of the really cool things that has happened since Cricut came out with the Maker is that they have teamed up with Simplicity Patterns to offer some great patterns that can be cut right on the maker.diy-felt-flower-pattern

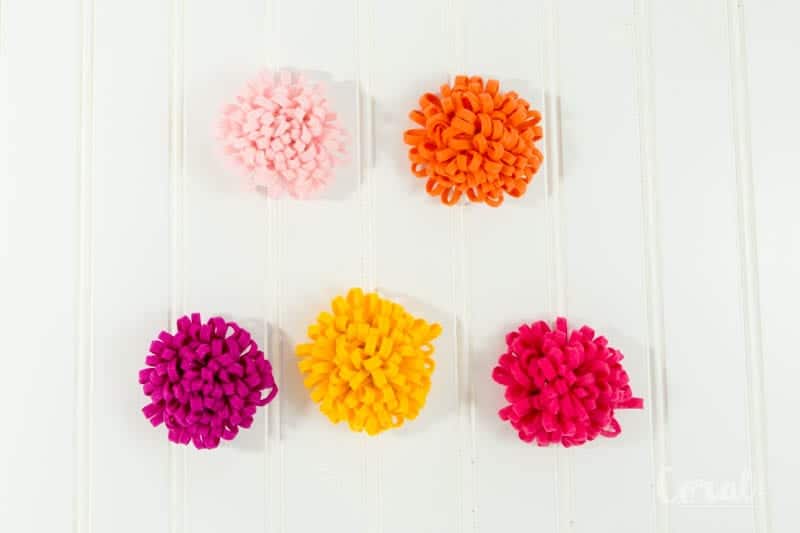
No more having to unfold the unwieldy tissue pattern, pin it in place, and cut every so carefully around the edges trying not to cut the pattern piece itself.  Not to mention trying to fold up that big old tissue paper pattern that refuses to ever fit again in the envelope upon which it came.diy-felt-chrysanthemum-flower-pattern

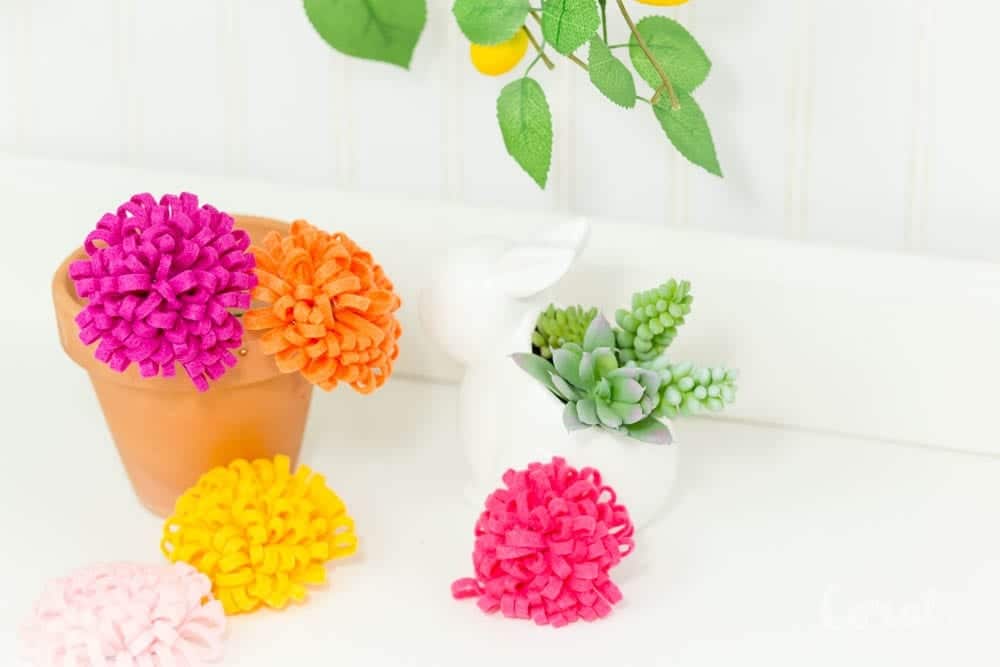
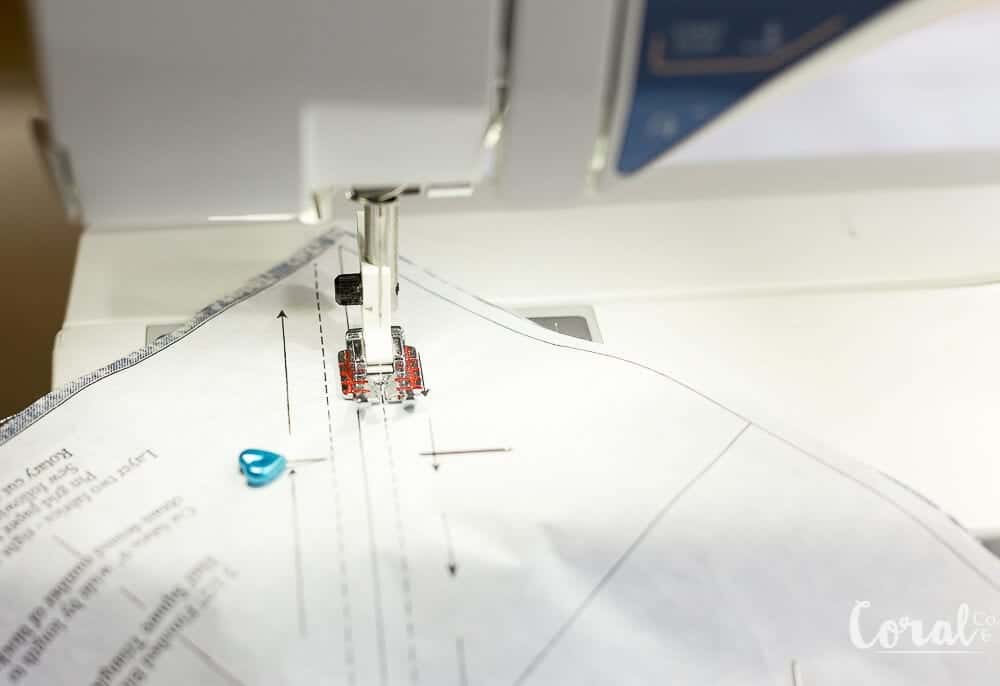
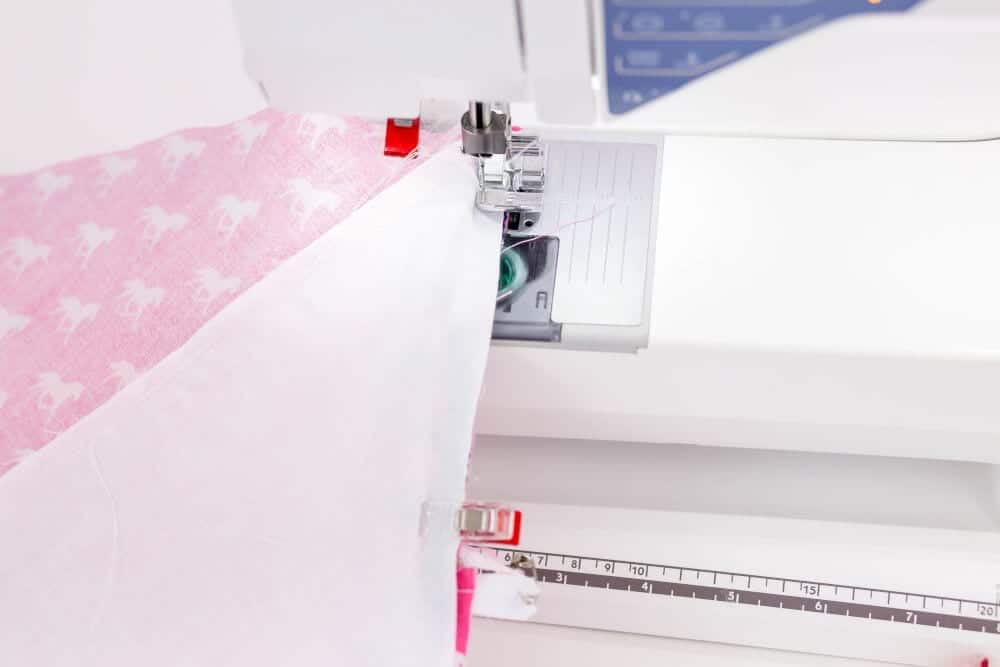
The Cricut Maker makes it super easy to lay your fabric on the cutting mat, load the pattern through design space, and the Cricut Maker will cut your Simplicity Pattern out for you.how-to-make-felt-chrysanthemum-flowers-tutorial

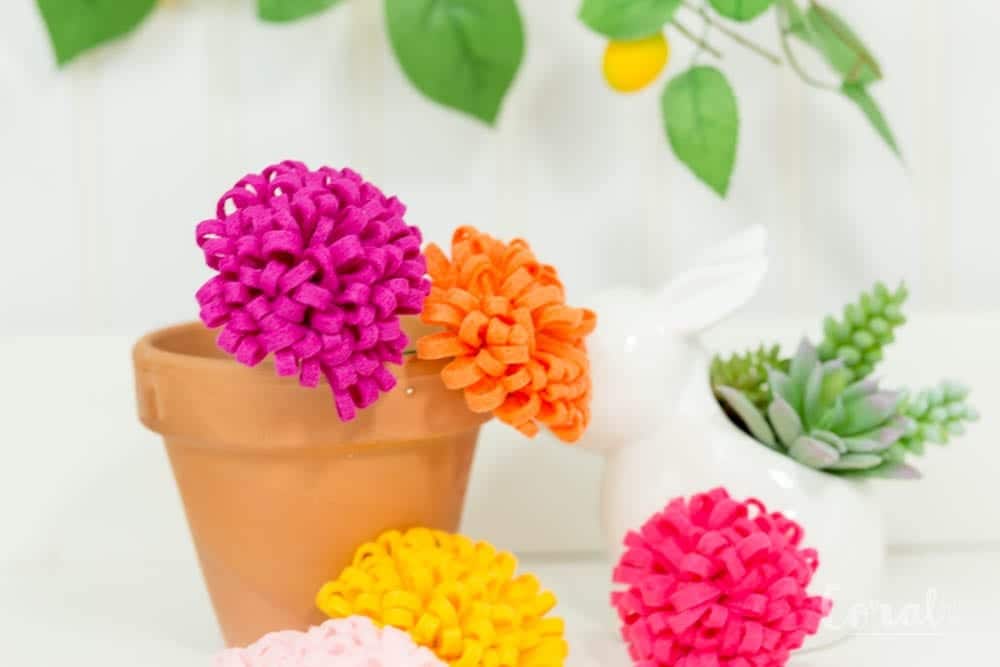
All you have to do is follow the sewing directions provided in the pattern and you have a beautifully made new project.how-to-make-perfect-felt-flowers-tutorial

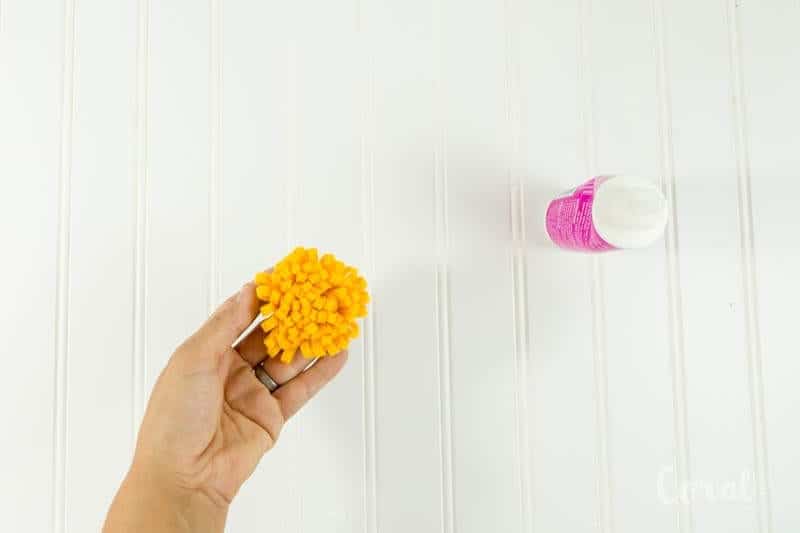
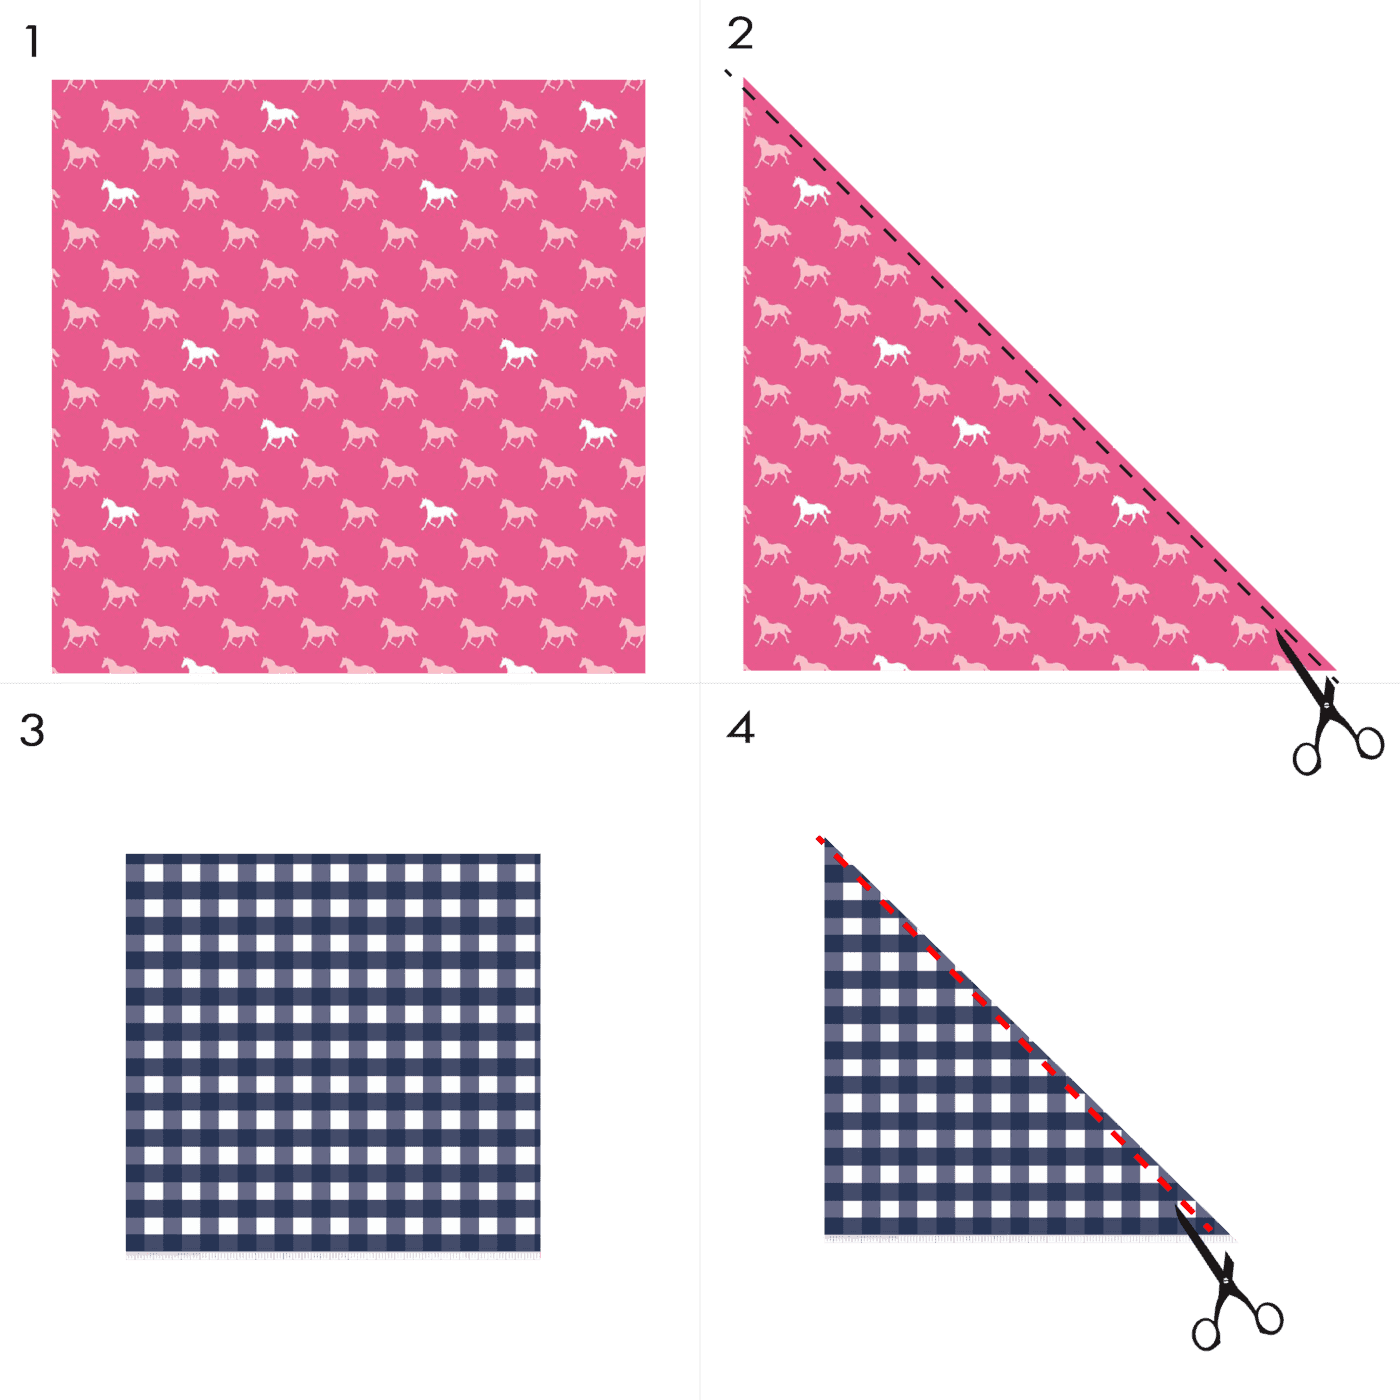
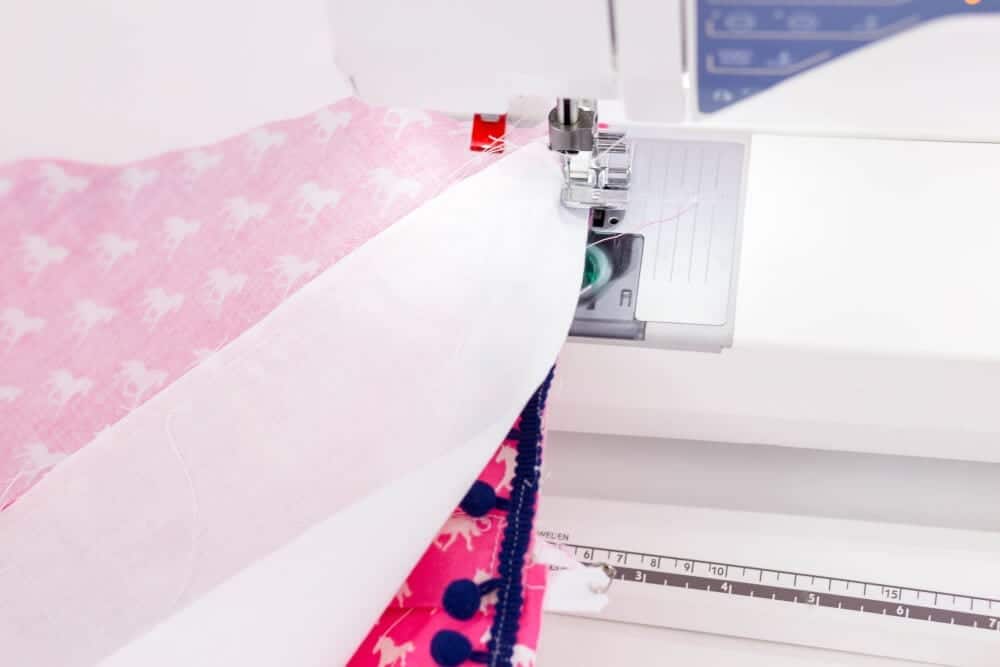
I personally dislike cutting felt with scissors.  I can never get it to cut exactly as I would like and my edges are always a little.  But using the Cricut Maker to cut out the Chrysanthemum Pattern from Simplicity made it super easy and it looks beautiful.  The cuts are perfect and I was able to work on some other projects while it was cutting the felt.

diy-felt-flower-cricut-maker-pattern

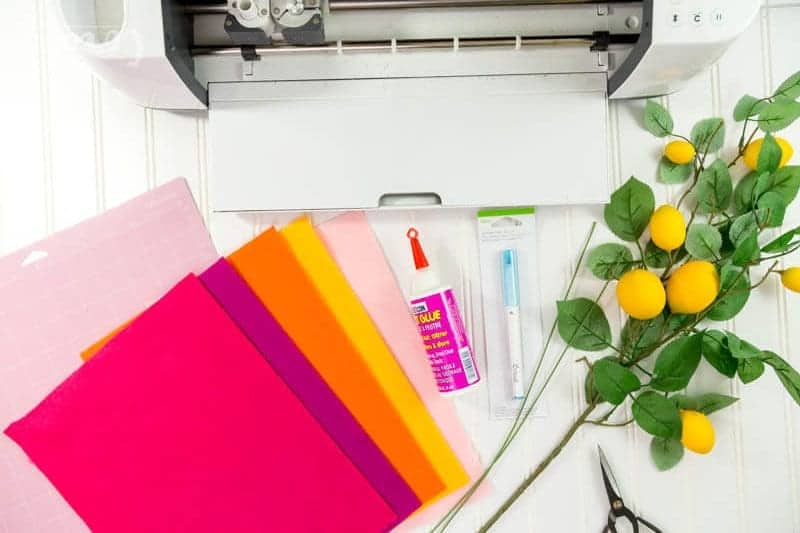
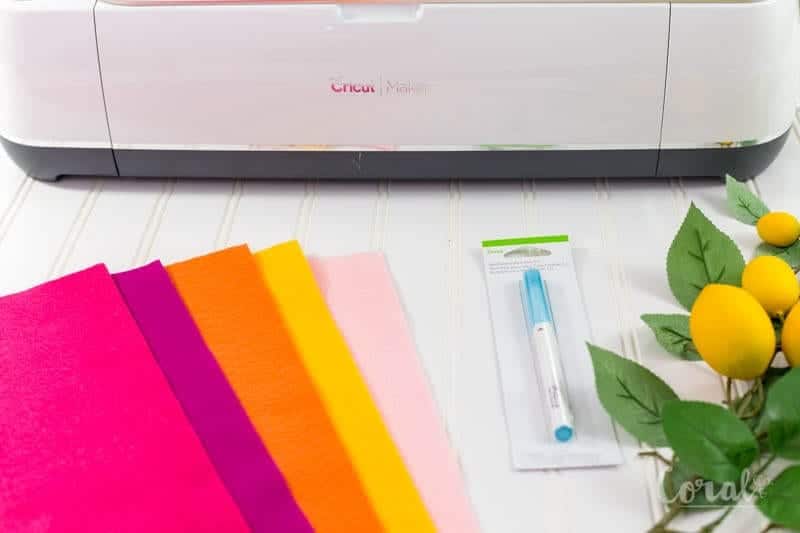
Supplies You Will Need For DIY Felt Chrysanthemum Flower Tutorial

  1.  9 x 6 Felt Piece for each flower
  2. Craft or felt glue
  3. Cricut washable fabric marking pen
  4. Cricut Maker
  5. Cricut 12″ x 12″ Fabricgrip Mat
  6. Simplicity Chrysanthemum Flower Patterncricut-fabric-maker-on-felt

DIY Chrysanthemum Felt Flower Tutorial

add-felt-to-cricut-fabric-cutting-mat

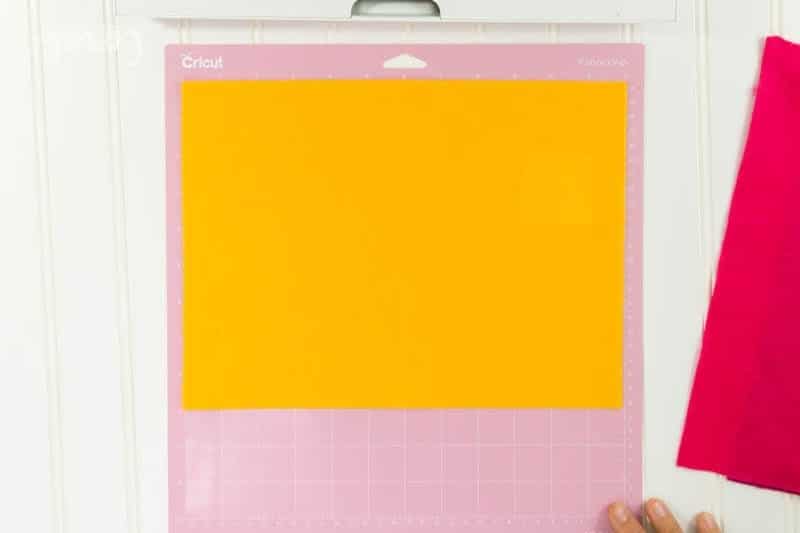
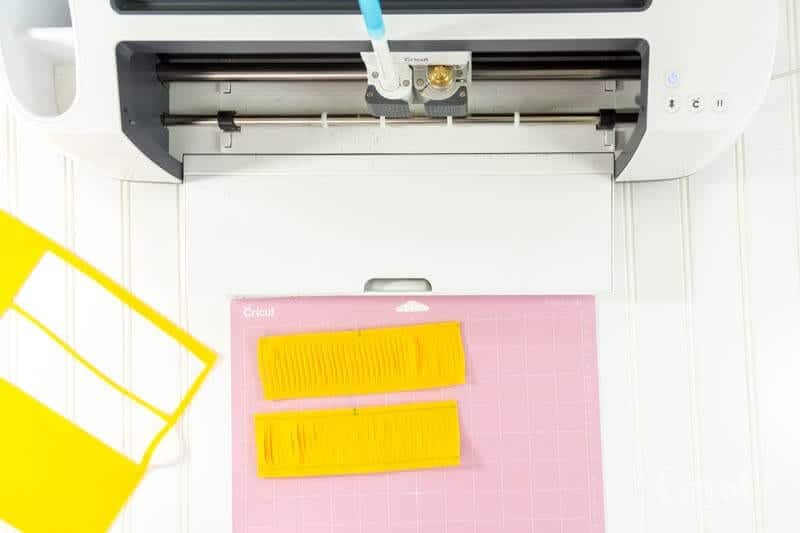
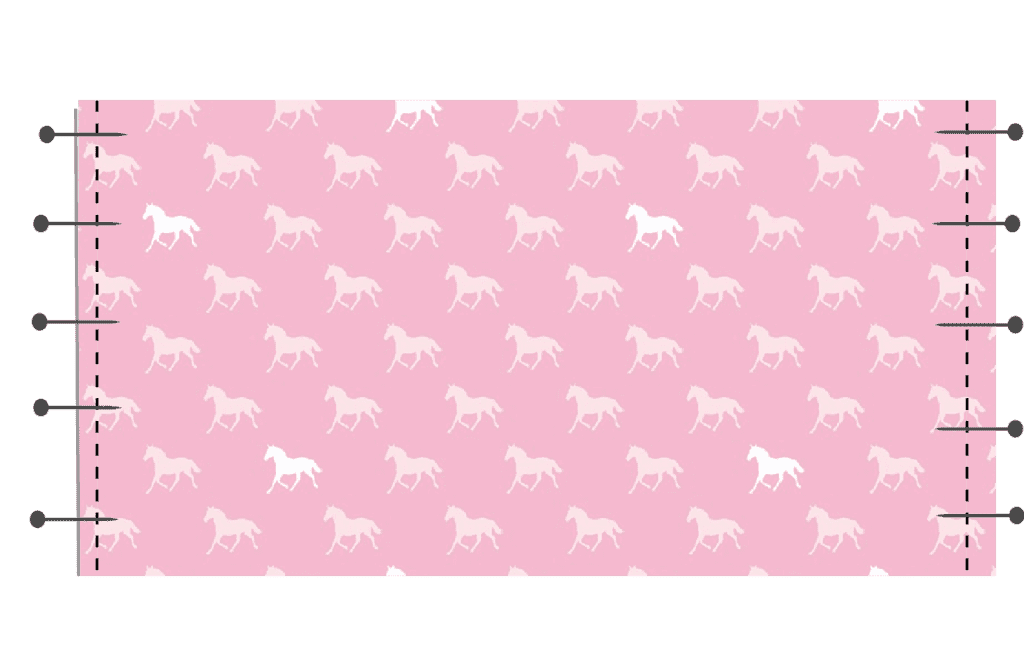
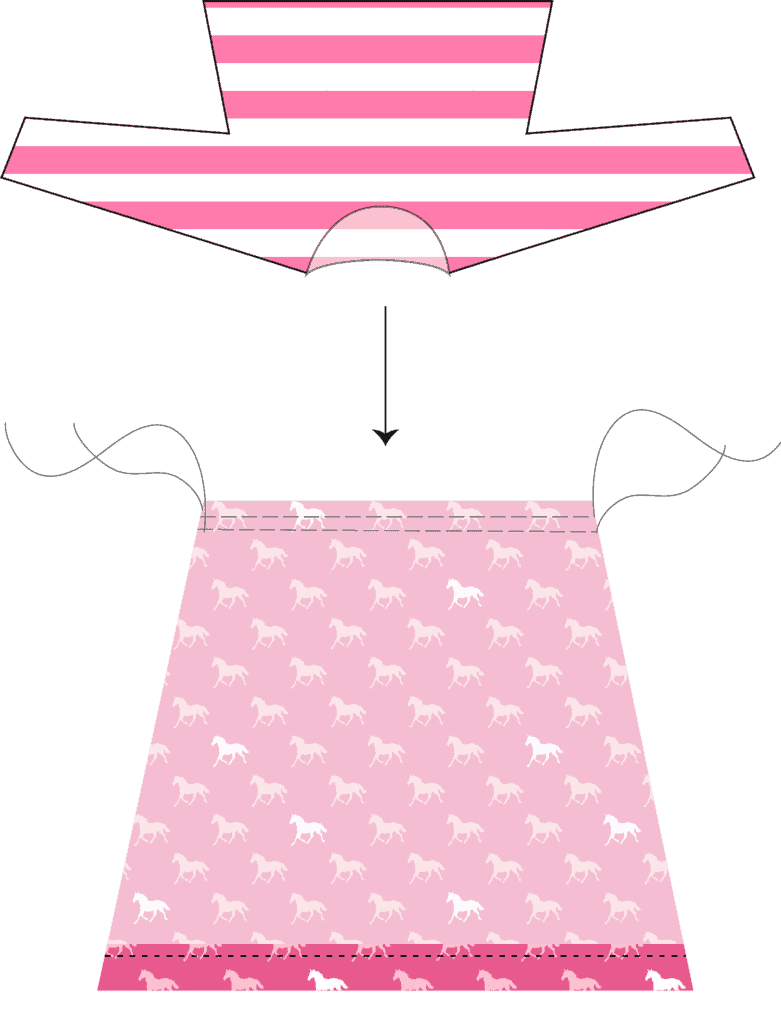
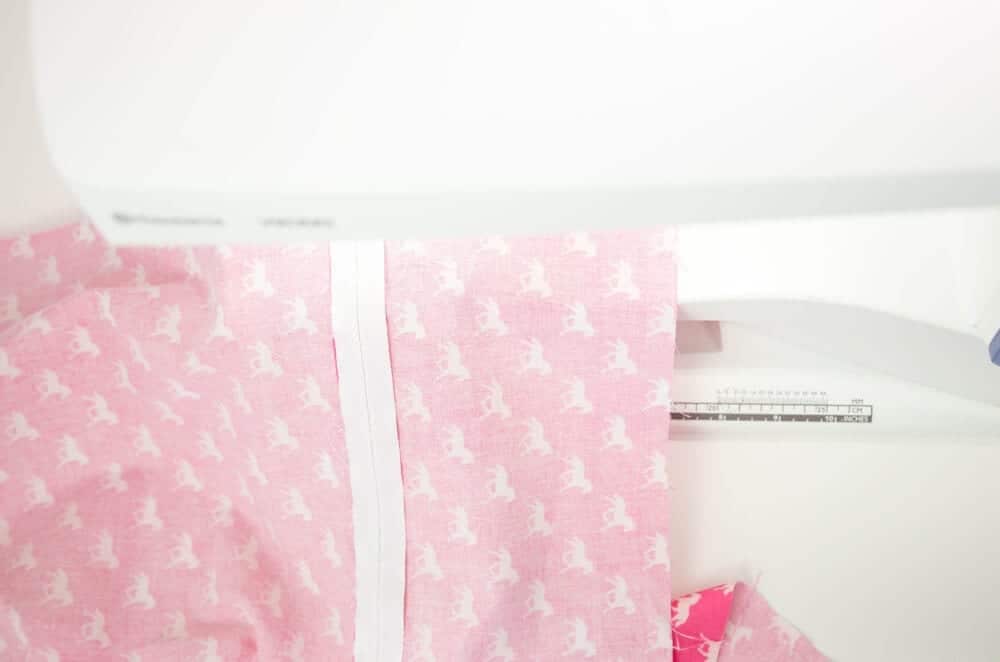
    1. Place your 9 x 6 (or larger) felt piece on the 12 x 12 fabricgrip mat.place-cricut-cutting-mat-in-the-cricut-maker
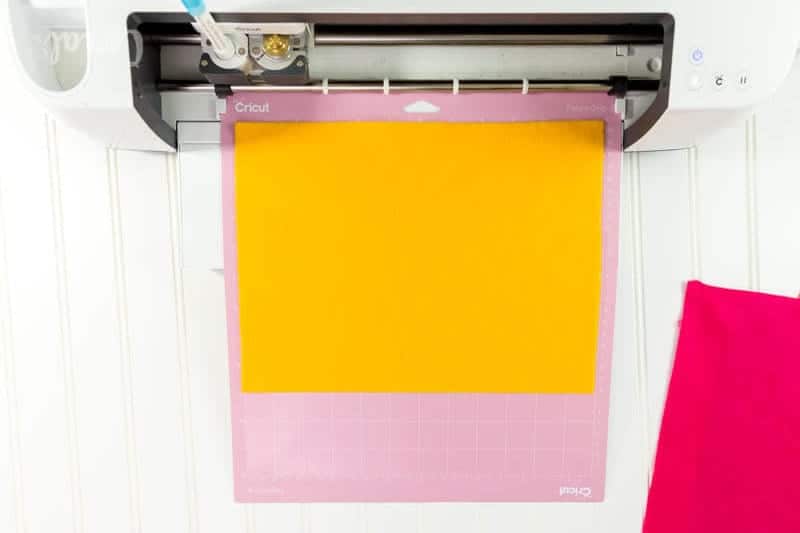
    2. Load the fabricgrip mat into the Cricut Maker.place-cricut-fabric-pen-in-cricut-maker
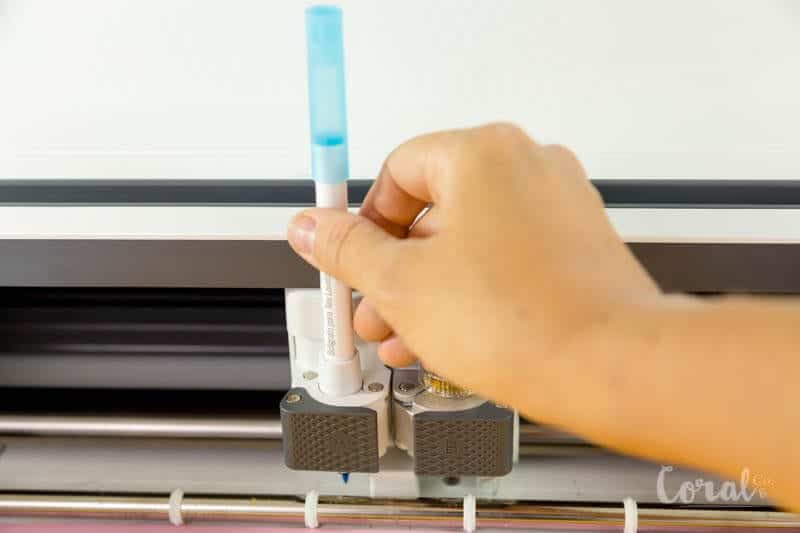
    3. Insert the washable fabric marker in the pen slot in the machine.simplicity-felt-flower-pattern-in-design-space-app
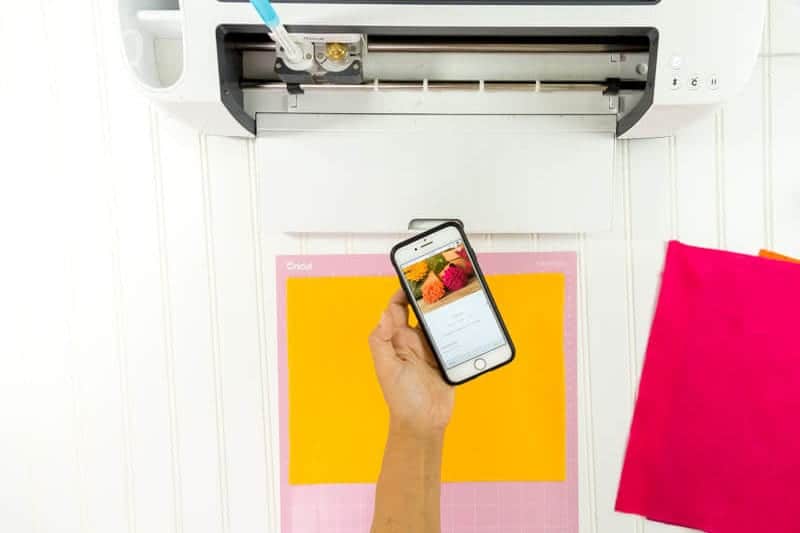
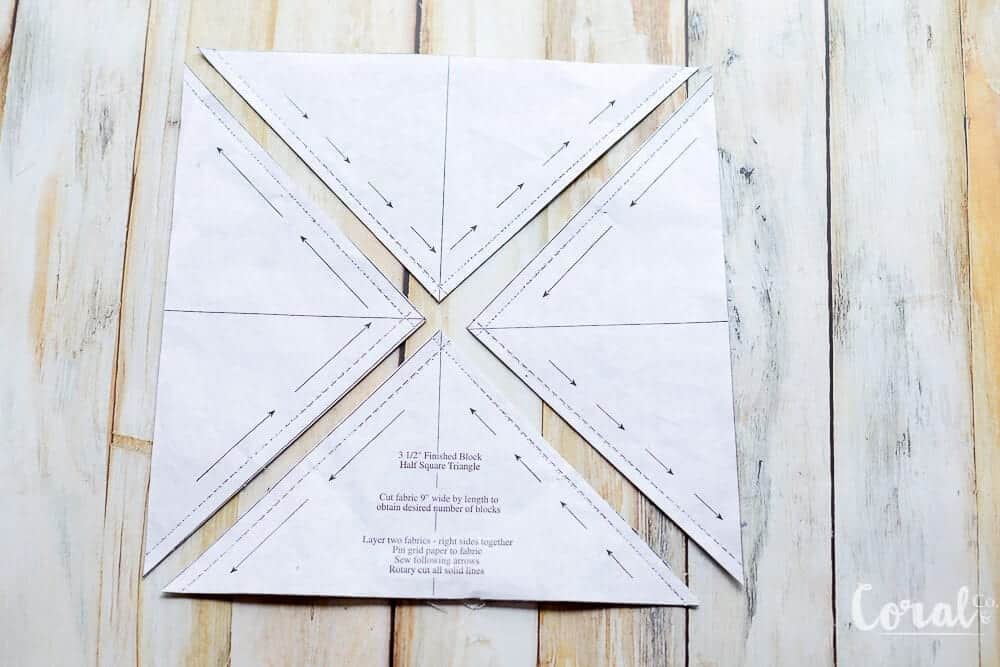
    4. Go into Design Space and load the Simplicity Chrysanthemum Pattern and click Make.cut-felt-in-cricut-maker


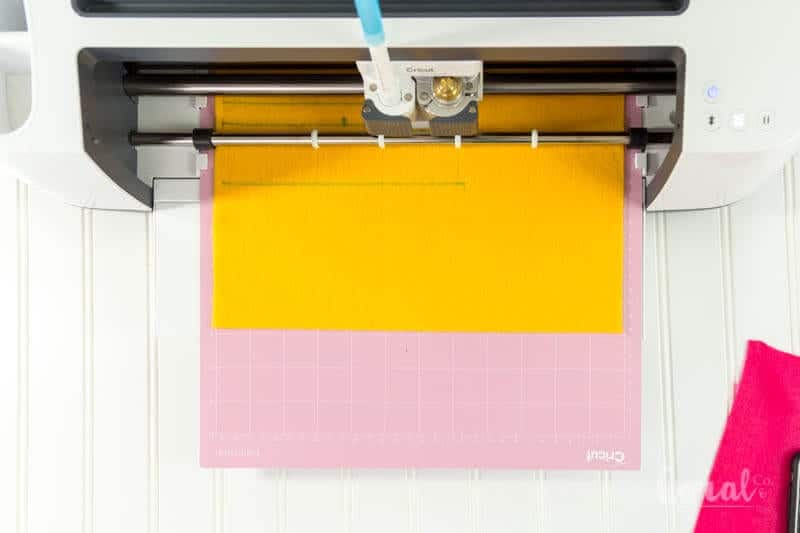
  1. Mark and Cut felt with the Cricut Maker.diy-chrysanthemum-felt-flowers-on-cricut-cutting-mat
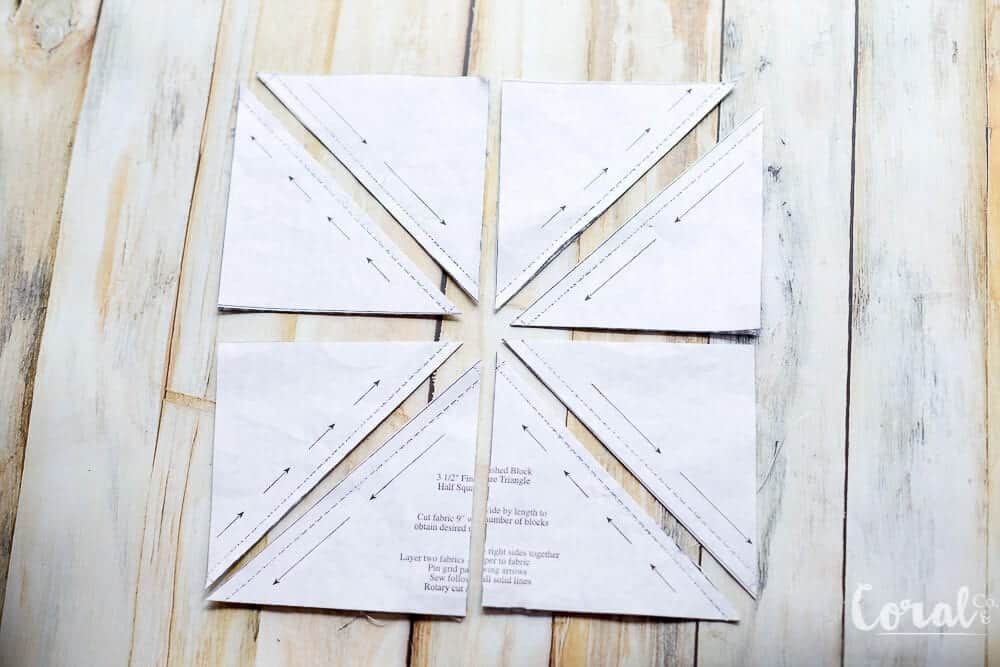
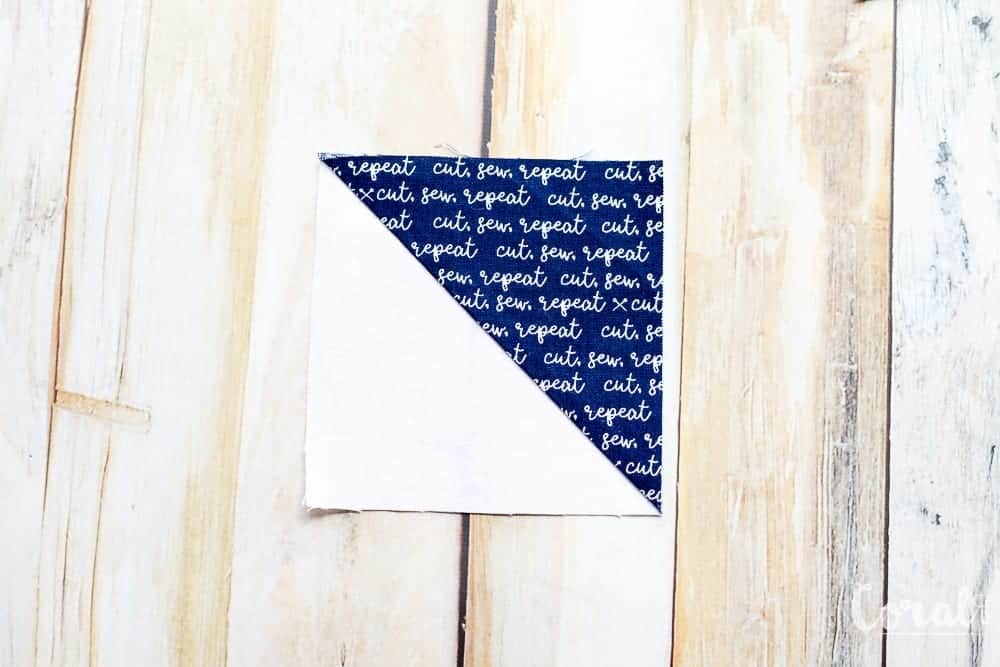
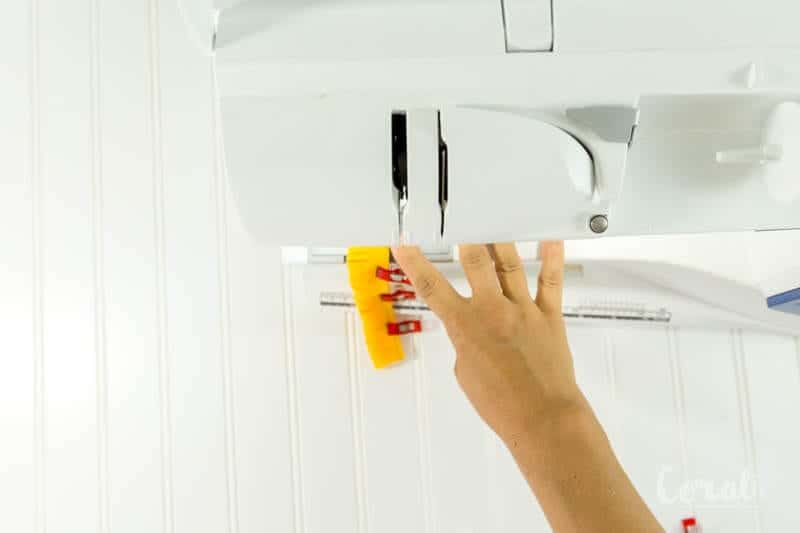
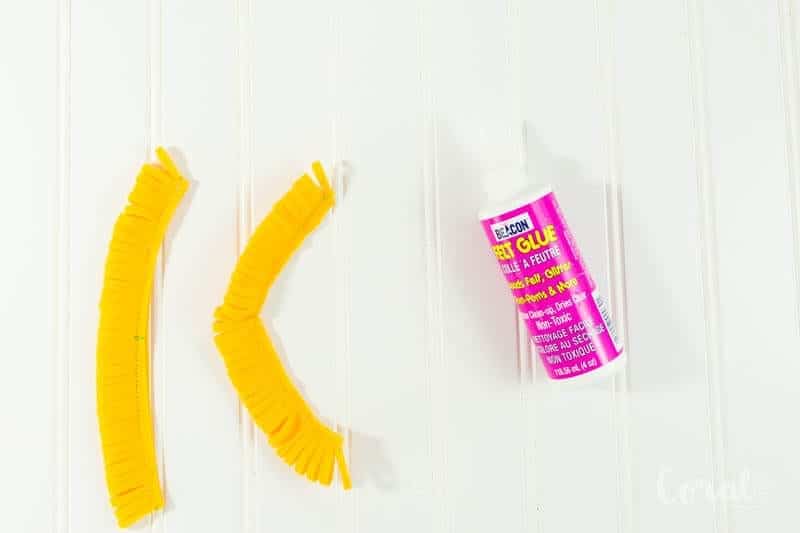
  2. Pull felt off the fabricgrip mat.  You will now have two cut felt pattern pieces.fold-diy-felt-flower-pattern-piece-in-half-and-clip
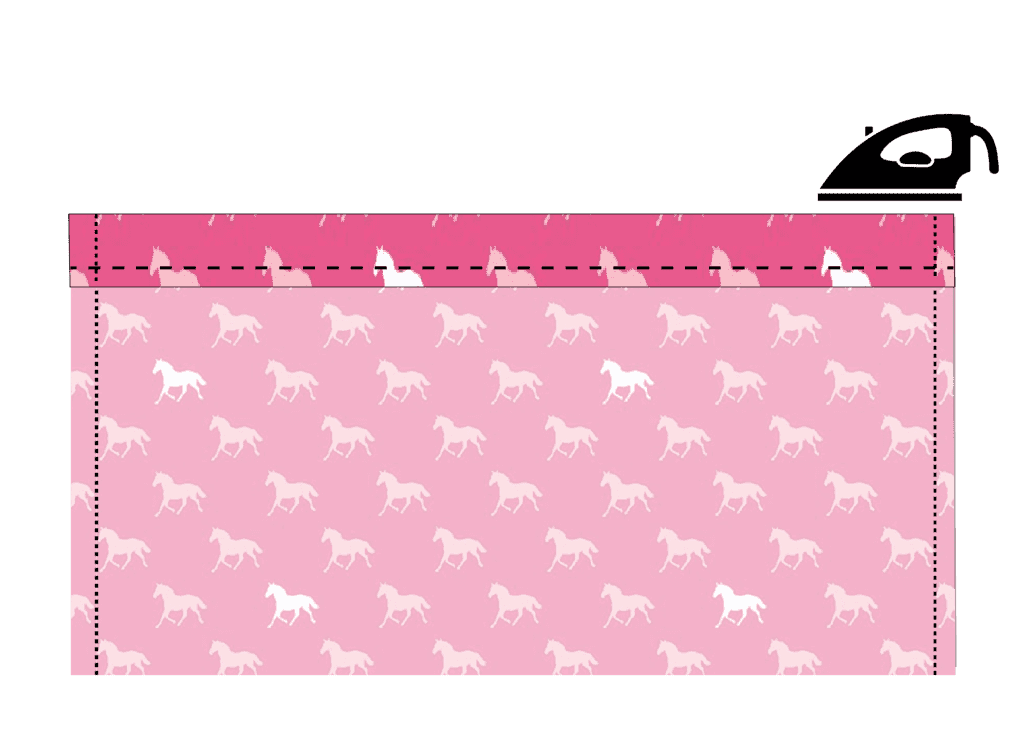
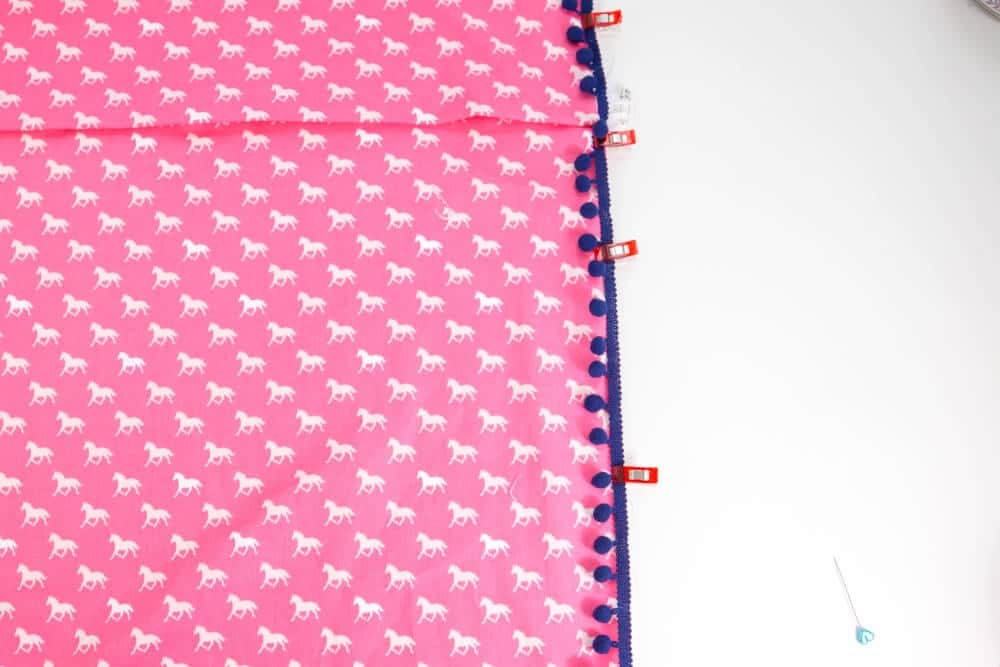
  3. Fold the felt in half lengthwise and clip or pin to hold.sew-straight-line-down-felt-flower-pattern-piece
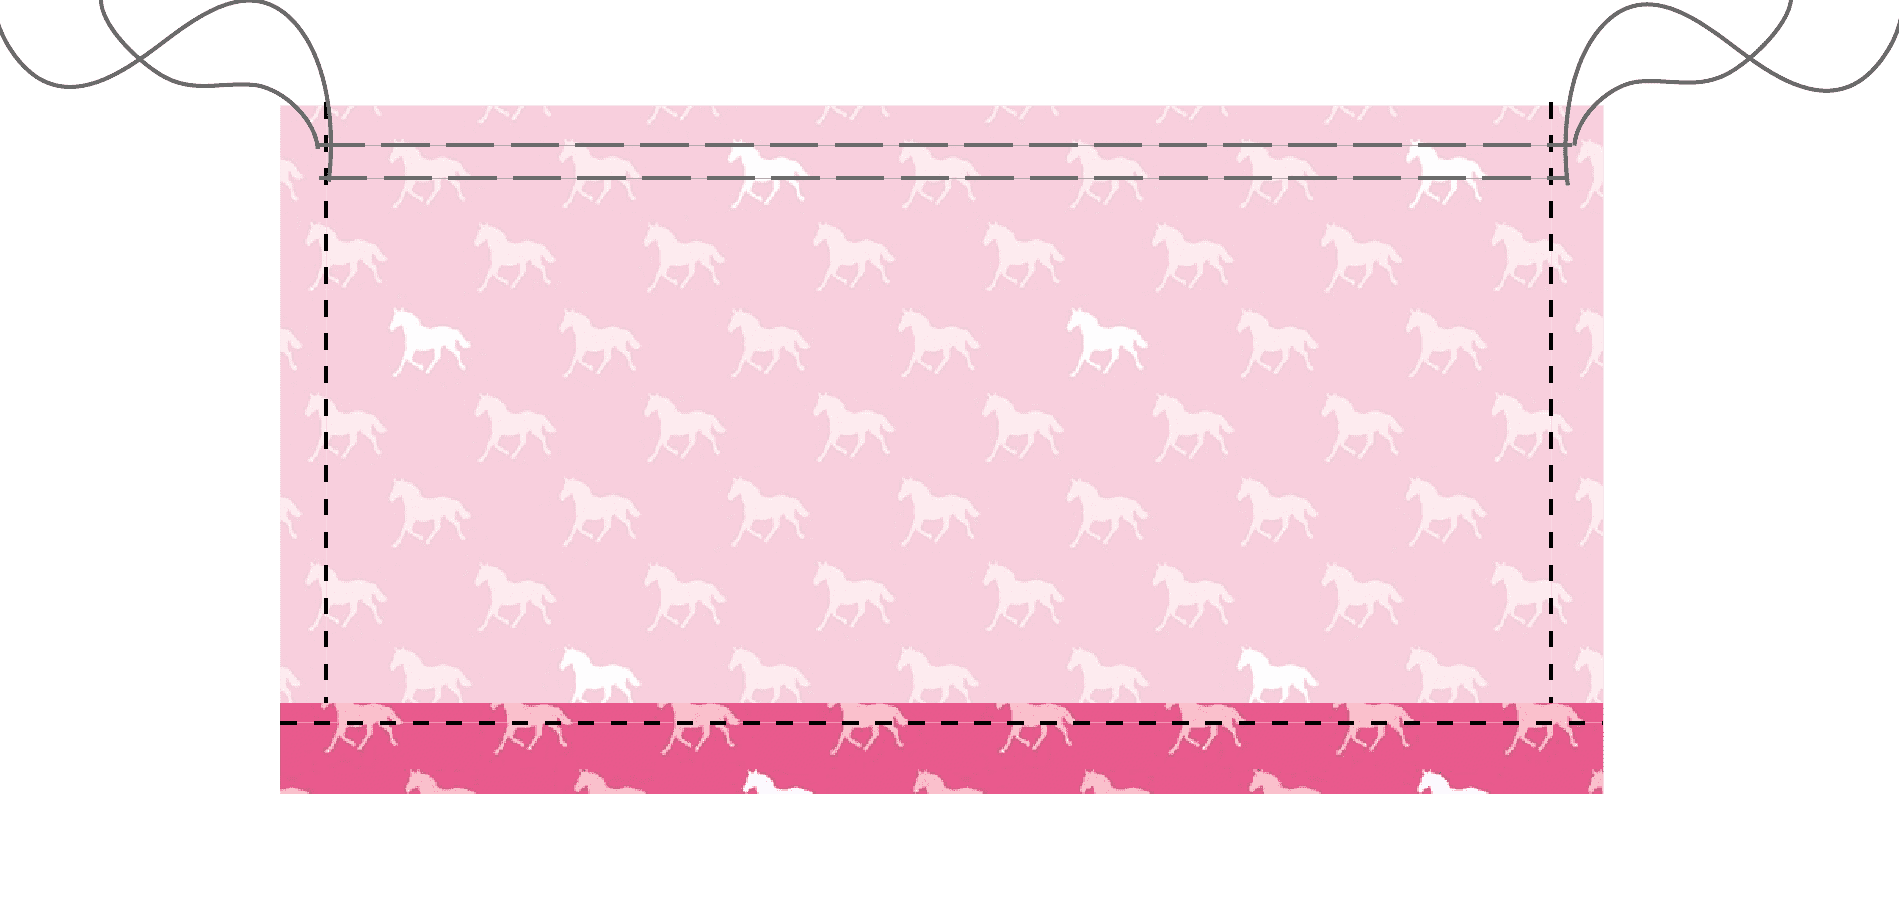
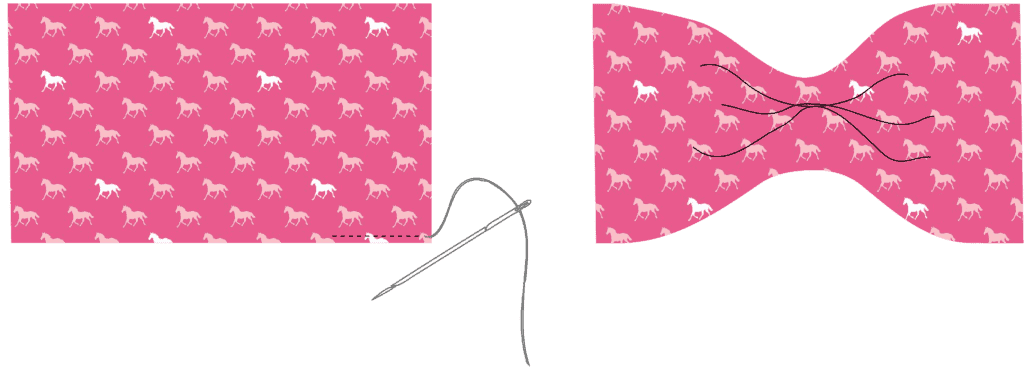
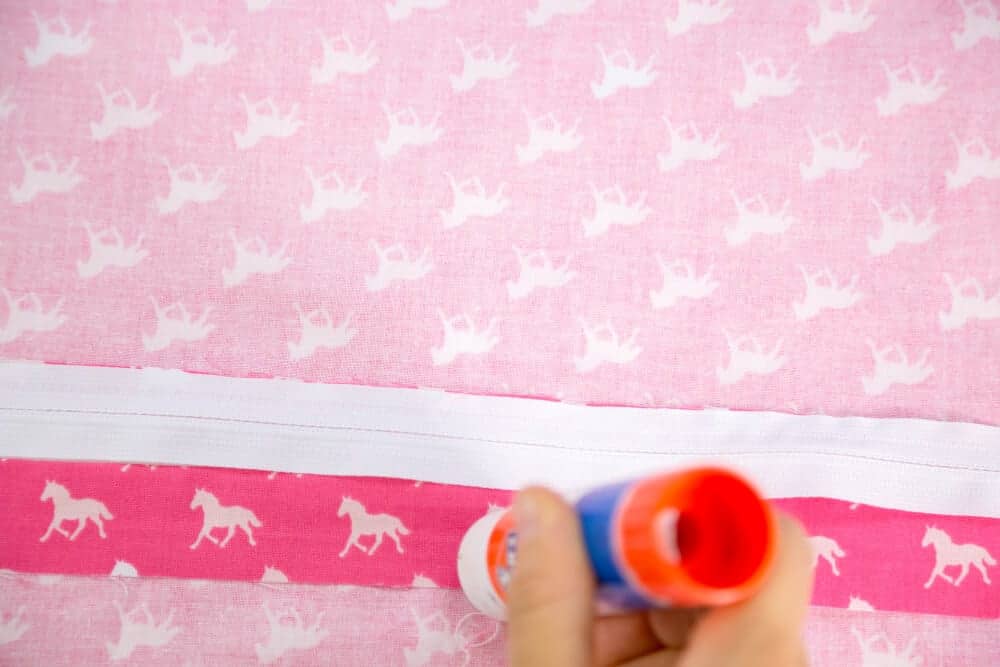
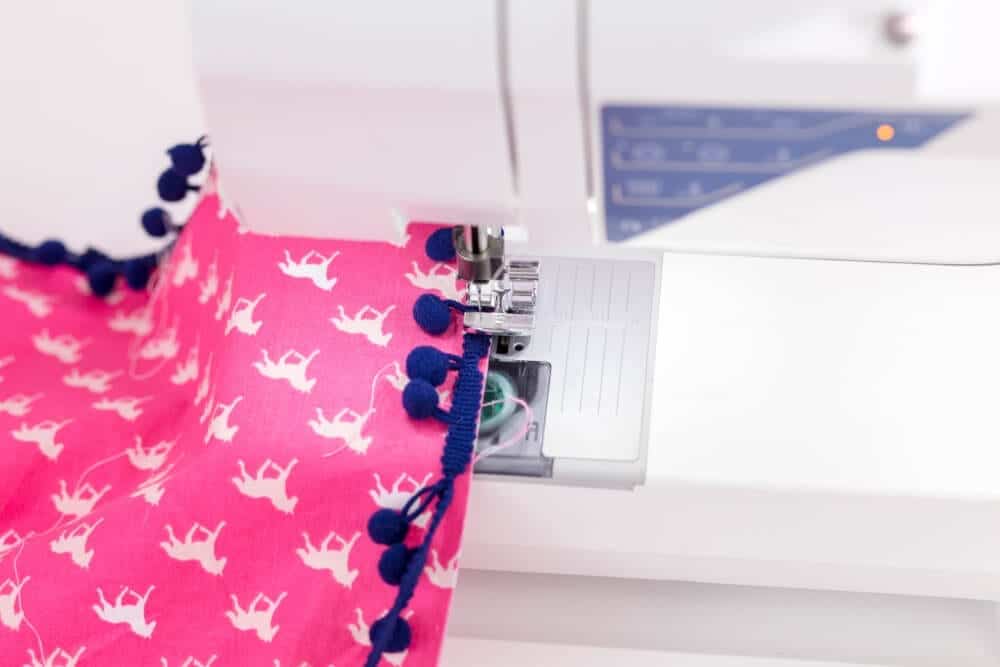
  4. Sew using a 1/4″ seam down the straight (noncut) long edge of the pattern piece.add-glue-to-felt-flower-fabric-piece-and-roll
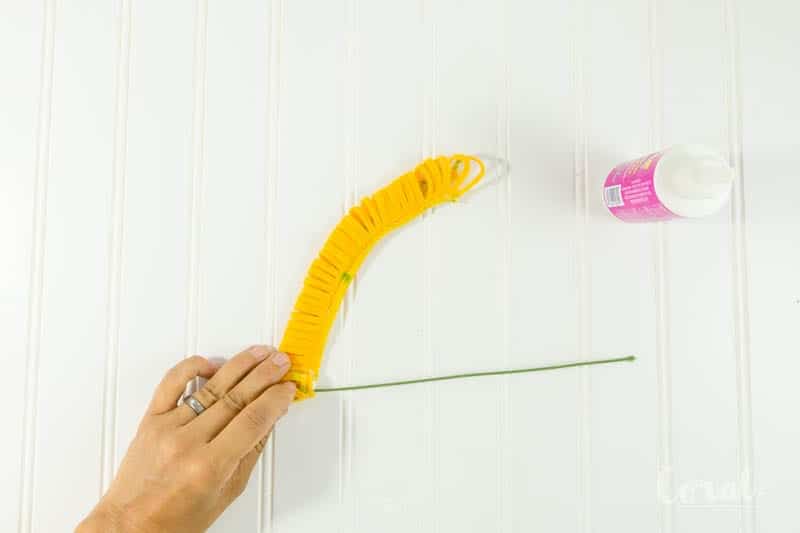
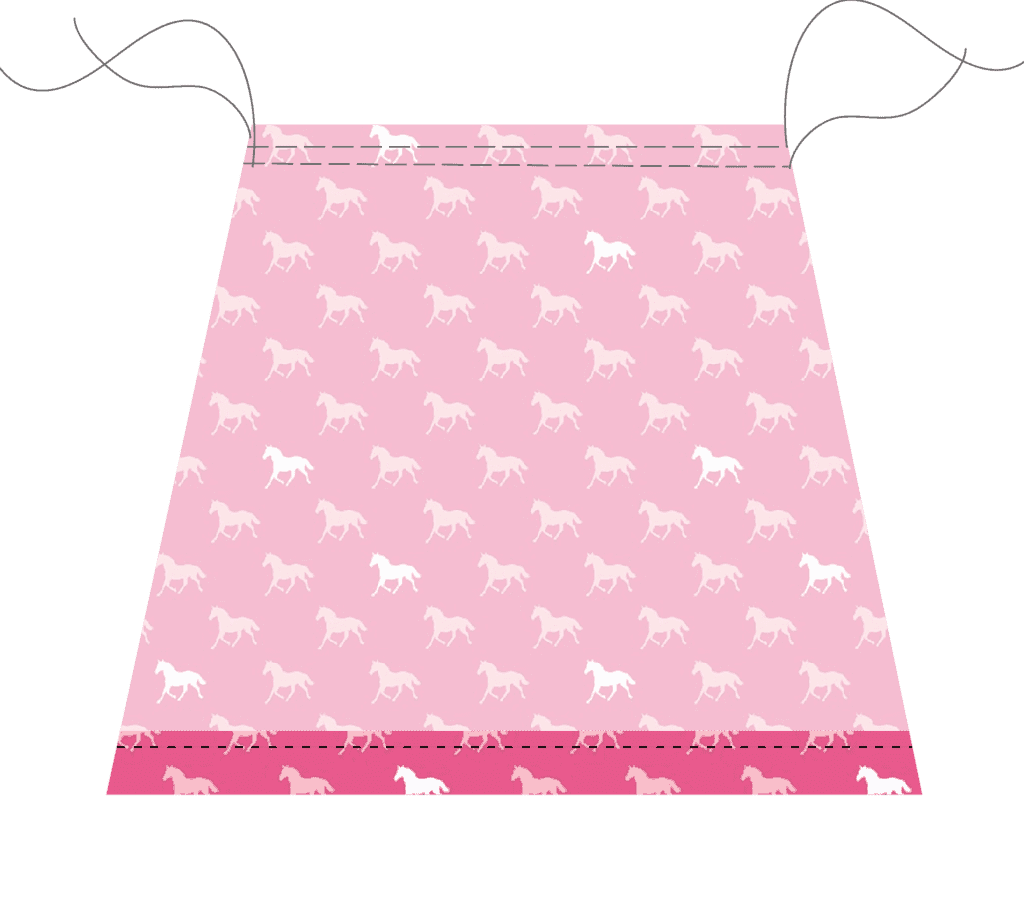
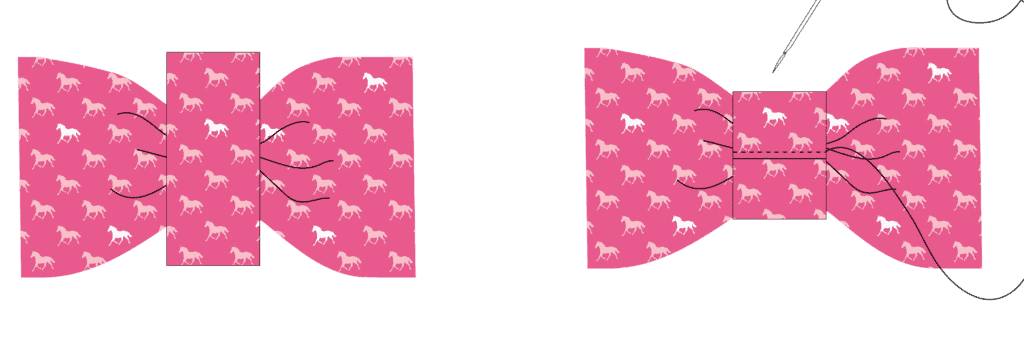
  5. Starting at the bottom roll the flower pattern piece to form a flower.  Secure with fabric glue and add the second piece to make a full chrysanthemum.  You can insert a floral stem if you would like.  
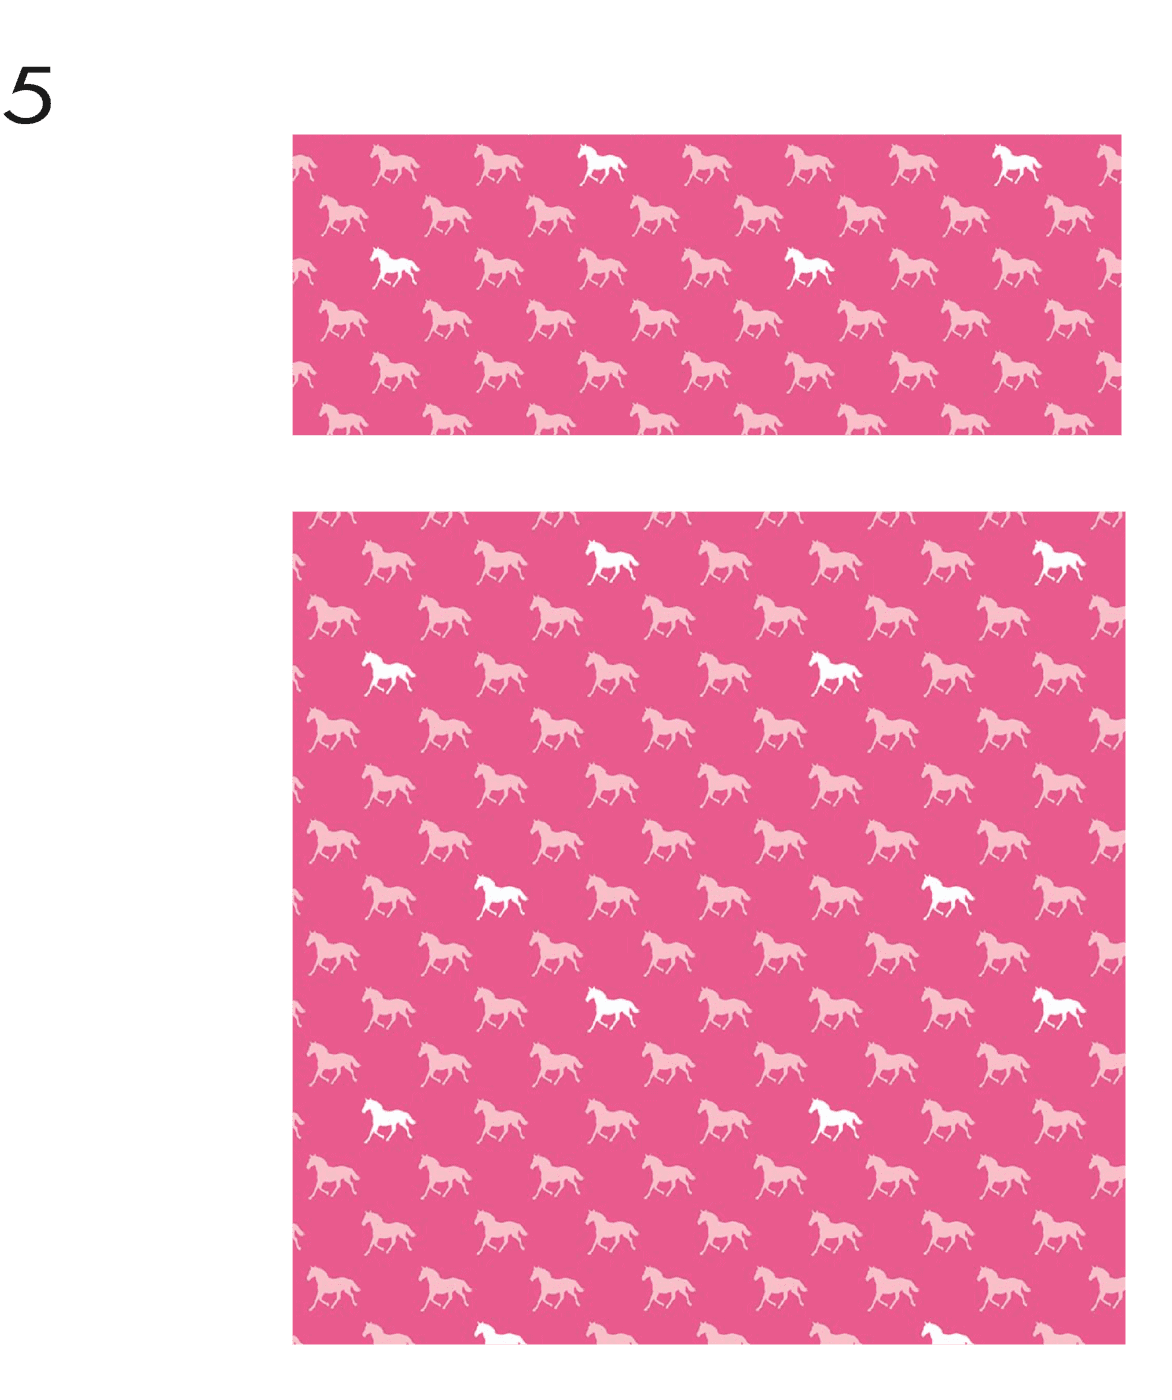
  6. You are all finished!  Make them in a variety of colors!
    roll-felt-flower-up-and-secure-with-glue

Watch the Video for the DIY Chrysanthemum Felt Flower Tutorial!


This is a sponsored conversation written by me on behalf of Cricut. The opinions and text are all mine.

Crafts, Cricut, Free Tutorials, Videos crafts, cricut, felt

Fun and Fabulous Crafts and Recipes + Block Party Link Up!

May 21, 2018 · Leave a Comment

I-want-to-try-these-recipes-and-craft-tutorials-fun-ideas

There have been so many amazing DIY projects and delicious looking recipes I seriously want to make them all.

I want to try these recipes and craft tutorials fun ideas

Half Square Triangle Tutorial | Sorting Hat Cupcakes | DIY Firepit Cover | Chickpeas and Black Bean Snack

Book Quote Pendants | DIY Jewelry Holder | BBQ Egg Rolls | Photo Wreath

Peanutbutter Cup Cookies | Tricks to Productivity | Pom Pom Napkins | Kid Science Experiments

Wood Slice Pendants | Shrimp Tacos | Dream Craft Room | DIY Cat Teacups

Here are some that jumped out at me from the last few Block Parties. I can’t wait to try out all the tasty recipes and craft up my own version of these creations!

Rae Gun guest posting picture

And since we are in full blown Summer mode over here, here are some of my favorite Summer posts.

nail stamping instant pot butter chickent swim bag tutorial

Fun Nail Tutorial | Pressure Cooker Butter Chicken | Ultimate Pool Bag Tutorial

Now let’s see what YOU have been up to. Link up to the Block Party and be featured on all our blogs!

Rae Gun Ramblings | Keeping it Simple Crafts | Housewife Eclectic | Coral and Co.

Be sure to read over the guidelines…

  • We’d love it if you pinned the Crafts and Recipes Round Up!
  • Link to a specific post, not your homepage.
  • Don’t add links to promote giveaways, other link parties or your shops.
  • Visit and comment on at least 2 other links in the party.
  • Don’t link posts you’ve linked before.
  • This party starts Sunday @ 9pm EST and ends Friday @ midnight.
  • By entering a link, you give us permission to feature an image on our blogs. Proper credit and links will always be given.
  • Please link back to whatever blog you are linking from and let your readers know you joined the block party and invite them to do the same!

[inlinkz_linkup id=781379 mode=1]

SaveSaveSaveSave

SaveSaveSaveSave

SaveSave

block party block party

DIY Color Wheel with Yellow color Inspiration + Block Party

May 14, 2018 · Leave a Comment

DIY-yellow-color-crafts-inspiration

Summer is almost here and this week it’s all about everything sunshine and yellow!  Check out all the yellow color DIY inspiration below!  And don’t forget to enter the block party!DIY-yellow-color-crafts-inspiration


DIY sunshine in my pocket cut files

DIY Belle Dress from a men’s shirt

Framed Felt circle wreath

DIY farmhouse style frame

No-sew yellow rope baskets

DIY LEGO head storage containers

Rag skirt tutorial

Emoji candy pouch party favor

Diy Minion shirts

Easy lollipop cookies

DIY flexi-back dress with elastic panel tutorial

DIY baby changing station mat

Plus Block Baby Quilt 


It’s time for another Block Party hosted by Rae Gun Ramblings | Keeping it Simple Crafts | Housewife Eclectic | Coral and Co.! Be sure to check out all of our blogs, because we’ve been up to some fun things lately.

shelly-morgan-from-coral-and-co

Hey ya’ll its Shelly from Coral + Co.  I am recently new to the block party and am having a great time seeing all your craft link ups!  I love all things crafty and sewing.  Here are a few things that I have been doing lately.


diy-popsicle-stick-flower-pot-tutorialdiy-pom-pom-napkin-tutorial

DIY T-shirt dress tutorial | Popsicle stick planter | Unicorn Yoga T-shirt | Pom Pom Trim Napkin Tutorial


  • Now it’s time for the party!
    • We’d love it if you pinned the Yellow DIY Inspiration image above!

    Link to a specific post, not your homepage.

  • Don’t add links to promote giveaways, other link parties or your shops.
  • Visit and comment on at least 2 other links in the party.
  • Don’t link posts you’ve linked before.
  • This party starts Sunday @ 9pm EST and ends Friday @ midnight.
  • By entering a link, you give us permission to feature an image on our blogs. Proper credit and links will always be given.
  • Please link back to whatever blog you are linking from and let your readers know you joined the block party on any of your social media channels and invite them to do the same!

[inlinkz_linkup id=780380 mode=1]

block party block party, yellow

DIY Popsicle Stick Planter Tutorial – Easy Project to Make With Kids

May 7, 2018 · Leave a Comment

diy-popsicle-stick-flower-pot-tutorial

My kids love making anything with popsicle sticks.  Who’s don’t?!  And I kind of have a thing for succulents.   So I came up with this DIY Popsicle Stick Planter Tutorial that is fun and easy enough for kids to make, and functional enough to hold a plant, which also happens to make a great gift for Mother’s Day!

The kids and I headed Michaels, which might possibly be the easiest place to lose them now that they have discovered all the art supplies there.  Okay, not really lose them but they definitely find quite a few rabbit holes art projects to bring home even during a short trip.  Hmmm, that sounds vaguely familiar.  Haha.  Ok, I can’t leave Michael’s without bringing home at least five new projects that I found as well.

diy-popsicle-stick-flower-pot-tutorial

We found all the supplies there that we needed, and obviously a few that we didn’t need, including some Color Burst Sharpies.  Did I mention that I have a slight obsession with Sharpies?  And the colors in the Color Burst pack!  I had to have them all….of course.  I chose some really fun spring shades of pinks and blues and greens that I thought would be perfect for Mother’s Day.  

Supplies Needed For DIY Popsicle Stick Planter

You can find all of these supplies at Michaels

  1. Elmers Craft Bond
  2. Sharpies Color Burst Markers
  3. White Acrylic Paint
  4. Short Popsicle Sticks
  5. Can or round container
  6. Paint Brush

DIY-popsicle-stick-planter-tutorial-with-sharpies

DIY Popsicle Stick Planter Tutorial

DIY-popsicle-stick-planter-tutorial

  1. Add glue to around the outside of the can.
  2. Add popsicle sticks around the outside of the tin can and let dry.DIY-popsicle-stick-planter-tutorial
  3. Paint the popsicle sticks and top of the can with white paint.  Let Dry.diy-popsicle-stick-flower-pot-tutorial
  4. Draw dots or circles in different colors on the popsicle sticks.  Be sure that paint has dried well.diy-popsicle-stick-flower-pot-tutorial
  5. Add your dirt and plant.

“This post is part of a social shopper marketing insight campaign with Pollinate Media Group® and Newell Brands,but all my opinions are my own. #pmedia #GetCraftyWithElmers   http://my-disclosur.es/OBsstV”


Crafts, Videos kids crafts, mother's day

Summer Outdoor Fun and Block Party

May 7, 2018 · Leave a Comment

summer-outdoor-crafts-for-kids

School is out in just a few weeks! Check out these fun ideas for getting outside with your kids!


…

Read On →

block party block party

Best DIY Mother’s Day Gift Ideas for Crafters to Make or Buy

May 4, 2018 · Leave a Comment

diy-mothers-day-gift-ideas-for-crafters-to-make-or-buy

Mother’s Day is just around the corner so I put together a list of the Best DIY Mother’s Day Gift Ideas for Crafters to make or buy.  There are a lot of times that I enjoying making a diy Mother’s Day Gift, there are sometimes that I am just too busy, or didn’t think of it in time and need to buy something instead.  So I thought a list of both creative and thoughtful Mother’s Day Gift Ideas that would appeal to people who love to create even if you didn’t make the gift yourself!

diy-mothers-day-gift-ideas-for-crafters-to-make-or-buy

DIY Mother’s Day Gift Ideas for Crafters

diy-pom-pom-napkin-tutorial
  1. These DIY Pom Pom Dinner Napkins also make the perfect DIY Mothers Day gift and are crazy easy to sew!diy-mothers-day-printable-gift-tag
  2. Turn some mason jars into DIY Mason Jar Planters with some chalk paint and these Mother’s Day printable gift tags.
    mothers-day-handwritten-bracelet
  3. Is there anything sweeter than these handwritten bracelets.  What a great way to keep loved ones close to mom’s heart for Mother’s Day.mothers-day-personalized-stationary
  4. Personalized stationery is the perfect Mother’s Day gift idea for any mother who loves to write sweet notes to her friends and family.  Add in this super trendy floral print and you have a gift mom will love!diy-macrame-plant-hanger-brit-co
  5. This DIY Macrame Plant holder is so easy and would be really great for a kid to help make for mom’s day!diy-mothers-day-sugar-scrub
  6. I love when gifts are easy to make, and you can’t get any easier than this 3 ingredient Brown Sugar Scrub by Somewhat Simple. Just perfect for a DIY Mothers Day gift!diy-unicorn-body-scrub
  7. I couldn’t resist adding this Magical Unicorn Whipped Soap Scrub by Rose Garden Apothecary off Etsy. Mothers Day is the perfect day to tell your mother she’s as special as a magical Unicorn because of course, she is!diy-mothers-day-bath-bomb-donut
  8. I’m loving the Bath Bomb phase and these Donut ones are just gorgeous! Bramble Berry’s video tutorial makes them look so easy to make!
  9. Not sure you have time to make Bath Bombs? These Sprinkle Donut Bath Bombs by Off the Hook by Mary on etsy look just as amazing!diy-mothers-day-tassel-earings
  10. Earrings also make an amazing Mothers Day gift. These Tassle earrings by Swordfights & Starry Nights are so easy and cute!diy-mothers-day-tassel-earings
  11. These sweet PomPom Girl earrings are screaming my name! You can find the easy tutorial at Paris La Reunion.diy-mothers-day-mason-jar-string-art-gift
  12. Another great DIY Mothers Day gift is Mason Jar Wall Art. Dear Paradise gives a great detailed tutorial to make one!diy-mothers-day-mason-jar-string-art-gift
  13. Don’t feel like being crafty because it’s your Mothers Day too? You can always grab the Mason Jar String Art off Etsy! This trio by TimberFarms Co are just darling!unicorn-yoga-shirt-svg
  14. We can’t forget those of us that love our Yoga! I just love these vinyl sayings and they’d make a perfect gift for Mother’s Day!mothers-day-sewing-gift
  15. Since we’re on the subject of Yoga, staying hydrated is also a must! These tumblers are just the thing to keep in any crafters bag on the go and this quick and easy tutorial by Sweet Red Poppy will have Mom out the door in no time!diy-mothers-day-apron-tutorial
  16. If you’re a beginner seamstress, aprons make a great quick and easy project. This one by Sew What Alicia is a perfect choice!diy-mothers-day-hexi-notebook-quilter
  17. How cute is this Personalized Notebook by Swoodson Says?? I may have an obsession with notebooks, and a personalized one with little hexies is even better!
    diy-mothers-day-glasses-holder
  18. Now this one is a very serious Mothers Day gift. My mother loses her glasses all the time! So having a crazy adorable Easter Island guy should help that
    right?? You can grab Mr. Easter island guy off Amazon.mothers-day-personalized-necklaces
  19. These Personalized necklaces grabbed my attention immediately. They come in so many pretty metals and designs!
    diy-mothers-day-printable
  20. If Mother loves sewing like most of us here do, she will definitely agree with this sewing printable.  This would look great in her sewing and craft room.diy-mothers-day-tassel-earings
  21. Of course, I’m still on jewelry, especially when it’s my favorite trend right now! These Mini Tassel Earrings by Petit Bout De Chou are another easy DIY and completely on point for Mothers Day!diy-mason-jar-spa-kit-mothers-day
  22. We all know that sometimes one gift just isn’t enough, so Mother Day’s Jar is a great idea! I love how this one is full of a great DIY spa day! You can see what Classy Clutter put in hers on her blog!
  23. I just love this gorgeous String Art Picture from by La. I never realized how easy it would be to make!

Pin for Later!

diy-mothers-day-gift-ideas-for-crafters-to-make-or-buy

Holiday, Mother's Day, Spring mother's day

Teacher Appreciation Week – Last Minute Teacher Gift Ideas + Block Party Link Up

Apr 30, 2018 · Leave a Comment

Last-Minute-Teacher-Appreciation-Gift-Ideas-721x1024

Teacher appreciation week is coming up and it is a great time to show the teachers the love that they deserve. They put so much time and energy into their jobs and the kids they teach. If you need some great teacher gift ideas, check out these last-minute teacher appreciation gift ideas that were linked last week in the linky party.

…

Read On →

block party block party

DIY T-Shirt Dress Tutorial – How to Add a Skirt to a Shirt

Apr 27, 2018 · 18 Comments

easy-t-shirt-dress-tutorial
diy-t-shirt-dress-tutorial

Turning an old t-shirt or dress that no longer fits into an easy t-shirt dress by adding a skirt to a t-shirt.  This project is simple and can be made quickly with this diy t-shirt dress tutorial.  I choose my favorite fabric to make a skirt and then added the skirt to the t-shirt and had a cute dress!

This post has been updated.  I was really excited to pull this dress out to go with the pillows I made with the new Derby Day fabric collection.  I honestly can’t believe the t-shirt dress still fits one of them (Ava was seriously still a baby in the first pictures.  The baby chub is killin’ me).  I am leaving the older pictures up as well because I simply adore the blue dress but sadly it was lost along the way.  I updated the tutorial graphics but am leaving the rest of the post as it originally was because it is still one of my favorites!

derby-day-fabric-t-shirt-tutorial
easy-t-shirt-dress-tutorial

I am so so excited, the Kentucky Derby will be happening again soon!  If you’re wondering why this makes me so excited let me explain.  I was born in Lexington, Kentucky, spent 8 years there during my 20’s and believe it or not…my dad was a jockey!  Yes, for real.  In fact, my family has and still does racehorses in Lexington.  Even while growing up in California my entire childhood was spent around horses.  I guess you could say I have never known a life without horses.

T-shirt bow dress tutorial and pattern from Coral and Co.

So when Melissa Mortenson of The Polka Chair (whose style I simply adore) came out with her horse-centric fabric line Derby Style I just about flipped.  I knew I HAD to do something awesome with these prints, so I decided that the diy t-shirt dress tutorial was the perfect project.  For more inspiration from this line, check out the horseshoe-shaped pillow I made!  Super fun!!!!  You can also see the Modern Hourglass Pillow made with Derby Day fabrics.

DIY T-shirt dress pattern and tutorial with two bow options. Perfect for Derby Day. By Coral and Co.

The Derby Style line is sold out but the new Derby Day line just came out and has so many cute prints, including my favorite horse print.

_MG_0363

My best friend Jennie sent me the horse print fabric because she knows my true heart.  Yay for best sewing friends!  I happened to have two boat neck style dresses that were getting very short on my girls and when I saw how well they went with this fabric I knew it was a perfect match.

derby-style-t-shirt-dress-tutorial

To make the easy t-shirt dress simply pick a coordination old t-shirt and  your favorite fabric. You will make a skirt and sew it to the shirt to make a diy t-shirt dress!So I have a super easy and fun T-shirt dress Pattern and Tutorial with two bow options.  I was able to use a 1/2 yard for each toddler t-shirt dress.  For the shorter dress (3T) I had a little more fabric and made a larger bow and for the longer dress (5T) I made a smaller bow and attached it to the collar.  For sizes 6 and up you will probably need a whole yard for the correct width.

DIY T-shirt Dress Tutorial

Supplies you will need

  1. Old T-shirt, dress, or boatneck style t-shirt pattern
  2. 1/2 to 1 yard of quilting cotton fabric, I used the Derby Day Fabrics
  3. Fabric Bow Sewing Pattern in the Resource Library
how-to-make-a-dress-from-a-t-shirt
  1. Using either a t-shirt or a dress that is too short determine where you would like to cut the t-shirt.  I generally use the belly button as a reference point at which to cut.  Add a half inch for the seam allowance.
  2. Measure either a skirt or from the belly button to where you would like the dress length to end.  I usually measure just below the knees.
  3. Add a half inch to both sides and the top for seam allowance.  For the bottom add a full inch so you can hem it.  Mark and cut.how-to-sew-skirt-tutorial
  4. Using a 1/2″ seam join both sides of skirt pieces right sides together, pin and straight stitch down the short sides.fold-skirt-over-quarter-inch-to-hem-press
  5. Fold bottom raw edge under 1/4″ and press.fold-skirt-over-three-quarter-inch-to-hem-press
  6. Fold bottom edge under another 3/4″ and iron.  Sew hem 1/2″ from the bottom edge.how-to-gather-skirt-tutorial
  7. To gather skirt lengthen your stitch to 4 or 5 and straight stitch 1/4″ from the raw edge.  Repeat this step sewing a second line 1/2″ from the raw edge.
  1. Pull thread ends to gather skirt to match the width of the t-shirt opening.pull=threads-to-gather-skirt
  2. With Shirt facing right side out insert into the waist of the skirt. The skirt will be RST with the wrong side on the outside
  3. Pin shirt and skirt waist together.  Sew together using a 1/2” seam, serge or zigzag stitch edges to prevent fraying.
how-to-sew-a-bow-tutorial
  1. Cut 2 rectangles 5 x 7 inches. Starting near one corner sew 1/4” around edges leaving a 1 1/2 inch opening.
  2. Clip all four corner.how-to-sew-a-bow-tutorial
  3. Turn rectangle right side out pushing corners square and slipstitch the opening shut. Repeat these steps with a smaller rectangle as well.
  4. Push the center of bow together, you can sew this together if you like.how-to-sew-a-bow-tutorial-pattern
  5. Using smaller rectangle, place on the front of the bow and wrap around until both ends meet.
  6. Hand sew the small rectangle edges together on the backside of the bow.  When finished hand sew and attach to dress in the desired place.

Download the Fabric Bow Template in Resource Library.  

This will give you the correct measurements for the bow.

*** For the skirt measurements, you can refer to the Double Layer Skirt Pattern also found in the Resource Library.

turn-a-skirt-and-shirt-into-dress

If you don’t have a t-shirt to upcycle my picks for a pattern would be the Bateau Neck Top from Aesthetic Nest.  And a few striped knits from Riley Blake Designs that would work the Derby Day cotton prints.

Hope you have a great Derby Day!

Apparel, Free Tutorials, Kids, Sewing derby day, t-shirt dress

Easy DIY Kitchen Crafts to Make

Apr 23, 2018 · Leave a Comment

DIY-kitchen-crafts.-Great-tutorials-for-kitchen-decor-and-projects.

Hey guys!  I am going to be adding something new to the blog and am totally excited.  I will be joining some other awesome bloggers for a weekly craft roundup and link party.  I would love it if you joined the link party and share what you have made!

DIY Kitchen Crafts make some of the best gifts. Everyone needs something for their kitchen and a handmade craft is sure to be a big hit. Whether it’s a personalize coaster or hotbed these awesome tutorials with have you created the cutest kitchen creations!
DIY kitchen crafts. Great tutorials for kitchen decor and projects.

Wood Burnt Coaster | Pot Holder Emergency Kit | Kitchen Subway Art

Customized Coffee Sleeve | Snack Cups | DIY Potholders

15 Minute Placemats | Teacup Light Shades | Etched Drinking Glasses

DIY Kitchen Conversion Chart | Map Coasters | Home Tray

Star Potholder | Casserole Carrier | Potholder Towels

…

Read On →

block party home, kitchen, roundup

Quilted Pillow Pattern: Modern Hourglass + Derby Day Fabrics

Apr 10, 2018 · 3 Comments

quilted-pillow-cover-pattern

I have a brand new quilted pillow pattern for y’all today!  This big block modern hourglass quilted pillow pattern is perfect for both small and large prints.  I love the way it uses bold colors to pack a punch!

quilted-pillow-cover-pattern

<

derby-day-fabric-quilted-pillow-pattern-and-tutorial-coral-and-co

p style=”text-align: center;”>There is also a Video at the end of the post showing you all the steps of how to sew a modern hourglass quilted pillow pattern.
And by the way, have you seen the new gorgeous Derby Day Fabric line from Melissa Mortenson at The Polkadot Chair?  I knew immediately when I saw this line, which is a remix of her original Derby Style line that I wanted to something really big and fun with the pink horse print.

quilted-pillow-tutorial

I made the cute t-shirt dress that Ava is wearing (I can’t believe she can still fit in it!) and this fun horseshoe-shaped pillow.  You can also find the pattern for the quilt that is shown here.

diy-quilted-pillow-cover-tutorial

I was inspired by her applique horse pillow to pair the blue gingham plaid with the pink horses because…it’s blue gingham y’all!  And what goes better with than pink!  So southern, it’s true.  I really actually wanted to make pillows out of all her fabrics but had to stop myself at three!  Sheesh!

hour-glass-quilt-block-pillow-pattern
diy-quilt-pillow-tutorial

And if you haven’t noticed I am a die-hard pom-pom girl.  It seriously goes on everything, like these coasters and napkins.  So I couldn’t make spring pillows without pom-poms on everything!

Supplies for the Derby Day Modern Hourglass Quilted Pillow Pattern

  • 1 yard of Derby Day Horses in Pink
  • 1/2 yard Confetti Cottons Riley White
  • 1 Fat quarter Medium Gingham Navy
  • 3 yards 1/2 inch Navy Pom-Pom Trim 
  • 1 24″ inch white zipper
  • 1 24″ pillow insert

Quilted Pillow Pattern – Hourglass Quilt Block Tutorialhour-glass-quilt-block-cutting-diagram

Hourglass Quilted Pillow Front Cutting Diagram Steps

  1. Cut a 17.5 x 17.5 inch square from both pink and white fabrics
  2. Fold the pink square in half and with your clear ruler cut 1/8″ or less on the long edge of the triangle to form 2 triangles.
  3. Repeat for white fabric.
  4. Cut an 8.25″ square from the navy plaid fabric
  5. Fold the square in half and with your clear ruler cut 1/8″ or less on the long edge of the triangle to form 2 triangles.lapped-zipper-cutting-diagram

Lapped Zipper Pillow Back Cutting Diagram

  1. Cut top piece 6.5″ x 24.5″

  2. Cut bottom piece 19″ x 24.5″

How to Sew a Quilted Pillow Pattern Instructions

  1. Cut 6.5″ from the bottom long edge on the white triangle.
  2. Fold smaller triangle right sides together over white strip aligning matching sides and sew 1/4″ seam.
  1. Press seam toward top triangle
  2. Lay blue and white triangle over pink triangle with right sides together matching the top short side and sew 1/4″ seam down top short side.
  3. Repeat for the other triangle half of pillow matching the bottom short triangle side and sew 1/4″ seam.
  4. You will now have two have large triangle pieces.
  5. Fold both triangles right sides together and clip. 
  6. Sew 1/4″ seam down the long side.

How to Sew the Pillow Back and Add Pom Trim

  1. To add zipper fold top of the bottom back piece over 1/2″ and press.
  2. Using dritz washaway wondertape (my favorite method) or pins secure zipper and sew into place.
  1. Fold top pillow back piece over 1″ and press.
  2.  Overlap zipper bottom 3/4″ as pictured below.
  3. Secure zipper by glue basting, using drizt washaway wondertape or pinning
  4. Sew zipper into place.
  5.  Clip pom pom trim along edges of pillow back.
  1. Sew along trim edge.
  1. Place pillow top and bottom right sides together to form a sanchwich with pom pom trim inbetween.  
  2. Sew 1/4″ around edges of pillow.  Open zipper a bit before sewing edges so you will be able to turn pillowcase.  Clip corners.
  3. Turn right side out and you are done!
quilt-pillow-tutorial
quilt-pillow-pattern


Free Quilt Patterns, Free Tutorials, Home Sewing, Quilt Blocks, Quilt Patterns, Quilts, Sewing, Videos kentucky derby, pillow, quilt block, quilting

Kids Unicorns and Yoga Tanks Video Tutorial + New Cricut SportFlex Iron On

Mar 28, 2018 · Leave a Comment

unicorn-yoga-svg-files-free-coral-and-co
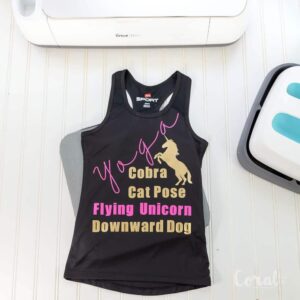
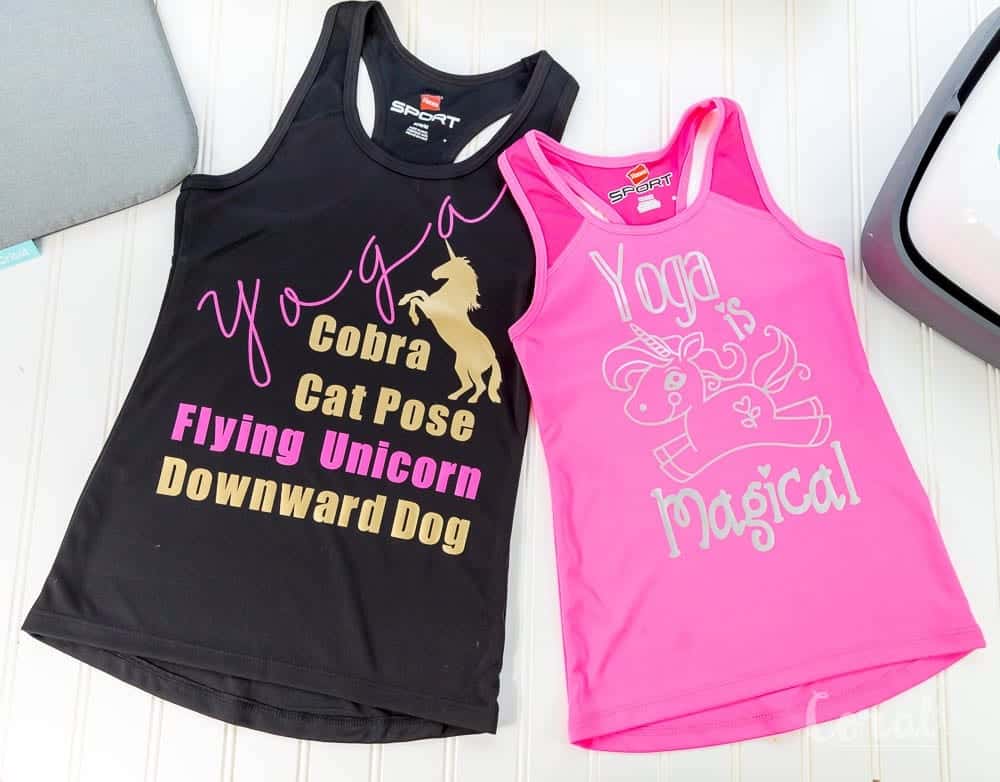
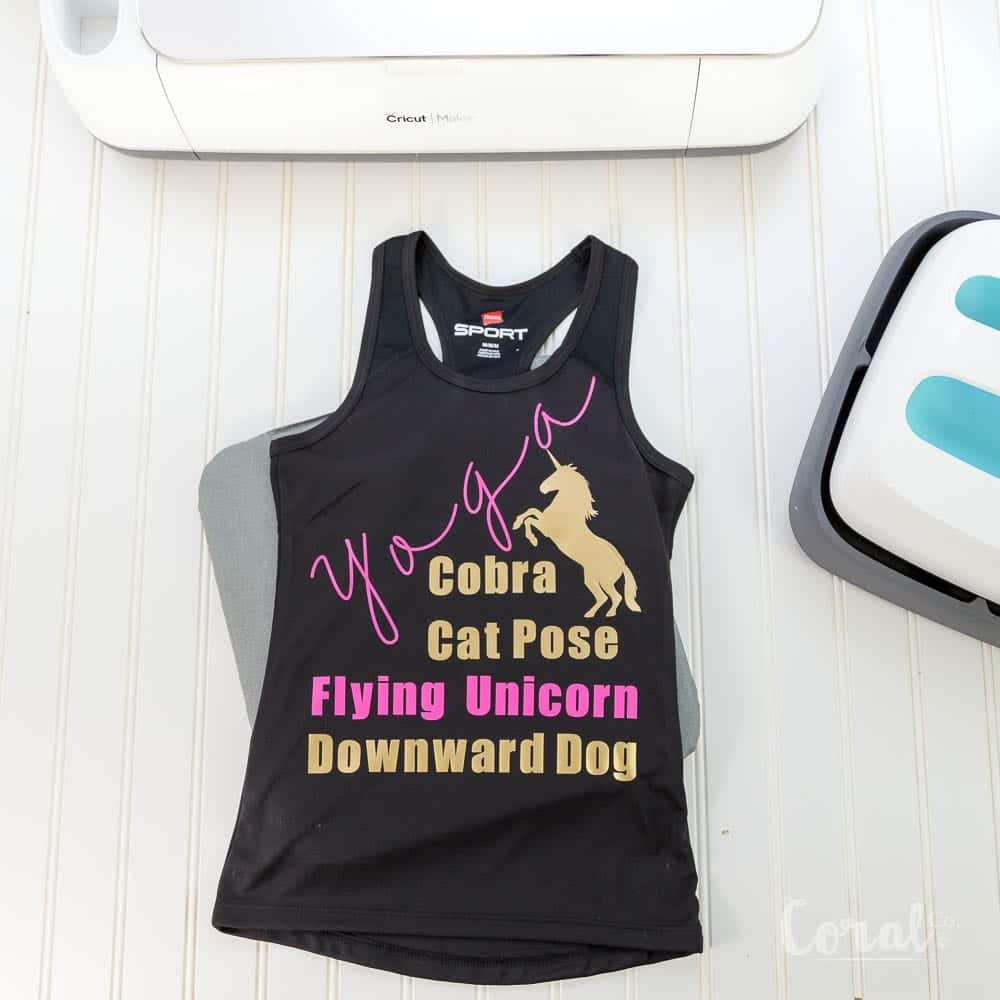
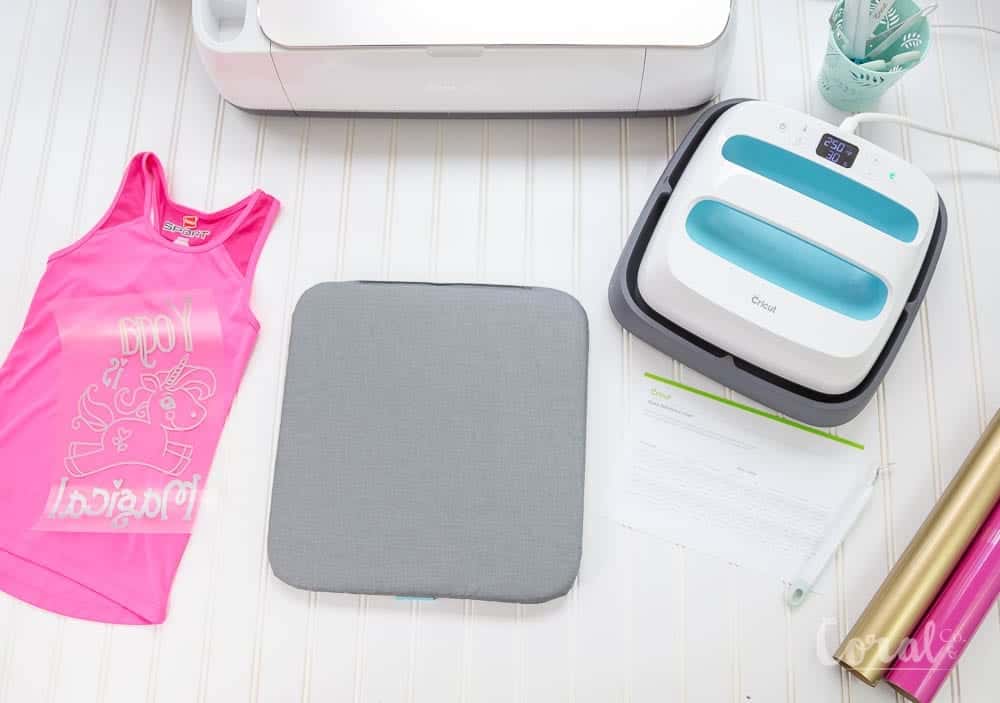
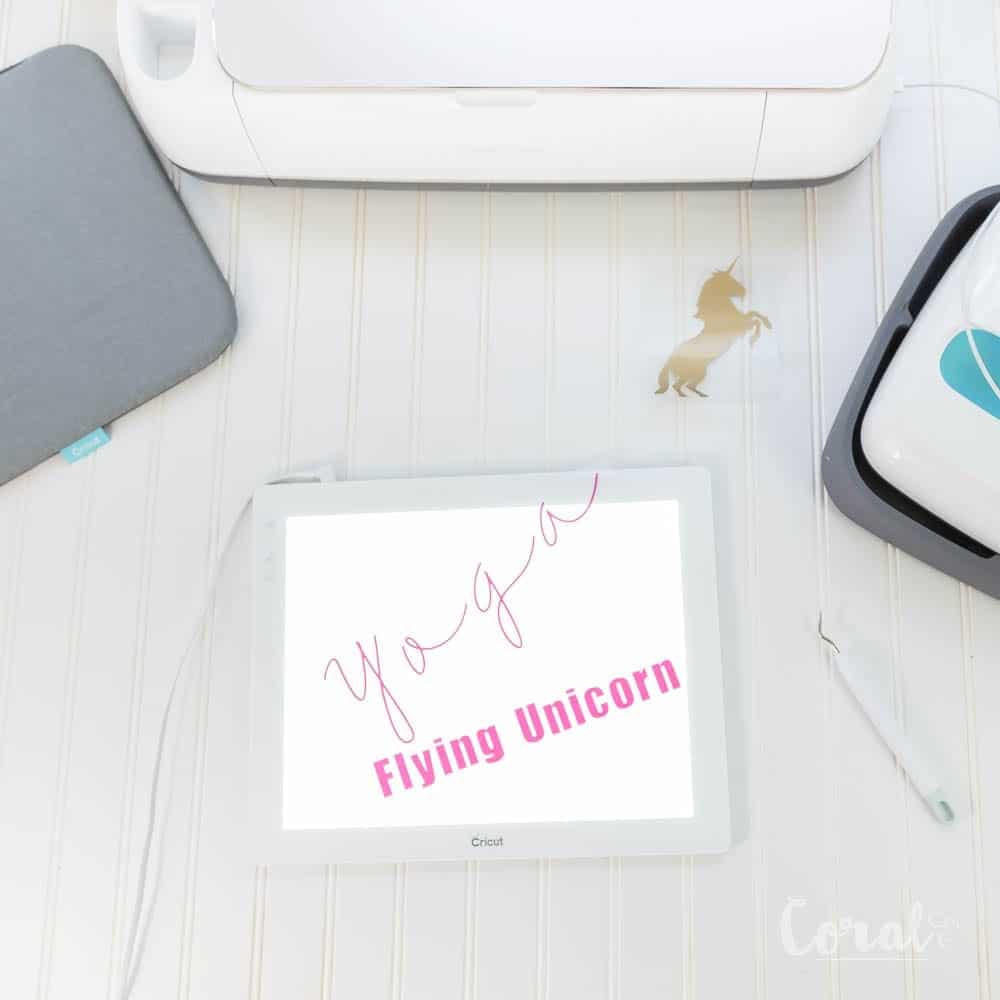
My kids are totally into workout gear right now and of course…UNICORNS!  So when Cricut came announced their new SportFlex Iron On I was ready for a yoga and unicorn loving iron on party!   kids-yoga-is-magical-unicorn-svg-workout-tank-coral-and-co
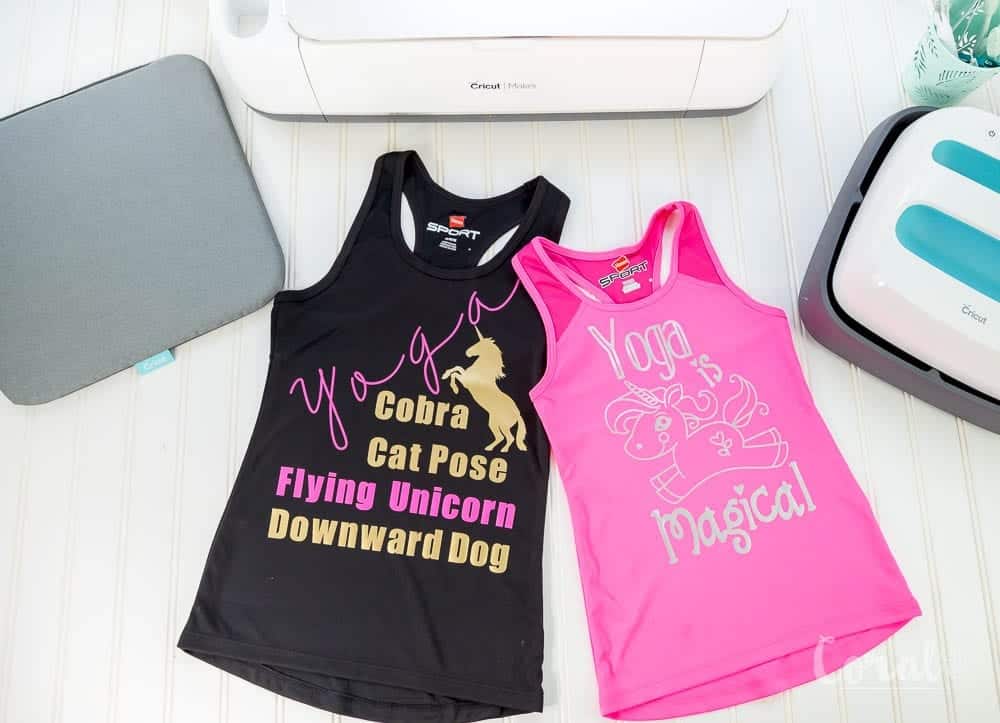
And it totally was a party!  Haha!  You should have seen the unicorn yoga poses my kids were busting out.  Now I am apparently on the hook for some unicorn horns.  I guess this is why I can never finish all my WIPs!
kids-yoga-svg-cut-files
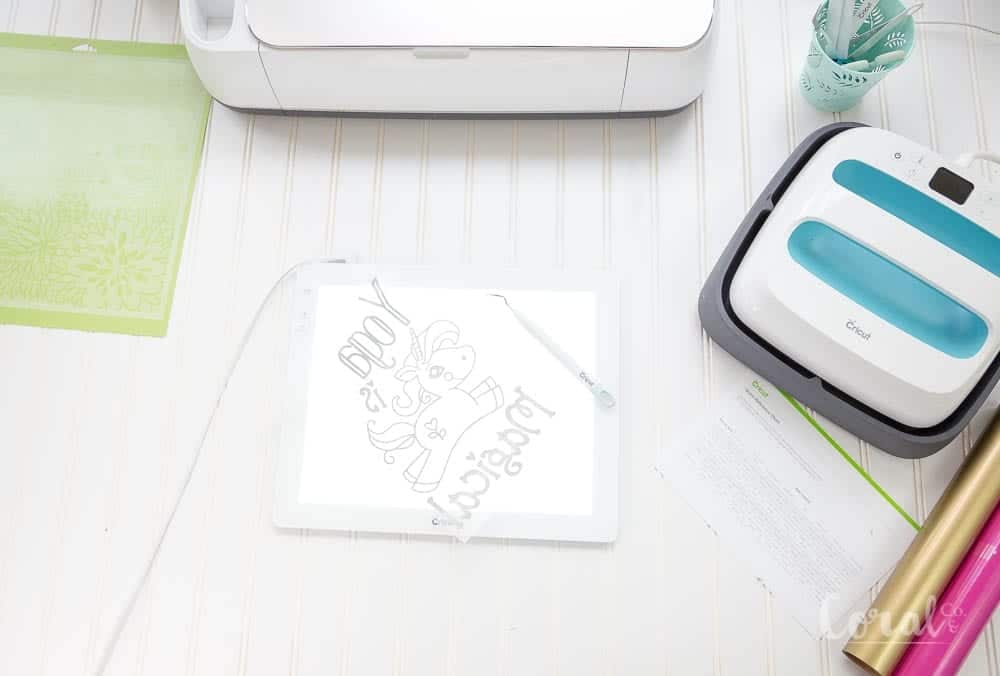
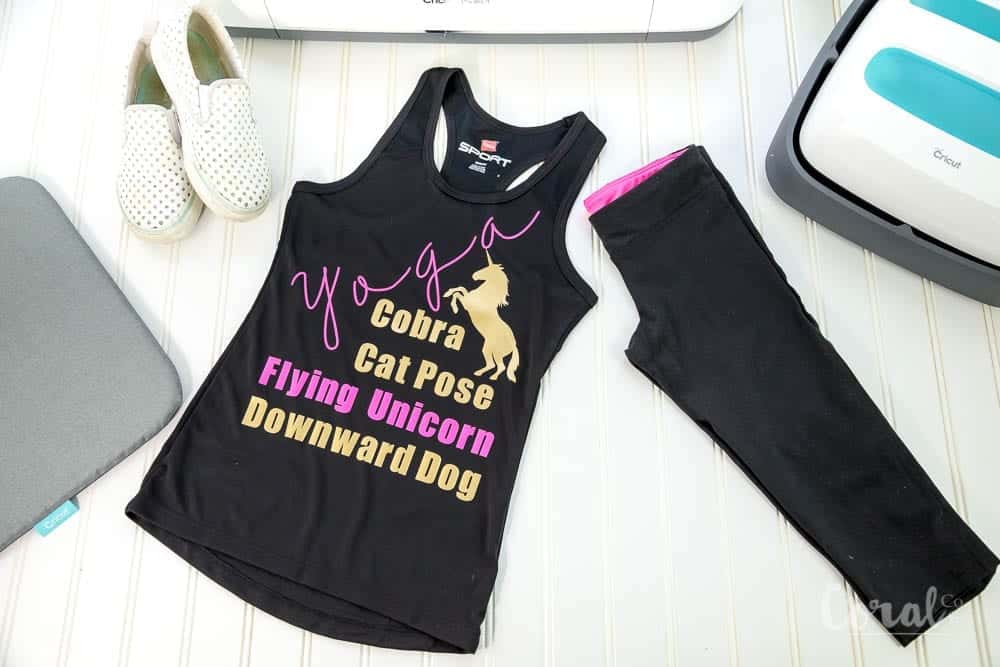
I absolutely love making custom T-s for the kids.  It’s such an easy way add some personal flair or holiday celebration to any blank shirt.  Most of the time I use plain cotton t-shirts, and shirts that don’t have a ton of stretch because I worry about the regular iron on getting a little funky and coming loose when the fabric stretches.cricut-sportflex-projects
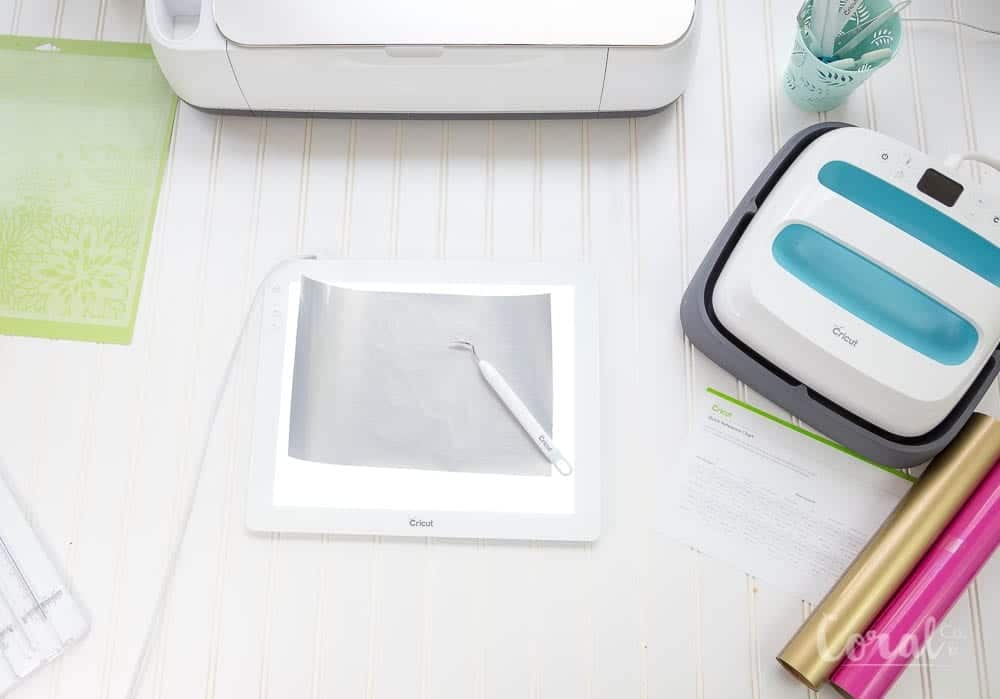
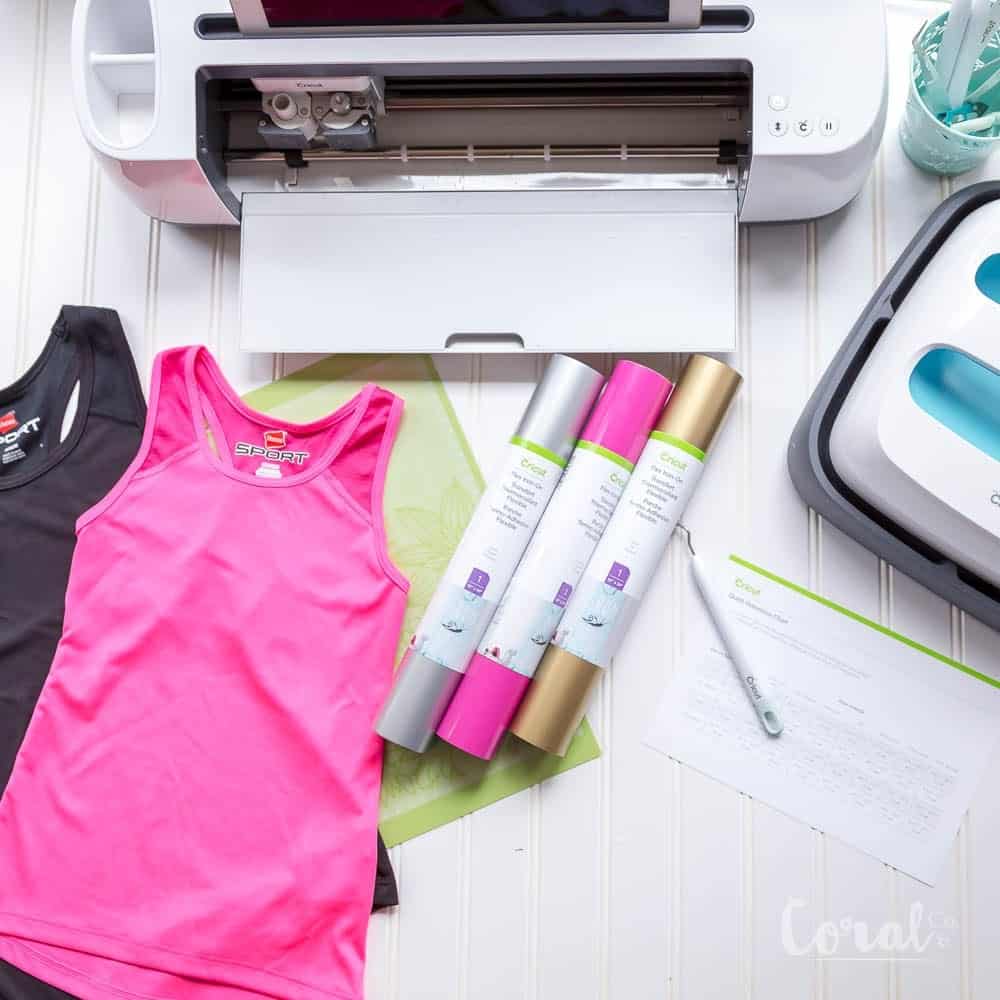
But now Cricut came up with the totally ingenuous SportFlex Iron On that can totally STRETCH and GIVE with the fabric. And oh my gosh, it definitely surpassed my expectations.  It is thin and supple and because it features the Cricut StrongBond Guarantee, boy oh boy does it STICK!  No peeling what-so-ever, eeek!  Ok, I know I sound a little ridiculously excited.  But I really can’t believe how well it worked.  This is going to be my go-to iron on from now on.

make-a-tshirt-with-cricut-sportflex-iron-on

I choose to use metallic silver, fuschia, and metallic gold for these shirts.  Right now there are only 9 colors to choose from, but I am sure that is going to be a super popular product and that they will add more.  I can’t wait to have aaaaaaaall the colors.  Ha.  You can also layer SportFlex On although Cricut suggests not using more than two layers at a time.

ironon-with-cricut-sportflex
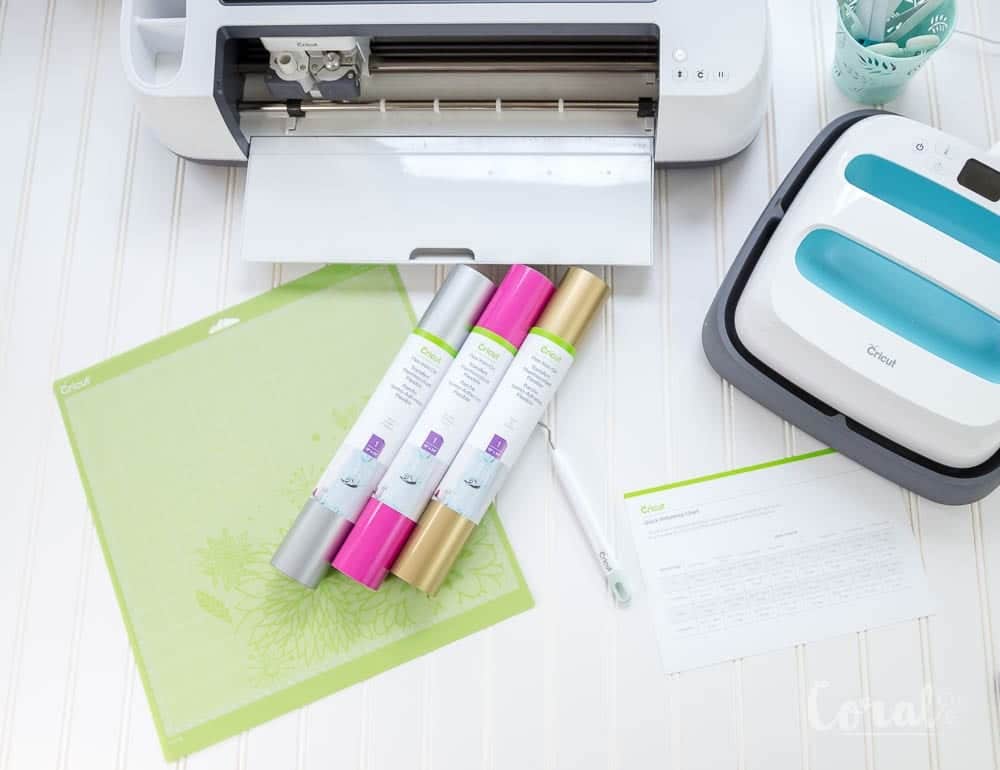
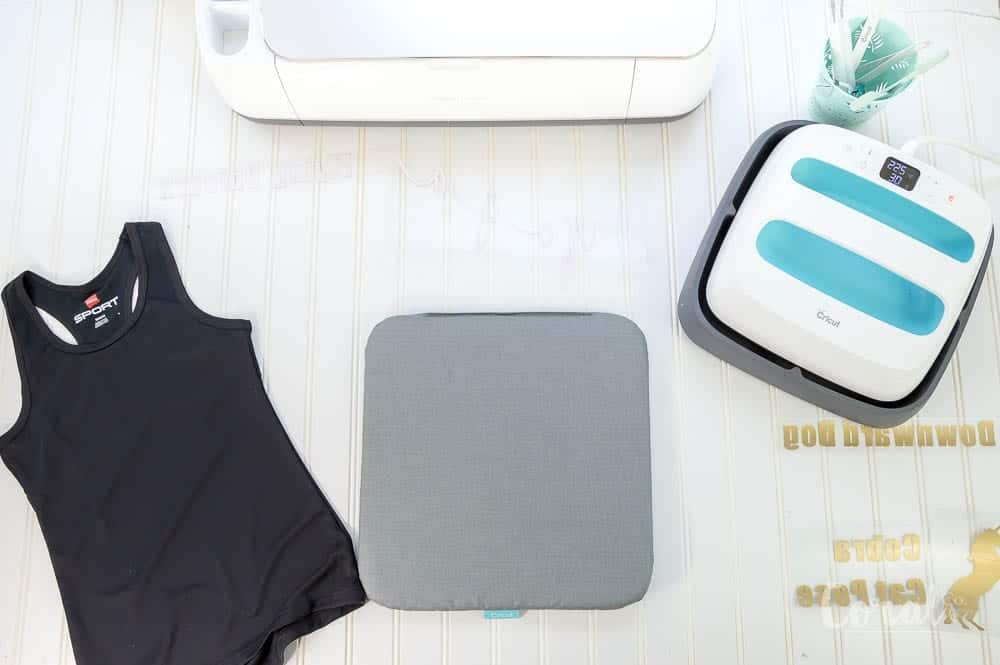
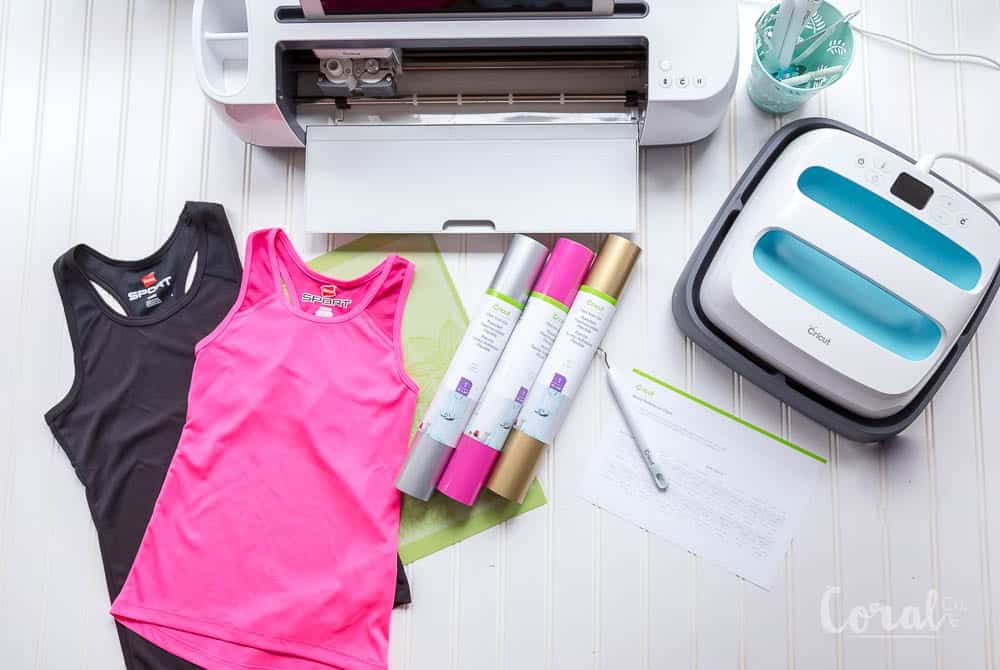
I ordered some color coordinating dry weave type workout tanks that are made from polyester.  The SportFlex Iron On is specifically made to work with synthetic materials like nylon and polyester, which works great with workout wear.  Maybe adding sparkly graphics and motivational sayings to all my workout gear will make me want to go to the gym more.  At least one can wish!  Hahahaha.flying-unicorn-yoga-pose-cricut-iron-on

Supplies you will need for Cricut SportFlex Yoga Unicorn Tank

Cricut Maker or Cricut Cutting Machine

1 to 2 Colors of Cricut SportFlex Iron On (comes in 11.8″ x 24″ sheets)

Workout Style Tank or T-Shirt

Cricut Design Space

Unicorn Yoga Poses Design (Bigger Size Layout or Smaller Size Layout)

Yoga Is Magical Design

Cricut Easypress and Mat (*Optional)use-cricut-sportflex-on-dry-weave-jersey
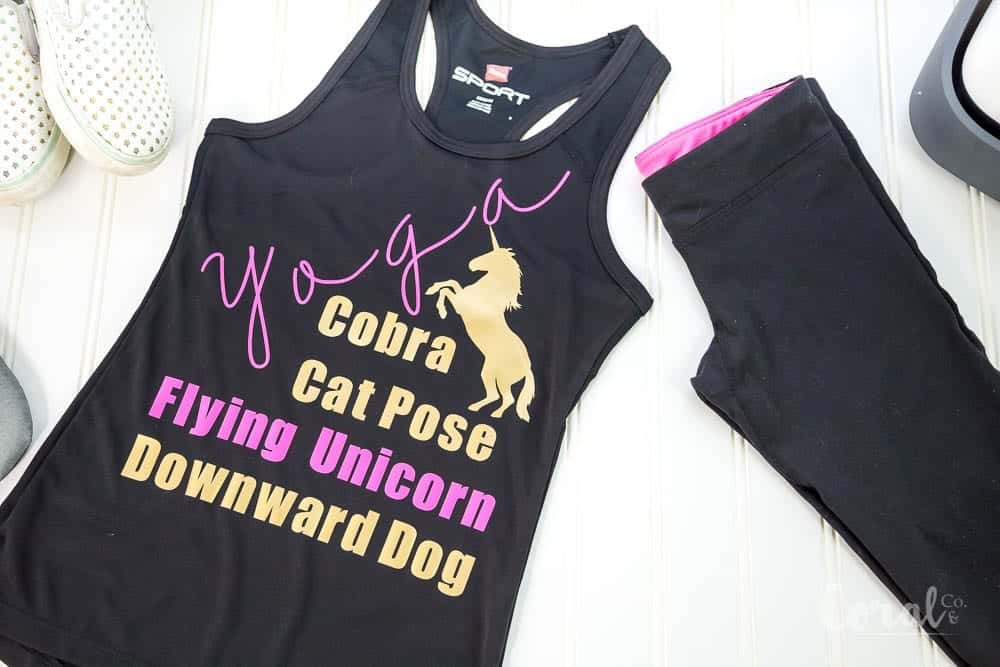
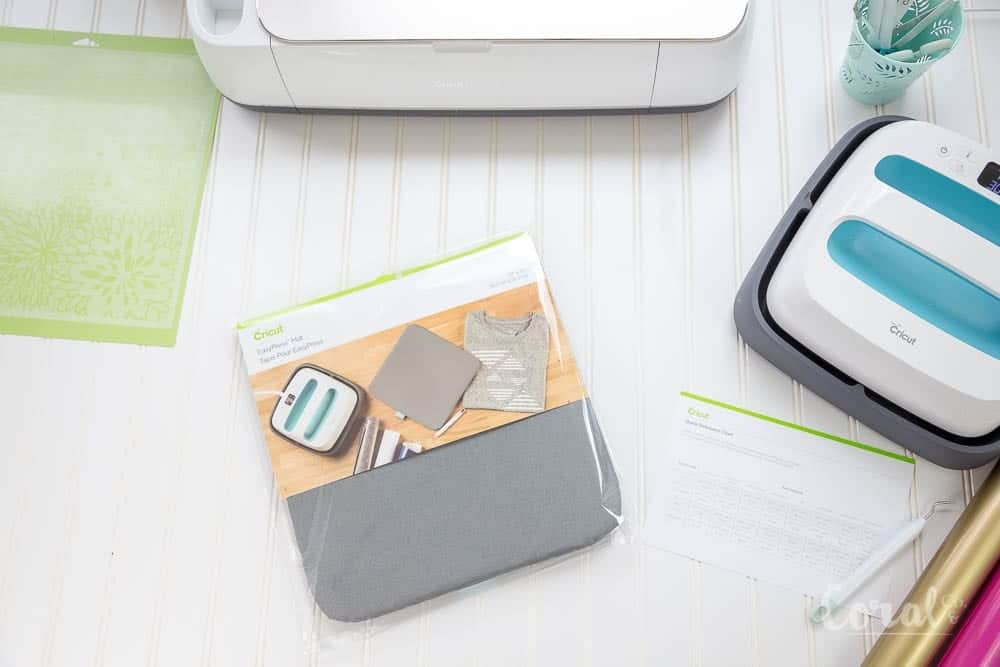
Annnnnnnd did you notice I said Easypress mat?  Yes, Cricut finally released a new mat just for the Easypress.  Its got a whole bunch of layers including silicone to absorb heat and keep your surface from heating up.  As well as being able to reflect heat back to the project and wick moisture so your project gets a nice dry heat to help it set correctly.

new-cricut-easy-press-mat

 Now I don’t have to lug my ironing board out everytime!  Which will totally be a relief to my husband since my sewing studio is actually a sunroom and he has to pass through it every time to get to the laundry.  Because we all know that husbands would never think of taking a hint about the ironing board being left out for them to iron their clothes!

new-cricut-easy-press-mat

How to Use Cricut SportFlex Iron On and Make a Yoga Unicorn Workout Tee Tutorial

You can skip to the bottom for the Video Tutorial or scroll through the photos for instructions.

use-ipad-with-cricut-maker
  1. Load your either the Unicorn Yoga Poses or Yoga is Magical Design on Design Space.  I used my ipad with the Design Space app because I love how easy it makes it connect everything.cut-sport-flex-iron-on-on-cricut-maker
  2. Cut out design with the Cricut Maker or other Cricut cutting machine.cut-iron-on-with-paper-cutter
  3. Cut away remaining Iron On.
  4. Weed Iron On.  I love using the Brightpad because it makes it so much easier to see what I’m doing. (Sidenote – my daughter loves to use my brightpad to trace pictures).weed-with-cricut-bright-pad
  5.  Warm up your Easypress mat for 5-10 seconds where you will be placing your shirt.  weed-sportflex-with-cricut-brightpadweed-sport-flex-with-bright-pad
  6. Apply the Easypress for 305 degrees and 30 seconds to the front of the shirt.  then 305 degrees and 15 seconds to the back of the shirt using medium pressurenew-cricut-easy-press-mat-review

This is a sponsored conversation written by me on behalf of Cricut. The opinions and text are all mine.

Crafts, Cricut, Videos cricut, iron on, svg

Little Photographer Camera Pattern – A Handmade Gift for Babies and Toddlers

Feb 22, 2018 · Leave a Comment

little-photographer-camera-pattern-handmade-gifts-for-preschoolers

Have ya’ll seen the cutest sewing pattern for preschoolers ever?  My friend Stephanie at Swoodson Says made the Little Camera Photographer Pattern and I have adored it since the first time I saw it.  It has been on my sewing bucket list for awhile but since my kids were starting to age out of the preschool and toddler age softie toy stage I hadn’t really had a reason to sew it up, other than how cute it is.  Hehe.

little-photographer-camera-pattern-diy-made-gifts-for-preschoolers
little-camera-photographer-pattern

More Baby and Toddler Sewing Projects:

  • 50+ Cutest Baby Sewing Projects
  • Basic Baby Hat Sewing Pattern
  • Top Knot Baby Hat Sewing Pattern
  • Sherpa Fleece Baby Blanket Tutorial
  • Minky Fitted Crib Sheet Tutorial
  • DIY Baby Leggings
  • Free Baby Bib Pattern

little-photographer-camera-pattern-handmade-gifts-for-toddlers
handmade-gifts-for preschoolers-little-camera-softie

But a friend of mine just told me she is having her first baby girl (after 3 boys!) and I wanted to sew up a bunch of great baby and toddler gifts for her.Since she has all boys I thought a girl toy was needed, and so Stephanie offered to send me her Little Camera Photographer pattern so I could sew up all its cuteness.I had this one inch wide black and white stripe from Riley Blake Designs that just jumped out at me when I thought about this little camera pattern.  I like the black and white to give the realism of a real camera but love how the floral accents and lighter colors made it all come together.I used some scraps from some of the same fabrics that I used in this block of the month post, I made last week.  The floral and mint fabric is part of the designer fabric sampler and the pretty diagonal stripe is from Riley Blake Designs as well.

litlle-camera-photographer
little-photographer-camera-pattern-diy-made-gifts-for-toddlers
little-photographer-camera-pattern-homemade-made-gifts-for-toddlers
little-photographer-camera-pattern-diy-made-gifts-for-babies
softie-[atterns-for-preschoolers

The little Camera Photographer Pattern called for vinyl for the LCD screen, but I didn’t have any so I thought this girl on the bike would be cute for the screen instead (and got the binding a little wonky – more charm!).  Because of course, little girls love to ride their bikes around.  If you use vinyl you can slip different pictures in and out of the pocket which is totally cute and any little preschooler or toddler would love to play with it.
My kids were begging me to let them keep this camera toy softie but it I can’t wait to give it to the new little girl joining the world.  I’m sure she will have lots of fun with it along the way.I just love sewing handmade gifts for toddlers or preschoolers.As you can see Ava loves cuddling with the little camera!  There are so many versions of this pattern that I would love to sew up.  Now I just need more friends with really little ones!  If you have any grandkids or friends with preschoolers or toddlers the Little Camera Photographer Pattern would make such a sweet and heartfelt handmade gift!

Baby Sewing, Kids baby, gift, kids, toddler

Modern Sewcialites Club Block of the Month + My Word of the Year

Feb 16, 2018 · 1 Comment

modern-sewcialites-heart-block-of-the-month
modern-sewcialites-block-of-the-month
modern-sewcialites-word-block-of-the-month

Have you heard about the new sewing club called Modern Sewcialites from Modern Sewciety?  I was scrolling Instagram when I heard my friend Stephanie from Modern Sewciety (you know, our favorite sewing podcaster) talking about her new project called Modern Sewcialites.  I love listening to her podcast, so I was instantly intrigued and had to know more!Stephanie is so good at telling a story and bringing together a community and is using her amazing gifts to start a community celebrating the joy of creating.  The Modern Sewcialites club comes with some pretty cool perks including exclusive podcasts (ok, she had me here!), a Block of the Month Club, and recipes from your favorite bloggers.
I love listening to her stories and how real she is about what goes on behind all the pretty stuff you see on the internet.  She’s not afraid to tell you her sewing fails and makes you feel like you are hanging out together in her front room.  I knew right away that I wanted to be part of this club!

modern-sewcialites-heart-block-of-the-month

I

modern-sewcialites-january-block-of-the-month

was a little late starting the Block of the Month Club, but I have finally caught up and have both January and February to show you.  Double whammy!

January’s block of the month is totally the coolest theme – your own word of the year!  I love, love, love this!  Such a great way to really make my quilt special and remind me of my journey.

modern-sewcialites-february-heart-block-of-the-month

I choose the word DISCIPLINE for my word of the year.  Being a creative person I definitely have the tendency to get sidetracked and do only the things I feel like doing at the time.  Which is totally fine for a hobby except that as my blog has become more successful and has become a business, doing things that I don’t feel like doing are part of the gig (like scheduling social media).

modern-sewcialites-my-block-of-the-month

So I really took the word of the year to heart and decided that spelling out the thing that I most wanted to be successful in this year was going to help make it happen.  Even this week my word has kept me on track.

modern-sewcialites-block-of-the-month-february

The kids have both been sick (first one and then the other) and with the crazy flu season, I have been to the doctor way too many times.  Time was pretty limited the last week and a half and honestly, I didn’t feel like sewing (I forgot to mention the 2 day dance rehearsal/recital in between one kid getting sick and the other) but knowing my end goal of posting two times a week this year and thinking about my word of the year pushed me to get it done.

I truly love sewing, so I don’t’ want you to think that I am complaining about sewing, but we all know how it gets pushed to the back of the list.  Even for bloggers!

modern-sewcialites-block-of-the-month-heart

I absolutely lurve the way these two blocks turned out.  I am using the cute designer fabric sampler that Cricut makes for the BOM quilt sampler plus this super pretty diagonal stripe from Riley Blake Designs.  The giant heart block is super simple and pieces together in about 5 minutes.  Definitely my kind of block!

cricut-maker-quilting-applique

I cut the letters out with my Cricut Maker and just used a font that I liked in Design Space.  I really like the font (its called Black and White Display) but some of the narrow parts of the letters made it difficult to applique.  A wider font definitely would have been easier.  You can check more things you can sew with the Cricut Maker here.This quilt is going to be super fun when it is all finished, and I will show each months block as I make them.

If you are interested in the Modern Sewcialites Club, I included her short video on it you can check out the details for yourself!


Quilts bom, quilt block

How To Use Half Square Triangle Paper to Make Half Square Triangles with Video

Feb 8, 2018 · 7 Comments

christopher-thompson-blue-carolina-fabric-quilt-by-coral-and-co
how-to-use-half-square-triangle-paper
christopher-thompson-blue-carolina-fabric-quilt-by-coral-and-co

I’m pretty excited to have my first real video tutorial for you today! I started out with this video on how to use half square triangle paper to make half square triangles.  I have definitely gotten the hang of photography but video is a whole new game. 
It’s a pretty quick video and shows you all the deets on how easy it is to get precise half square triangles when you use half square triangle paper. And speaking of half square triangles, don’t these half square triangles look UH-MAZING with this Blue Carolina fabric from The Tattooed Quilter.  All these shades of blue are just stunning.  Seriously one of my favorite lines <3  All the heart eyes <3I had this project in my mind for months, picturing how the different prints of Blue Carolina would look against the crisp confetti cottons white.  And I am totally stoked how it turned out.  Sometimes you picture a project in your mind and then it turns out completely different, which seriously sucks.  Especially after all that time you spent planning and daydreaming about it, shopping for the fabric, and then finally sewing it all together.  But this definitely does not disappoint!

 
How to use half square triangle paper is part of a series on making Half Square Triangles.  You can see the other posts below –
  1. Method I – Simple Half Square Triangle Block Tutorial
  2. Method II – Make 4 at a Time!
  3. Method III – The Magic * Method – Make 8 at a time
  4. Method IV – Half Square Triangles from a Jelly Roll – The Strip Method
  5. How To Use Half Square Triangle Paper to Make Half Square Triangles with Video
  6. 25+ Half Square Triangle Quilt Patterns
 

Supplies you will need

  • 10″ stacker of Blue Carolina
  • 10″ stacker of Confetti Cottons Riley White
  • Triangles on a Roll 3.5″
  • Tracing wheel for scoring the paper (alternatively, you can sew down the stitch lines with no thread in your machine before you pin in place to make it easier to rip off)
  • Rotary Blade – this is where I found the pink floral one
  • Cutting Mat – this aqua and green one is so cute!
  • Clear Ruler – I really love this pink Lori Holt one)

****This will make enough blocks to make a 45″ x 60″ finished lap quilt using 3″ finished blocks, with a few extra left over.

how-to-use-triangles-on-a-roll-for-half-square-triangles
triangles-on-a-roll-to-sew-half-square-triangles
pin-half-square-triangle-paper
sew-on-half-square-triangle-paper
cut-half-square-triangles-into-four-with-half-square-triangle-paper
half-square-triangles-eight-at-a-time

How To Use Half Square Triangle Paper

  1.  Trim down your 10″ stacker to 9″, so it will be the same size as the triangle paper
  2. Using your tracing wheel score the stitch lines on the triangle paper to make it easier to tear off (you can see this in the video).
  3. Making as sandwich lay down your white 9″ square with your printed fabric facing down so right sides are together.  Then Lay the triangle paper square on top with the printed side up.
  4. Pin triangle paper in place so it does not move while sewing.
  5. Following the arrows, sew down each of the dotted stitch lines.  You will sew four lines total.
  6. Trim edges and square up to make a nice even square.
  7. Cut down the diagonal lines so you now have four pieces
  8. Continue cutting across the vertical and horizontal lines to further divide the square into eight pieces.
  9. Gently press open and square up.  The finished triangle (with seam allowance – once blocks are sewn together) on the roll says 3.5″, however, I like a little extra wiggle room and cut mine down to 3.5″ before they are sewn, so they will finish as 3″ blocks.  This is just a personal preference.
half-square-triangle-made-with-half-square-triangle-paper-triangles-on-a-roll

quilt-blocks-with-half-square-triangle-paper
I need this quilt to be in my sewing room while I am cuddled up working at the computer.  Cut, Sew, Repeat is perfect inspiration!
blue-carolina-from-the-tattooed-quilter-christopher-thompson
Did you notice the pink cutting mat and pink polka dot pin bowl?  Aren’t they ridiculously cute?  Lori Holt has a crazy cute new line of notions that I just can’t get enough of   I seriously want one of the magnetic pin trays in every color!Easy peasy!  Now you know how to use half square triangle paper to make half-square triangles.  Aren’tblues are so soothing? I can’t wait to see this quilt finished!  And I am totally over the moon because this line is being printed in knit fabric too.  Gorgeous!!!

Learn How to Quilt Series

  • How to Chain Piece Quilt Blocks
  • How to Use a Rotary Cutter and Mat
  • How to Choose the Right Machine Quilting Needle
  • How to Use Half Square Triangle Paper

Free Quilt Patterns

  • Swiss Cross Quilt Pattern
  • Simple Squares Quilt Pattern
  • Ribbons and Bows Quilt Pattern
  • Four Square Quilt Pattern
  • Safari Party Squared Quilt Pattern
  • Heart Block Mini Quilt


Learn How To Quilt, Quilt Blocks, Quilts, Videos quilt block, quilting, video

  • « Go to Previous Page
  • Page 1
  • Interim pages omitted …
  • Page 10
  • Page 11
  • Page 12
  • Page 13
  • Page 14
  • Interim pages omitted …
  • Page 18
  • Go to Next Page »

Primary Sidebar

  • Home
  • Blog
  • About
  • Featured Elsewhere
  • Contact

Copyright © 2026 Coral + Co. on the Seasoned Pro Theme