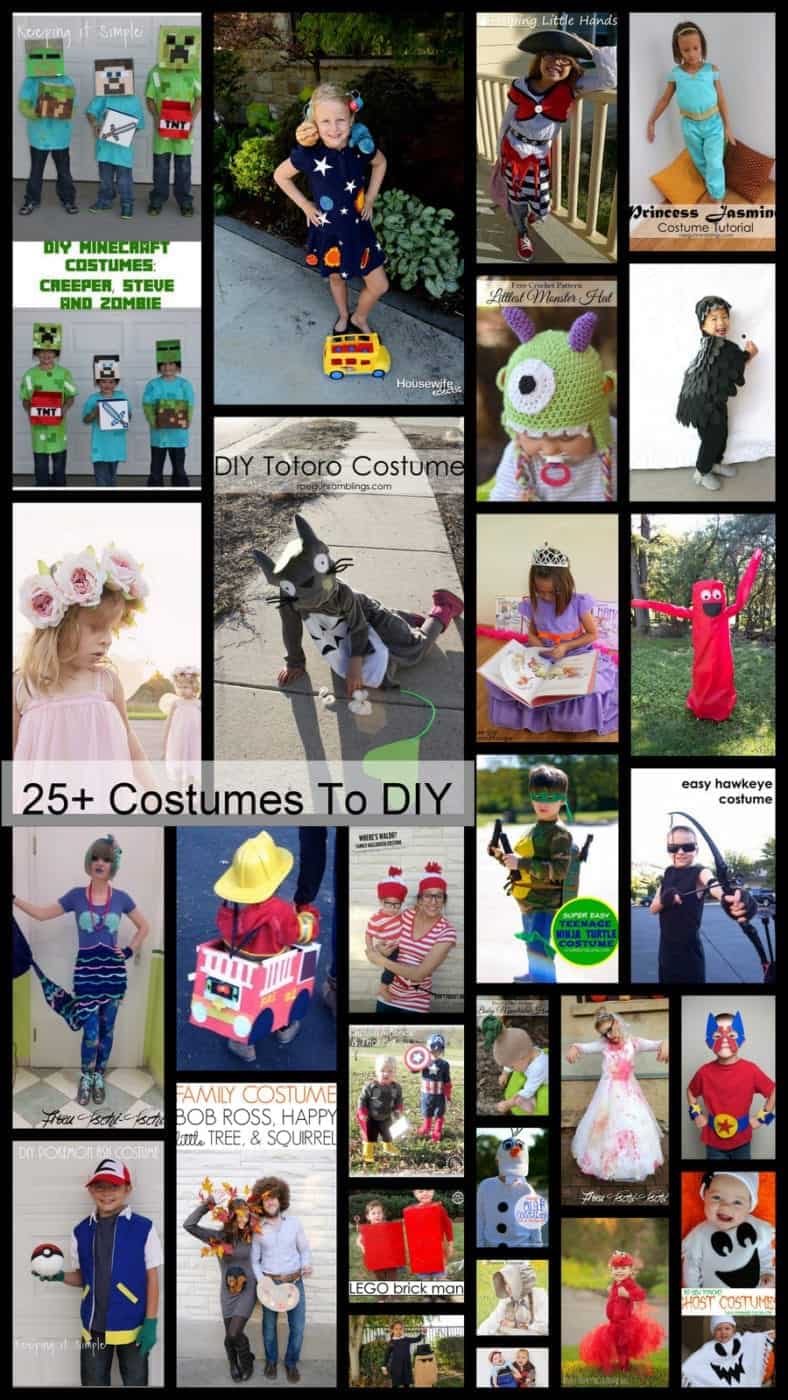
Halloween is in just a little over a month and if you are a DIY-er, it is time to start thinking about costumes. We have you covered with 25+ costumes that you can DIY!

…
Halloween is in just a little over a month and if you are a DIY-er, it is time to start thinking about costumes. We have you covered with 25+ costumes that you can DIY!
…
It is apple season!! Apples are one of my favorite fruits and now that I live in Washington, I especially love apples! There is nothing better than going and picking a fresh honeycrisp apple off of a tree in the fall, yum! Since it’s apple season, I decided that we needed to share some amazing and easy apple recipes for the block party. Warning, your mouth might start to drool!
![]()
…
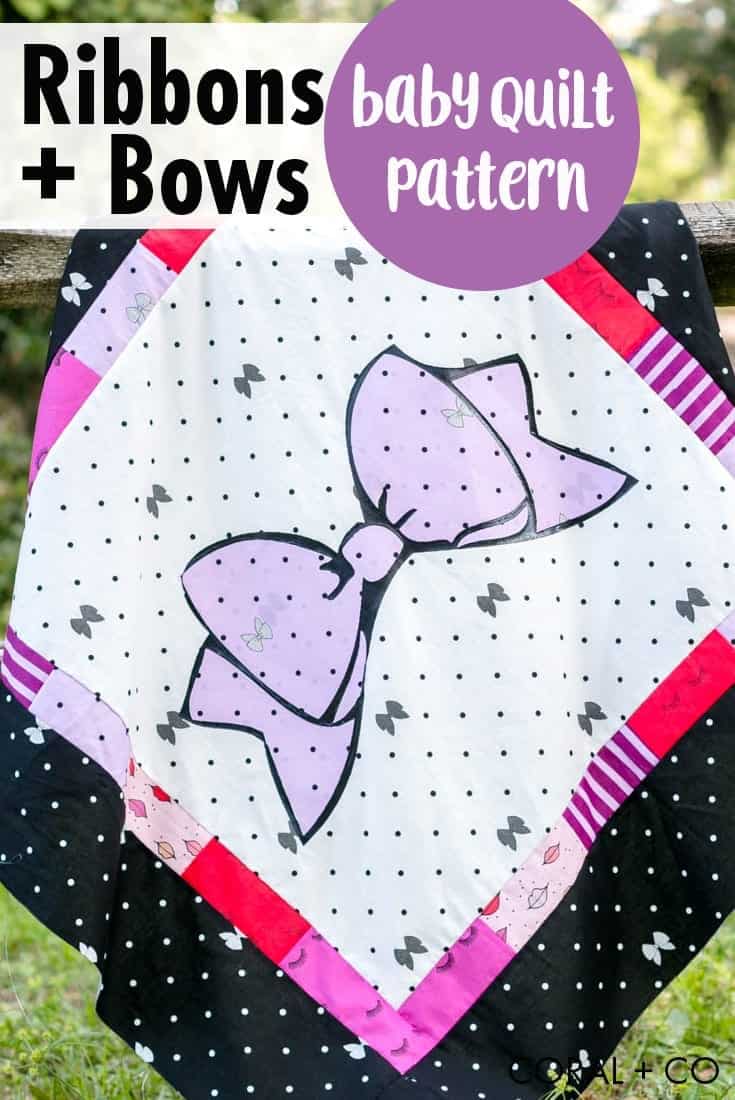
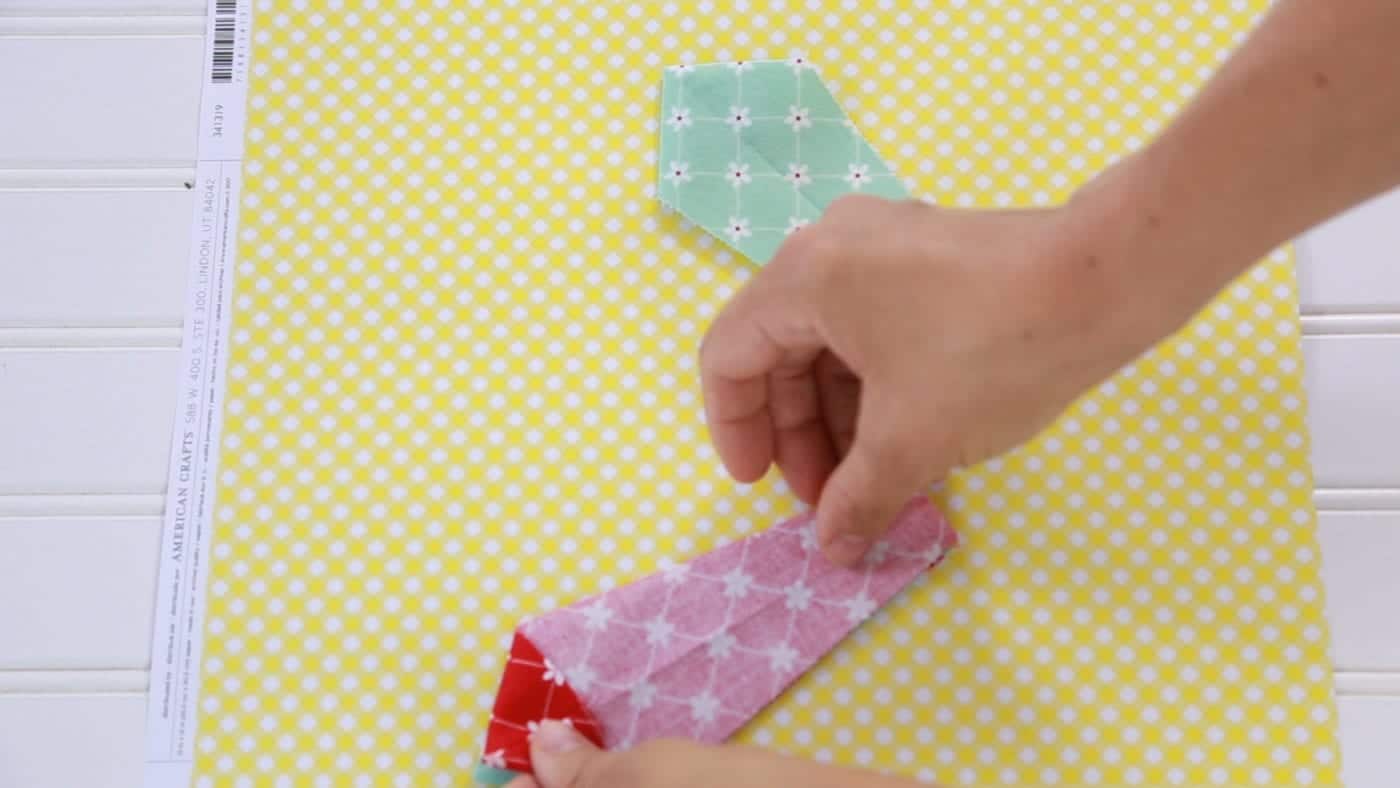
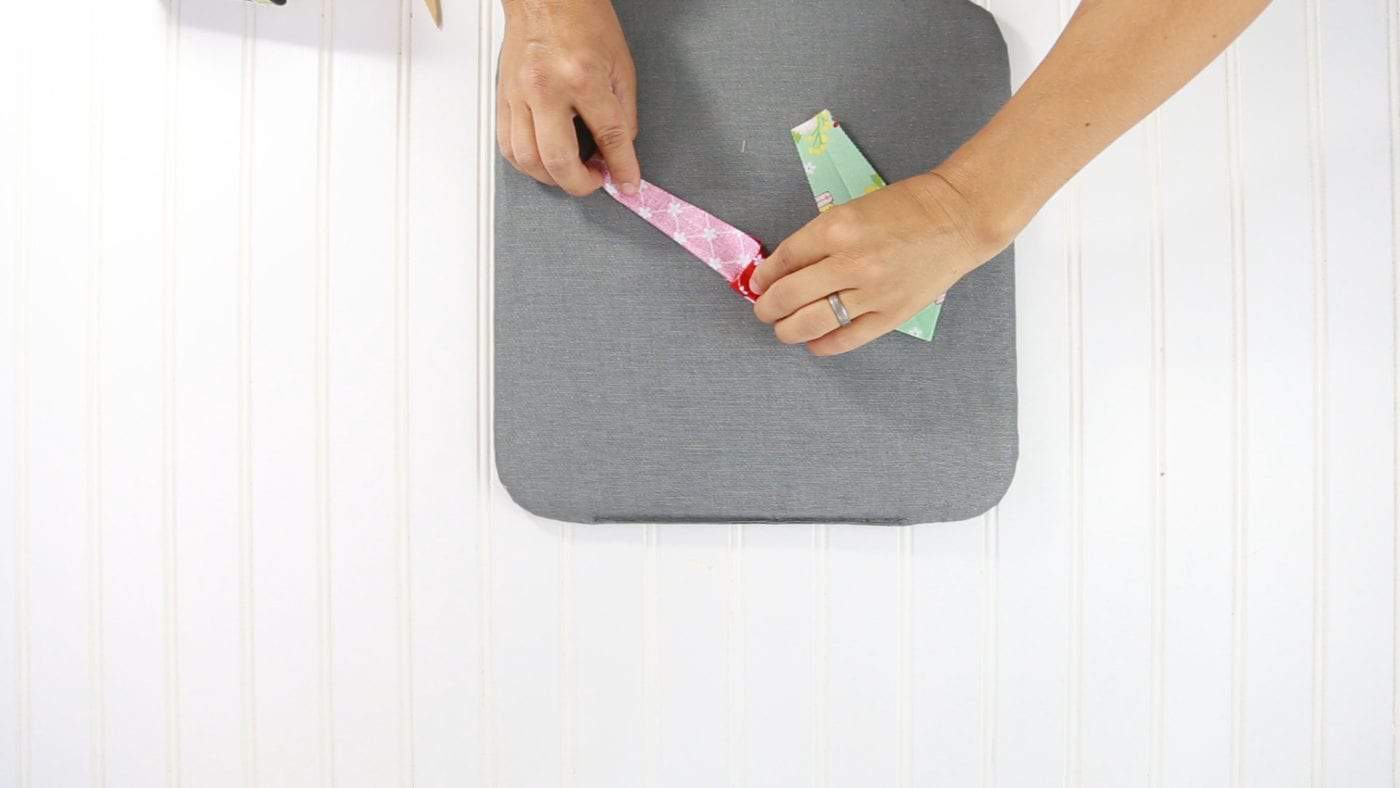
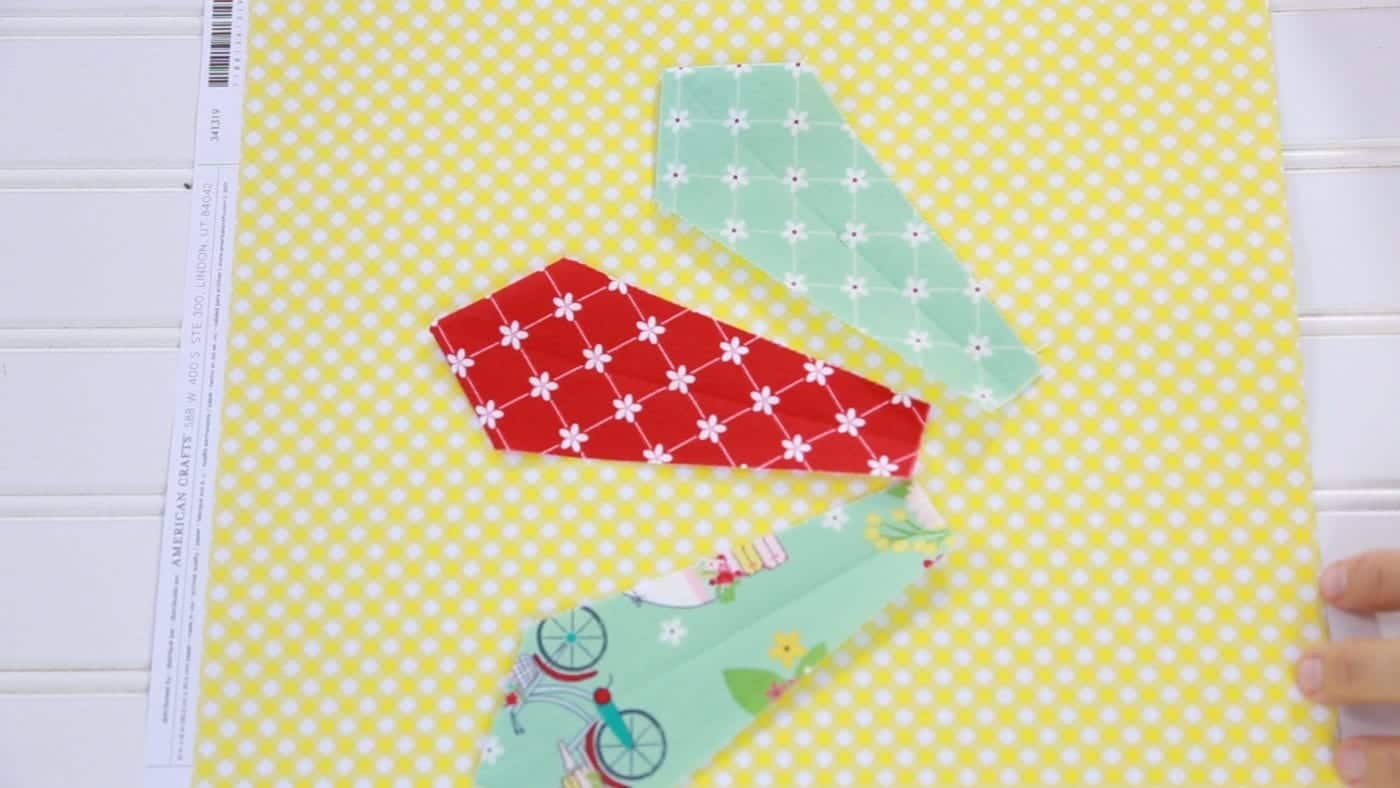
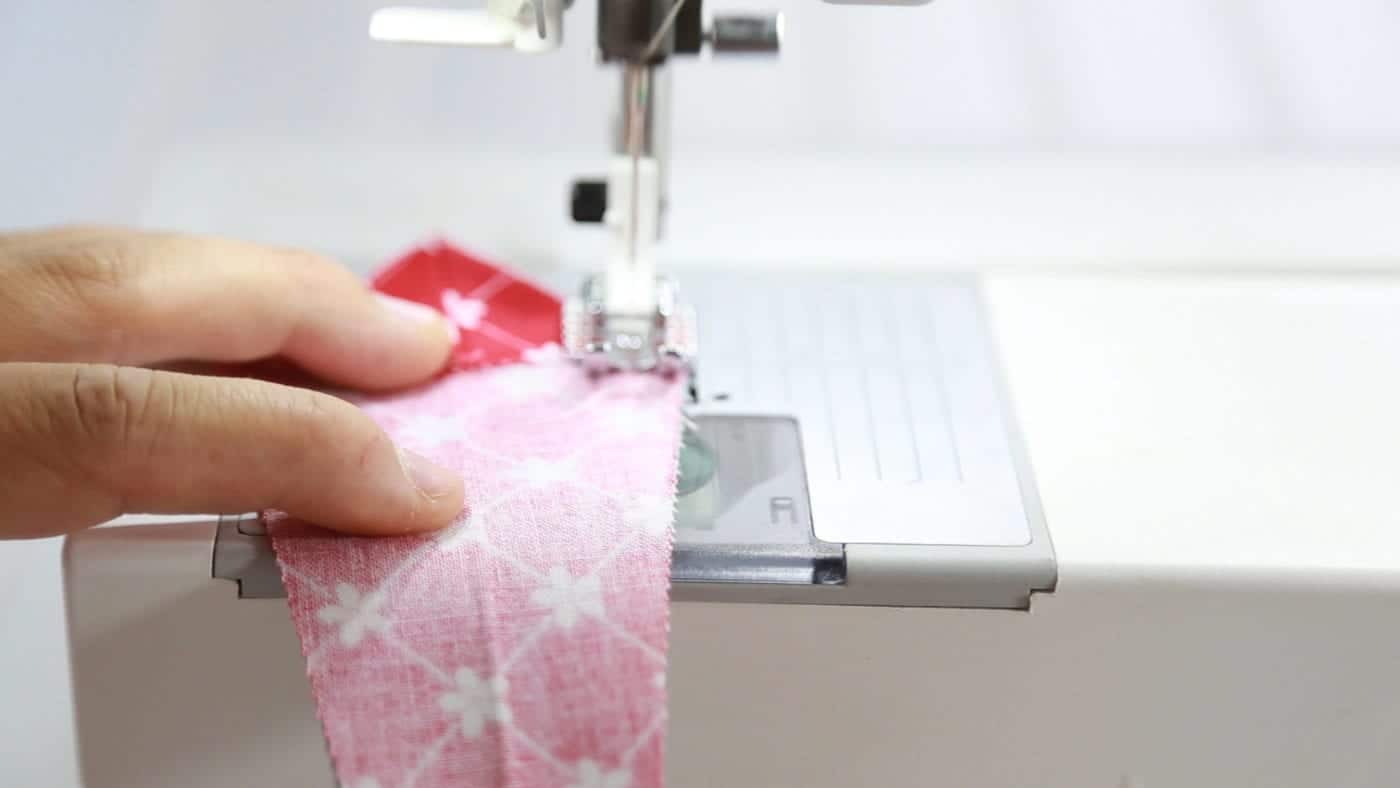
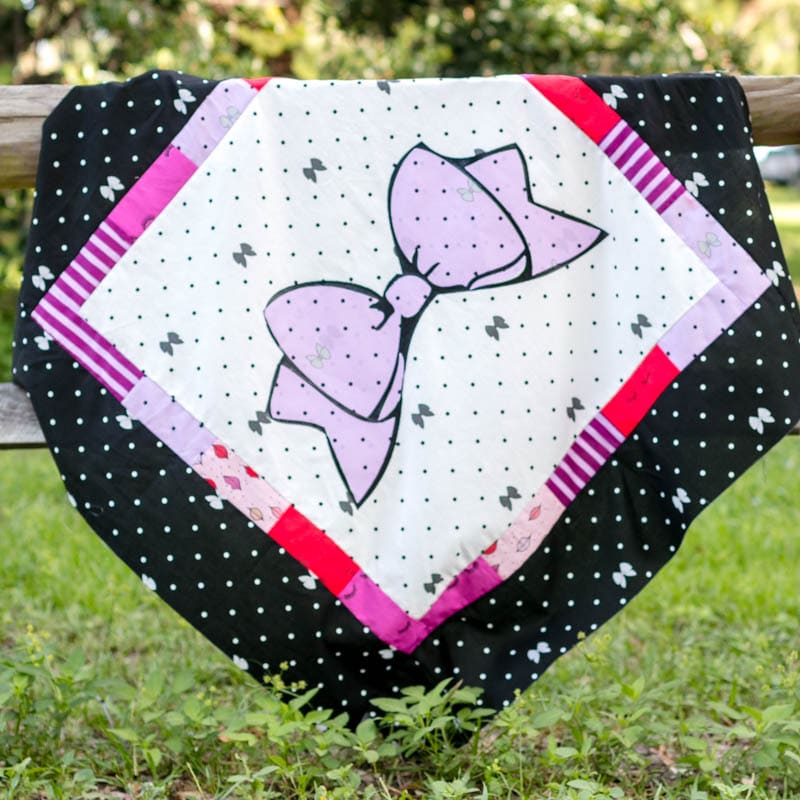
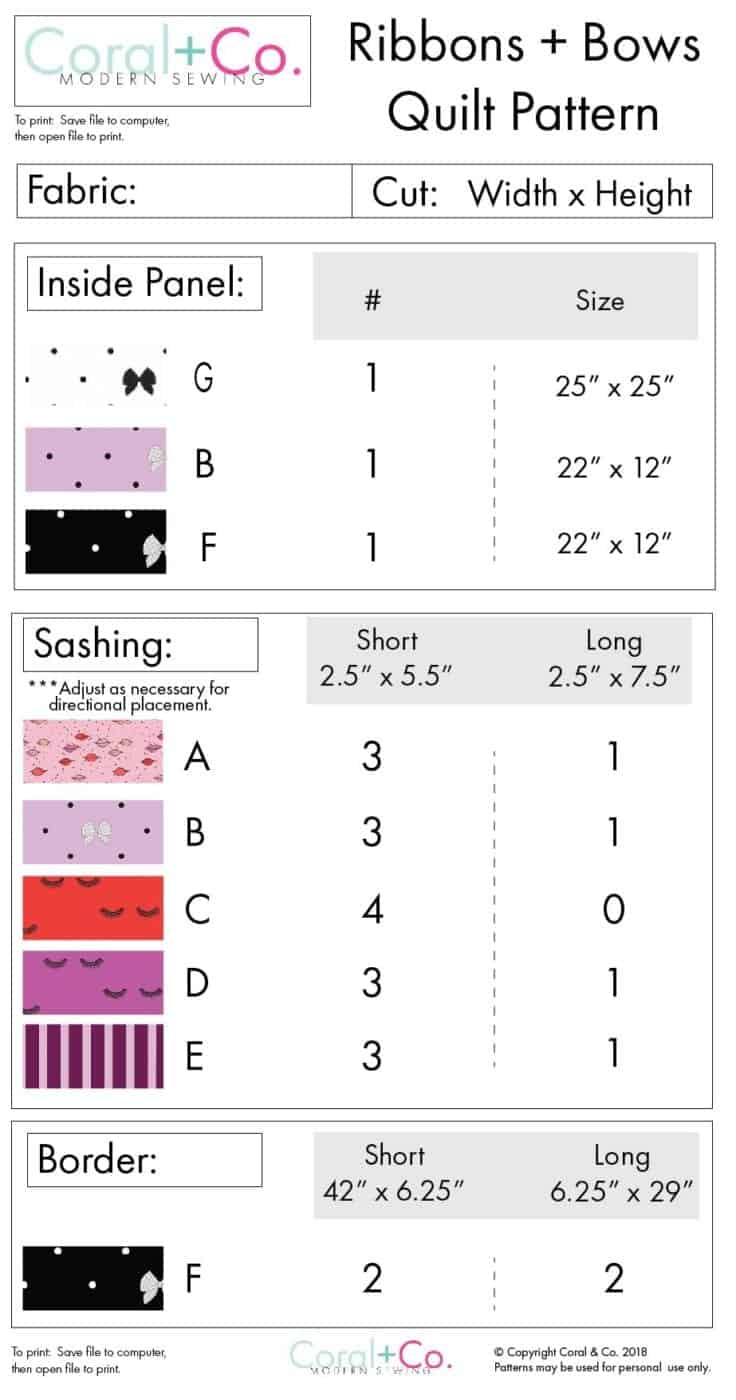
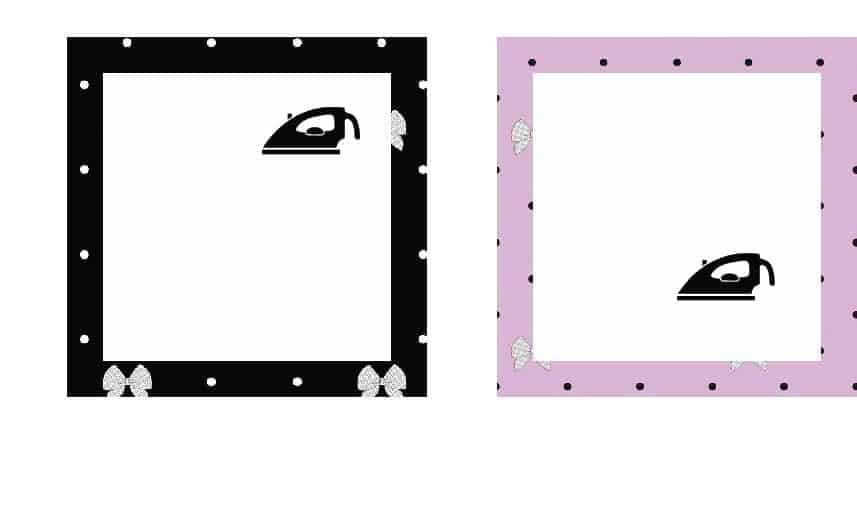
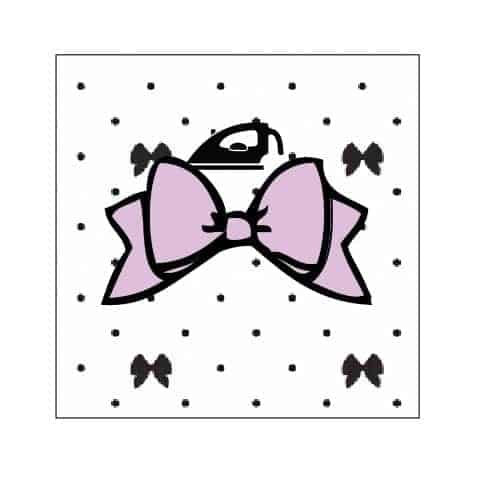
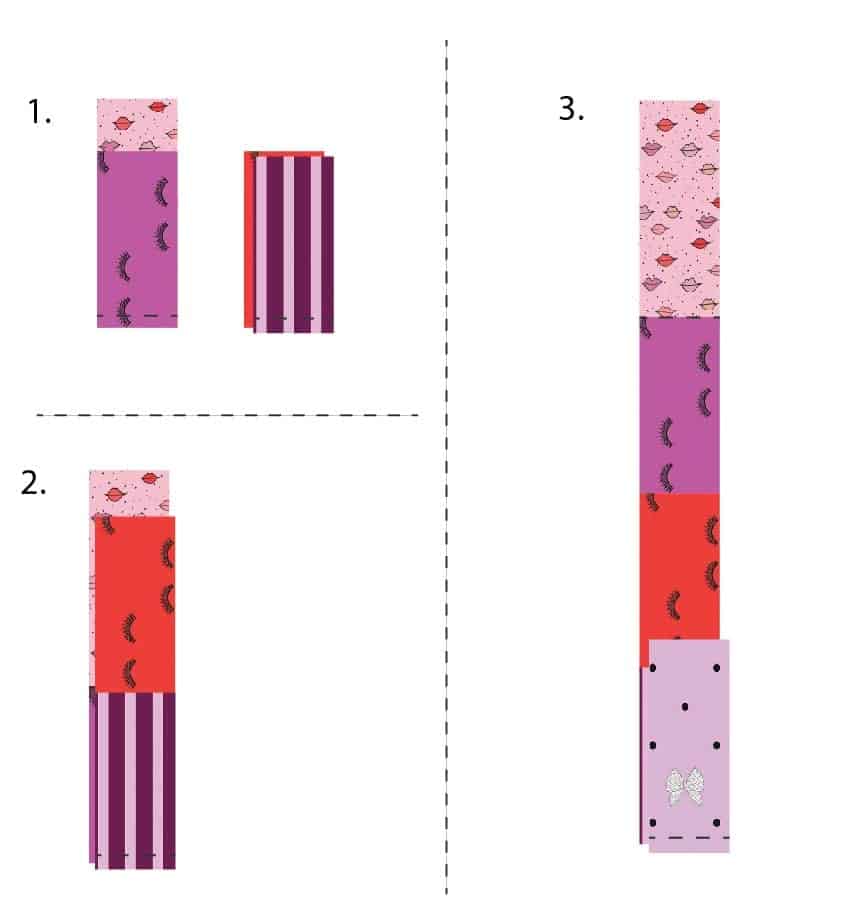
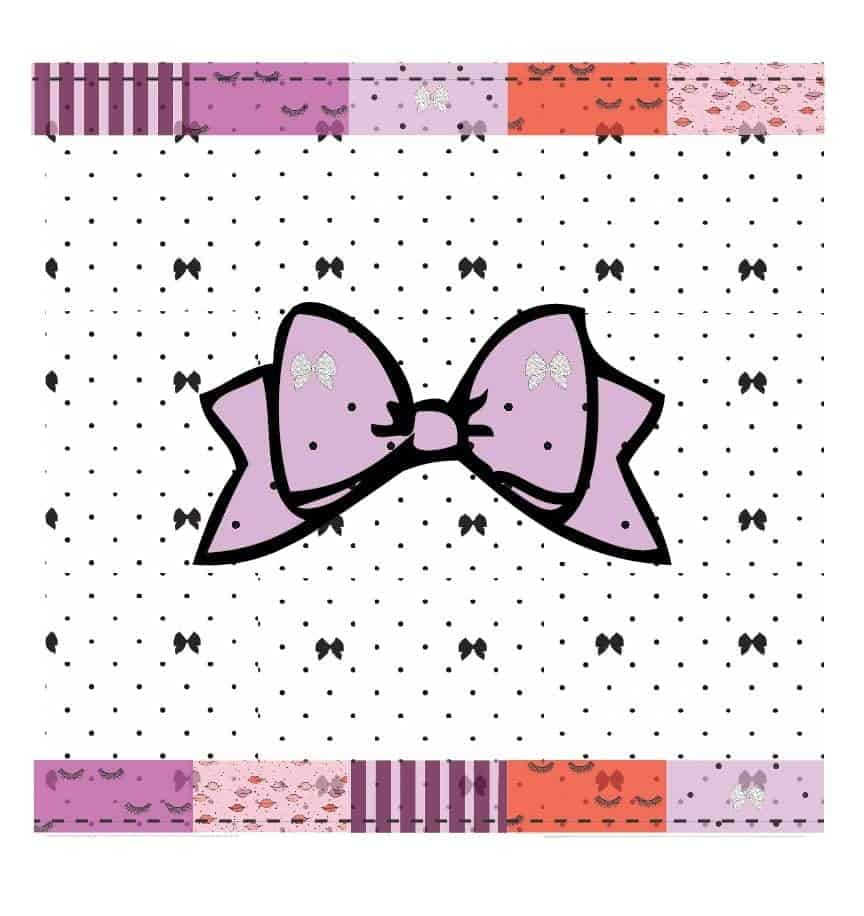
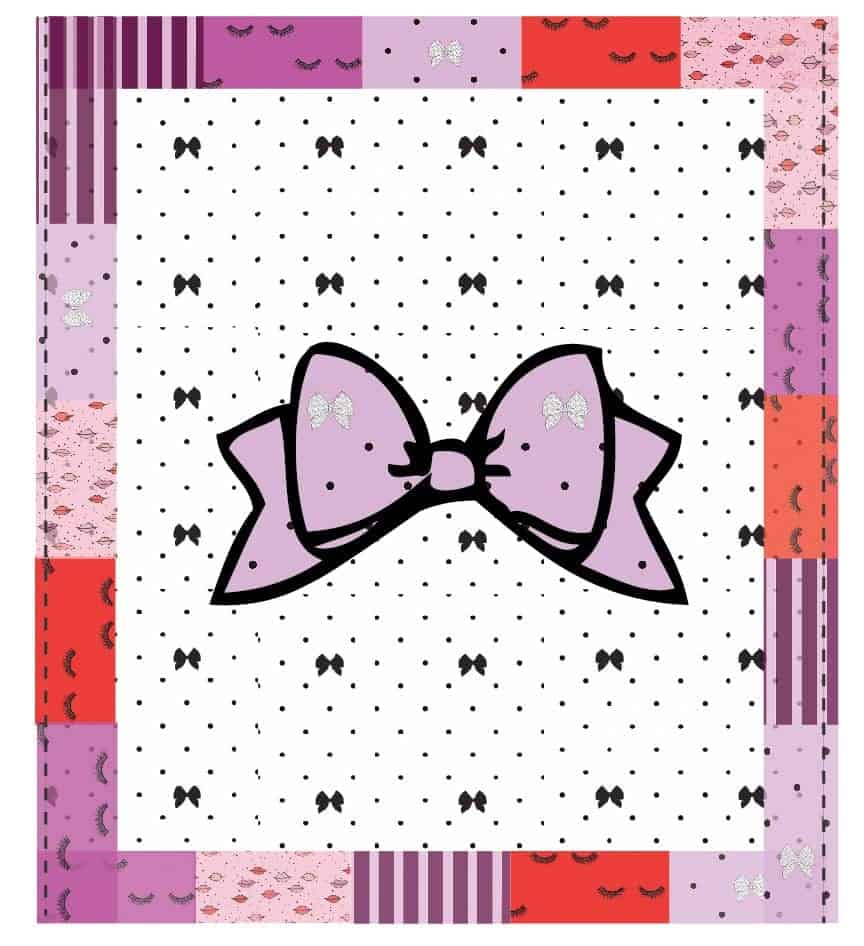
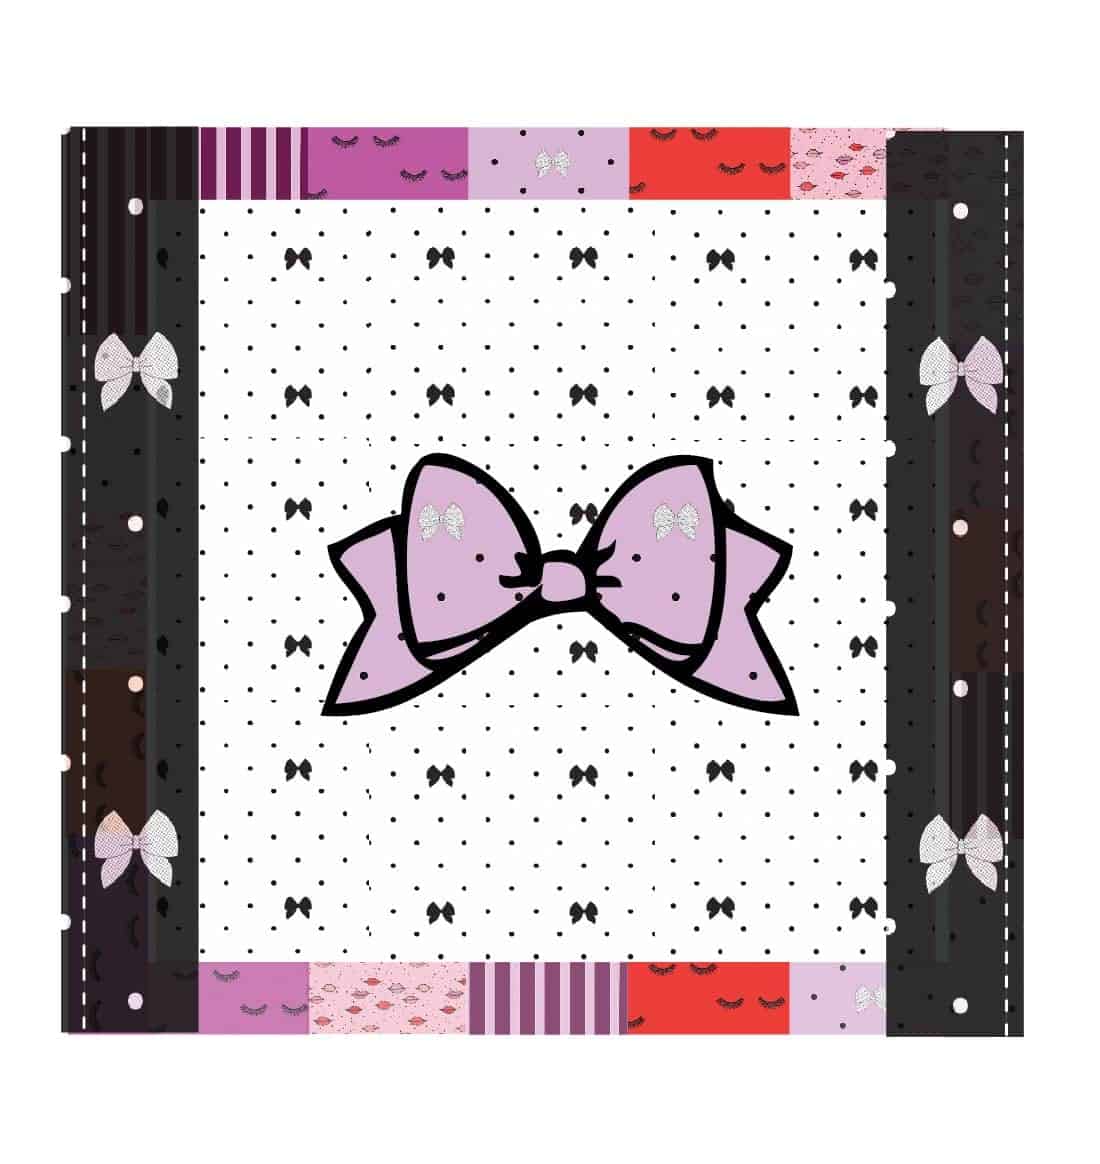
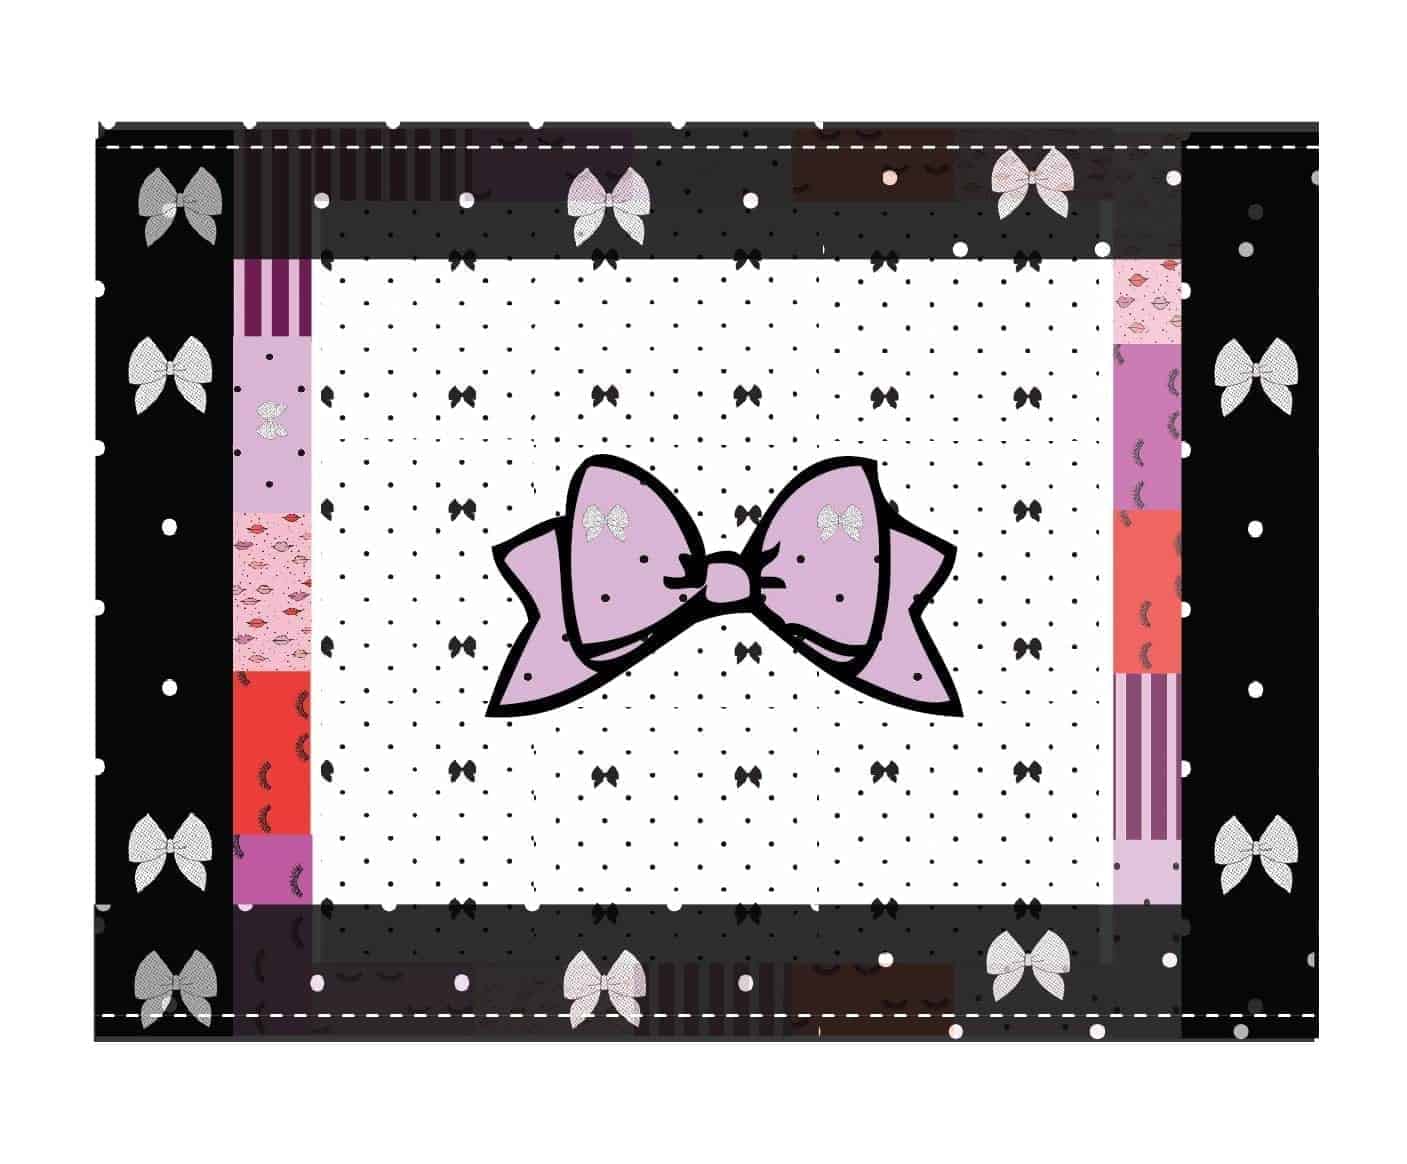
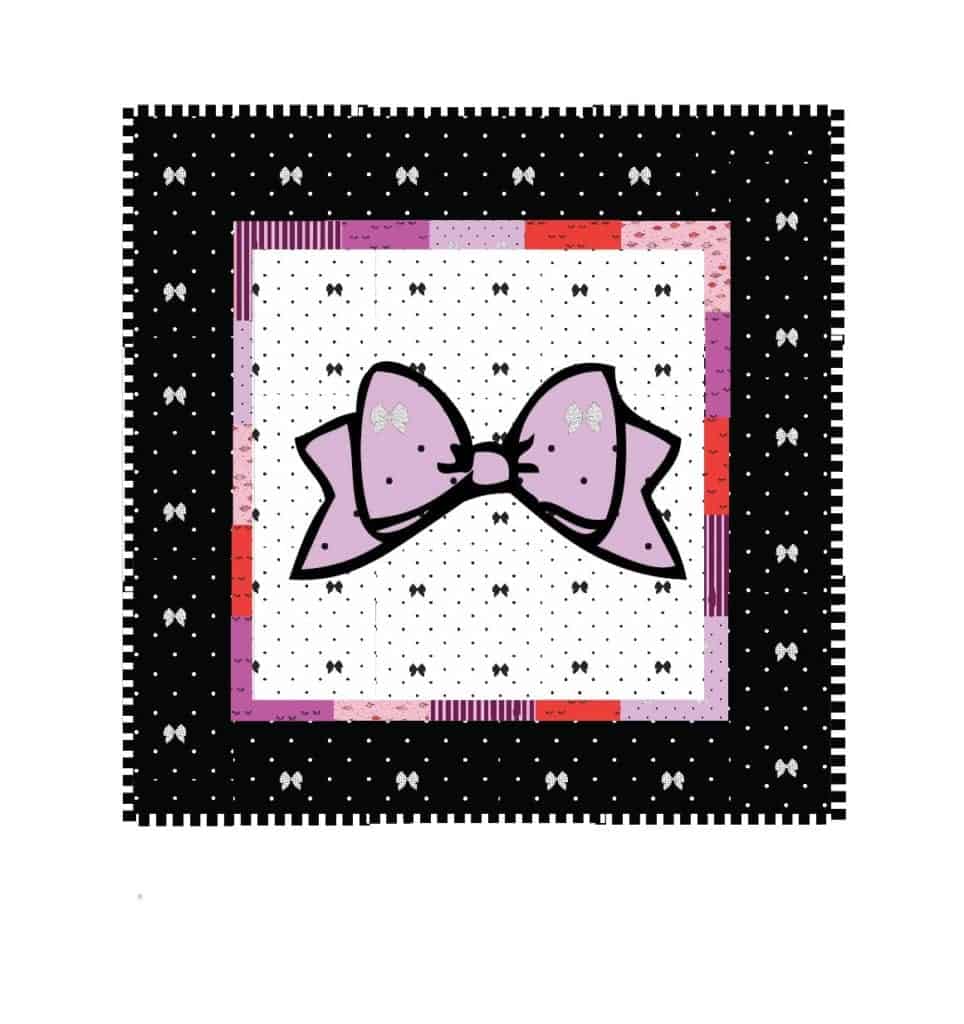
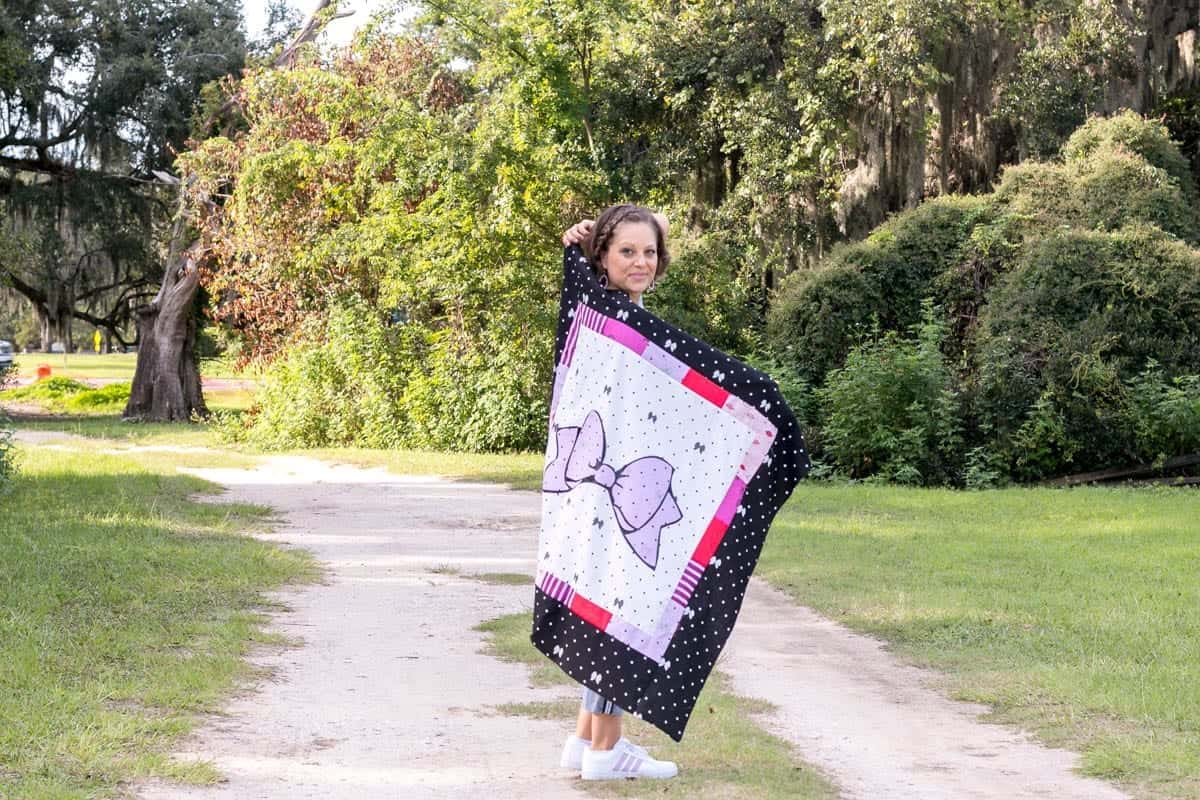
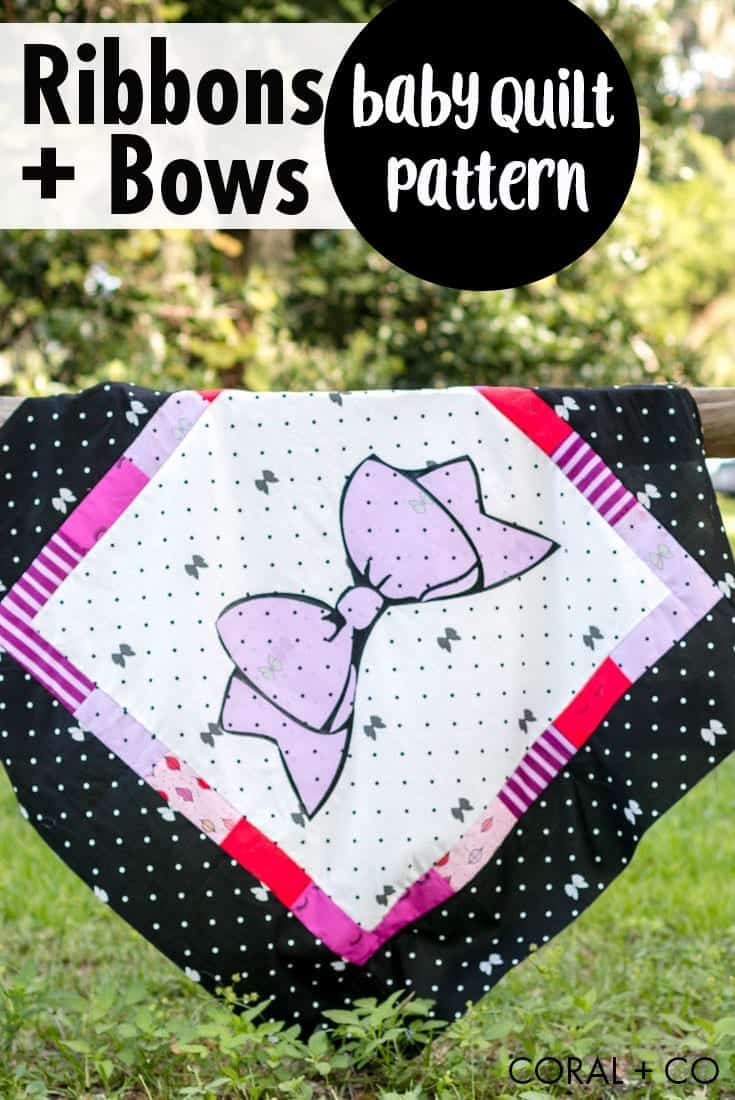
I’m showing you all the pretty and girly things this week with the new Ribbons and Bow Baby Girl Quilt Pattern. The Baby Girl Quilt Pattern was inspired by the release of the new fabric line Kiss Me Kate from See Kate Sew.
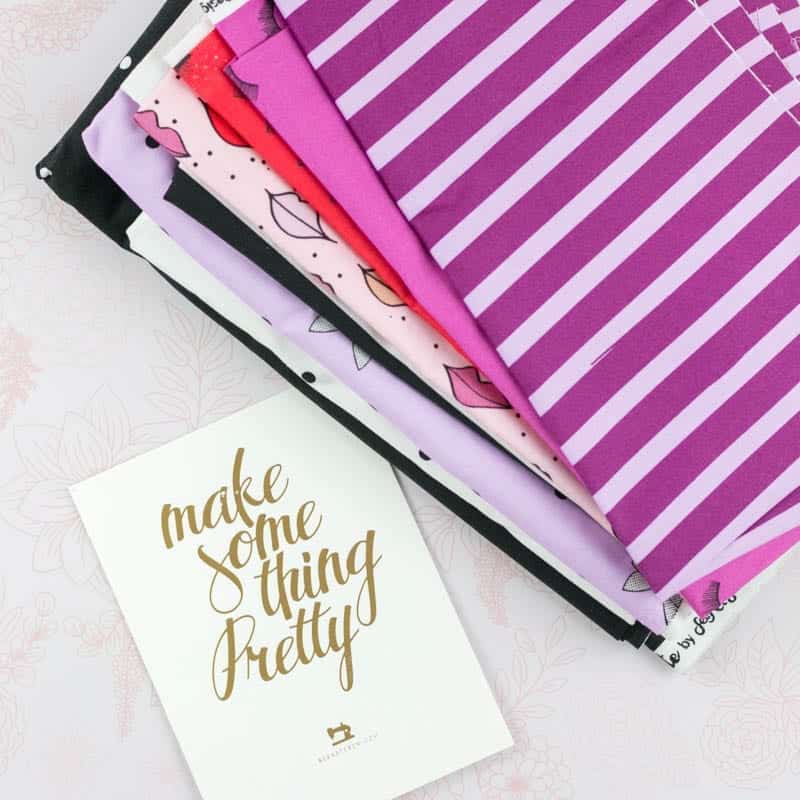
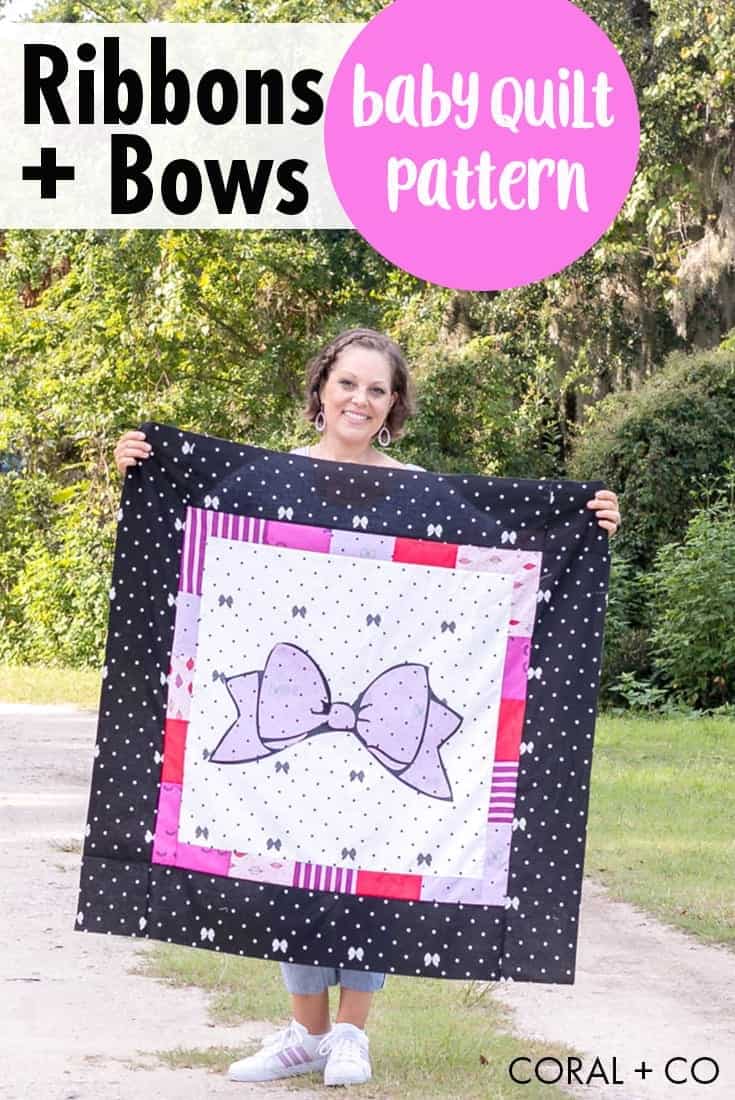
Kate has a modern and feminine aesthetic that I just can’t get enough of. Her new line combines her love of all things fashion and glamour with a modern color scheme that is totally trendy and will make any girl (big or small) want to whip up a project with it. If there is a sweet little girl in your life you will want to be sure to make her the Ribbons and Bows Baby Quilt Pattern. It can be made in one evening and is the perfect baby shower gift for an expecting momma. You may also like these Free Baby Quilt Patterns.
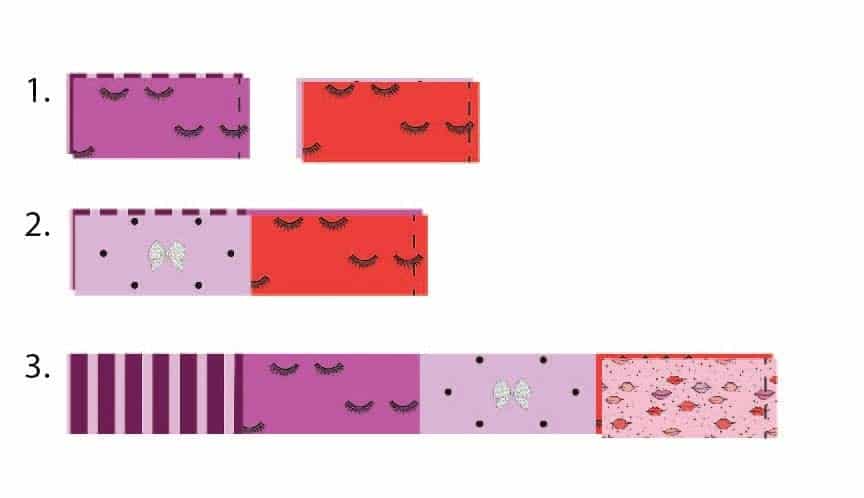
Cut the Fabrics according to the chart below. A PDF Version of this will be coming soon. This includes the amount needed for the Bow Applique.

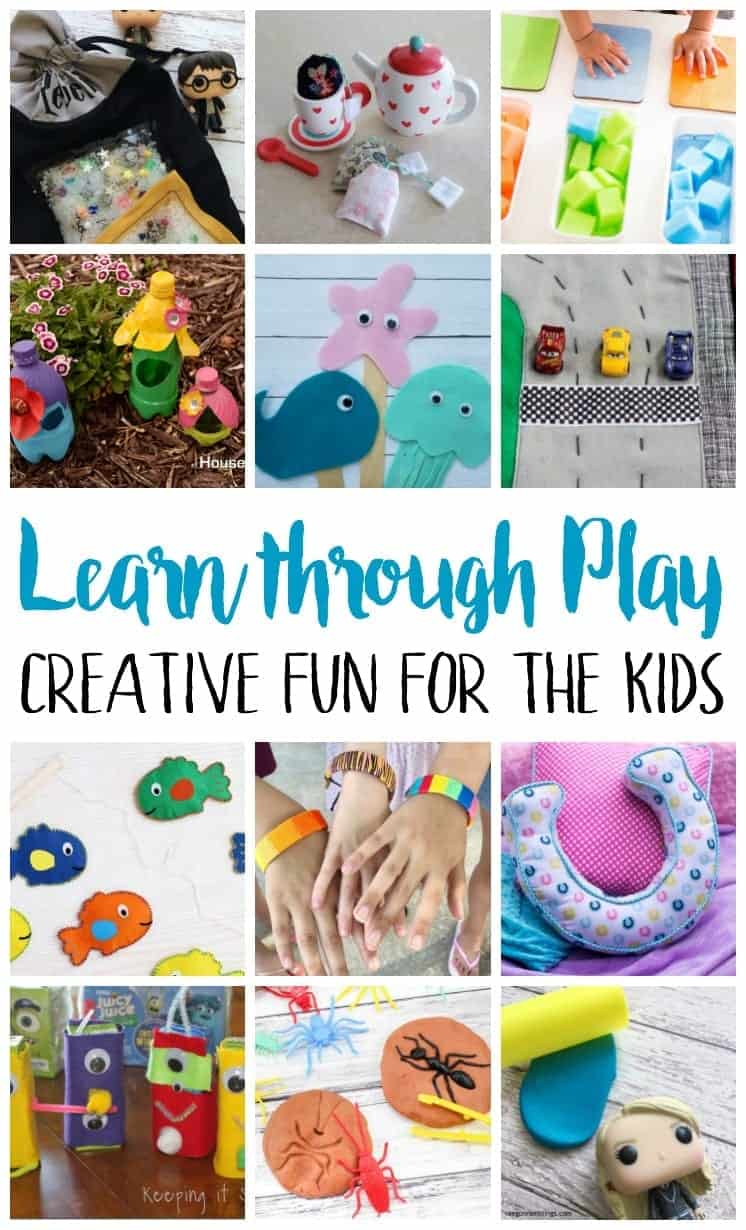
I love tricking kids into learning and these awesome Learn through Play kid activities and craft ideas are perfect for getting those little minds turning!

These fun, educational projects are all so cute I want to whip them all up. From sensory play with playdough to learning how to move their bodies, and of course colors and shapes the little ones will never guess all the good stuff they are learning!
Harry Potter I Spy Bags | DIY Play Teabags | Color Recognition
Plastic Fairy Houses | Felt Sea Creatures | Reversible Race Track Mats
Magnetic Fish Game | DIY Popsicle Bracelets | Horseshoe Pillow
Monster Juice Boxes | Insect Bug Fossils | DIY Glitter Playdough
Marissa here from Rae Gun Ramblings as your host today!

I’ve been in full blown Harry Potter mode as we’re smack in the middle of my annual Happy Harry Potter series where loads of my creative friends share brand new Harry Potter crafts, recipes, DIY ideas, book lists, and even travel tips. You can see all the entries so far (the post is updated as new ones go up!) at the kick off post and make sure to enter the awesome giveaway which includes a $50 Amazon gift card (for purchasing whatever HP goodies or really whatever you want)!

Okay, now let’s see what YOU have been up to. Link up to the Block Party and be featured on all our blogs!
Rae Gun Ramblings | Keeping it Simple Crafts | Housewife Eclectic | Coral and Co.
Be sure to read over the guidelines…
[inlinkz_linkup id=797524 mode=1]
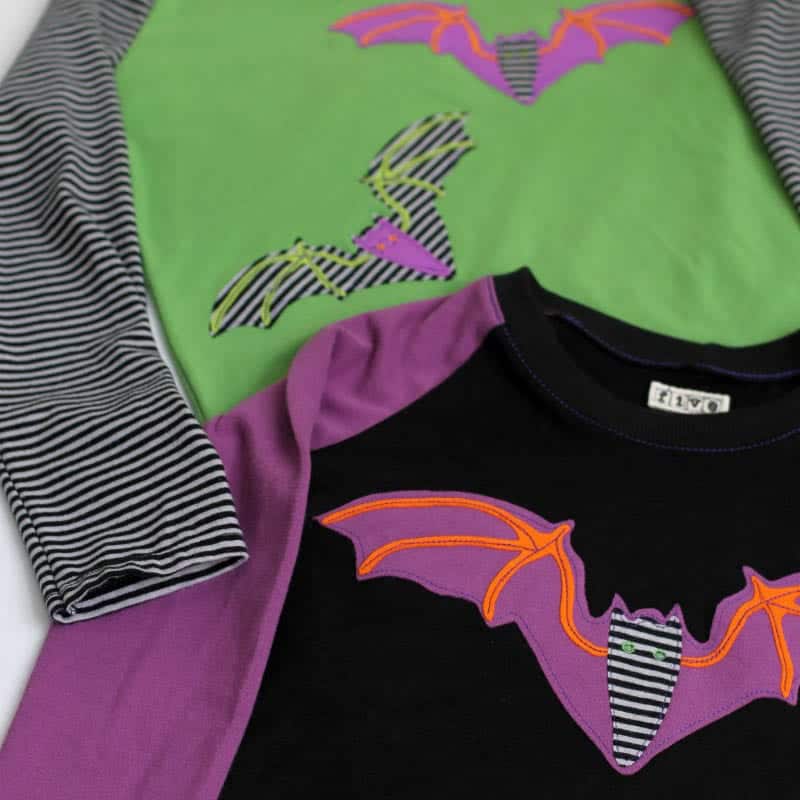
It’s the last day of the Halloween Sewing and Crafting Series of 2018 and we are wrapping up with some really great t-shirt ideas! Both of these Halloween t-shirts look really quick to make! Yay for last minute DIY Halloween ideas.
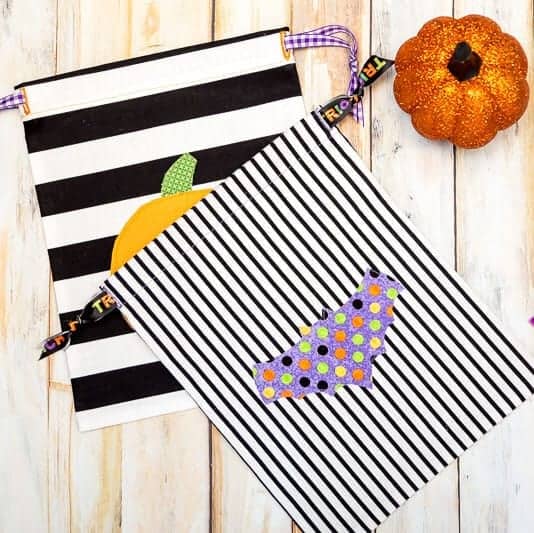
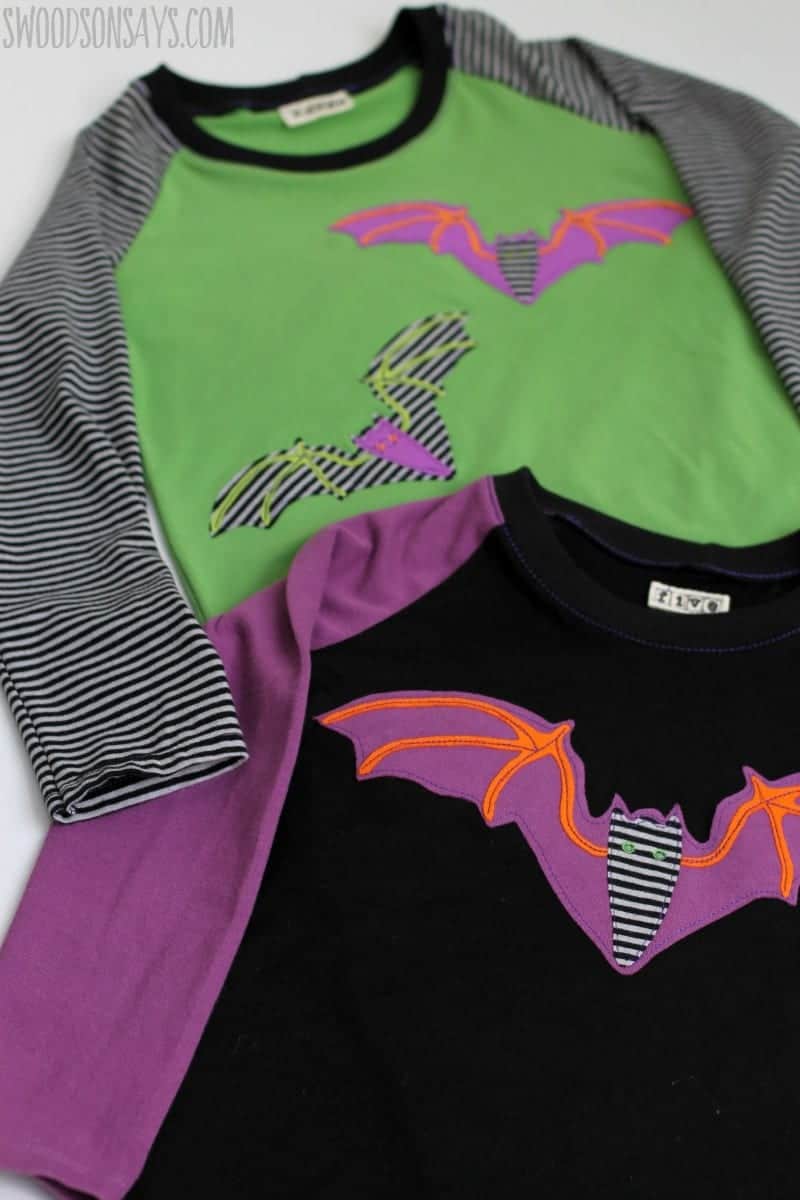 Stephanie from Swoodson says has a really cute Bat Applique Pattern that is perfect for using up scrap fabric. And it’s free! Get the Free Halloween Bat Applique Pattern.
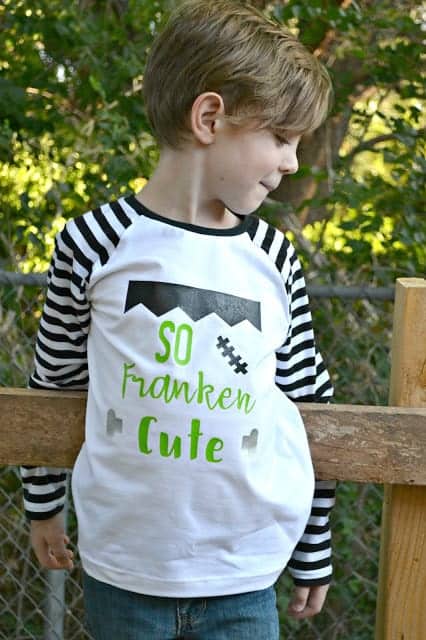 Do you have a little one that is ‘So Franken Cute’? Well, then you will definitely need to make one of these t-shirts from Karly so that you can tell everyone! Get the Halloween So Franken Cute Cut Files.
Go check out their posts and get the tutorials/patterns. Also, pin it for later, but be sure to pin from their so it links back to them.
You can see all of the Halloween Sewing and Crafting Series here!
Check out all the fun Halloween Inspired Tutorials everyone is making!
9/3 Sweet Red Poppy | Apple Green Cottage
9/4 Housewife Electic | Life Sew Savory | Heather Handmade | The Seasoned Homemaker
9/5 Flamingo Toes | GYCT Designs
9/6 SoOkEe Designs | Pattern Revolution | Coral + Co.
9/7 Paisley Roots | Swoodson Says
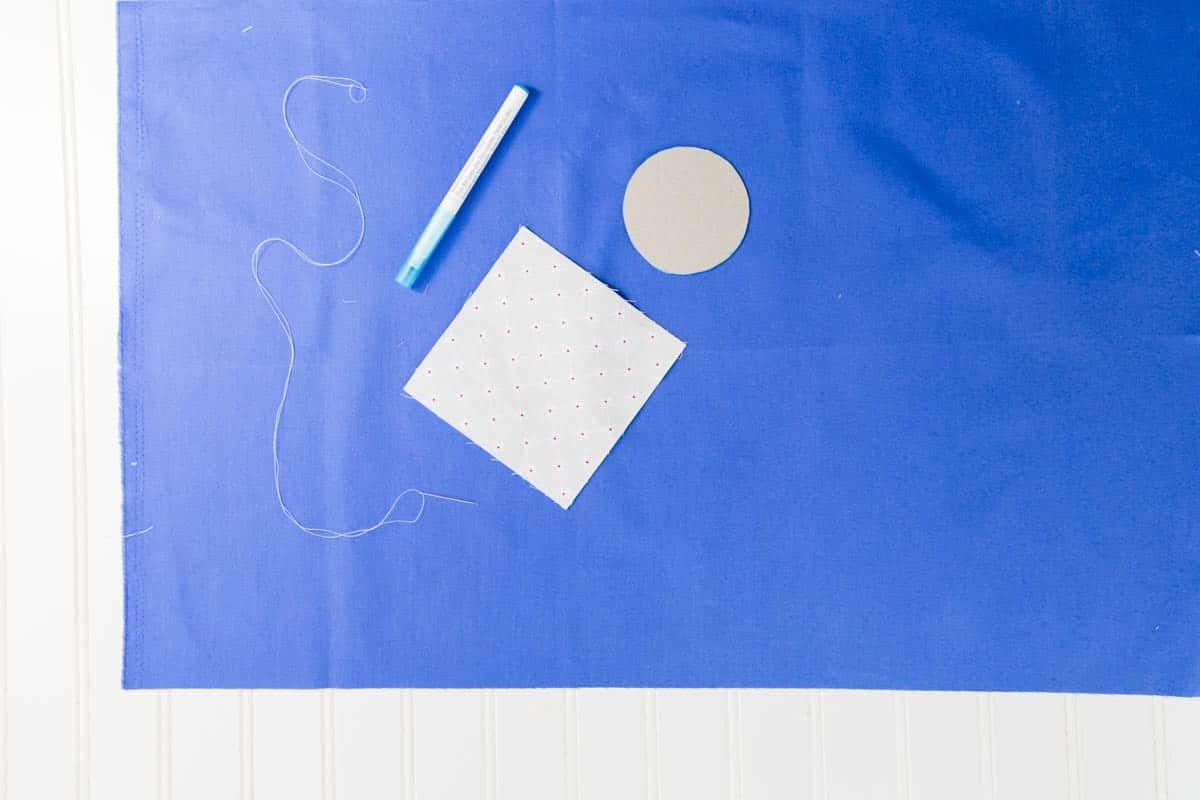
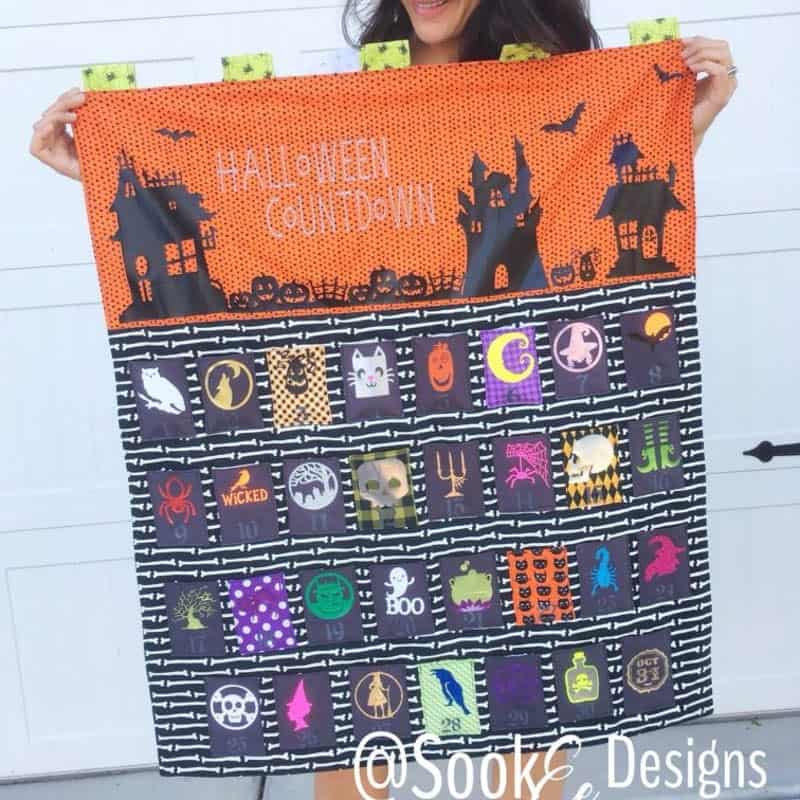
Are you guys loving all the Halloween Inspiration this week? Well, we’ve got more since it’s Day 4 of the Halloween Sewing and Crafting Series and there are more fun Halloween sewing ideas for you! 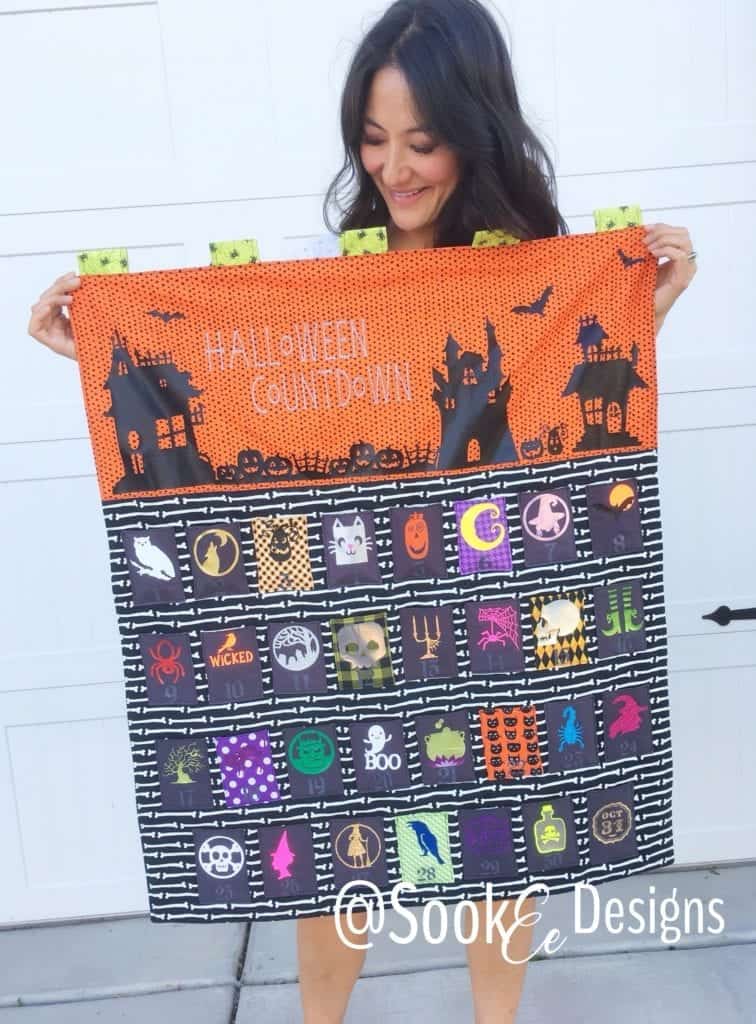 The first one is this crazy cool Halloween Countdown Calendar from SooKEe Designs. This is such a great way to let kids celebrate the month of October and get excited for Halloween. Go to Halloween Countdown Calendar Tutorial.
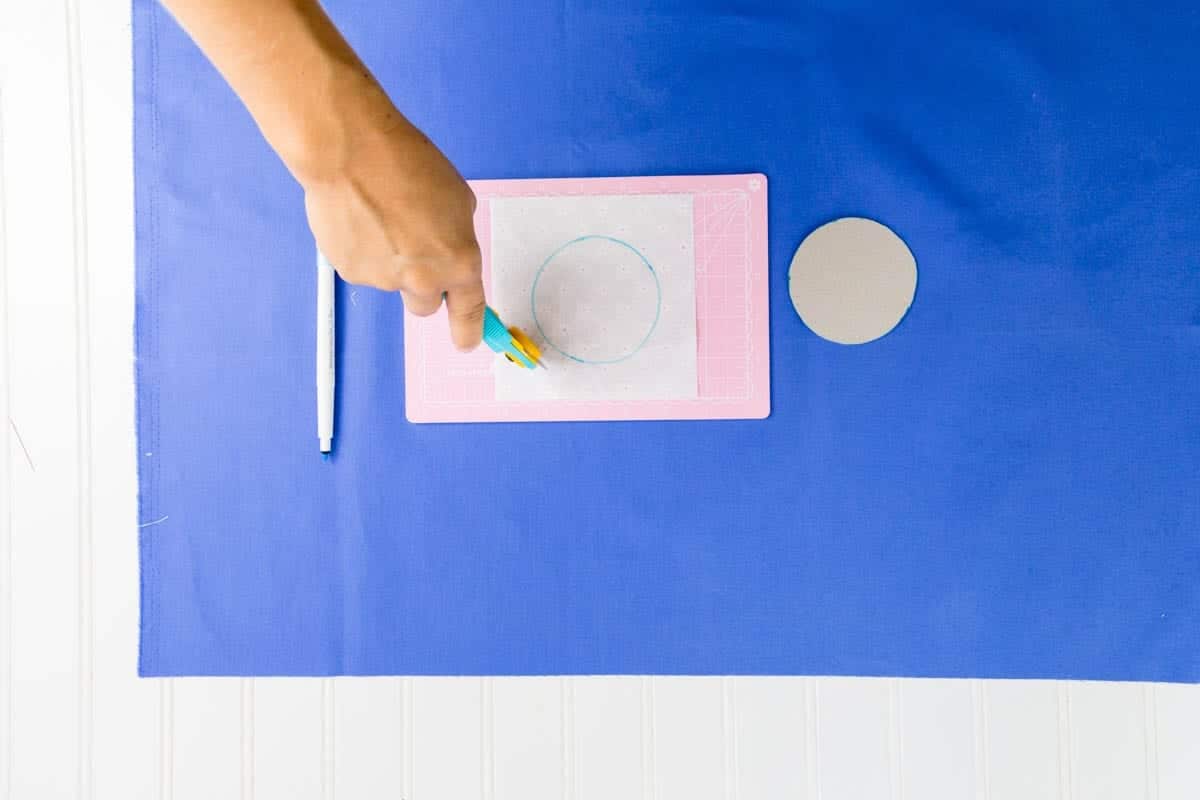
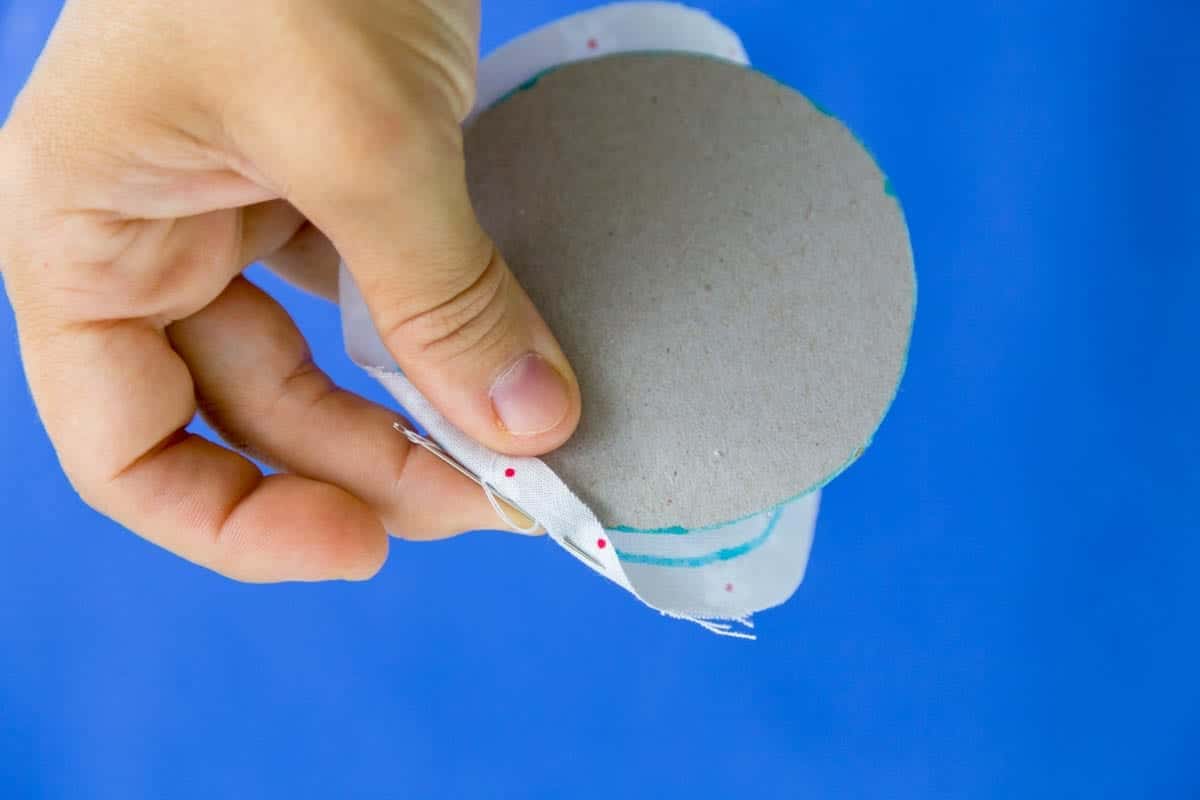
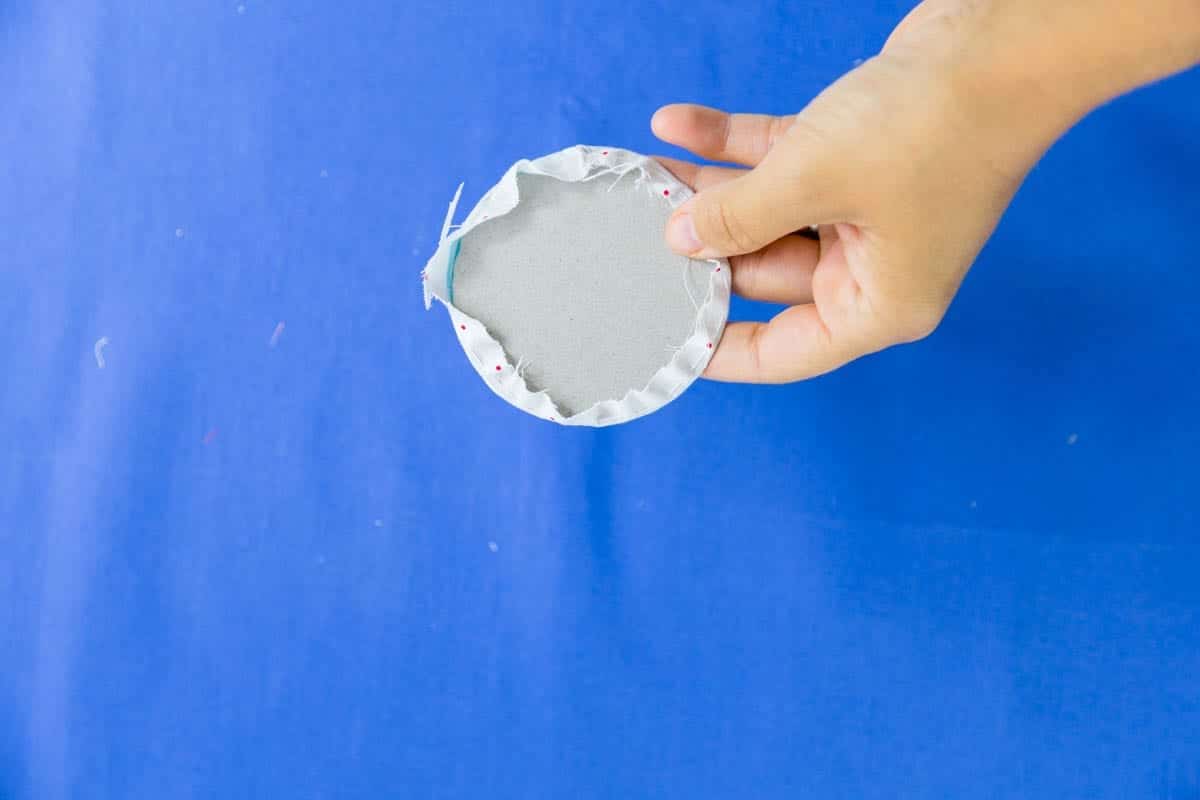
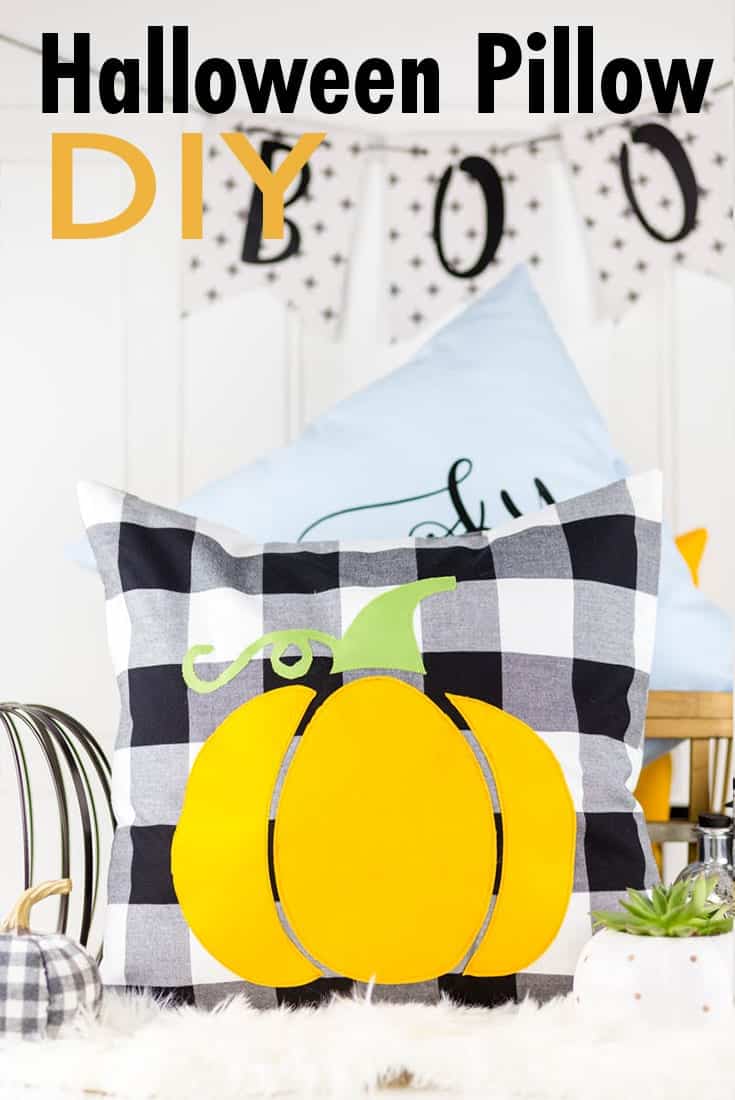 The Halloween Pumpkin Applique Pillow is my addition to the Halloween Sewing and Crafting Party. This pillow is a fun, festive, and modern take on Halloween and comes with a free pumpkin applique pattern. Go to the Halloween Pumpkin Applique Pattern.
Go check out their posts and get the tutorials/patterns. Also, pin it for later, but be sure to pin from their so it links back to them.
You can see all of the Halloween Sewing and Crafting Series here!
Check out all the fun Halloween Inspired Tutorials everyone is making!
9/3 Sweet Red Poppy | Apple Green Cottage
9/4 Housewife Electic | Life Sew Savory | Heather Handmade | The Seasoned Homemaker
9/5 Flamingo Toes | GYCT Designs
9/6 SoOkEe Designs | Pattern Revolution | Coral + Co.
9/7 Paisley Roots | Swoodson Says
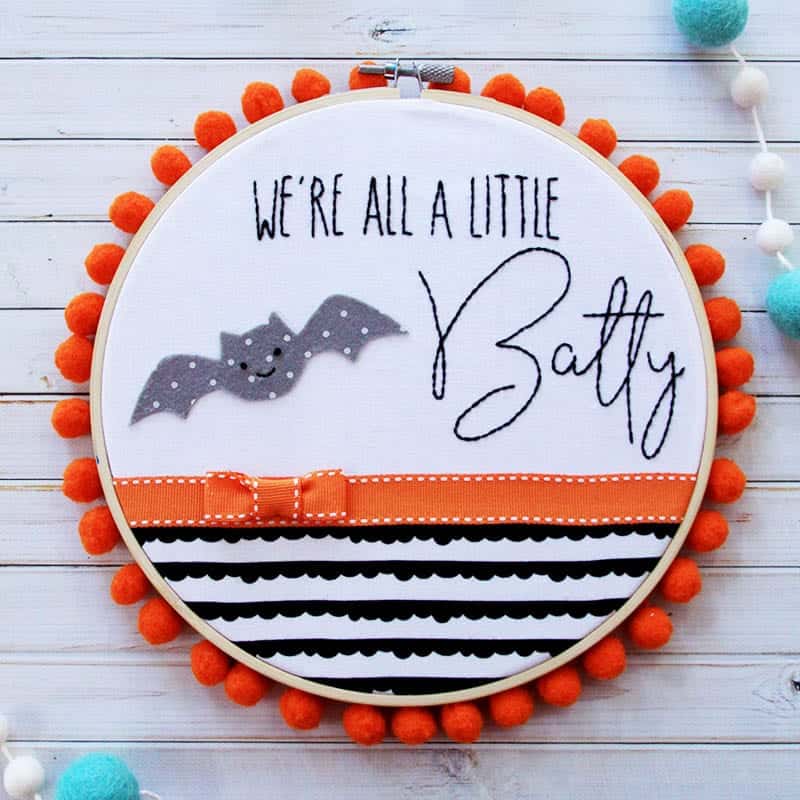
Are you ready for some more great Halloween Sewing and Crafting Projects? Today’s Halloween Sewing Projects are fantastic!
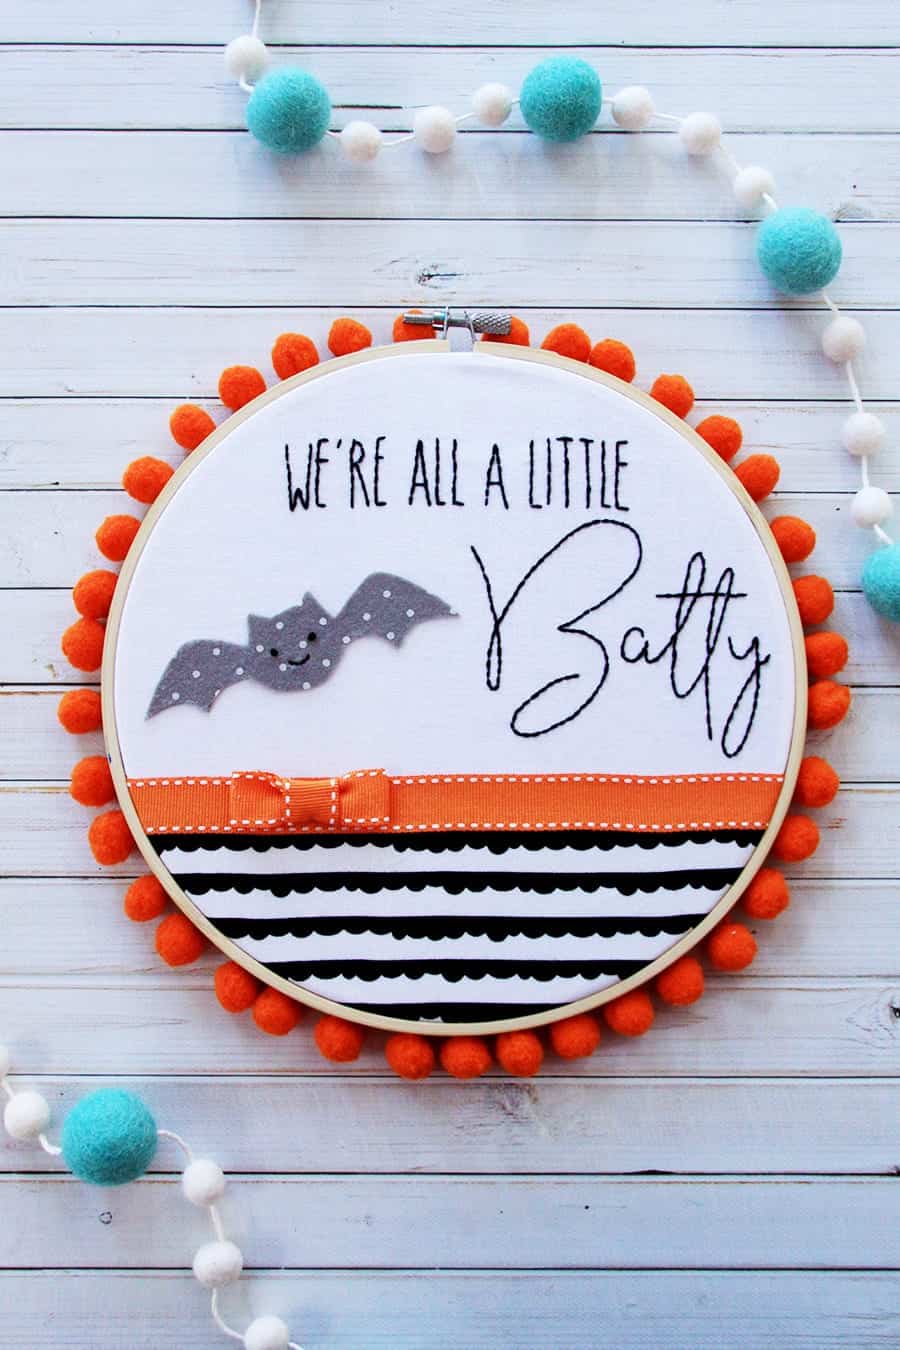
Then you will love this hilarious Halloween Embroidery Hoop Art from Bev at Flamingo Toes. This is so Halloween and spot on for all us crazy crafters! Get the Halloween Pattern!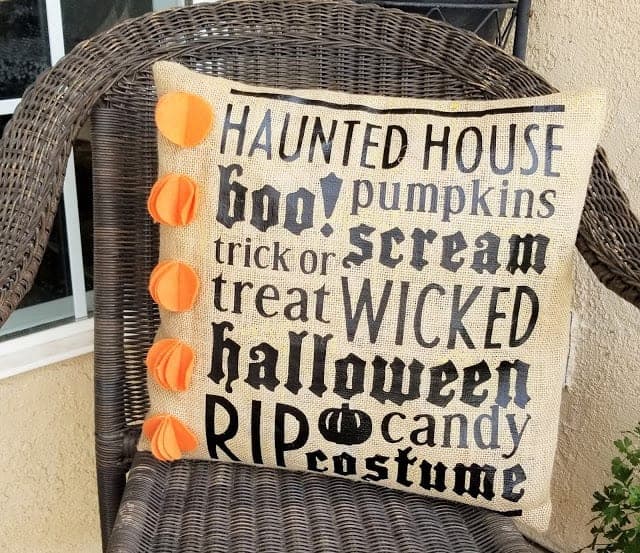
Chelsea from GYCT Designs has some awesome Halloween Pillows to sew up! This one with all the Halloween sayings is perfect! Go to the Halloween Pillow Tutorial.
Go check out their posts and get the tutorials/patterns. Also, pin it for later, but be sure to pin from their so it links back to them.
You can see all of the Halloween Sewing and Crafting Series here! And stay tuned for some more great Halloween Inspiration and Tutorials tomorrow.
Check out all the fun Halloween Inspired Tutorials everyone is making!
9/3 Sweet Red Poppy | Apple Green Cottage
9/4 Housewife Electic | Life Sew Savory | Heather Handmade | The Seasoned Homemaker
9/5 Flamingo Toes | GYCT Designs
9/6 SoOkEe Designs | Pattern Revolution | Coral + Co.
9/7 Paisley Roots | Swoodson Says
Ohhhh emmmm gee, day 2 of the Halloween Sewing and Craft series was insane! There were soooo many amazing projects that you will be itching to start your Halloween crafting and sewing.
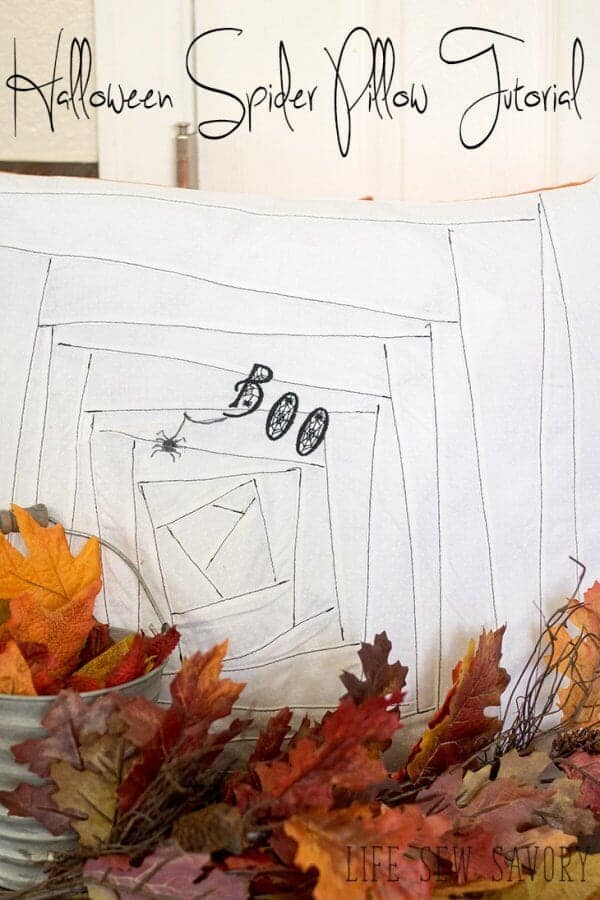
Emily from Life Sew Savory made this crazy awesome quilt as you go Halloween Spider Pillow. It is so unique and looks so cool. Go to the tutorial. 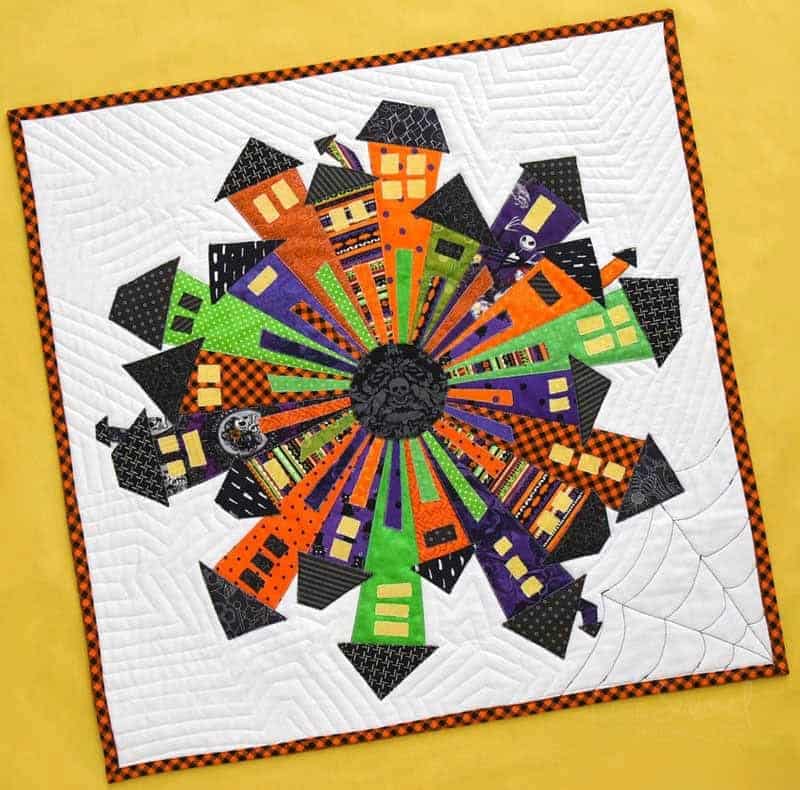 Can you believe this Halloween Dresden Neighborhood Mini Quilt that Leslie from the Seasoned Homemaker made? What an ingenious way to use Dresden Plates. This is a must have for your Halloween Decor. Get the pattern.
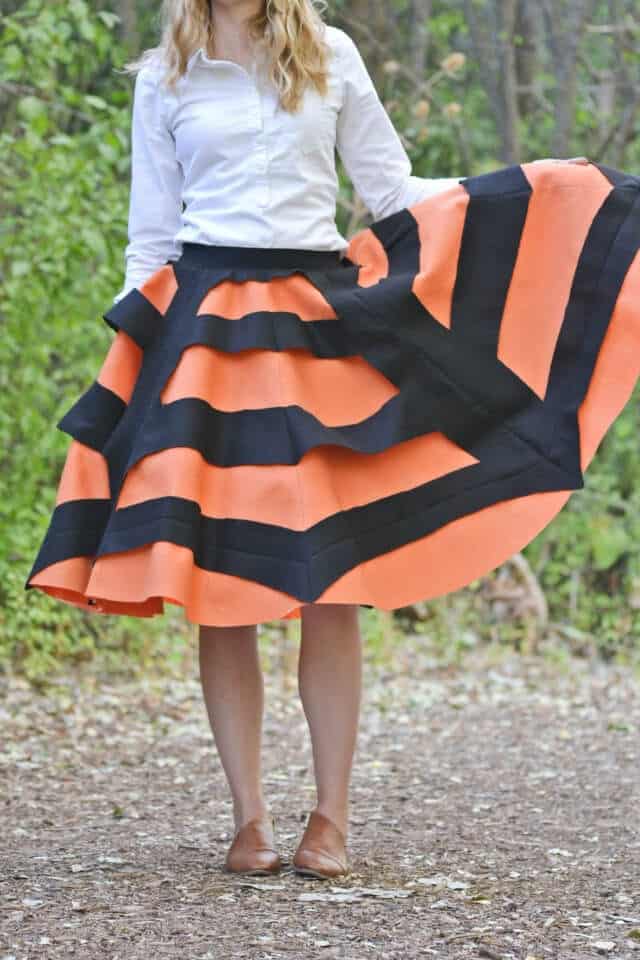 Heather from Heather Handmade completely blew me away with this totally unique and festive Halloween Spiderweb skirt. Even if you don’t dress up on Halloween this would be super fun to wear and perfect for a party. See the Spiderweb Skirt tutorial here.
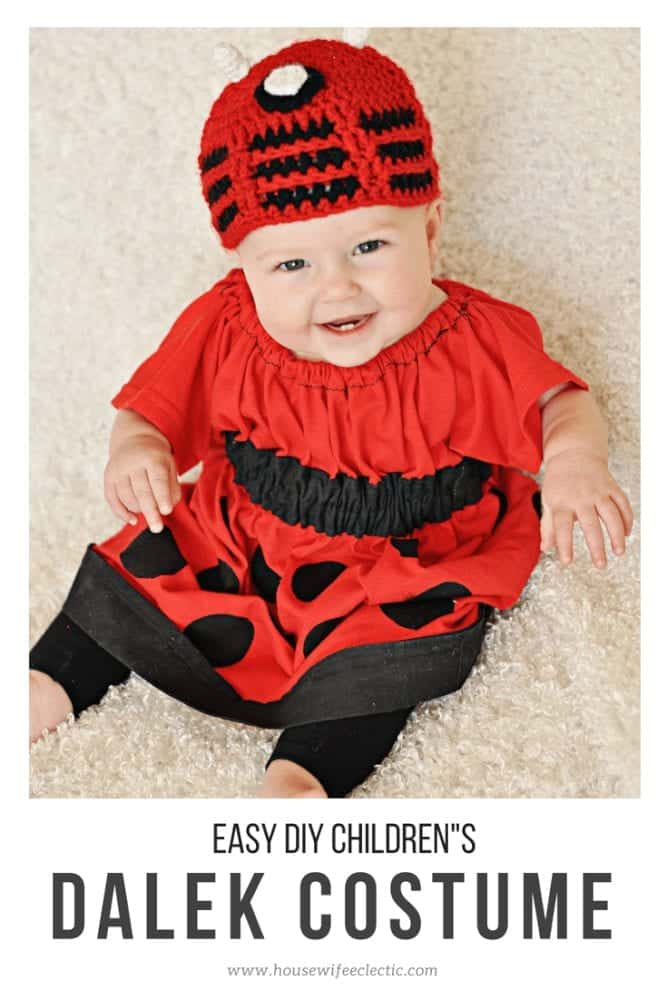
Comic-Con fans Debra from the Electic Housewife has the cutest little children’s Dalek Costume tutorial for you. If you are a Doctor Who fan you will be totally digging this. And who doesn’t love a cute little baby all dressed up for Halloween! See how to make the Costume here.
Go check out their posts and get the tutorials/patterns. Also, pin it for later, but be sure to pin from their so it links back to them.
You can see all of the Halloween Sewing and Crafting Series here! And stay tuned for some more great Halloween Inspiration and Tutorials tomorrow.
Check out all the fun Halloween Inspired Tutorials everyone is making!
9/3 Sweet Red Poppy | Apple Green Cottage
9/4 Housewife Electic | Life Sew Savory | Heather Handmade | The Seasoned Homemaker
9/5 Flamingo Toes | GYCT Designs
9/6 SoOkEe Designs | Pattern Revolution | Coral + Co.
9/7 Paisley Roots | Swoodson Says
You guys Day 1 of the Halloween Sewing and Crafting series started of sooooo good and I can’t wait to see what the rest of the week brings. 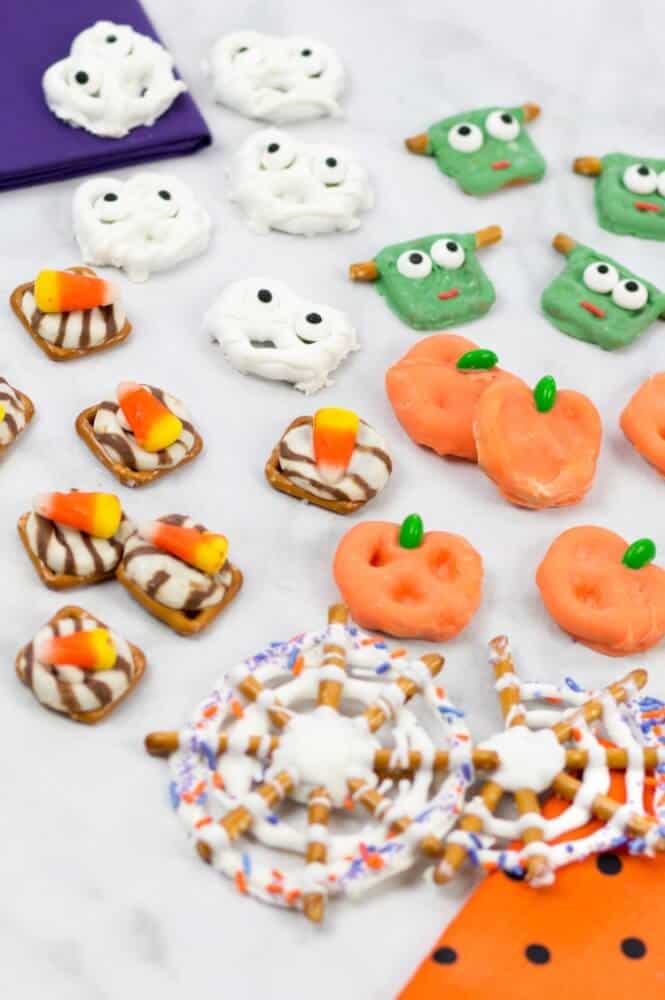
Kim from Sweet Red Poppy made these adorable Halloween Pretzel Treats that are all sorts of fun and festive monsters. I had no idea these were so easy to make!
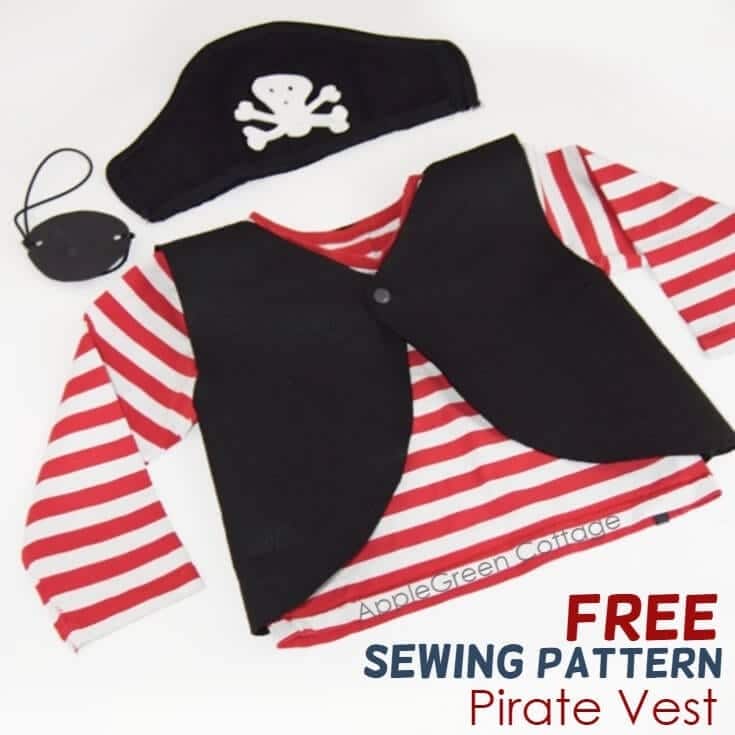
Damjana from Apple Green Cottage made an awesome DIY Pirate Costume that comes with a FREE pattern for the pirate vest. Perfect for your little pirate fan.
Go check out their posts and get the tutorials/patterns. Also, pin it for later, but be sure to pin from their so it links back to them.
You can see all of the Halloween Sewing and Crafting Series here! And stay tuned for some more great Halloween Inspiration and Tutorials tomorrow.
Check out all the fun Halloween Inspired Tutorials everyone is making!
9/3 Sweet Red Poppy | Apple Green Cottage
9/4 Housewife Electic | Life Sew Savory | Heather Handmade | The Seasoned Homemaker
9/5 Flamingo Toes | GYCT Designs
9/6 SoOkEe Designs | Pattern Revolution | Coral + Co.
9/7 Paisley Roots | Swoodson Says
Welcome to this year’s Halloween Sewing and Crafting series. This is the third year that I have hosted the crafty Halloween series and it keeps getting better and better every year! This year there is a great group of super talented ladies that ready to get you into the Halloween craft groove.
Check out all of the fun Halloween Tutorials from the previous years!
Check out all the fun Halloween Inspired Tutorials everyone is making!
9/3 Sweet Red Poppy | Apple Green Cottage
9/4 Housewife Electic | Life Sew Savory | Heather Handmade | The Seasoned Homemaker
9/5 Flamingo Toes | GYCT Designs
9/6 SoOkEe Designs | Pattern Revolution | Coral + Co.
9/7 Paisley Roots | Swoodson Says
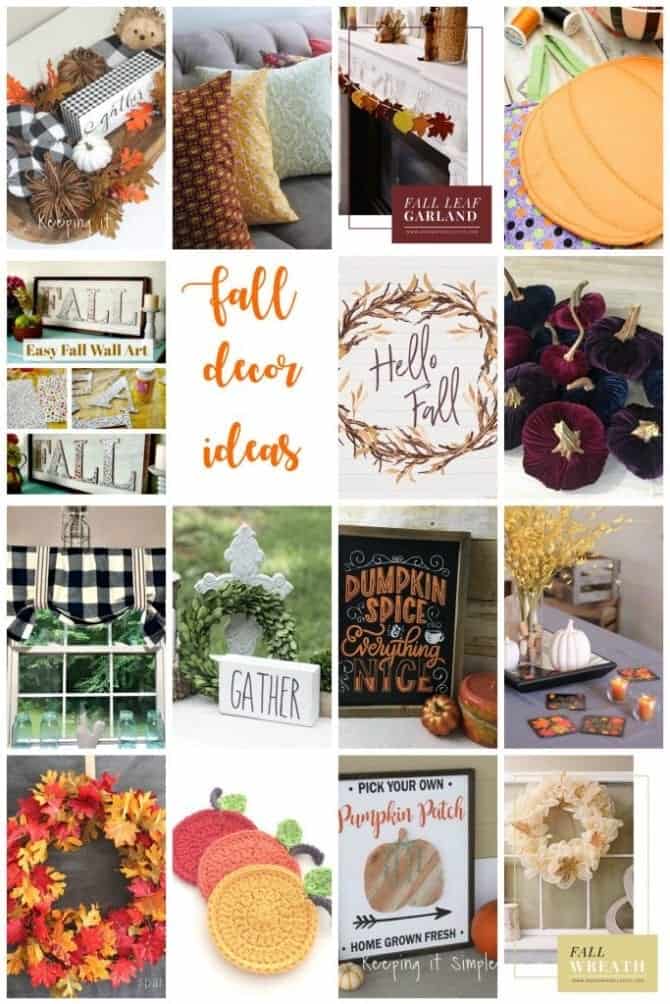
It’s official. Pumpkin spice lattes can be spotted at every Starbucks so we must be headed into fall. If you live in a place that is still 90 degrees than these DIY Pumpkin Crafts, Decor and Recipes will have you daydreaming of cooler weather. Either way, we are officially on the countdown to comfort food and sweaters. Check out these super fun Pumpkin themed DIY’s to get you into the fall spirit.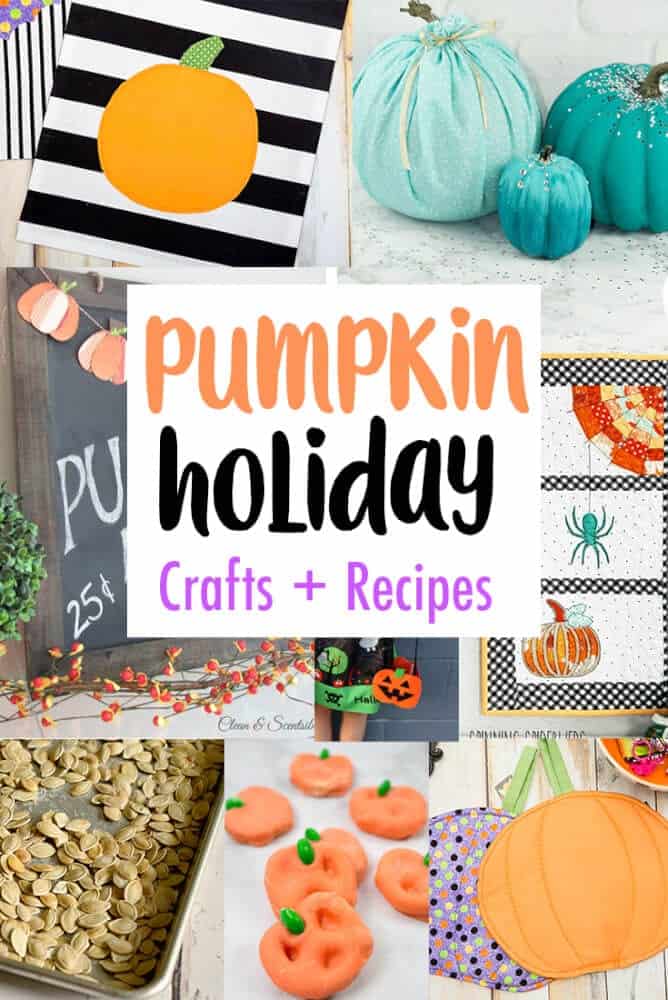
It’s time for another Block Party hosted by Rae Gun Ramblings | Keeping it Simple Crafts | Housewife Eclectic | Coral and Co.! Be sure to check out all of our blogs, because we’ve been up to some fun things lately.

Hey ya’ll its Shelly from Coral + Co. I am recently new to the block party and am having a great time seeing all your craft link ups! I love all things crafty and sewing. Here are a few things that I have been doing lately.
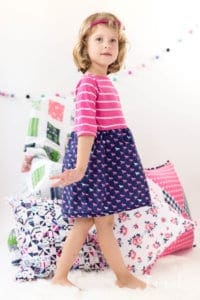
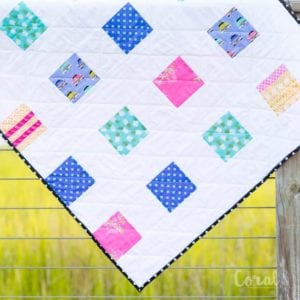
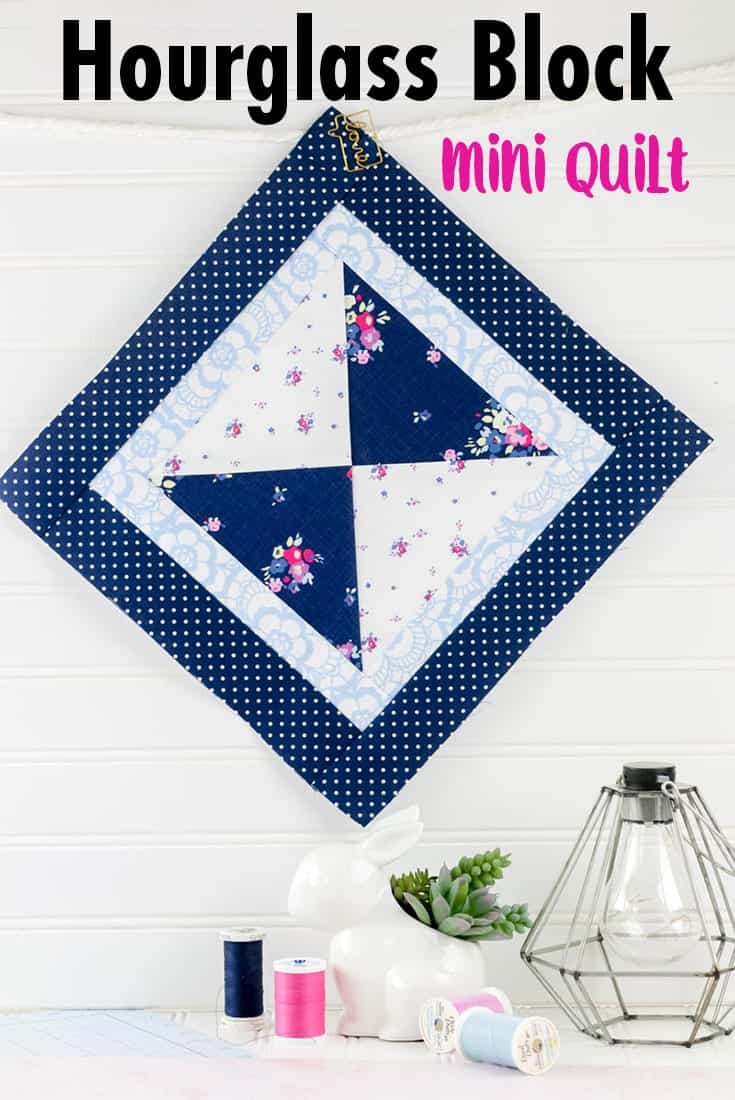
DIY T-shirt dress tutorial | Four Squares Baby Quilt Pattern | Hourglass Mini Quilt
Link to a specific post, not your homepage.
[inlinkz_linkup id=796482 mode=1]
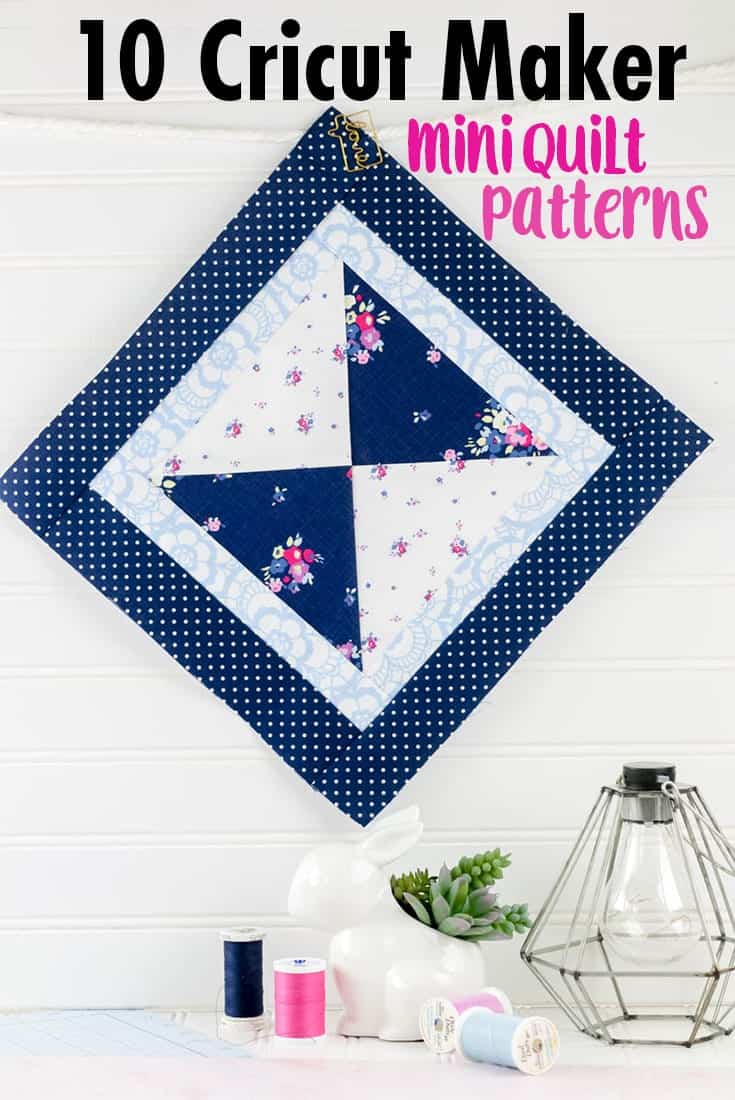
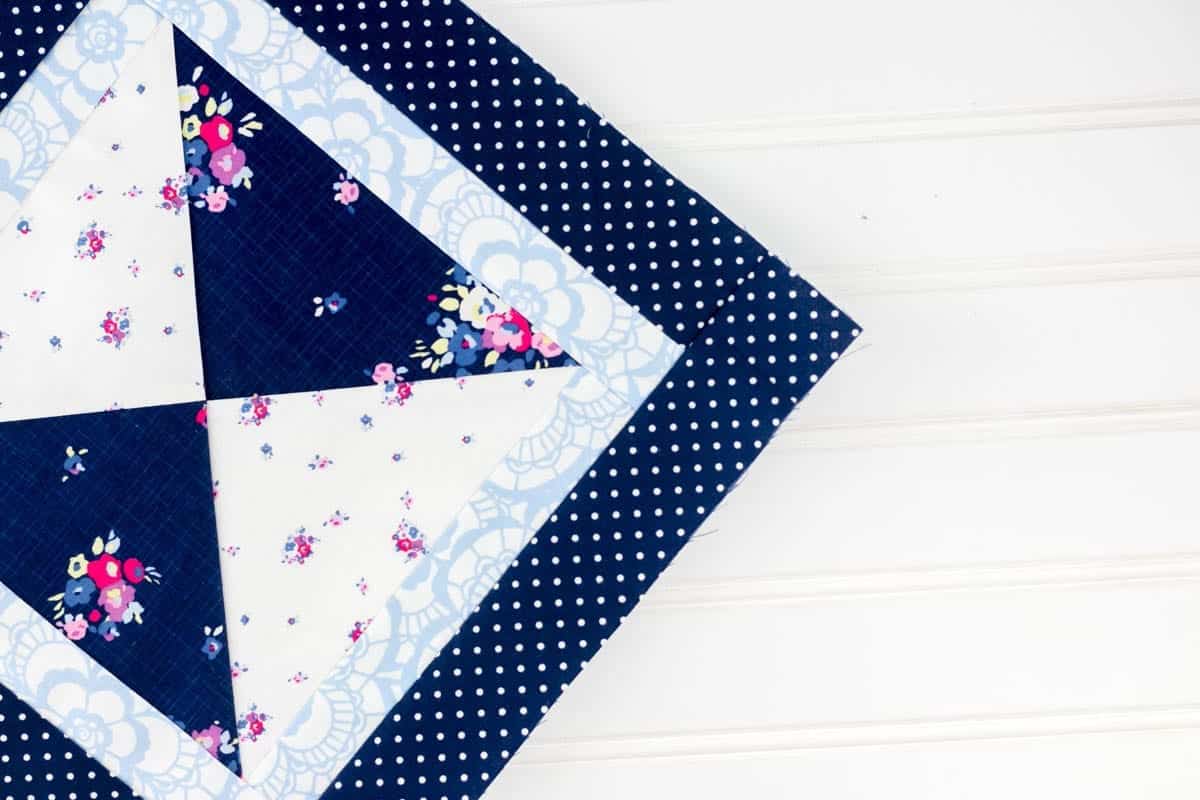
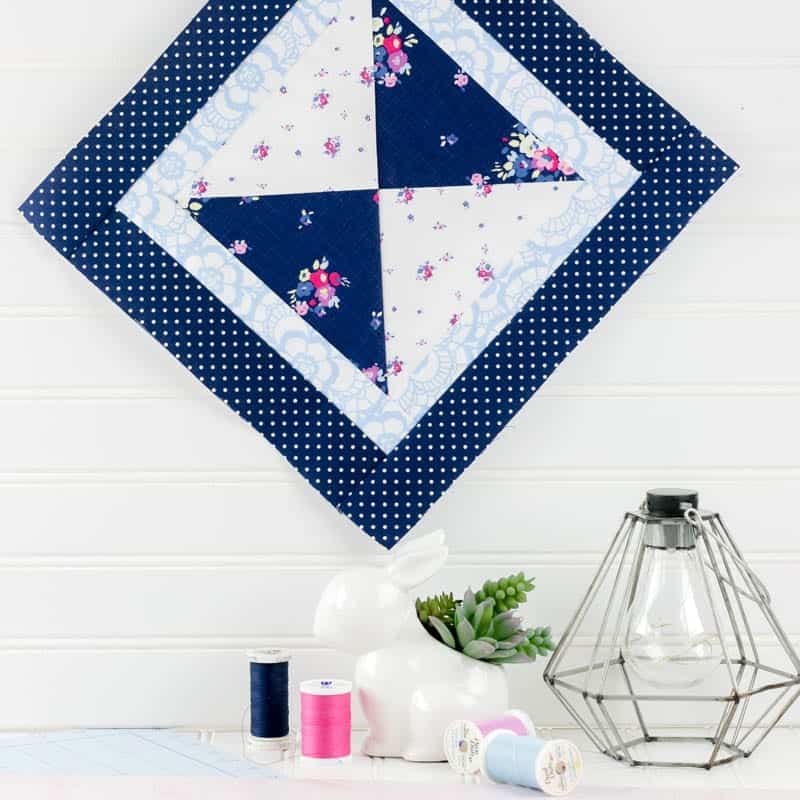
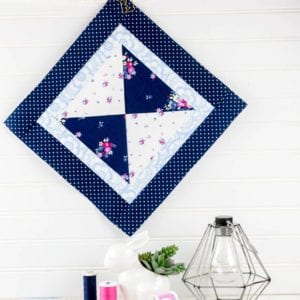
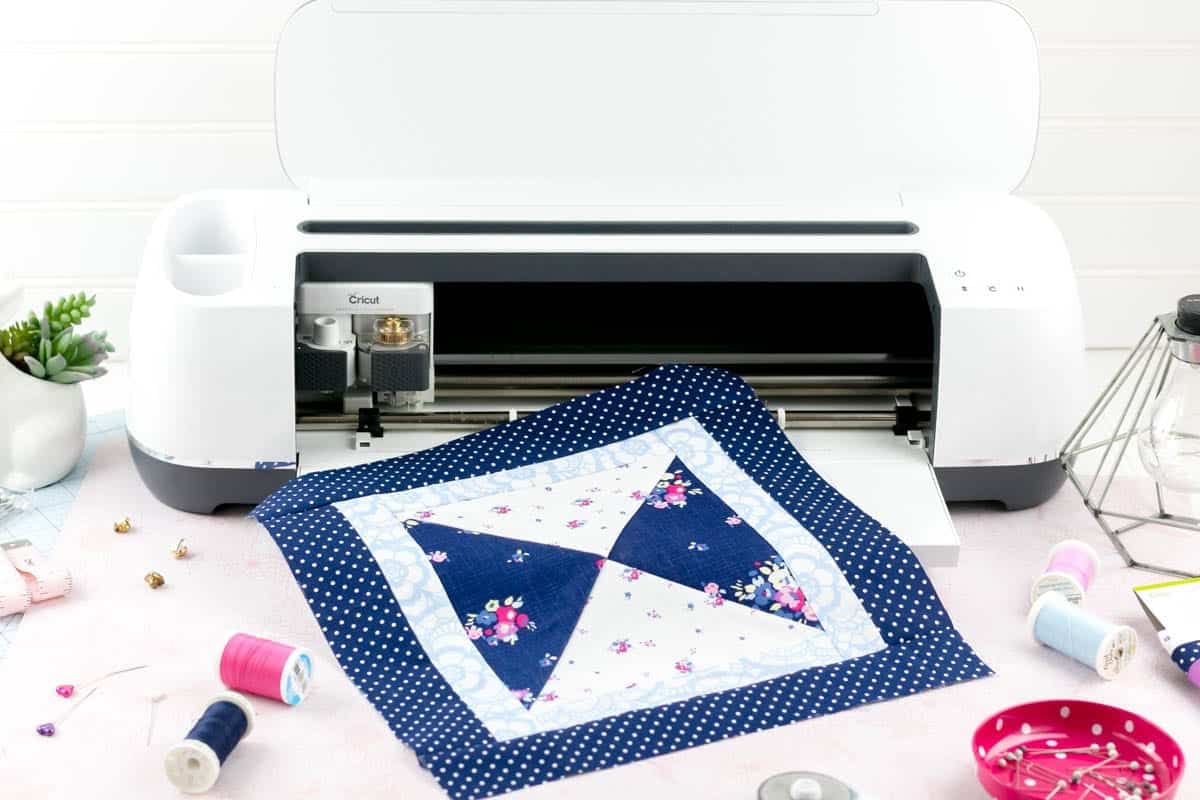
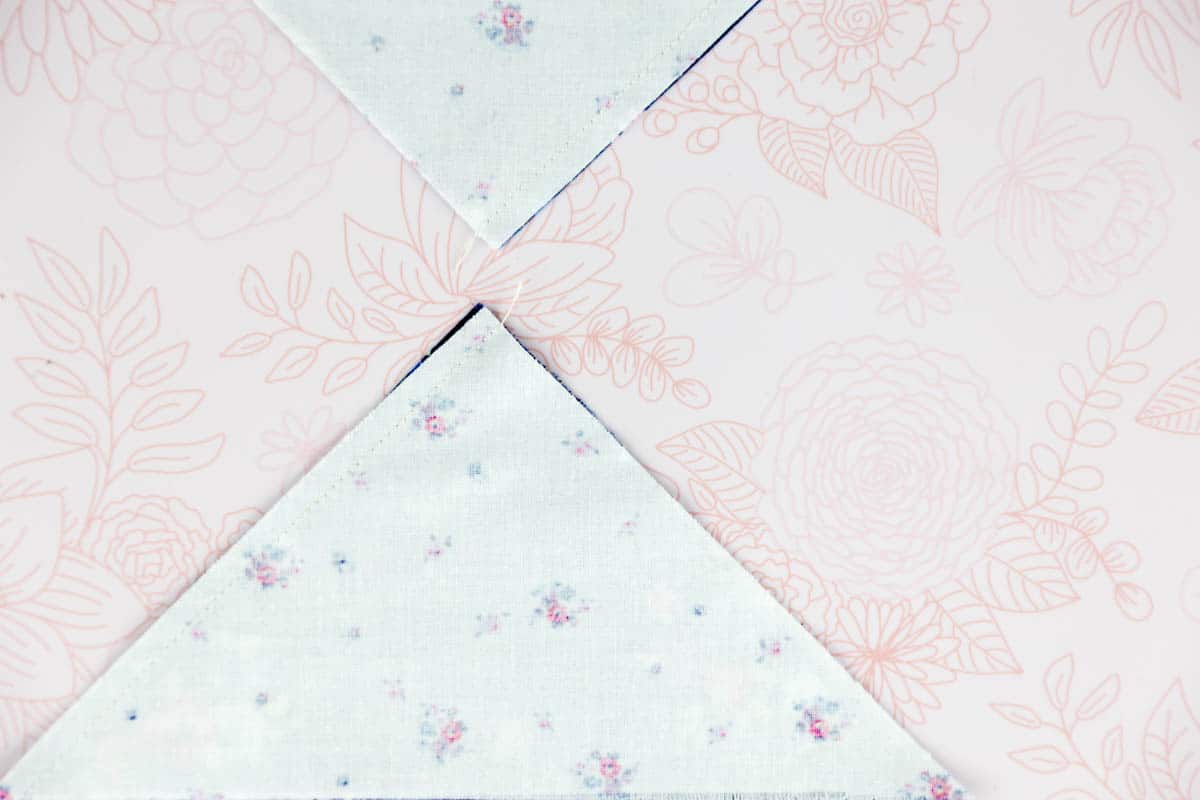
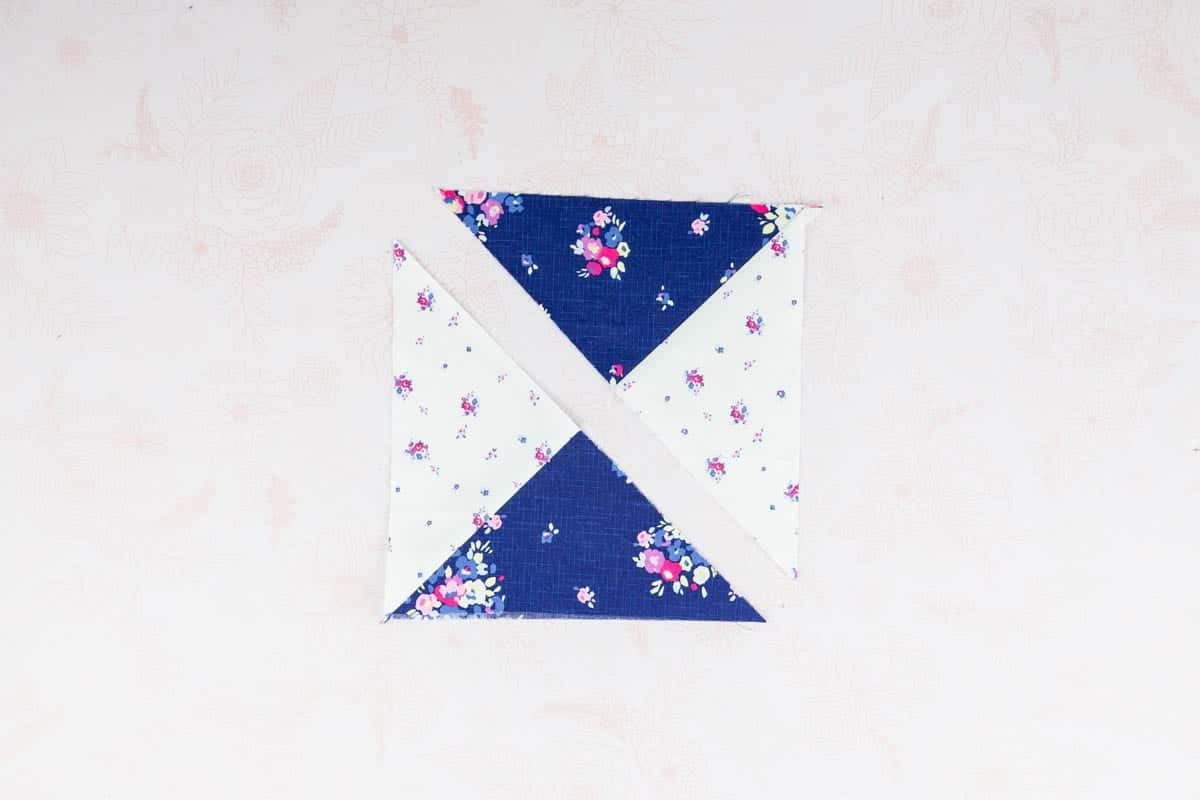
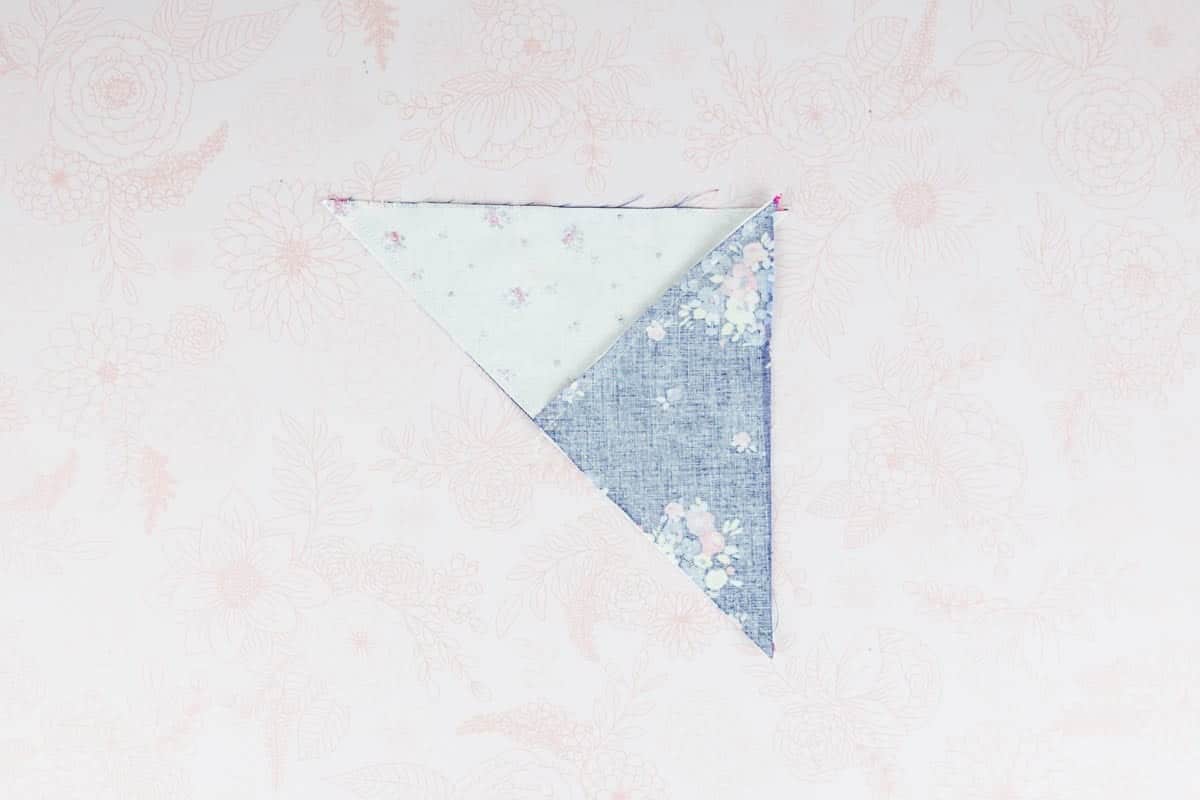
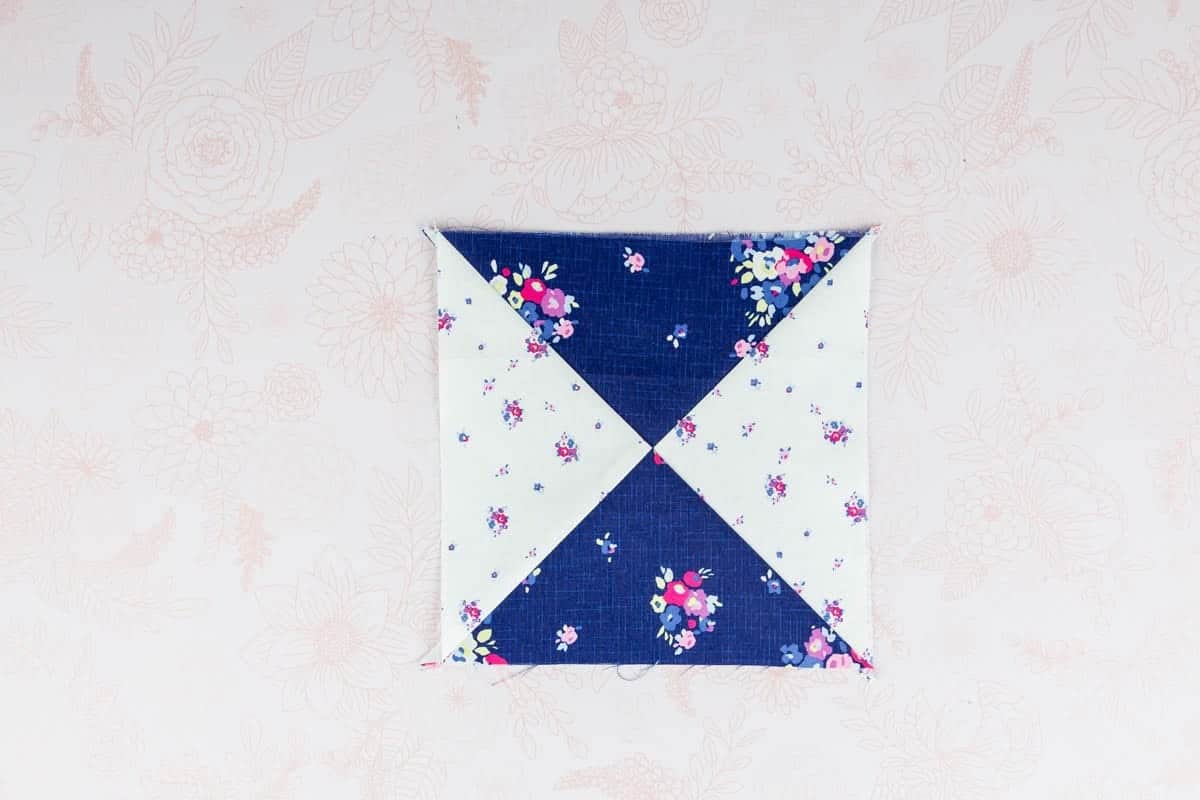
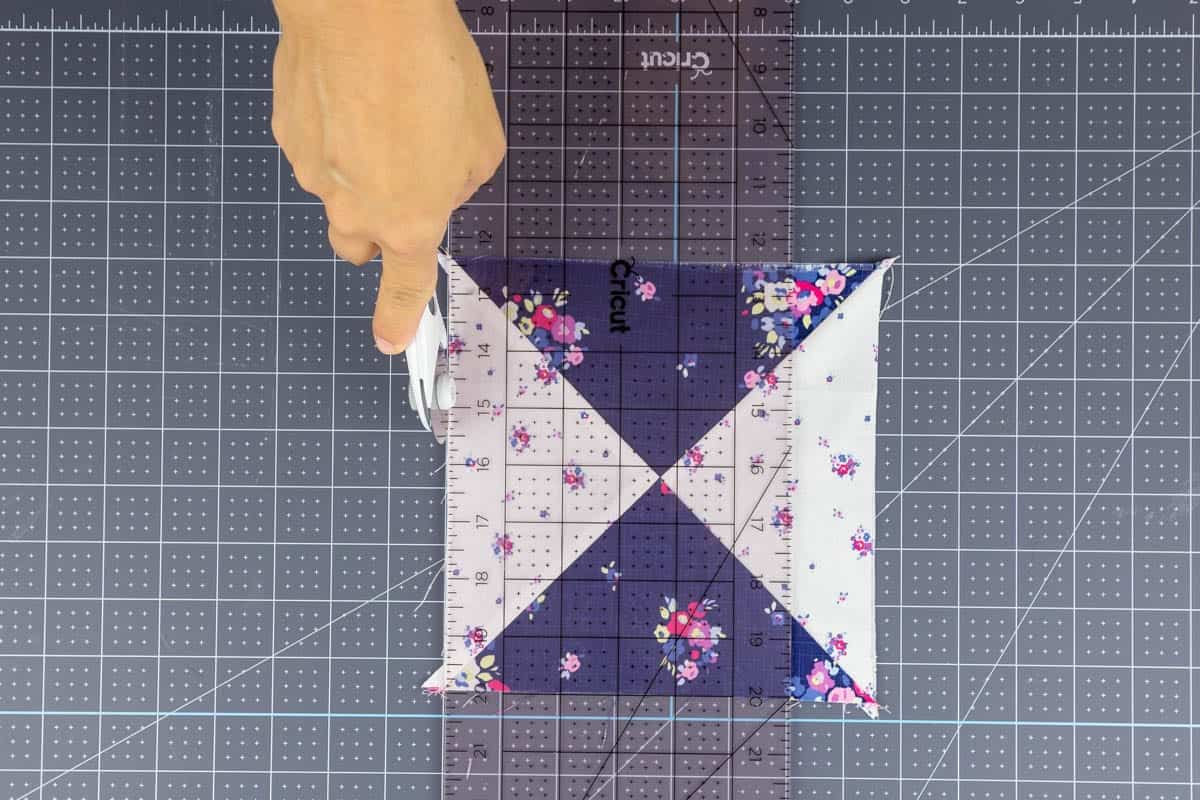
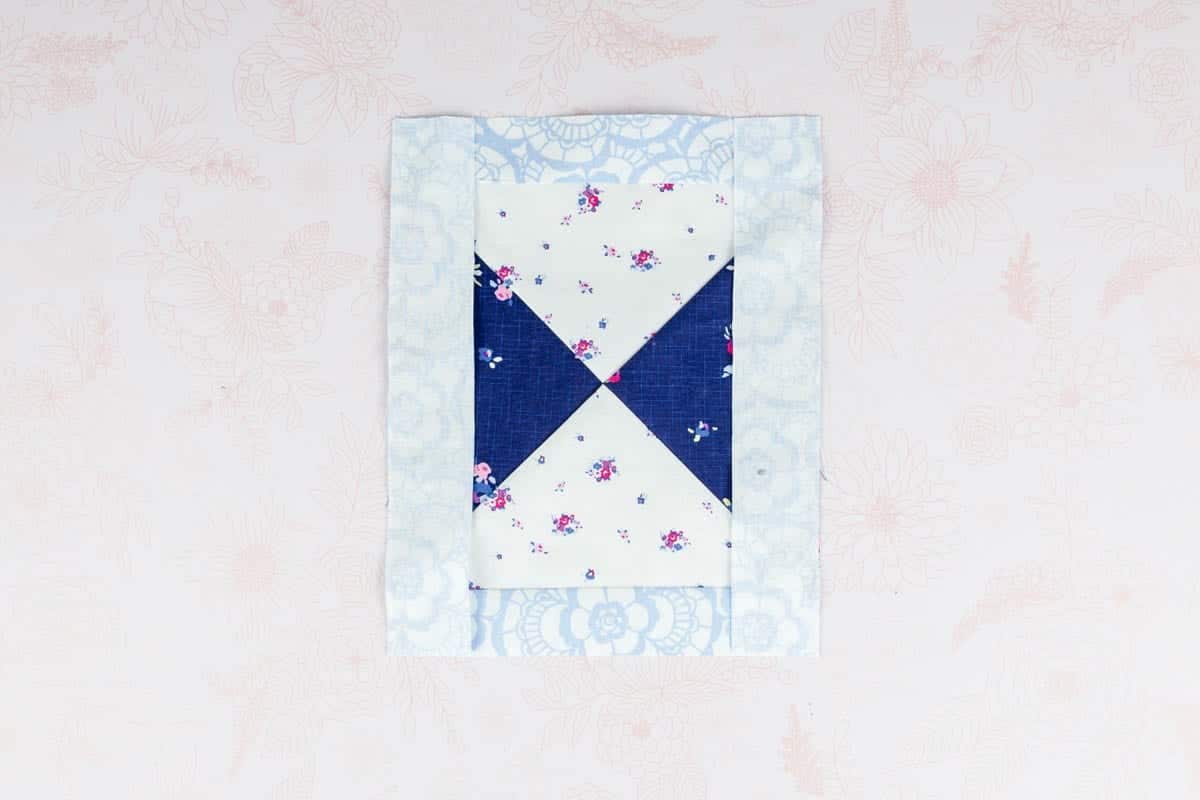
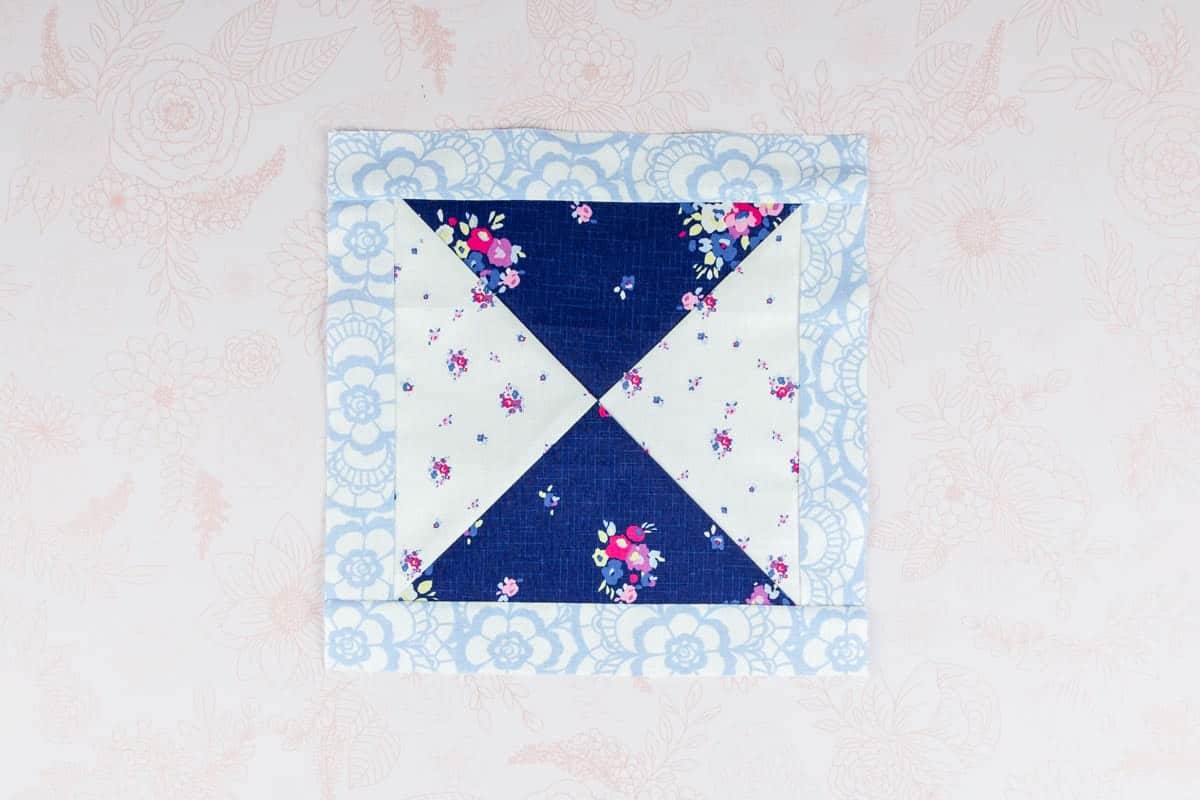
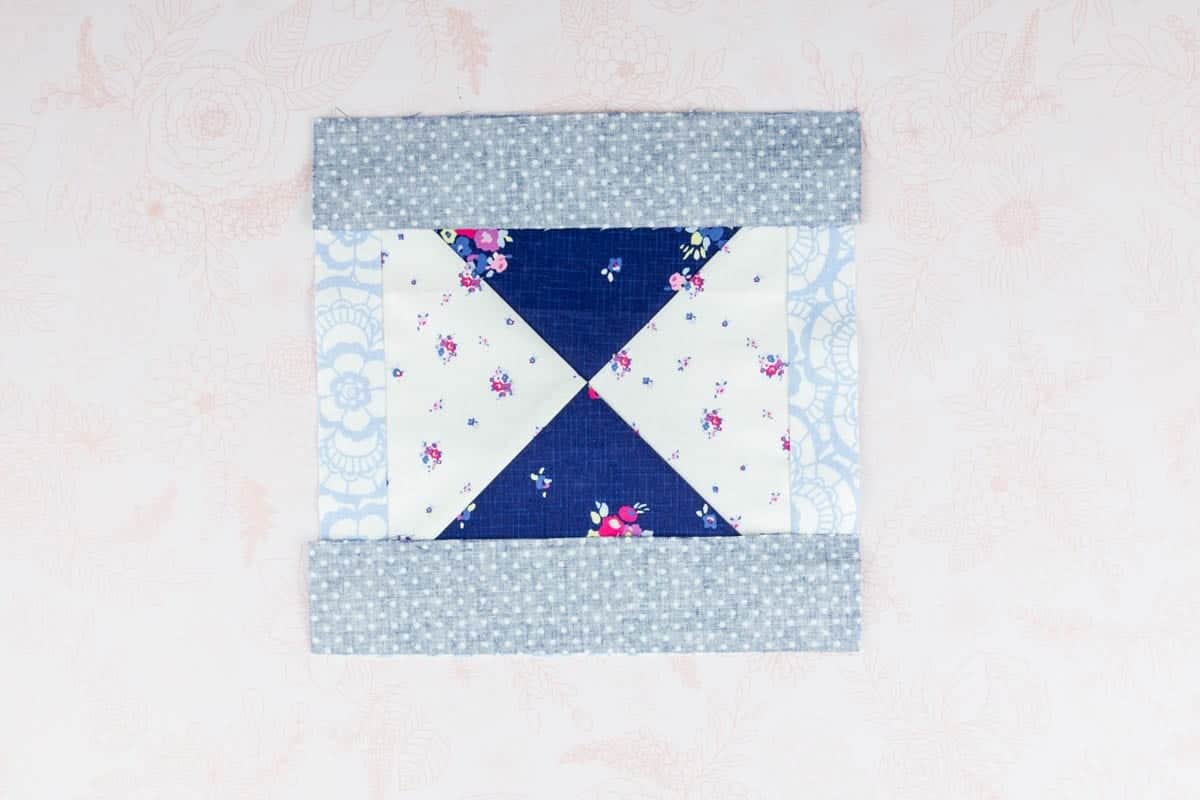
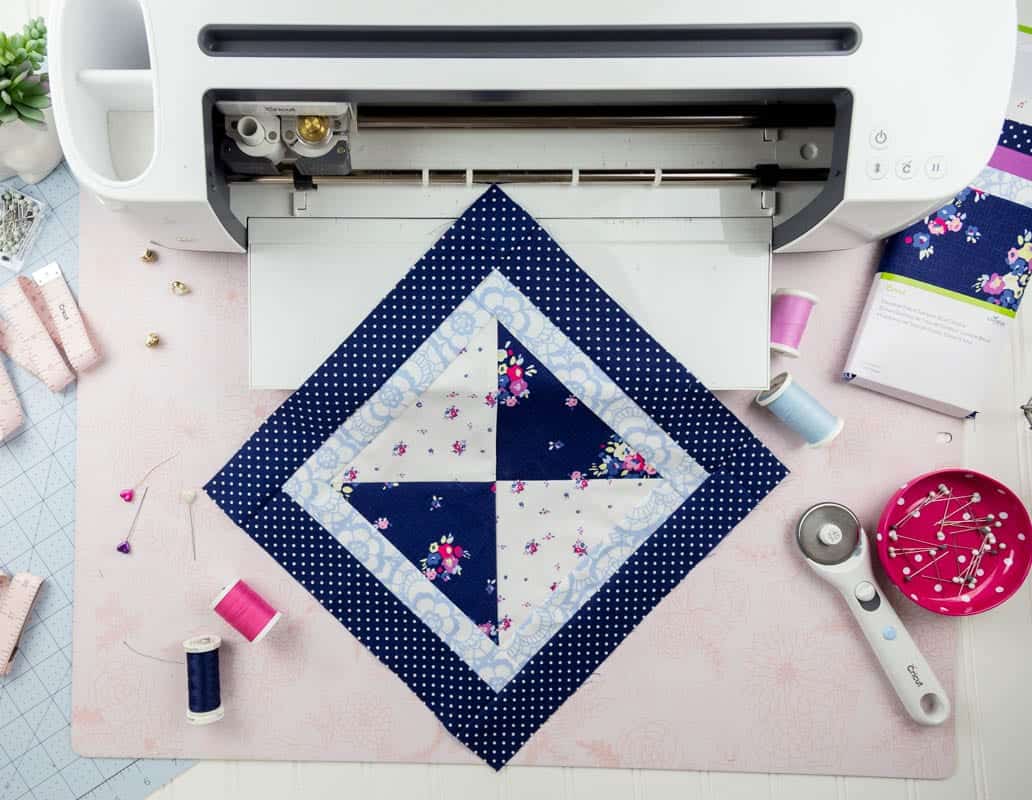
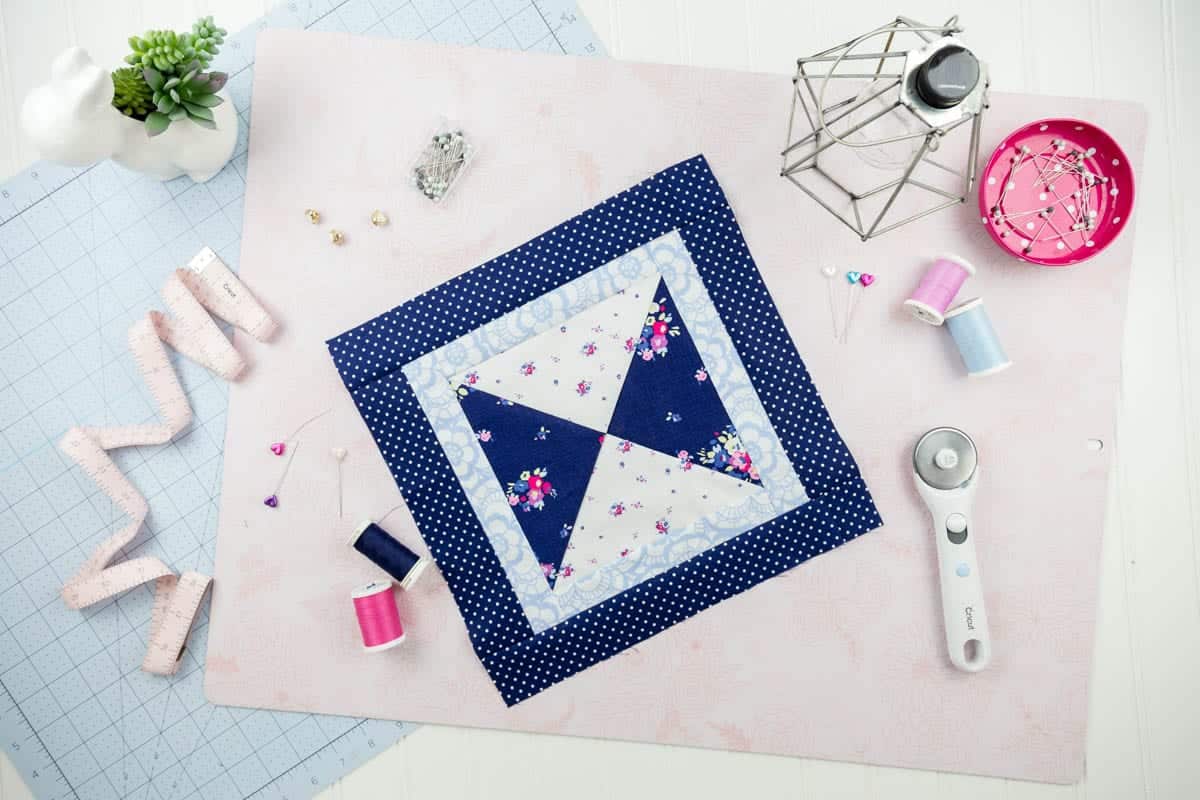
Here is a list 10 Easy Cricut Mini Quilt Patterns that you can make with the Cricut Maker. Plus a tutorial to learn how to make this lovely blue Mini Hourglass Quilt Block Pattern. Scroll down to the bottom of the post to see the video tutorial.
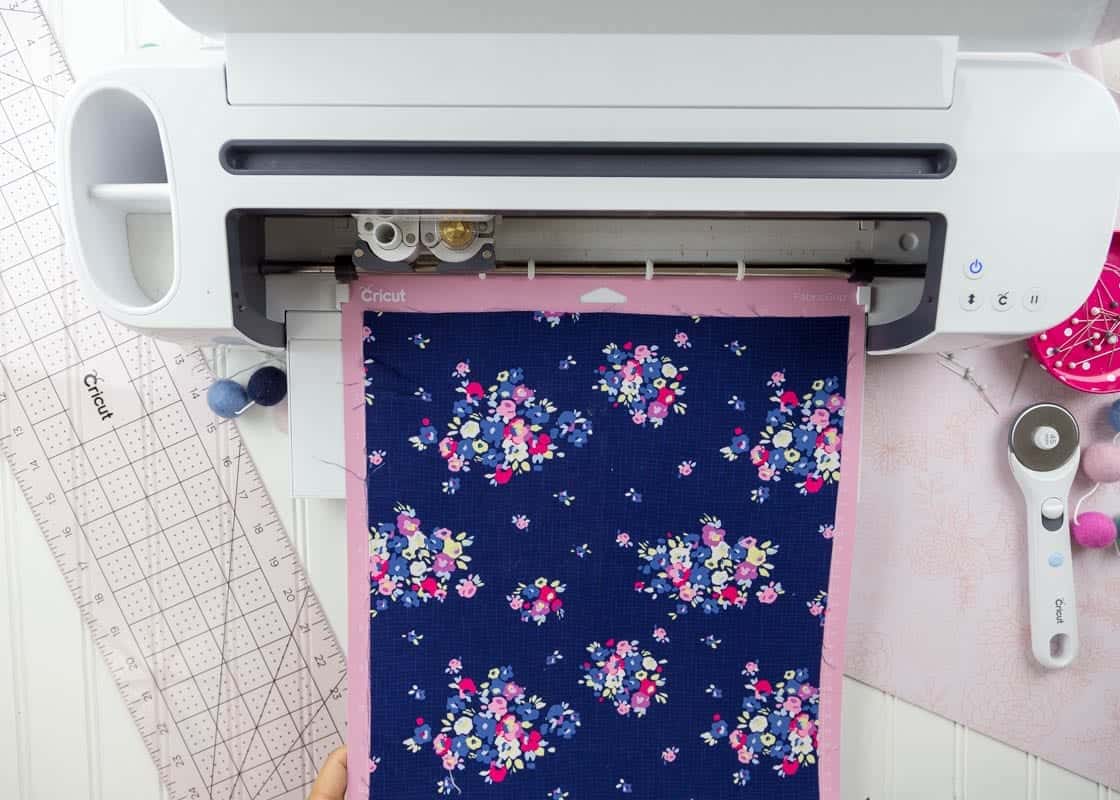
I have a fantastic mini quilt that you can make with your Cricut Maker plus 10 great Mini Quilts that you can make quickly with your Cricut Maker because let’s be honest, not having to cut your own fabric is just plain awesome. And the fact that the Cricut Maker uses a rotary blade it can cut virtually any fabric without a backing or stabilizer and is totally precise when doing it is seriously genius.
True story, I used to make applique onesies for a friend of mine with cutout letters and all and wished every. single. time. that I cut out shapes by hand that there was a machine like this. They must have read my mind because it’s finally here.

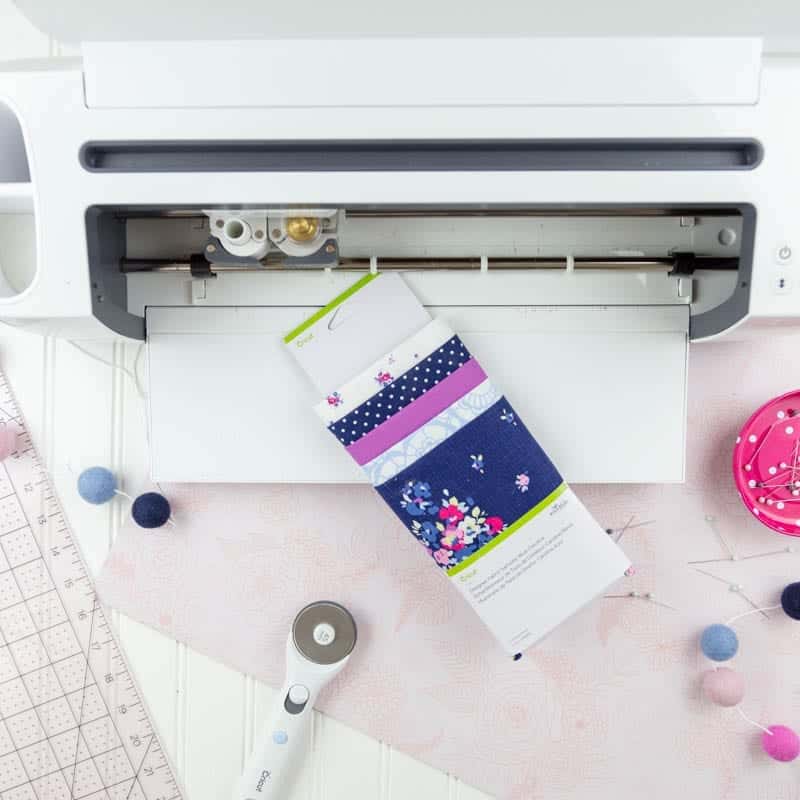
And if your a little quilty, you will totally appreciate all the time (and pain) that can be saved when cutting tons of small pieces of fabric. Plus the crazy cute coordinating fabric samples made just for the maker. You can read more about how to get started quilting in design space and how easy it is to make a quilt with a quilt kit and pattern using the Maker.
**** Instructions for these patterns to come
Scroll down to the bottom of the post to see the video tutorial.


This is a sponsored conversation written by me on behalf of Cricut. The opinions and text are all mine.
School has started and fall is just around the corner. I can’t wait to pull out soups for cooler weather!

…
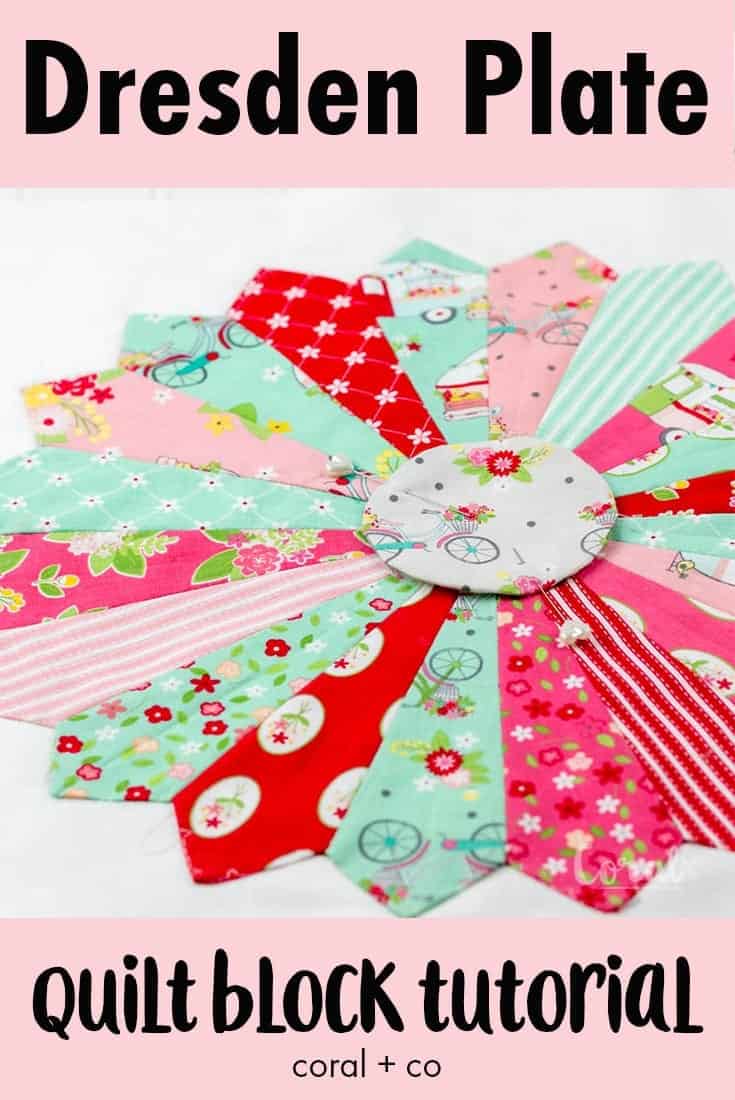
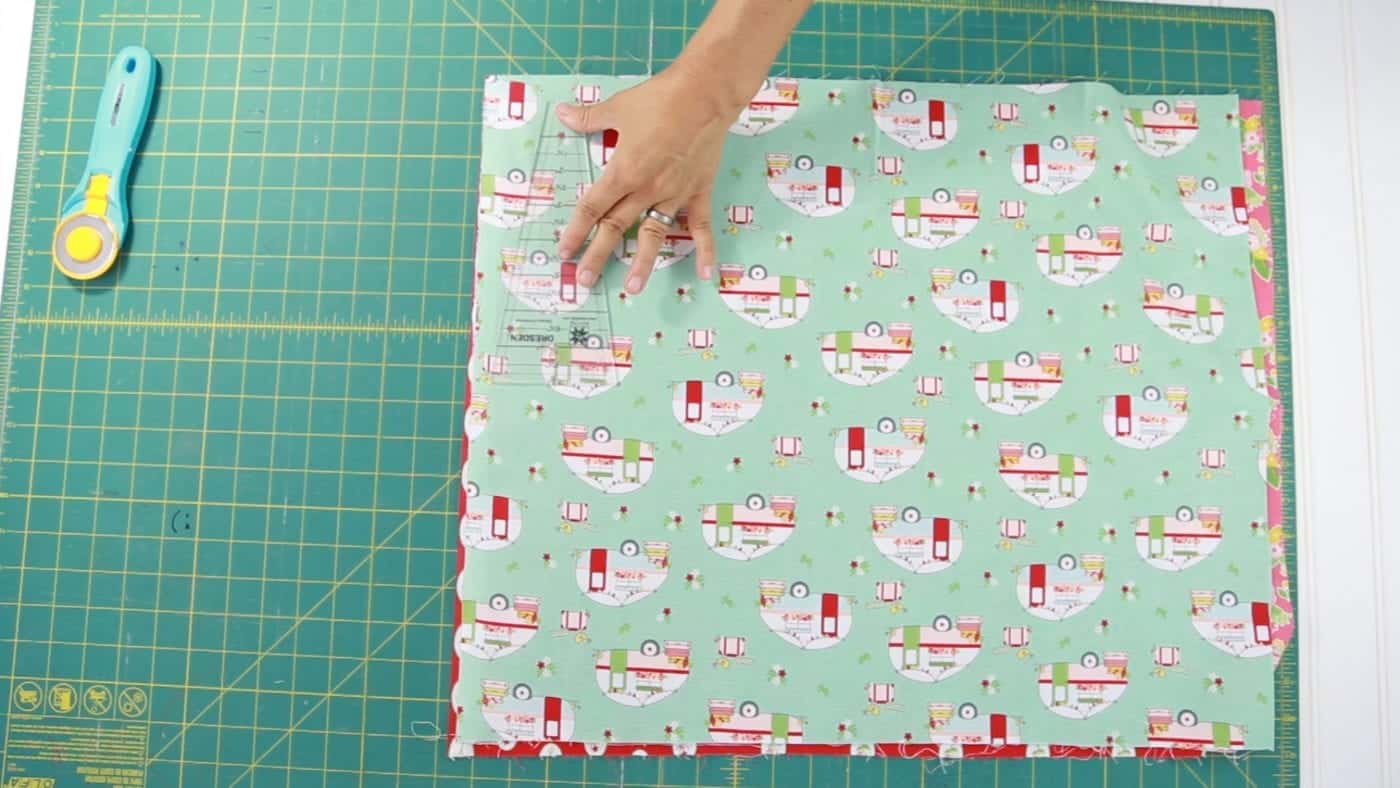
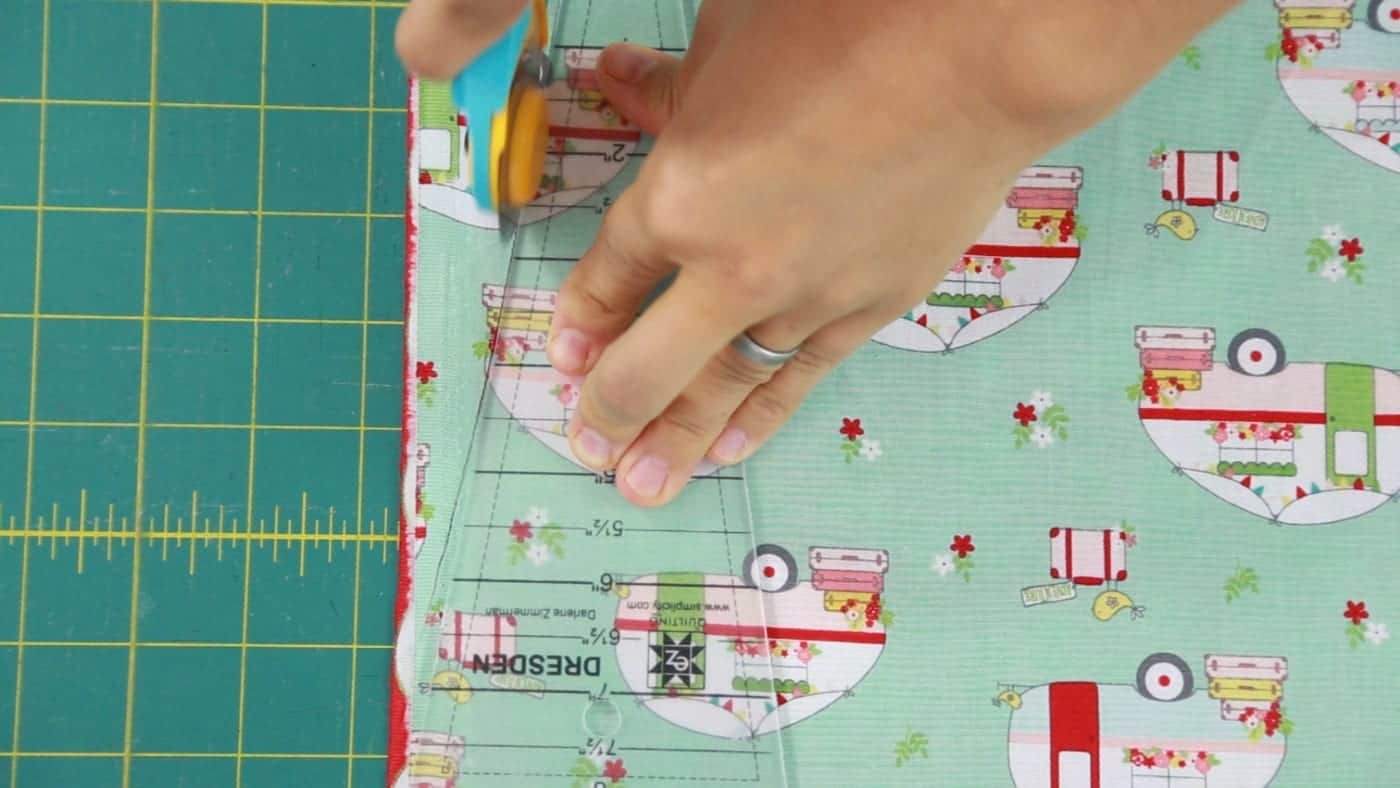
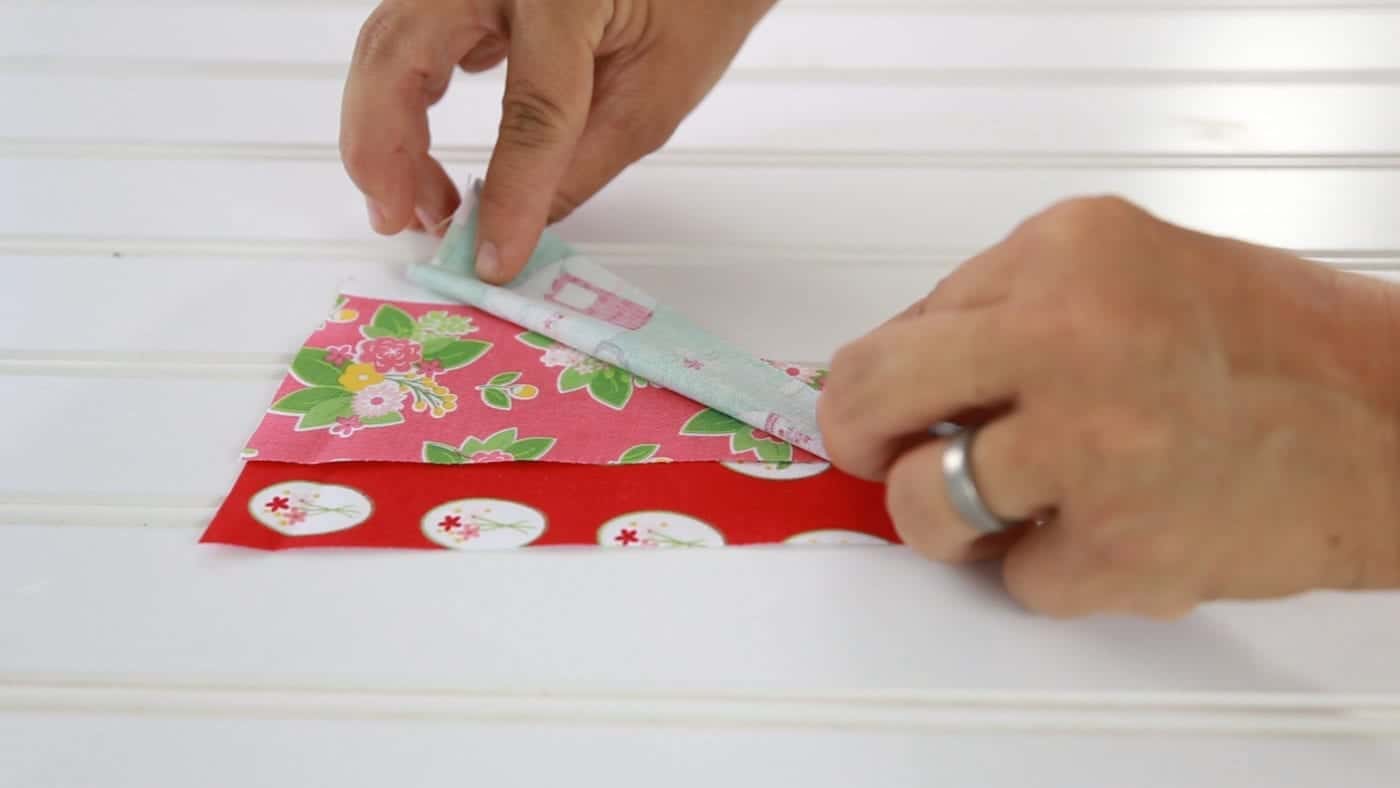
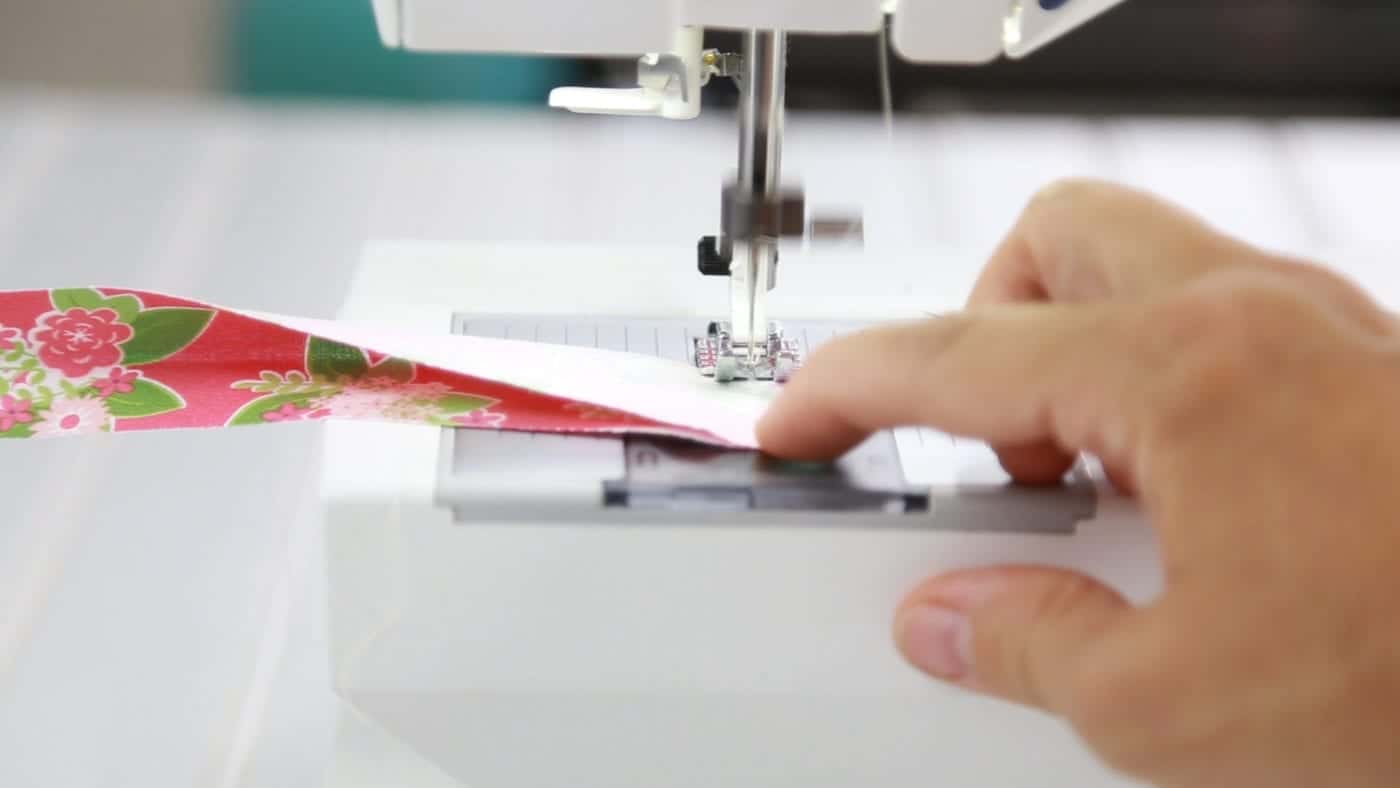
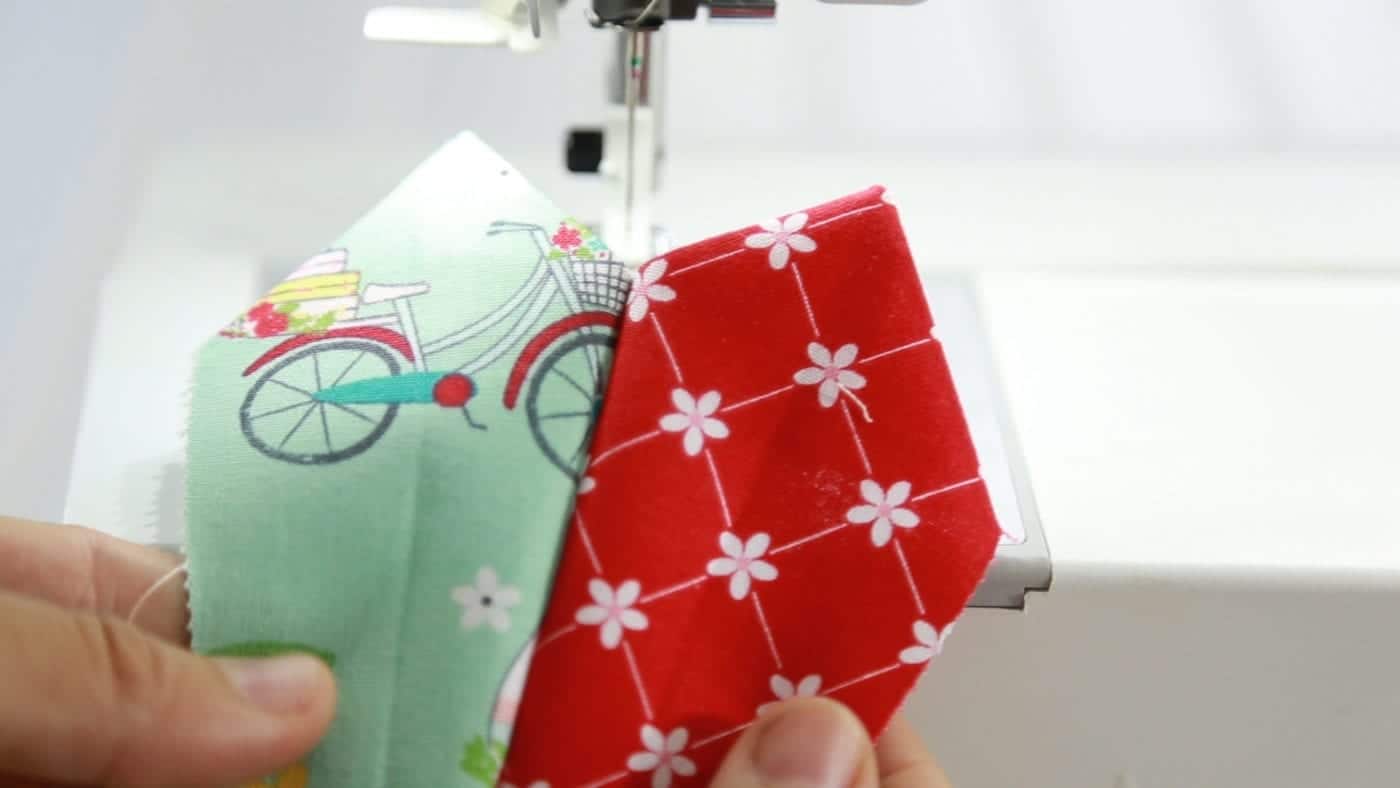
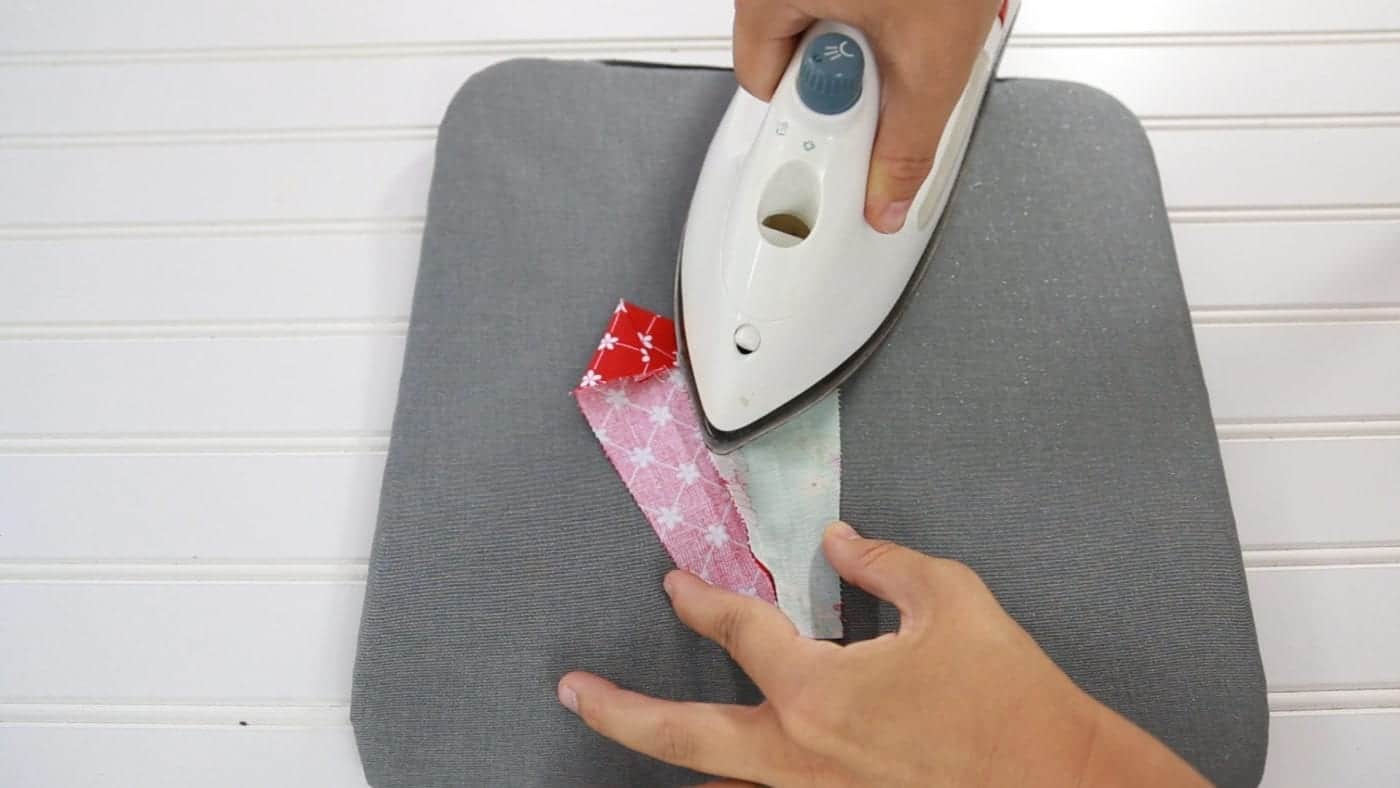
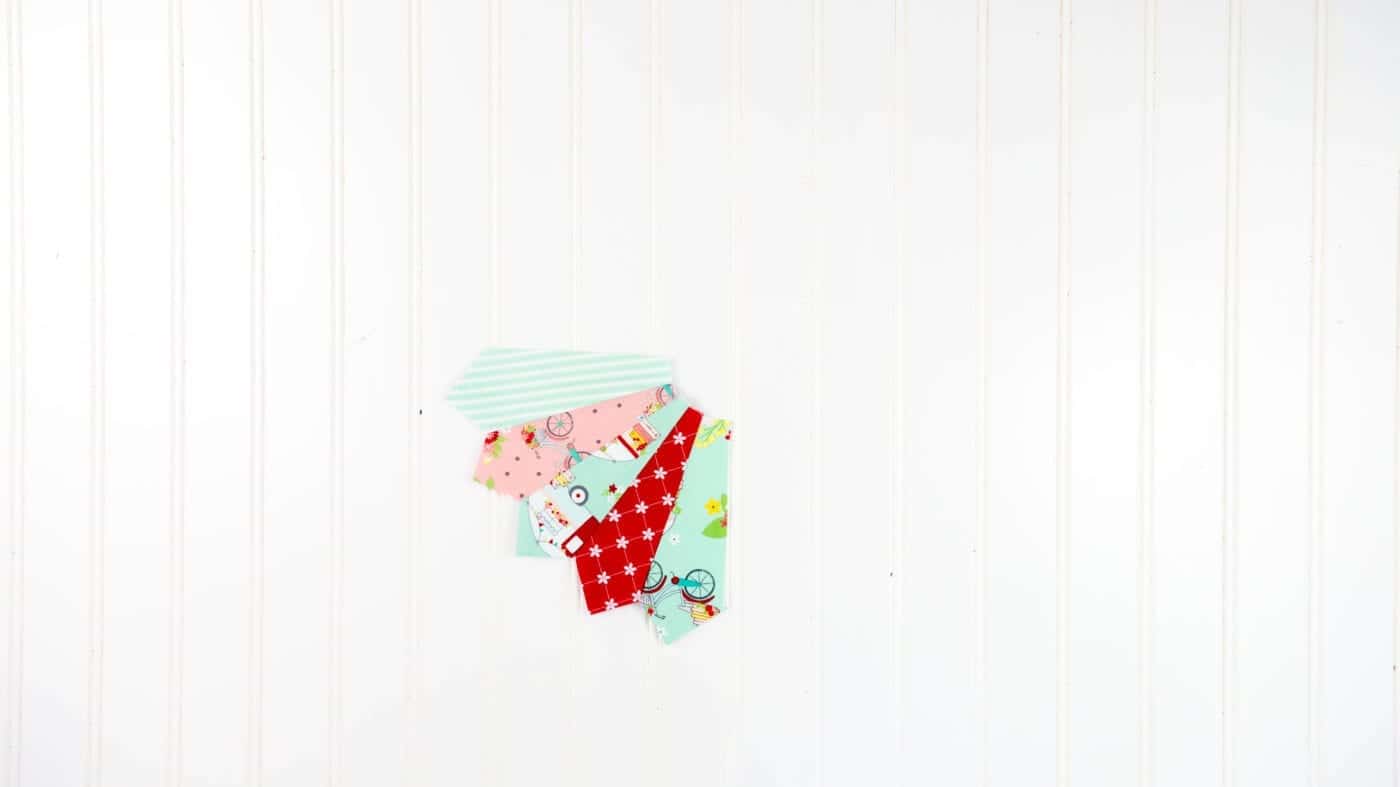
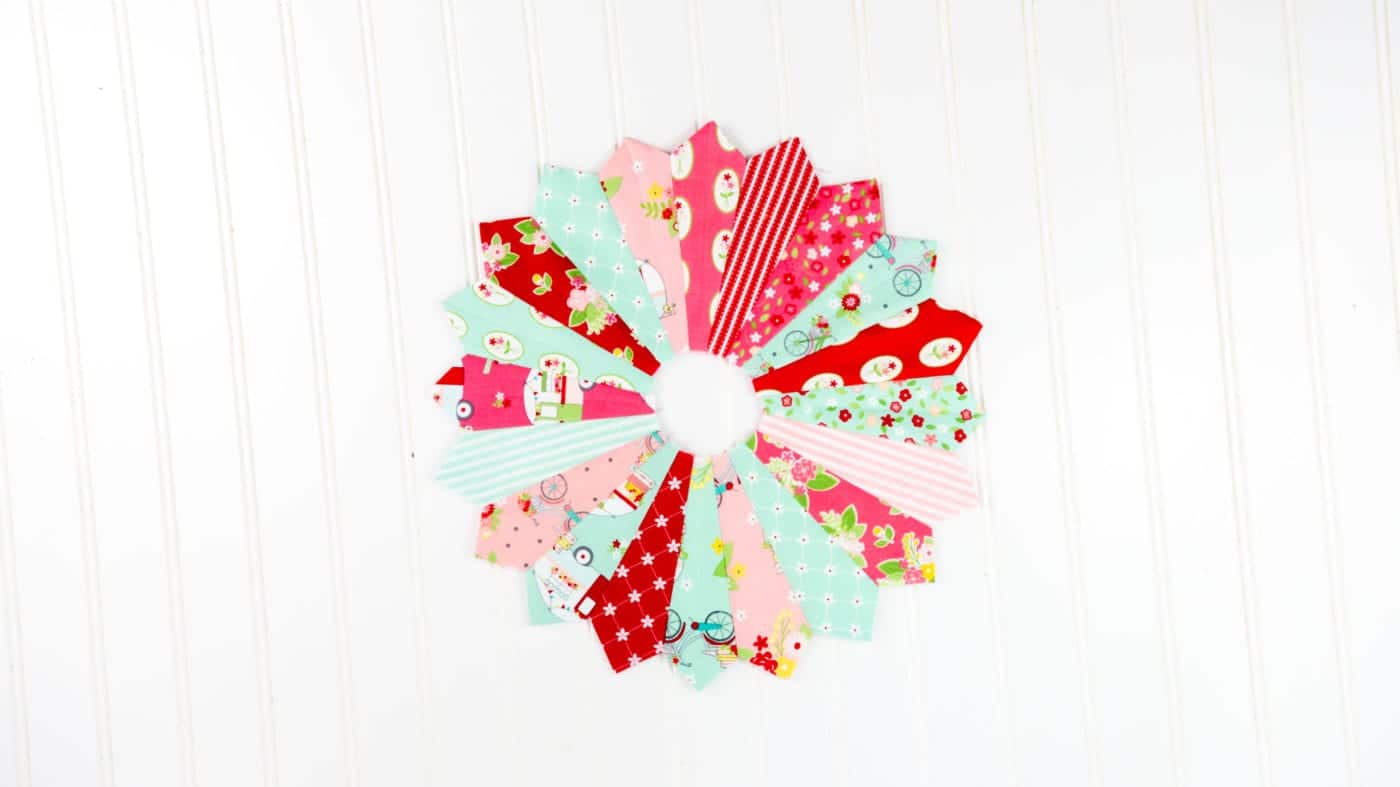
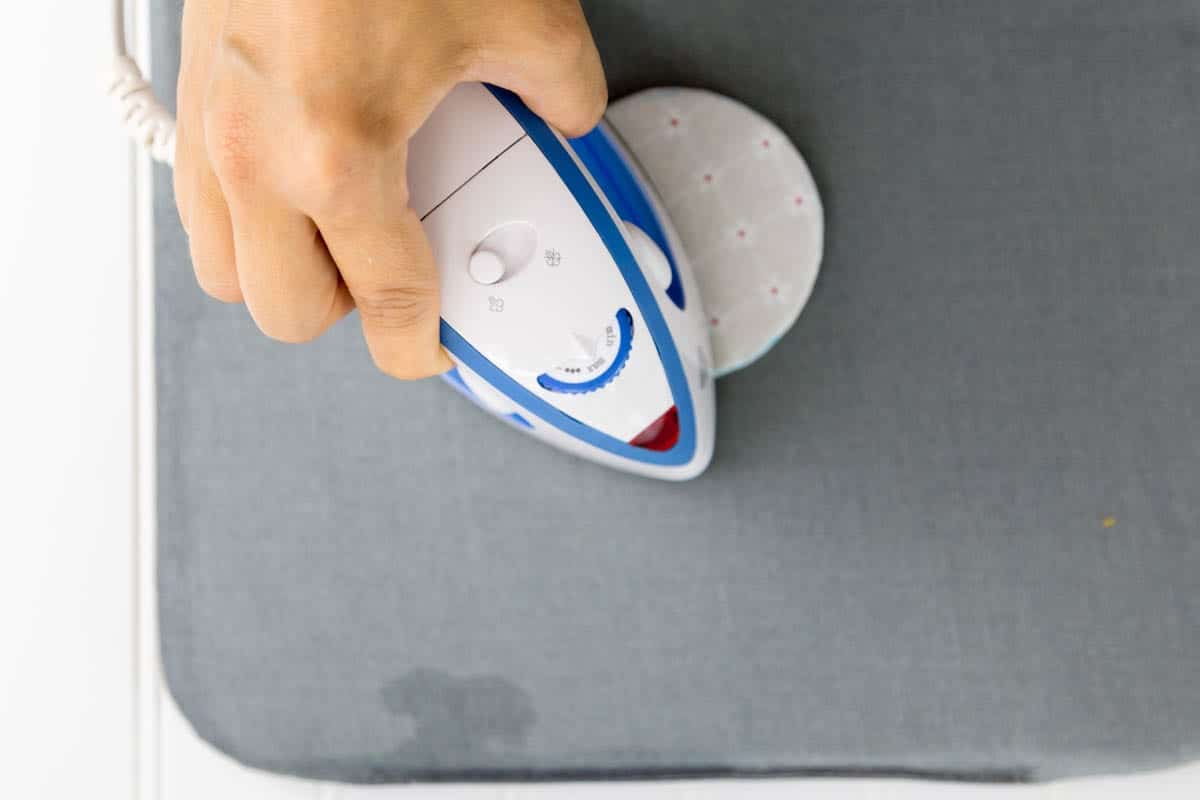
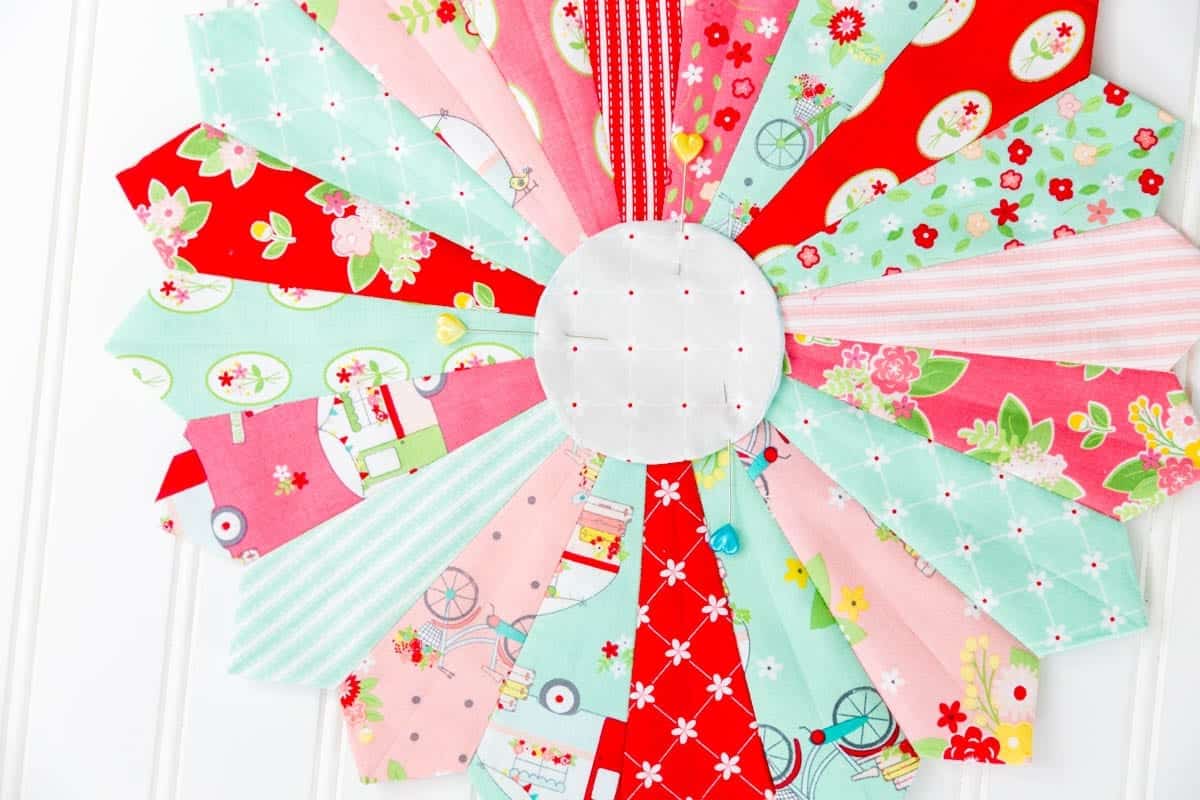
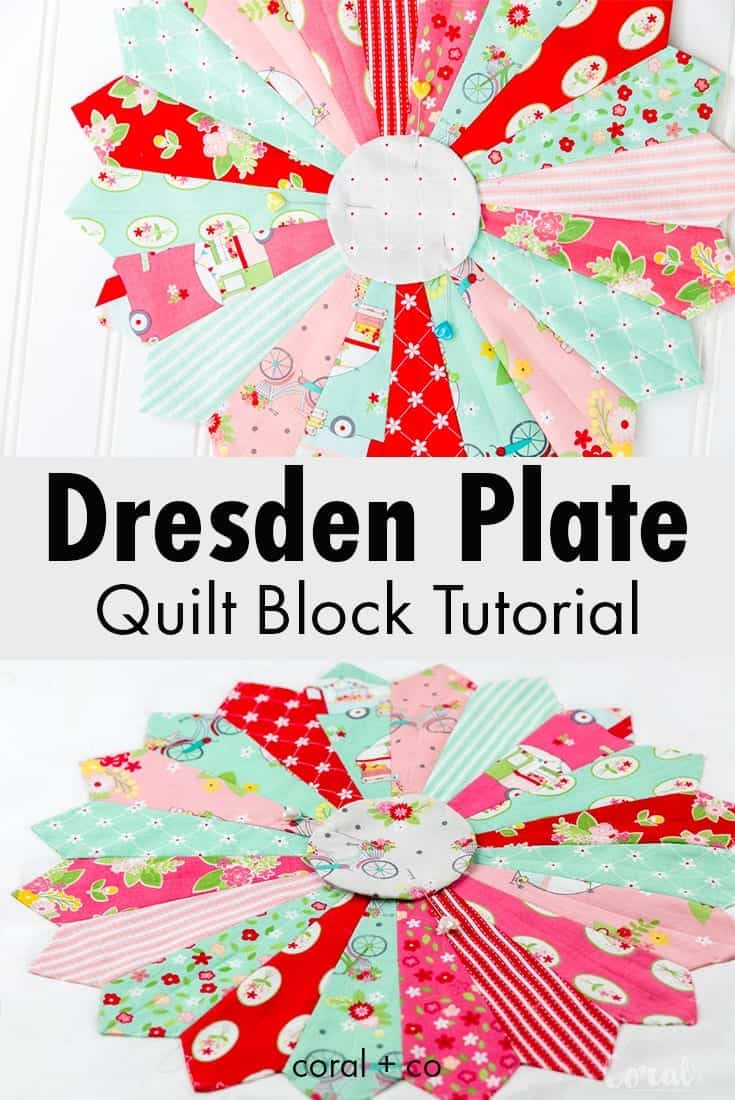
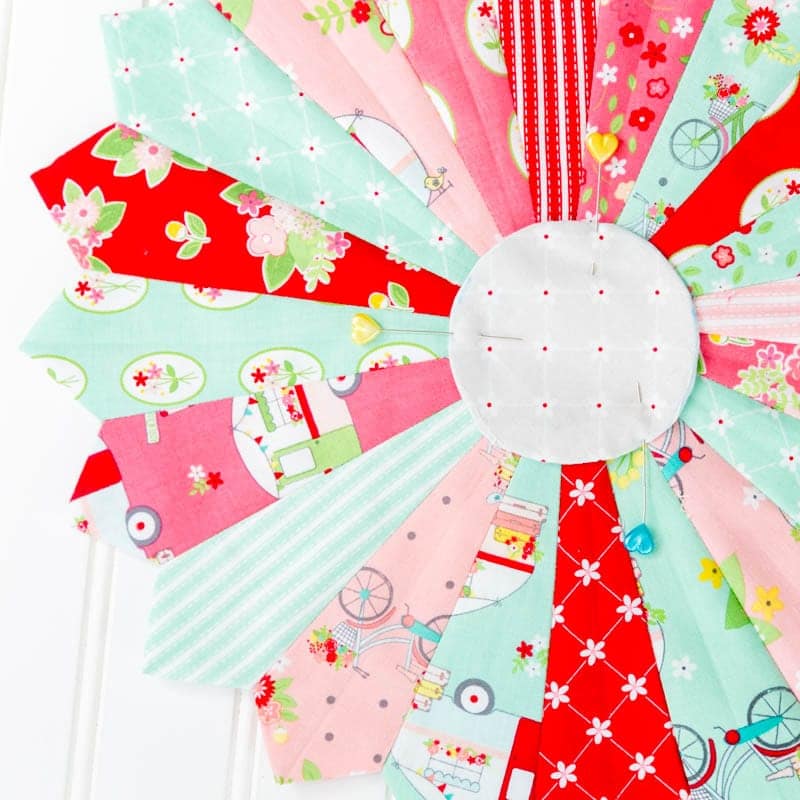
How to make a Dresden Plate Quilt Block Tutorial. Dresden plates are so good for using your scraps up and can be added to pillows, quilts, and lots of other cute sewing projects.