
If you need to make a ton of Half Square Triangles, 8 at a time using the Magic 8 Quilt Block Method is the way to go! For this week's installment of the Half Square Triangle Tutorial Series, I will show you all how to make 8 half square triangles at one time and am including an 8 at a time half square triangle chart and math cheat sheet!
This one is great for making lots of them at one time and also if you are making a quilt that uses several blocks with one fabric or print like pinwheels or turnstiles.
Scroll to the bottom for the video tutorial.
The Magic 8 Quilt Block is sometimes known as the Magic 8 Half Square Triangle Method or Half Square Triangles 8 at a Time. But however you call it, it is a super useful method for making one of the most basic quilting blocks.
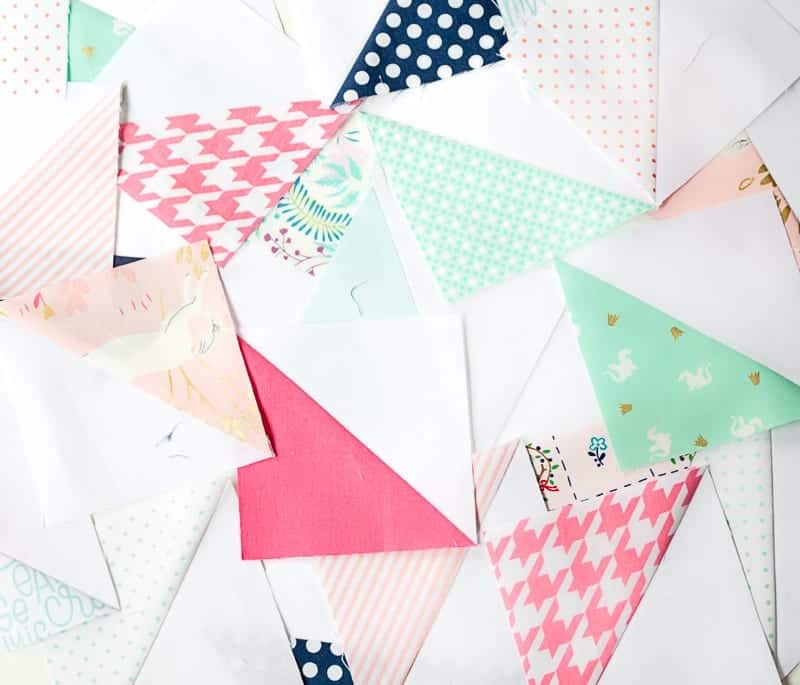
I just love all the color combinations that can be mixed and matched and almost any fabric looks good in a half square triangle block. They are also super fast and the quilt combinations are endless. Most of the fabrics I used in the picture above are Riley Blake Designs Basics and prints from one of my favorite designers Sarah Jane. You can see the rest of the series here:
Ways to Make Half Square Triangles
- Method I - Simple Half Square Triangle Tutorial
- Method II - HST Tutorial 4 at a Time
- The Magic 8 Quilt Block - Make 8 Half Square Triangles at a Time!
- Method IV - Half Square Triangles from a Jelly Roll - The Strip Method
- Method V - How to Use Half Square Triangle Paper
- 25+ Half Square Triangle Quilt Patterns
The Magic 8 Quilt Block Half Square Triangle Method Tutorial
Scroll to the bottom for the video tutorial

1. To make the Half Square Triangles 8 at a Time place two equal size squares of fabric Right Sides Together (RST). It is much easier with this method, to make the squares 1/2in to 1 inch bigger than you would like the resulting square to be. Mark a diagonal line across both diagonals on the wrong side of the top fabric square.
2. Sew a scant 1/4in seam on both sides of the marked diagonal lines.
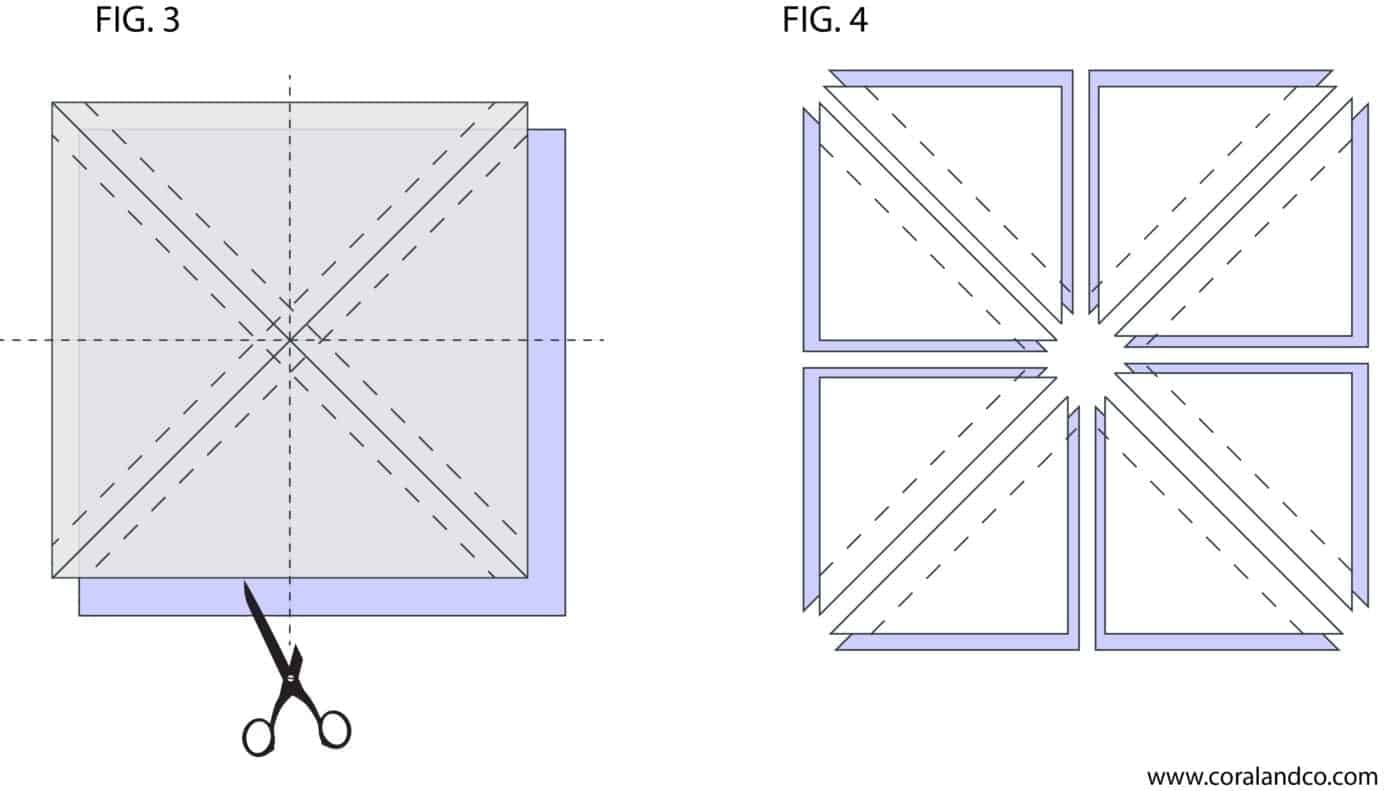
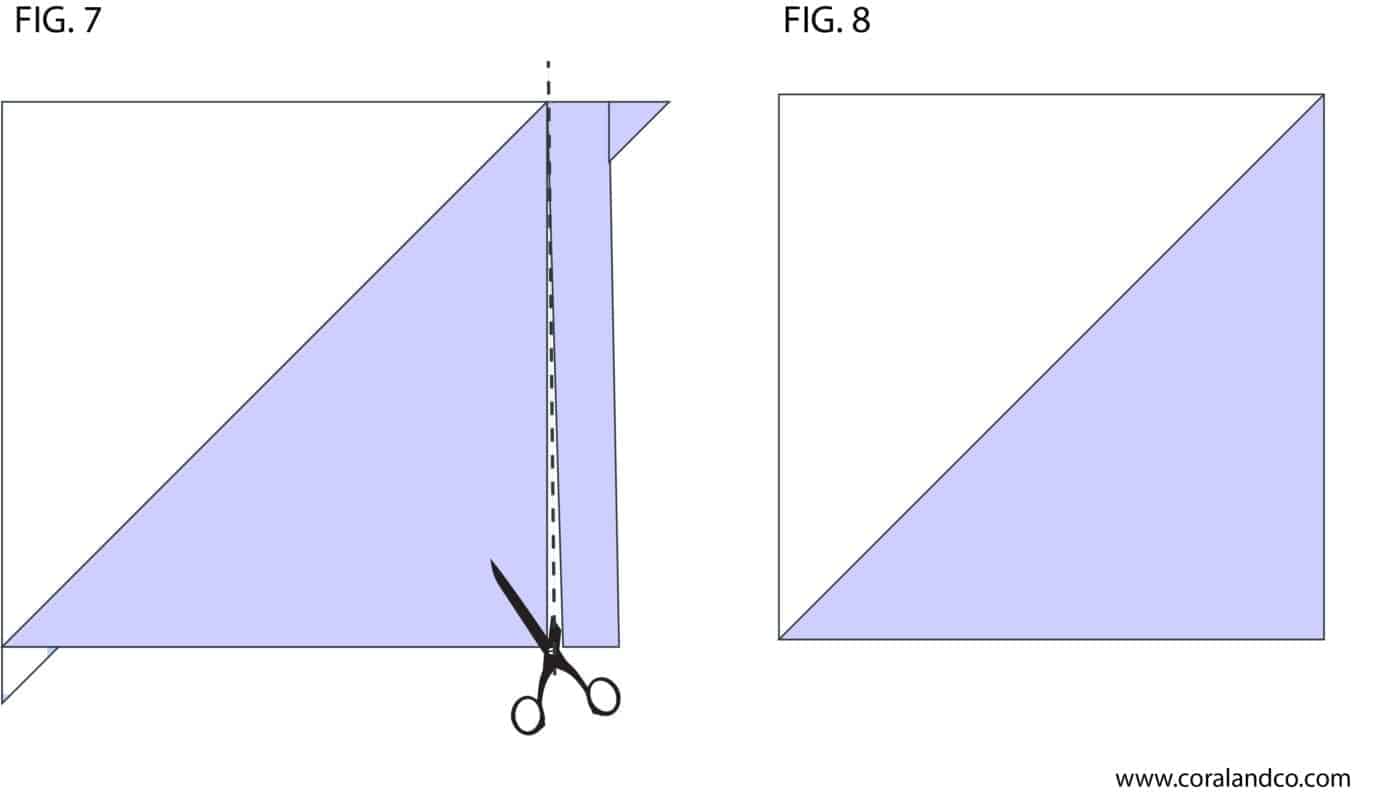
3. Using your rotary blade, cut the square into eighths as pictured above. You will cut a horizontal line, vertical line, and on both diagonal lines. following the drawn diagonal lines.
4. You will now have 8 Half Square Triangle Blocks.
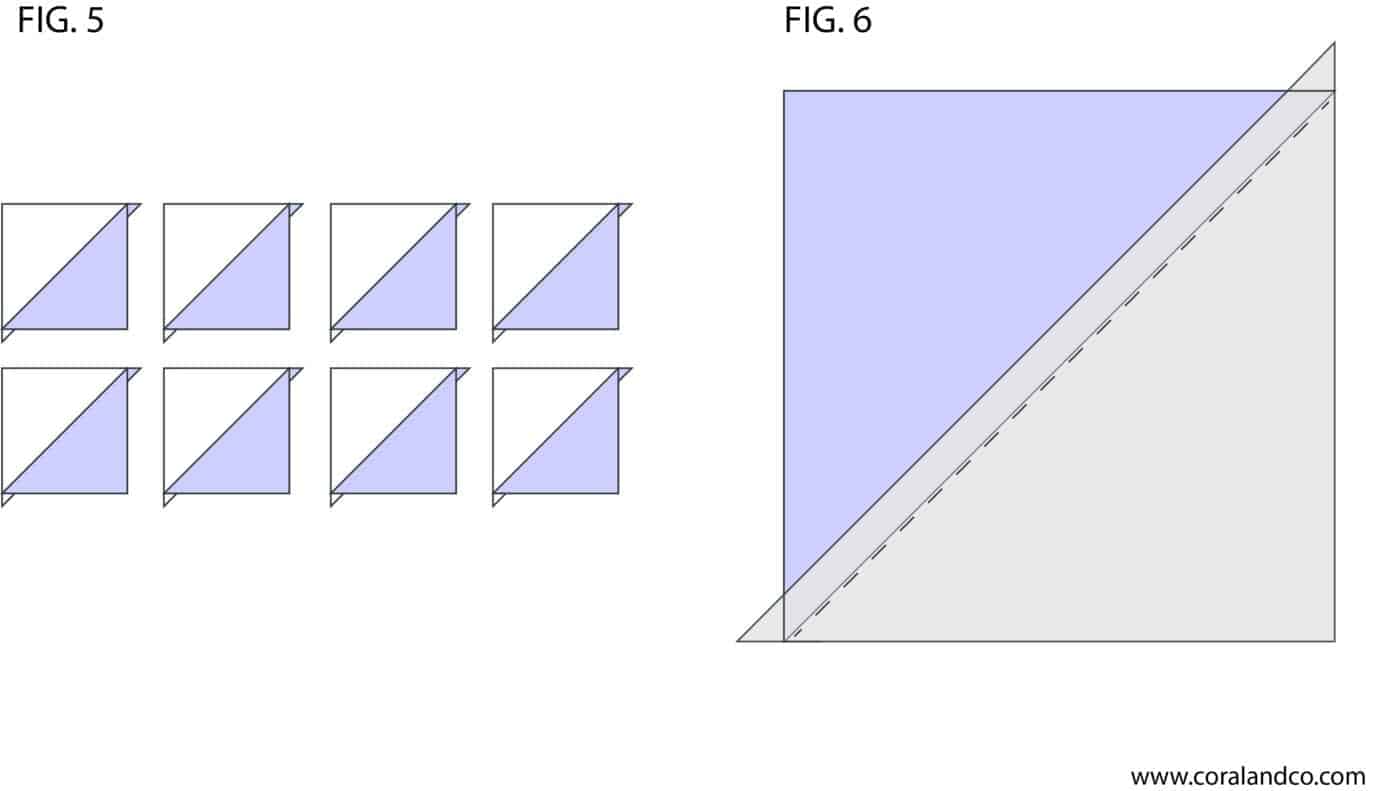
5. Open the blocks outward and either lightly finger press or use your iron to lightly press. Be very careful to only press up and down, NOT back and forth so as not to stretch them.
4. Your seam should be pressed (both layers) toward the darker color.
6. Place a ruler on the block keeping the 45-degree diagonal line over the diagonal seam. Trim each side of your square to the desired size.
7. Easy peasy! You now have 8 Magic 8 Quilt Blocks finished and ready to assemble in a quilt top.
Scroll to the bottom for the video tutorial
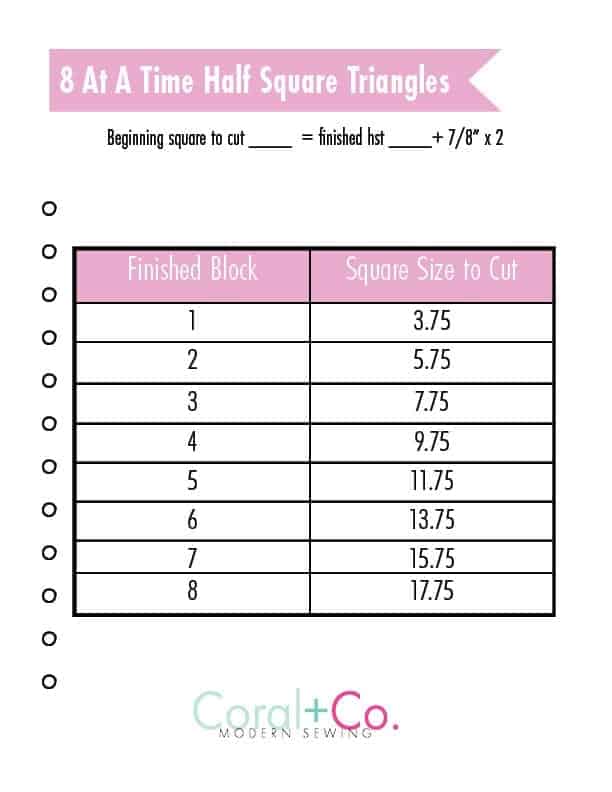
Magic 8 Quilt Block Chart and Formula Math
Here is a handy cheat sheet for the 8 at a time Chart and quilt block math formulas. You can either use the dimensions given or use the formula to figure out your own dimensions.
- To figure out your own dimensions for the magic 8 quilt block you will need to know either what the beginning square you need to cut or how big the finished half square triangle will be.
- Using the finished size half square triangle you would like, for instance, 3 inches, you will add 7/8" or .875 and multiply times 2. That will give you the beginning size square to cut to make 8 half square triangles at one. Which for 3 inches will be 7.75 inches square, to begin with.
SUPPLIES NEEDED FOR THIS HALF SQUARE TRIANGLE TUTORIAL:
- 5" CHARM PACKS FOR QUILTING
- 5" WHITE CHARM PACKS
- SEWING MACHINE
- ROTARY CUTTER
- ROTARY MAT
- CREATIVE GRID RULER
- FRIXON ERASABLE PENS
- THREAD
- WONDER CLIPS
- IRON
- WOOL PRESSING MAT
- STARCH
HALF SQUARE TRIANGLES - 8 AT A TIME VIDEO TUTORIAL
Learn How to Quilt Series
- How to Chain Piece Quilt Blocks
- How to Use a Rotary Cutter and Mat
- How to Choose the Right Machine Quilting Needle
- How to Use Half Square Triangle Paper
I love this idea!! Where can I get the half square triangle paper template?
You can find it on amazon. There should be a link in the post 🙂
You can also buy Brenda Henning Triangulations cd. It prints out sizes from 1/2 inch to 7 1/2 inches.
You did not say how to do the math to make different sizes.
The chart is now available!
I dont understand your math... especially on the 4 HST .....
Which part is confusing? For the 4 at a time I rounded up to give a little room to square up.
Thanks for a great short tutorial on the 8 square triangles and the "cheat" sheet of various sizes, you have been very generous. I am about to give it a try !
You are so welcome! They are a great block to make!
Thank you so much for sharing this information
Does this method leave the bias exposed, like the 4 method does? Thanks!!
No, this method sews along the bias, so those bias edges are enclosed in the seam allowance *before* you cut the squares. All the other (unsewn) cuts are either cross-grain (only a tiny bit stretchy) or straight grain (not stretchy). If you can use 8 of the same HSTs, this is definitely the way to go!
Do I understand that the Magic 8 Method makes finished squares from the chart (i.e., 3"= 3-1/2" unfinished)? But in Method 2 Make 4 HSTs, the chart lists 3" unfinished=2-1/2" finished? I just want to mark the charts, so I get the sizes I need. Thank you in advance for clarifying this and for the very useful info!
By "finished" do you mean the block will be 3" or will it be 3.5' to allow for 1/4 seams?
By “finished” do you mean the blocks are 3” or 3.5” to allow 1/4” seams?
Finished means the size after it is sewn into a project, unfinished means you still have a 1/4 inch seam allowance on all sides.....thus, it is 1/2 inch bigger.
My first try at the whole quilting thing. I decided to dress up the boarder of my first quilt and this is exactly what I was looking for. Thank you.
I am so happy you are here and enjoying my tutorials!
Thank you sooooo much for this information. I have agonized for days to make multiple HST's as I need so many. So, happy to have found your tutorial. This is a true timesaver and you have taken the guess work and math out of the equation for me.
Thank you for the tutorial on using 8 " block for the triangles
This is the best explanation I have seen; I have finally been able to understand the process. Thank you
Mine (6" squares) turned out really wavy, even though I used a walking foot and ironed the heck out of them! It made them very difficult to cut! Yours looked pretty flat so I wonder what went wrong? After cutting (an exercise in patience) and trimming, they were fine but yikes! Probably my first and last attempt at HST's!
I would use a TON of starch since these are cut on the bias (which makes the fabric stretch a lot). Drench them in starch and then press really gently when ironing. Lift and press instead of moving across the fabric since this will lead to stretching and distortion. I hope these tips help!