

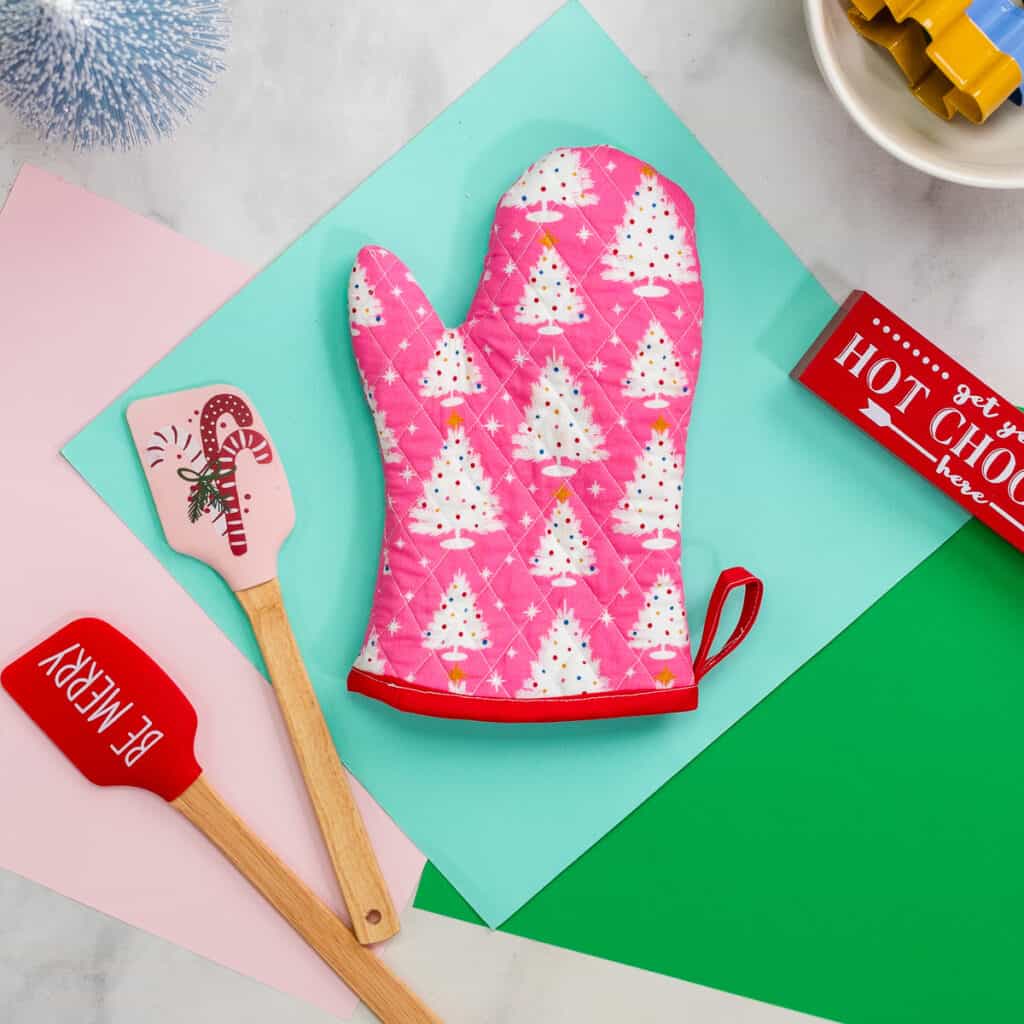
Spice Up Your Kitchen with a Free Oven Mitt Pattern!
Hey there, fellow kitchen enthusiasts! Today, I've got something special for you that will add a dash of creativity to your cooking routine. We're talking about a fantastic and oh-so-handy free oven mitt pattern that you can use to create your very own oven mitts. No need to settle for ordinary kitchen gear when you can make your own, right?
Table of Contents
Why Make Your Own Oven Mitts?
First things first, you might wonder why you should bother making your own oven mitts when you can easily buy them. Well, let me tell you – making your own mitts is not just about functionality; it's about adding a personal touch to your kitchen.
Imagine pulling a homemade oven mitt out of the oven to grab that delicious batch of cookies you just baked. It's not just about protection; it's about the warmth of knowing you crafted it yourself. Plus, you can choose fabrics and designs that match your kitchen's decor or showcase your unique style.
More Patterns You Might Like:
- Easy Quilted Potholder Pattern
- 15 Quilted Potholder Patterns to Sew
- Quilted Christmas Potholder Pattern
- Halloween Pumpkin Potholder Pattern
- Easy Coaster Sewing Pattern
The Free Oven Mitt Pattern Details
Now, let's get to the good stuff – the free oven mitt pattern. We've got your back! With this pattern, you'll have all the guidance you need to create mitts that fit your hands perfectly. Say goodbye to those loose-fitting, store-bought mitts that slip and slide.
Our pattern comes with step-by-step instructions that are perfect for beginners. Even if you're new to sewing, you can tackle this project with confidence. It's a great way to learn some basic sewing skills while crafting something useful.
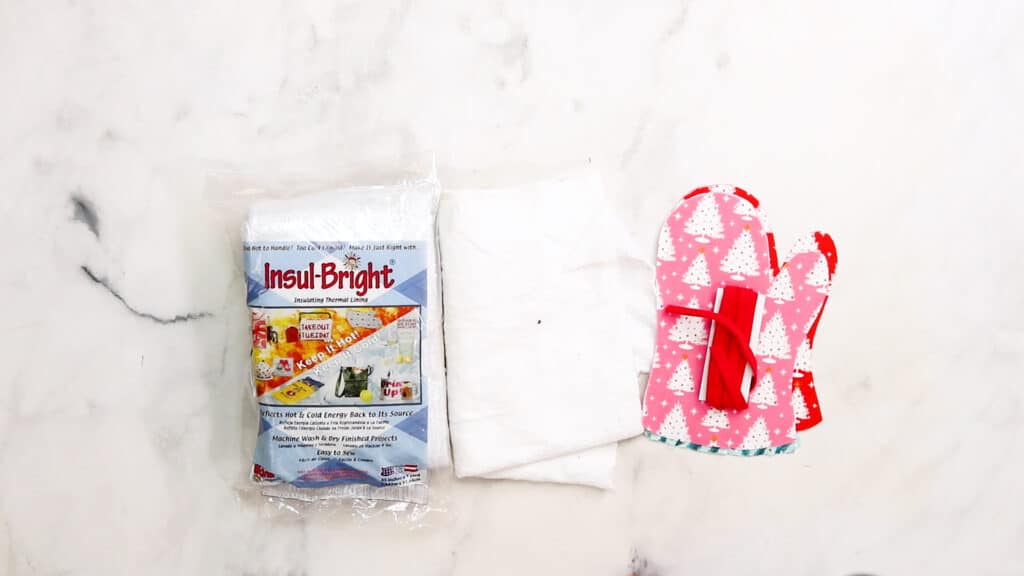
To get started, you'll need some basic materials: fabric, batting, thread, and of course, your trusty sewing machine. You can choose fun, colorful fabrics that match your kitchen's color scheme or go wild with patterns that showcase your personality. The choice is yours!
Supply List
- Insulbrite
- Cotton Batting
- 2 fat quarters of the fabric (I used the Peppermint Fabric Collection designed by Dana Made for Figo Fabrics).
- Wrights 1/2" Double Fold Bias Tape
- Oven Mitt Pattern (Download Below)
Download the Oven Mitt Pattern
Instructions
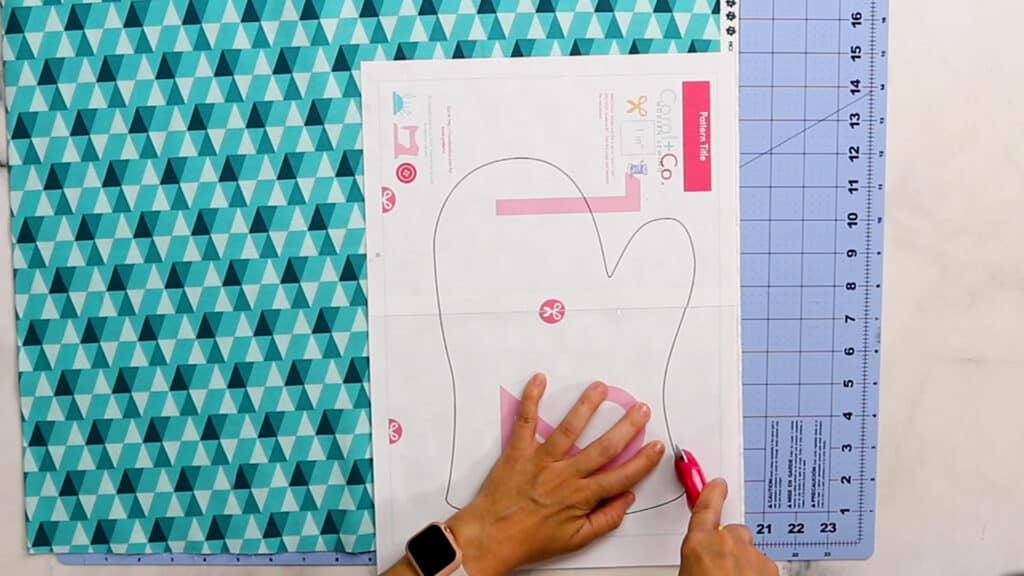
Step 1 - Cut the pattern out of the fabric:
- Cut 2 outer fabric
- Cut 2 lining fabric
- Cut 2 large squares of insulbrite
- Cut 2 large squares of batting
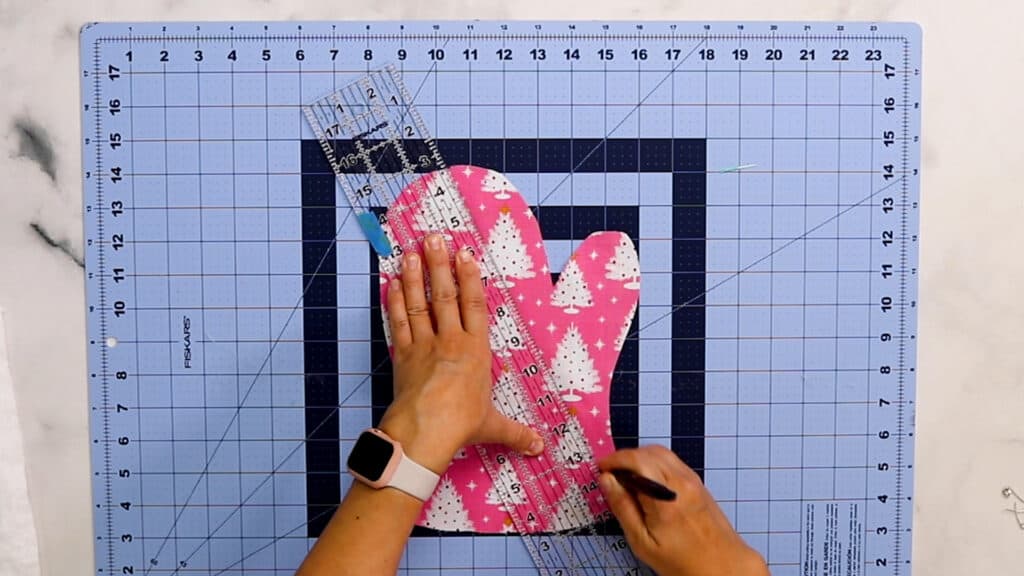
Step 2- Using a marking tool, draw diagonal crosshatch lines in both directions on the fabric for quilting.
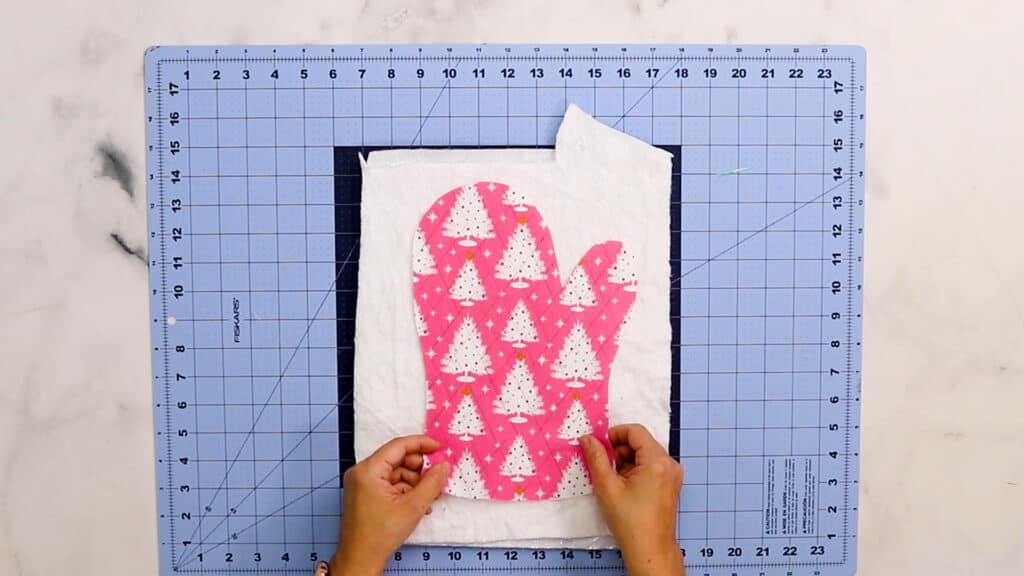
Step 3 - Make a quilt sandwich by placing a layer of batting, then a layer insulbrite, and finally the fabric oven mitt pattern piece on top. Baste with basting pins to hold it in place.
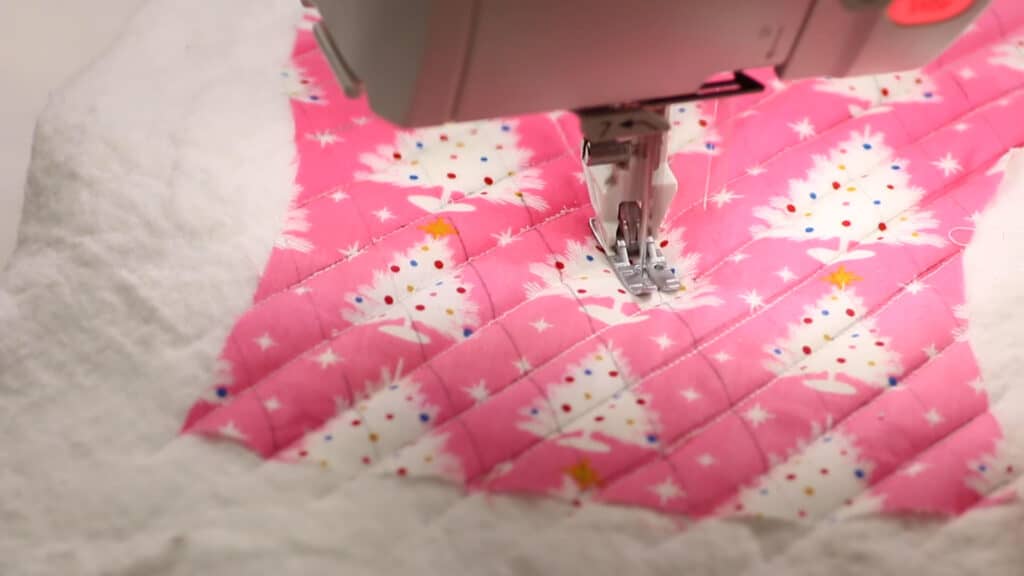
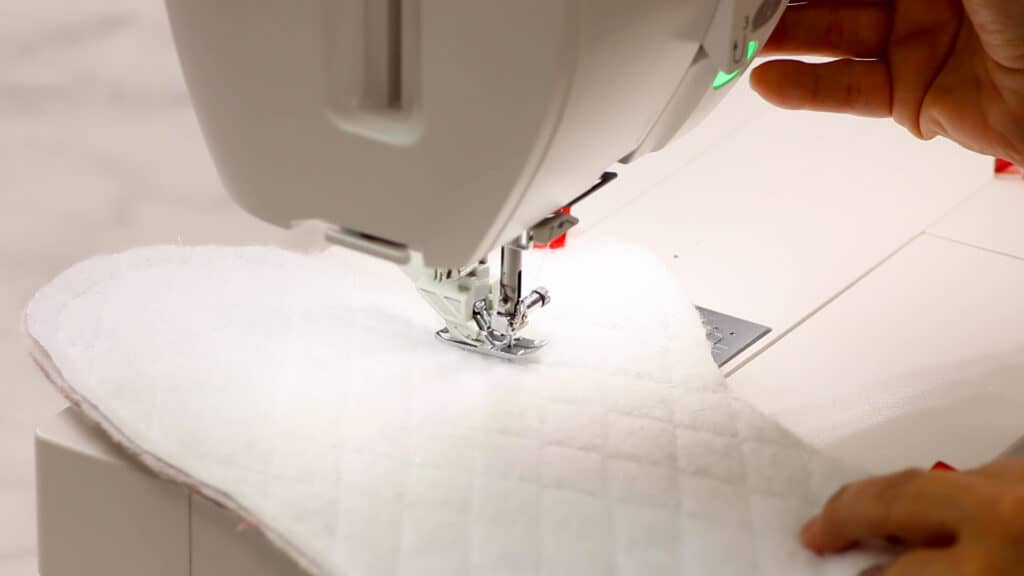
Step 4 - Quilt both sides of the oven mitt by sewing down the diagonal lines you previously marked.
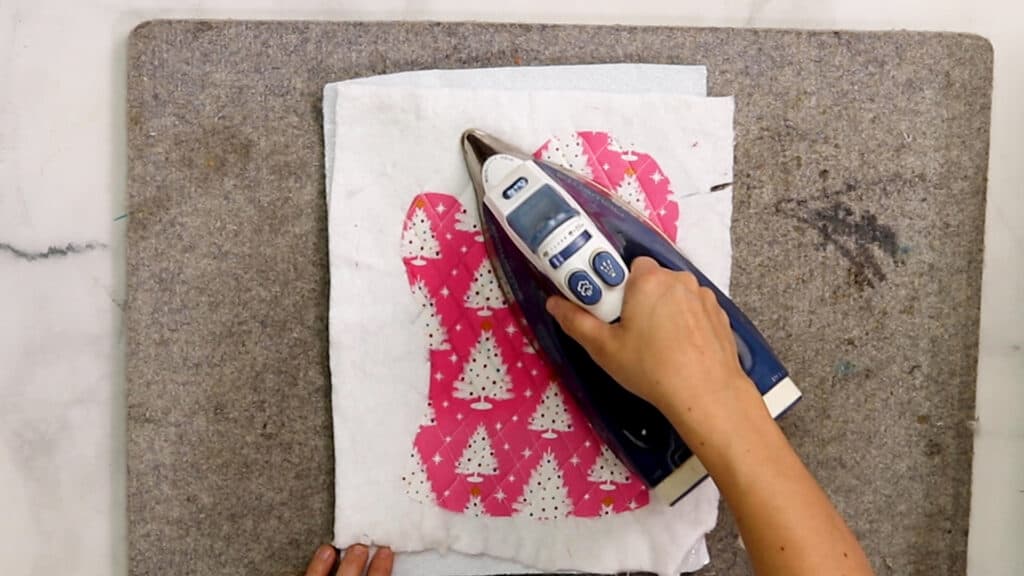
Step 5 - If using a frixon pen for marking, iron to erase the lines.
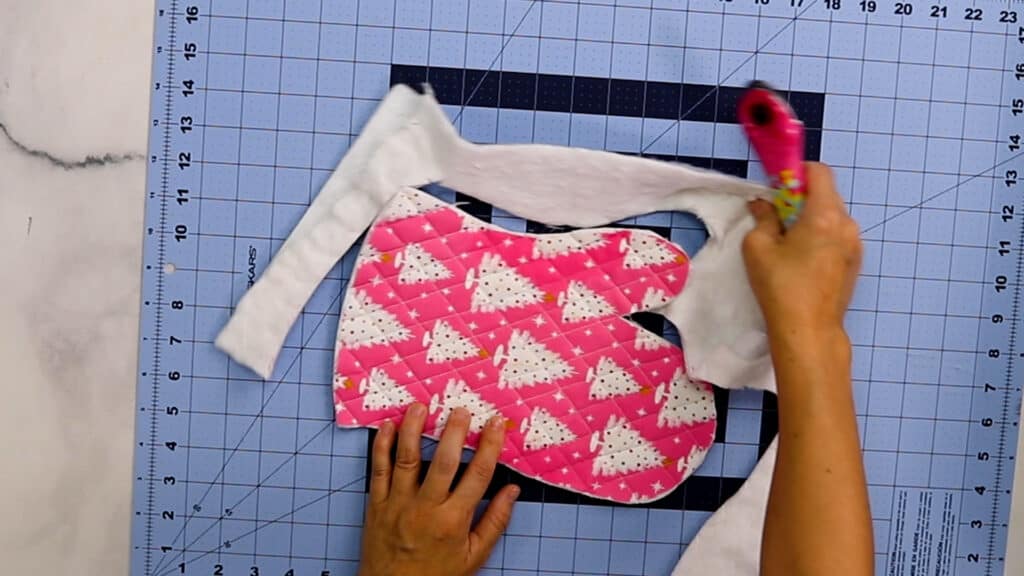
Step 6 - Trim away the layers of batting from around the oven mitt.
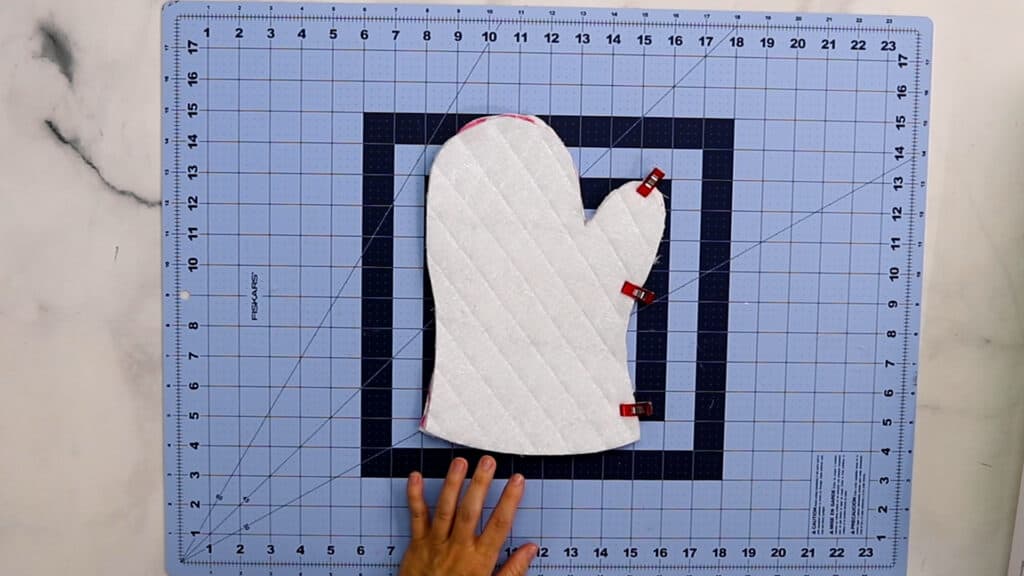
Step 7 - Place the quilted oven mitt top and bottom outside pieces right sides together and pin or clip in place.
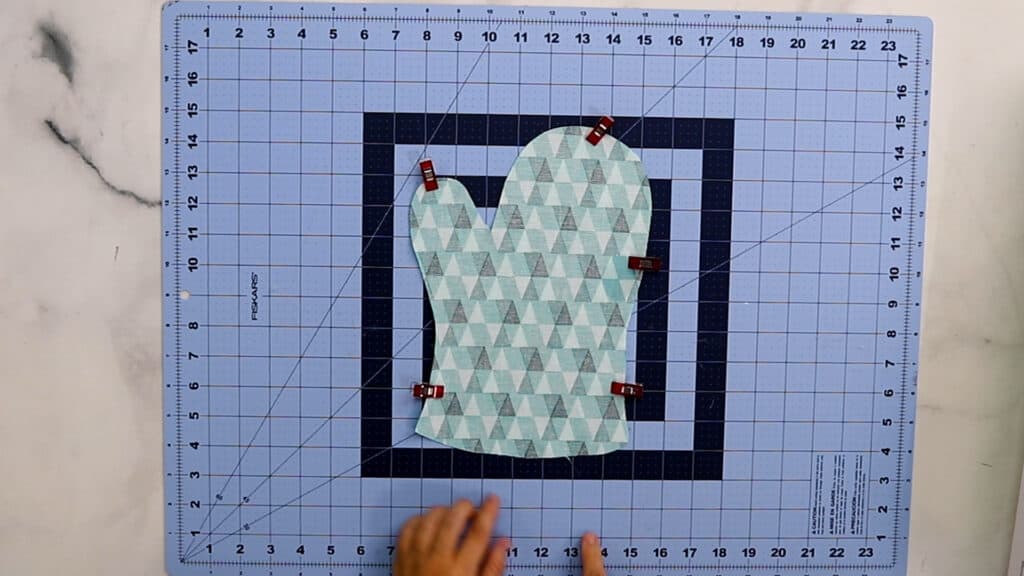
Step 8 - Place the oven mitt top and bottom lining pieces right sides together and pin or clip in place.
Step 9 - Sew together outside layers using ¼ seam allowance leaving the bottom open. Remember to backstitch in place at the beginning and the end.
Step 10 - Sew around the edge of the lining pieces using 1/4 in seam allowance, leaving the bottom open.
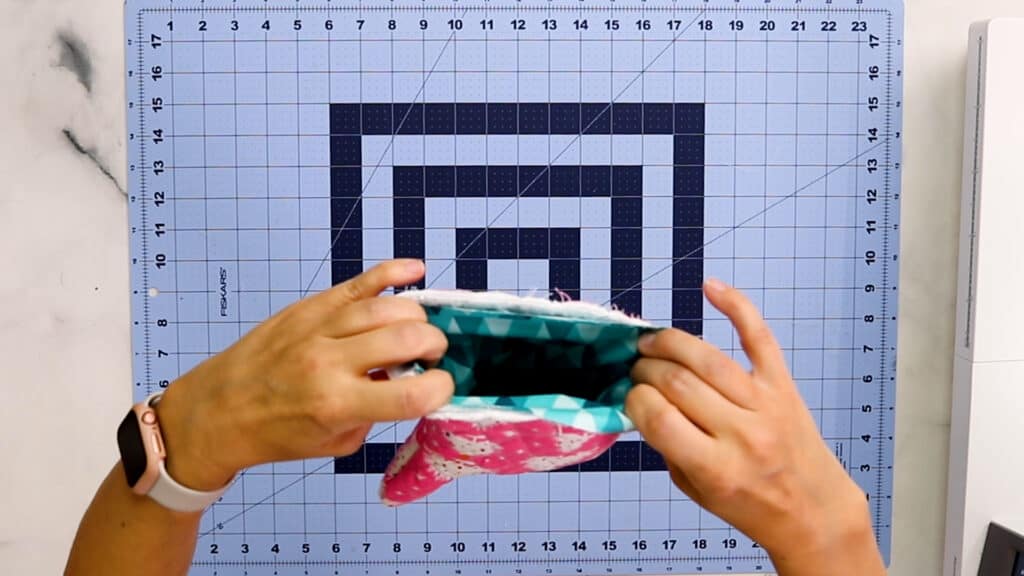
Step 11 - Turn the outside layer of the oven mitt right side out. Place the lining piece inside the oven mitt outside layer.
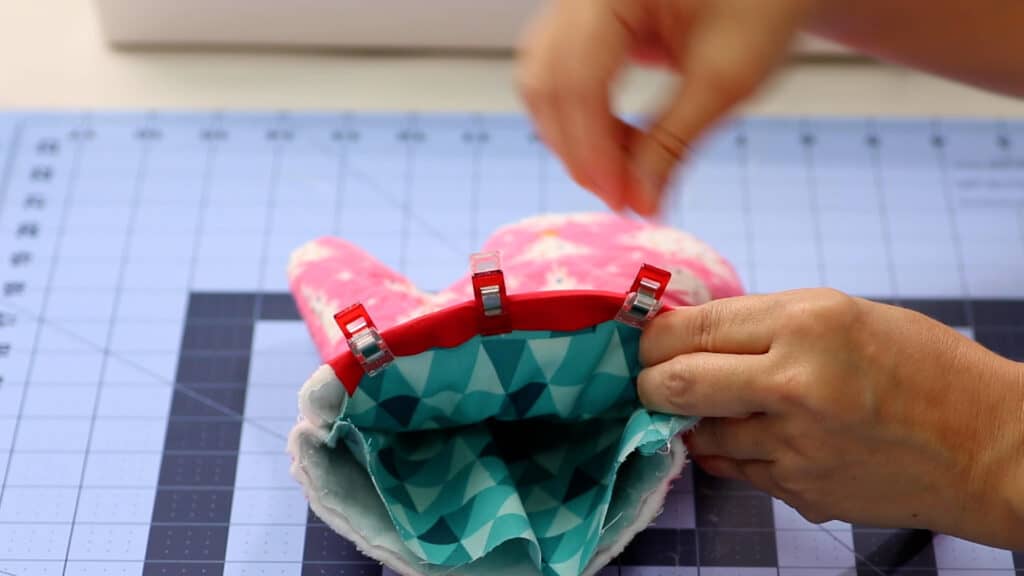
Step 12 - Open the bias binding up and fold it around the raw edges of the opening of the oven mitt. Both the raw edges of the inside lining and outside layers will be inside the binding fold.
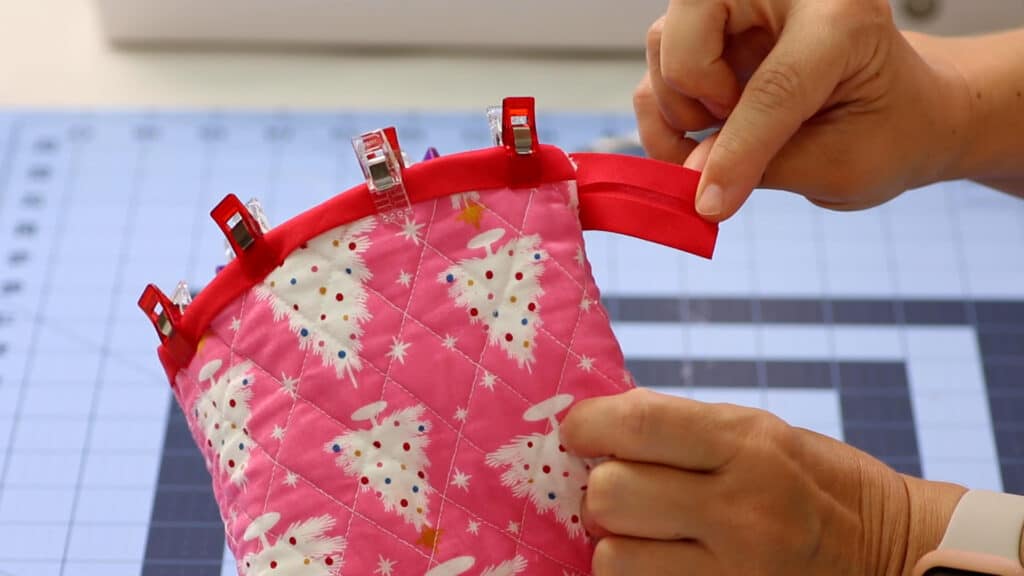

Step 13 - Overlap the ends by an inch. Fold the raw edge of the overlapping edge of the bias binding over to contain the raw edge and pin it in place.
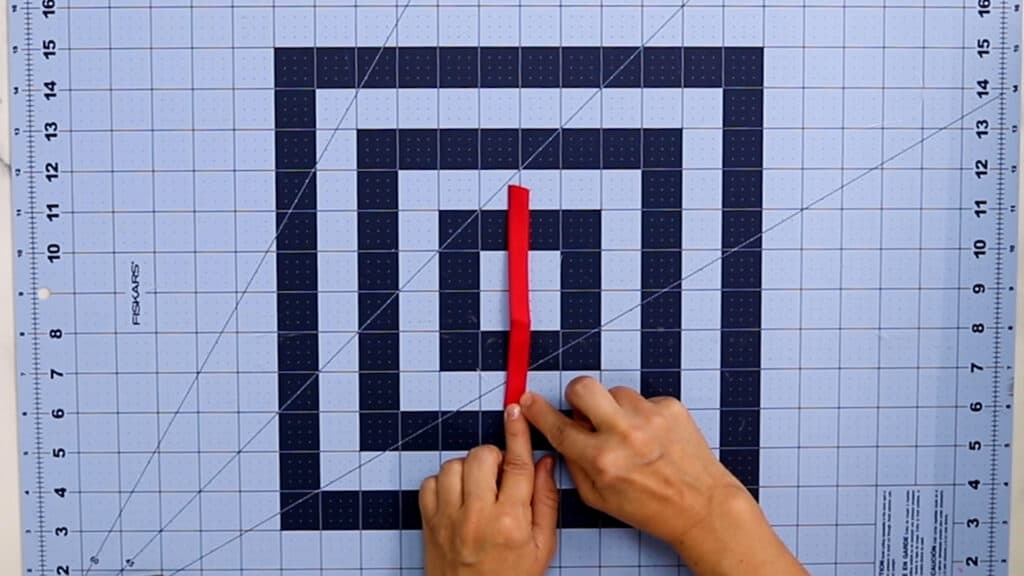
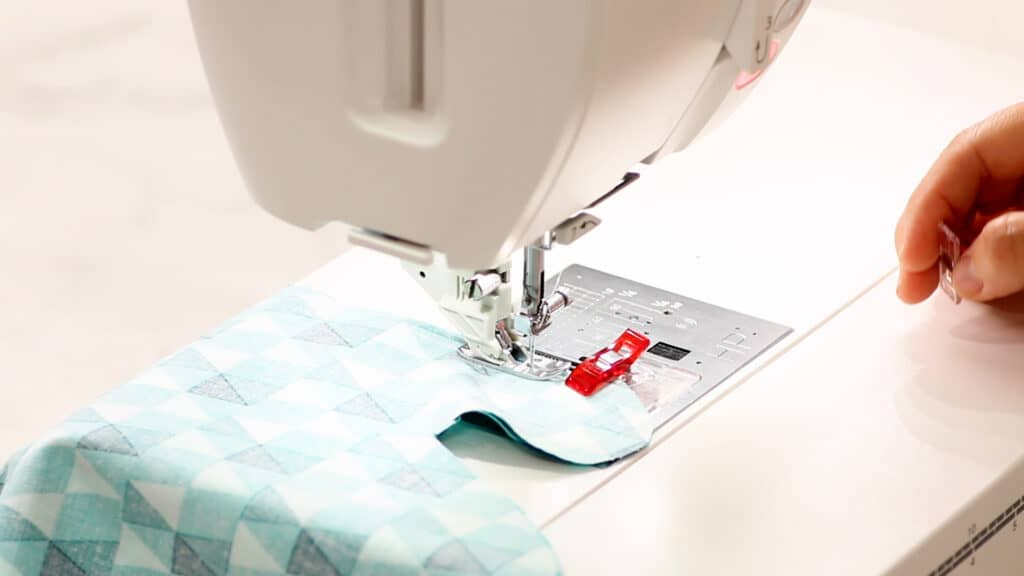
Step 14 - Cut a binding strip 6 inches long. Topstitch along the edge to close the fold.
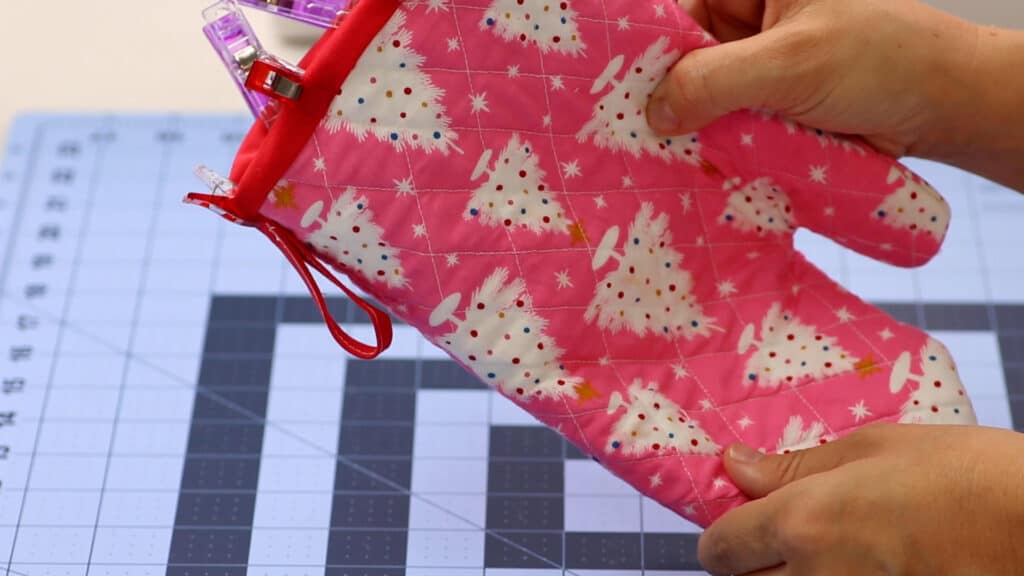
Step 15 - Fold the strip in half and insert it under the back edge of the binding. Pin or clip in place.
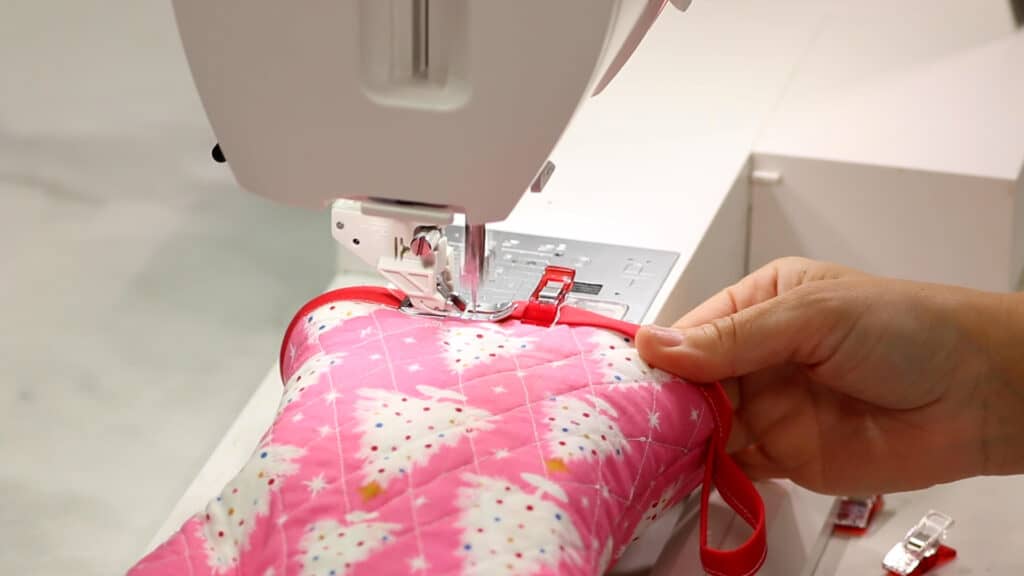
Step 16 - Topstitch along the bottom edge of the binding to sew the binding in place around the raw edges of the oven mitt. And you are all done.
Get Creative in the Kitchen
Once you've created your own oven mitts using our free pattern, you'll find yourself feeling more connected to your kitchen. It's like adding your personal signature to every dish you make. Cooking and baking become even more enjoyable when you're using something you've crafted yourself.
So, what are you waiting for? Download the free oven mitt pattern today and embark on this fun DIY journey. Spice up your kitchen, add a pinch of creativity, and enjoy the warmth of handmade cooking essentials. Happy crafting and happy cooking!
Pin the Oven Mitt Pattern for Later

What do you think?