
I love seeing all the pretty fabrics being used for the Nordic Crossing Quilt on Instagram. Don't forget to show off what you are working on, on instagram!
Let's get going on week 2 of the Nordic Crossing Quilt Along. This week we will be making 8 of the square in square blocks. I have a little tutorial below on piecing this block with a few tips to help you along.
NORDIC CROSSING QUILT ALONG
Dates: January 8 – February 26
Duration: 8 Weeks
Quilt Size: 48″ x 48″ but you are welcome to make any size you would like
Get the Nordic Crossing Quilt Kit from Cottoneer Fabrics
SCHEDULE:
- Week One: Gather and cut fabrics, Make your first block or a test block
- Week Two: Make 8 Square in a Square Blocks
- Week Three: Make 8 Square in a Square Blocks
- Week Four: Make 9 Plus Blocks
- Week Five: Make 32 Flying Geese Blocks
- Week Six: Make 32 Flying Geese Blocks
- Week Seven: Piece together rows
- Week Eight: Sew together rows. Quilt or send out for quilting.
HOW TO FOLLOW ALONG:
- Follow along on Instagram using the hashtag #nordiccrossingquilt or join the facebook group.
- A new blog post and video will be up each Monday of the quilt along.
SUPPLIES NEEDED:
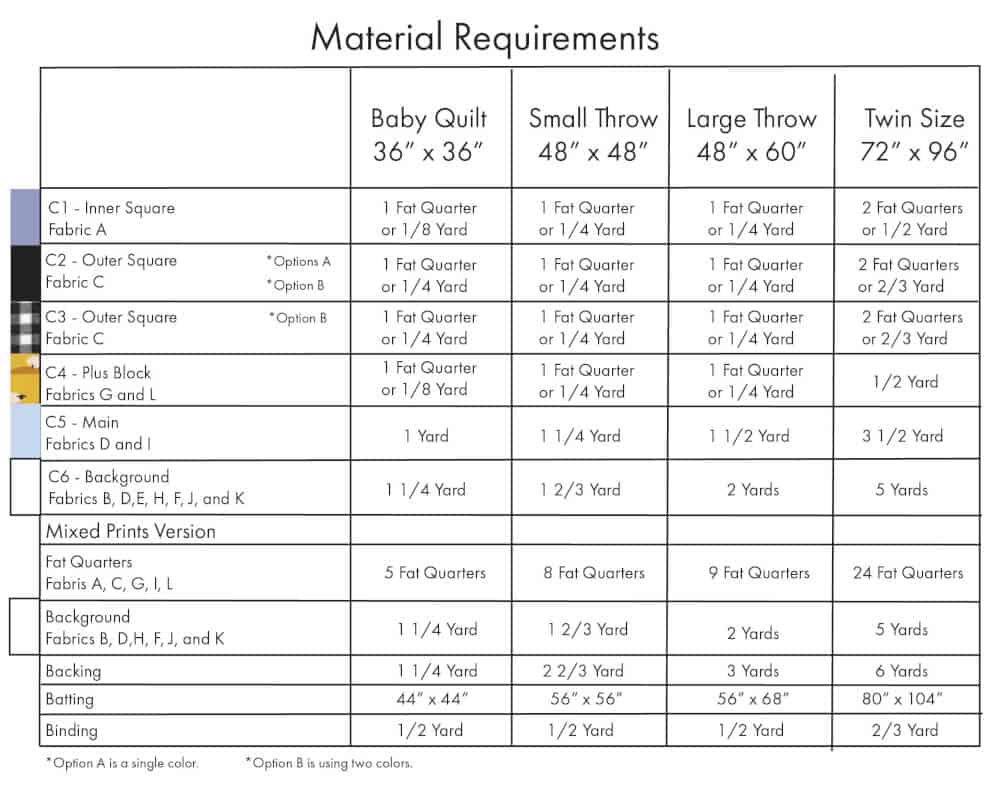
Nordic Crossing Quilt Kit or Fabric Requirements Below:
WEEKLY PRIZES

There will be some great weekly prizes totalling over a $500 value along the way for the participants who post to the #nordiccrossingquilt hashtag on Instagram. Be sure to check out the sponsors below!
WEEK TWO
- Cut out your fabrics if you haven’t already.
- Make 8 blocks
- Remember to use the hashtag #nordiccrossingquilt on intagram.
GRAB THE PATTERN
If you don’t have the pattern already, grab your copy in the shop.
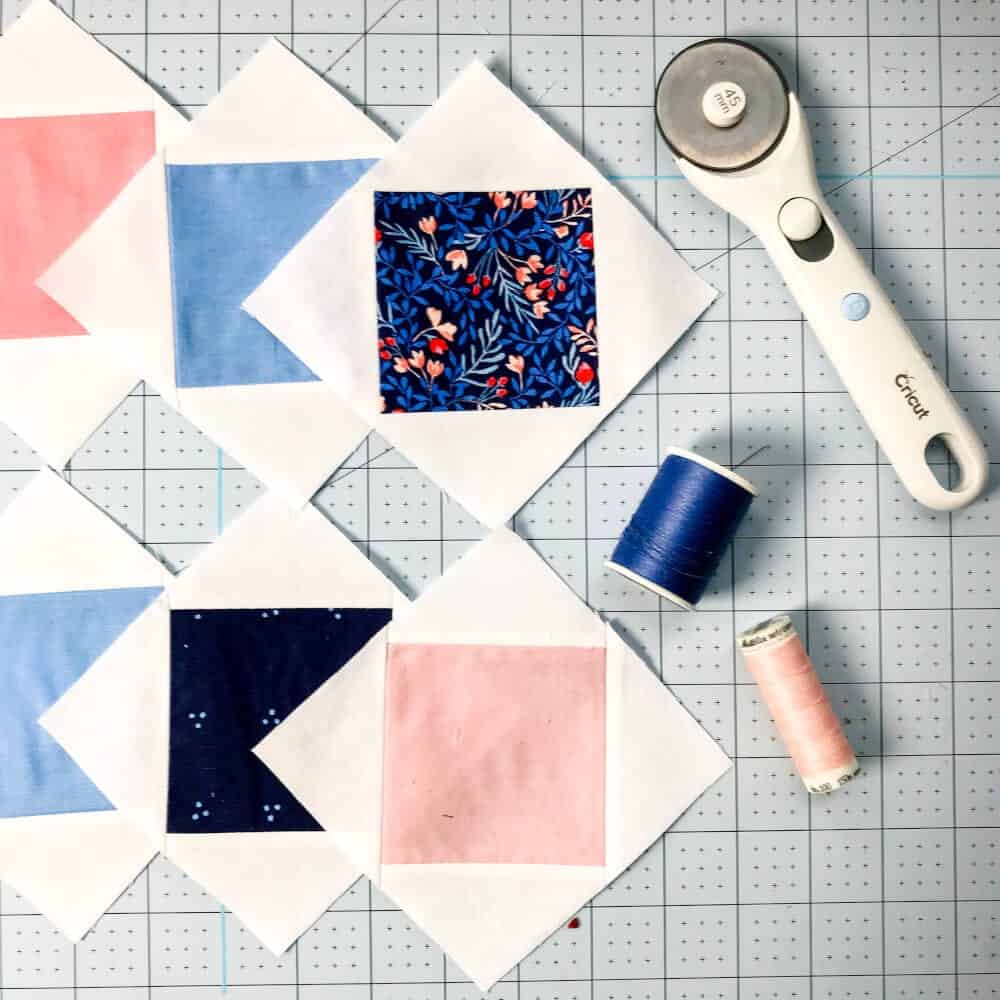
As I mentioned last week, I am making a scrappy version so all my center blocks will be different fabric prints and I love how they all look together.

You have to excuse the photos this week. My computer has refused to start, so I took all the photos on my iphone instead of my good camera. But beautiful photos or not the quilt is so fun to start sewing. I love watching the square in square blocks come together.
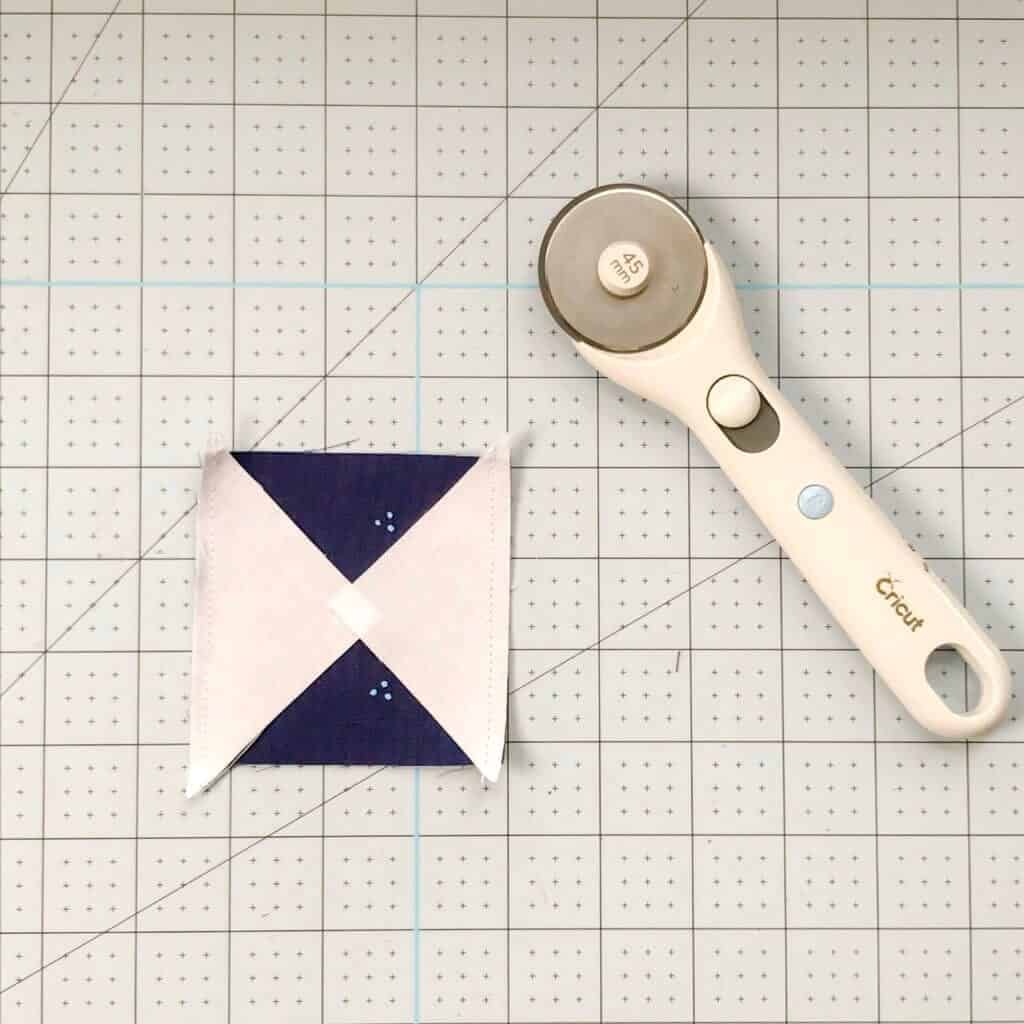
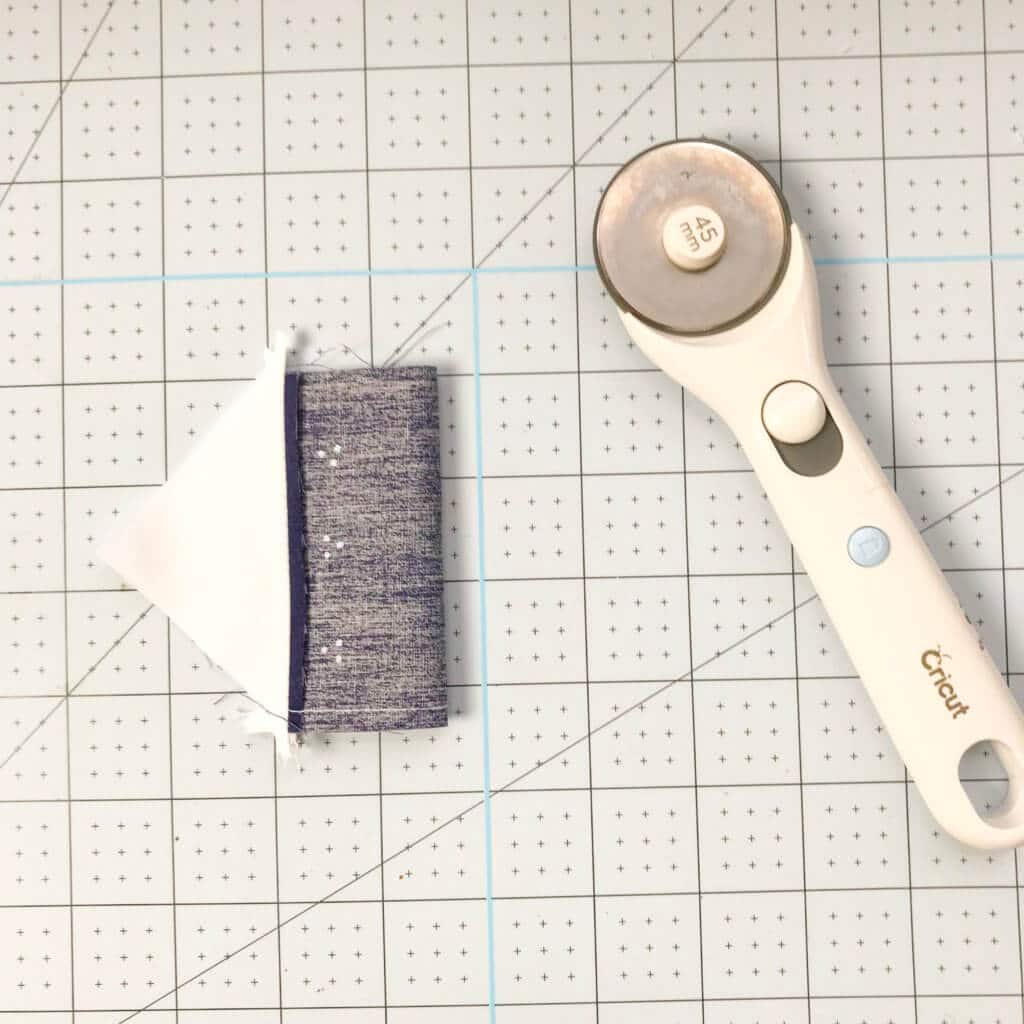
To start making the square in square block you will sew the two of Fabric B triangles to the opposite sides of Fabric A.
Then Press open.
To help with the center placement of the triangles, I like to make a fold along the center of the square so I can easily line up the point of the triangle with the crease.
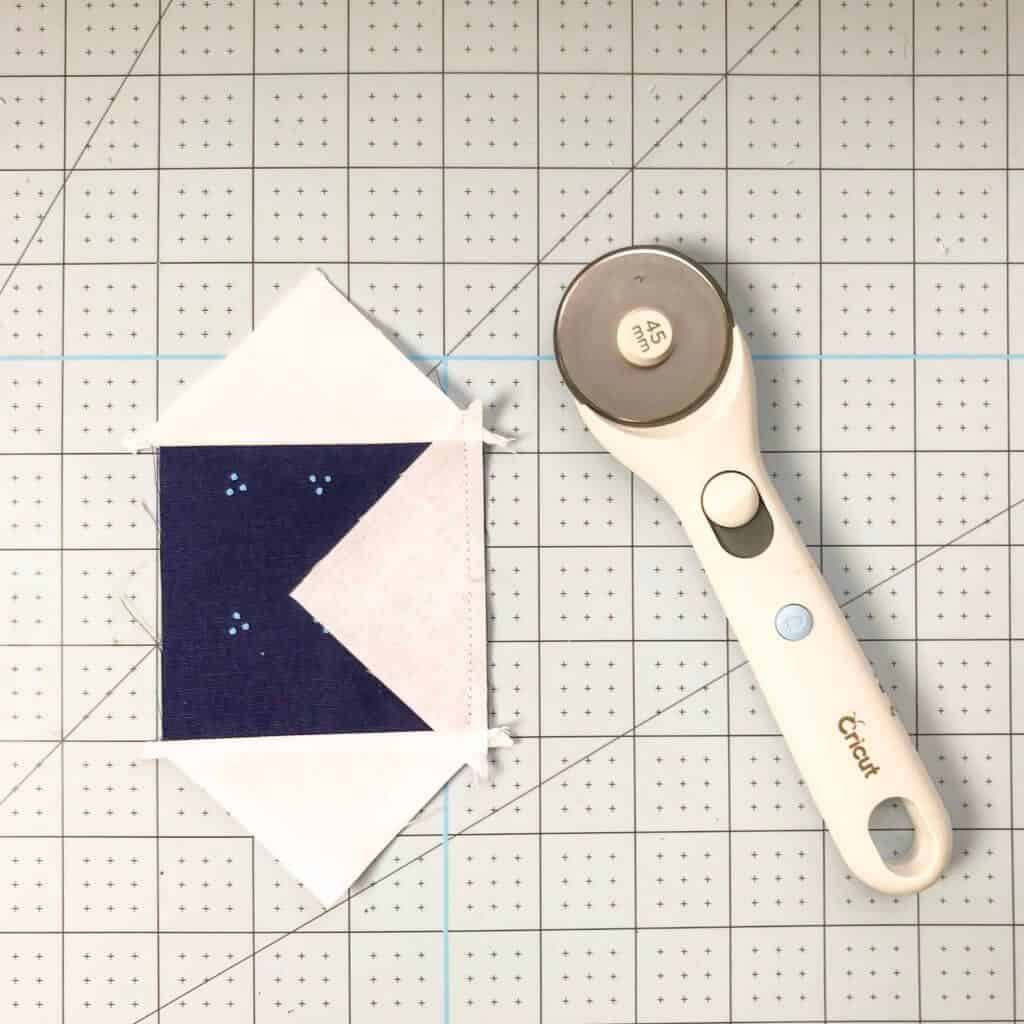
Then sew the remaining two fabric B triangles to the other two sides of the the unit. Press open.
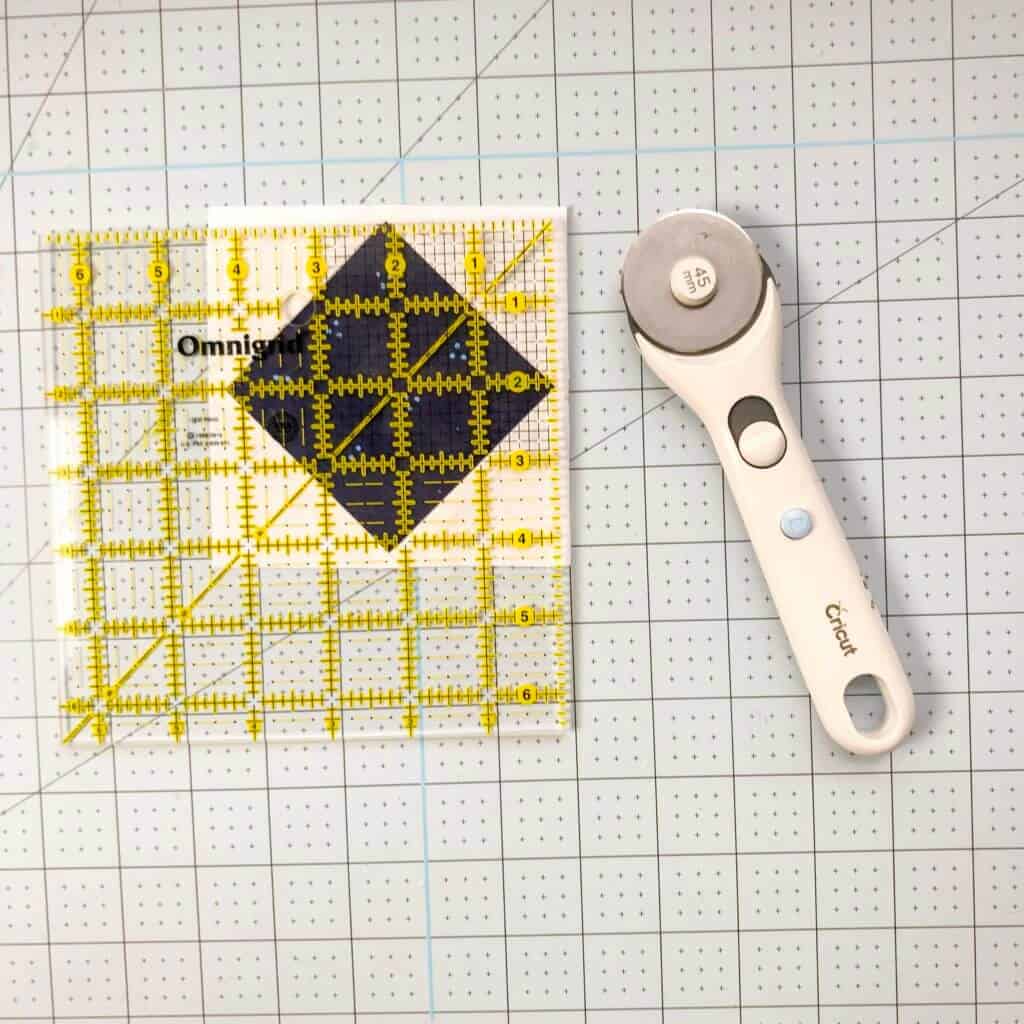
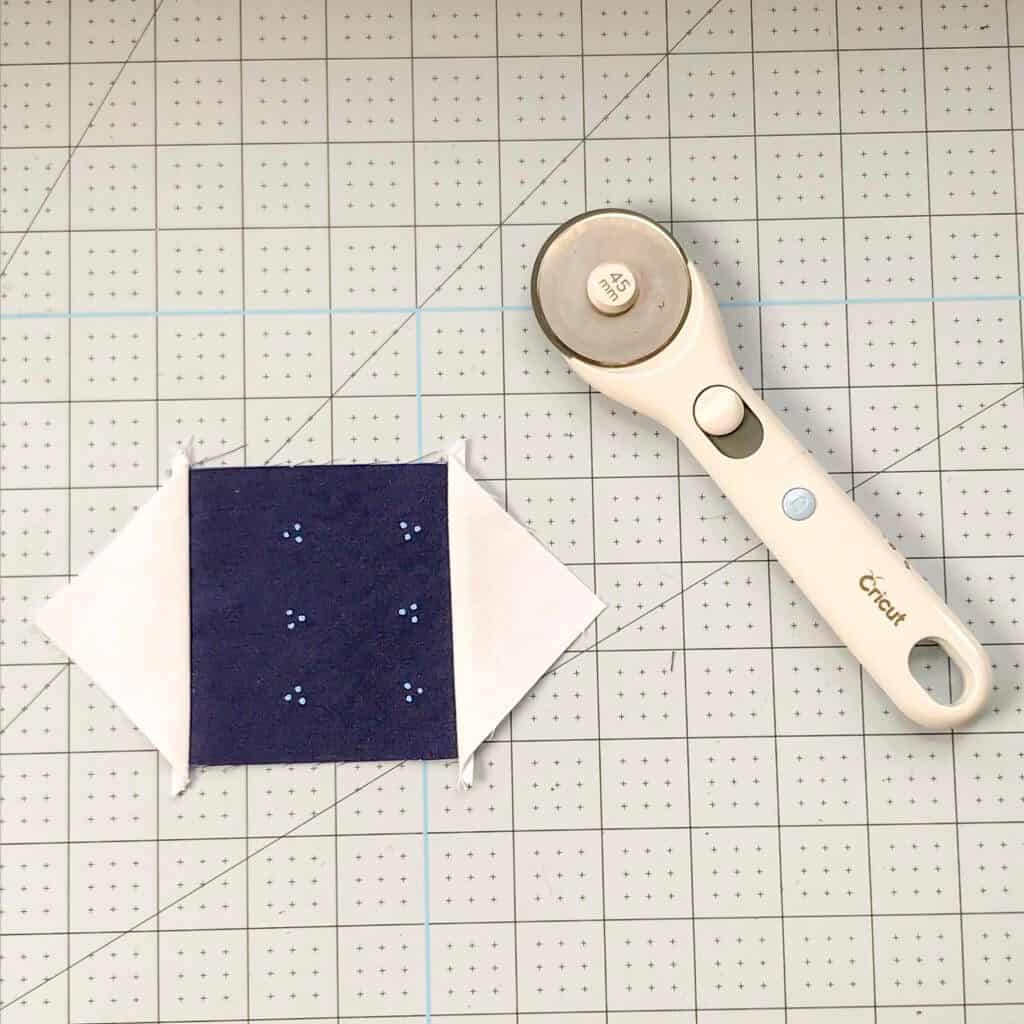
Trim and square up the edges, making sure that there is 1/4in seam allowance from each point of the square to the edge of the white fabric.
Repeat this steps above for placing the first unit into the the second square.
Winners are chosen and announced on Instagram.
Thank you to our sponsors this week:
The Simple Life Pattern Company - Winner will receive 3 Free Patterns of their choice.
Havel's Sewing - A gift set of quilty notions worth $50
What do you think?