
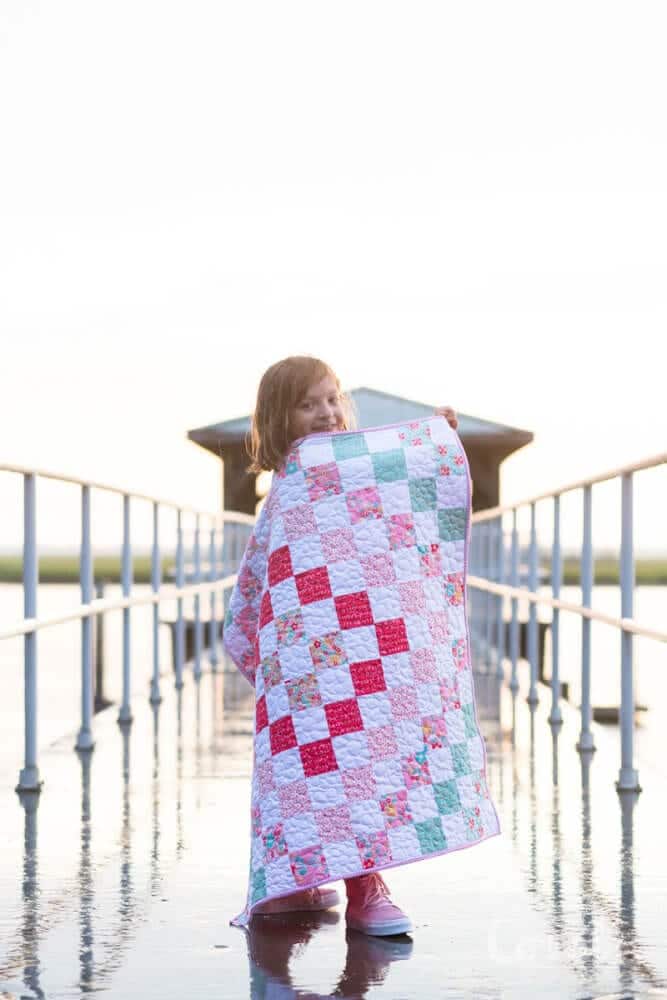
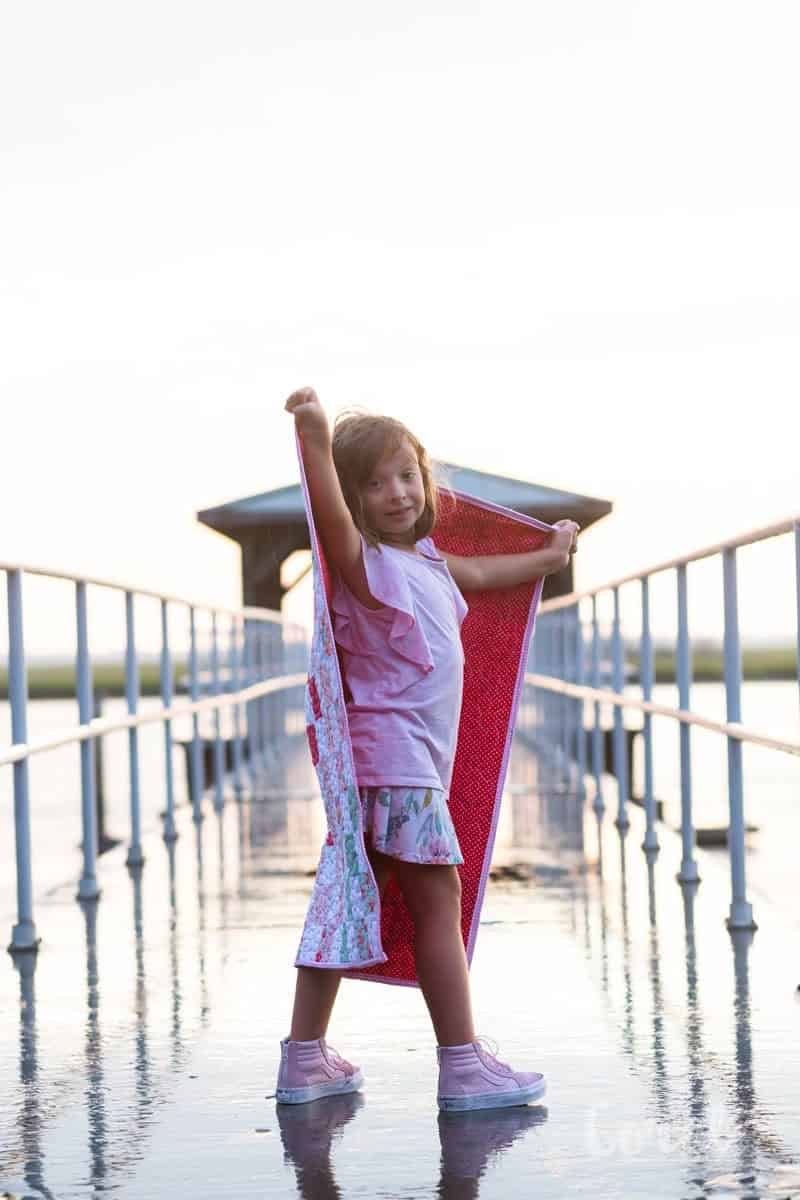
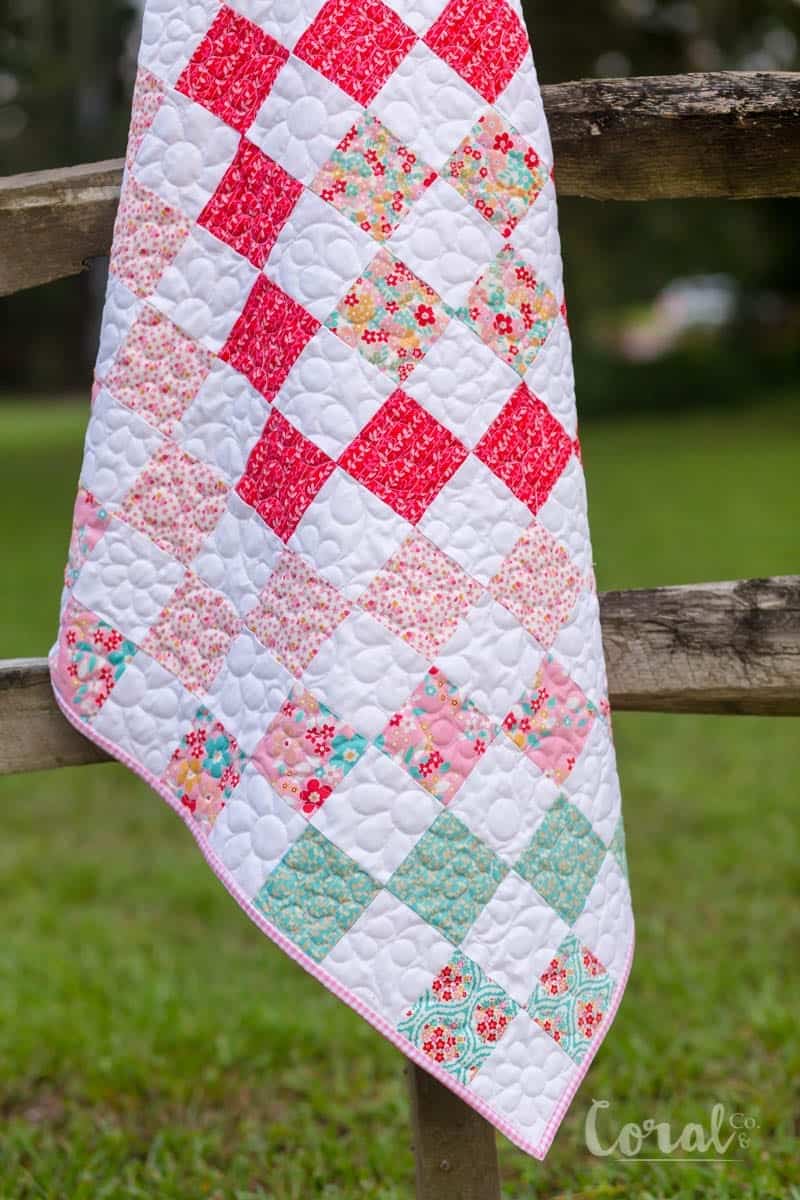
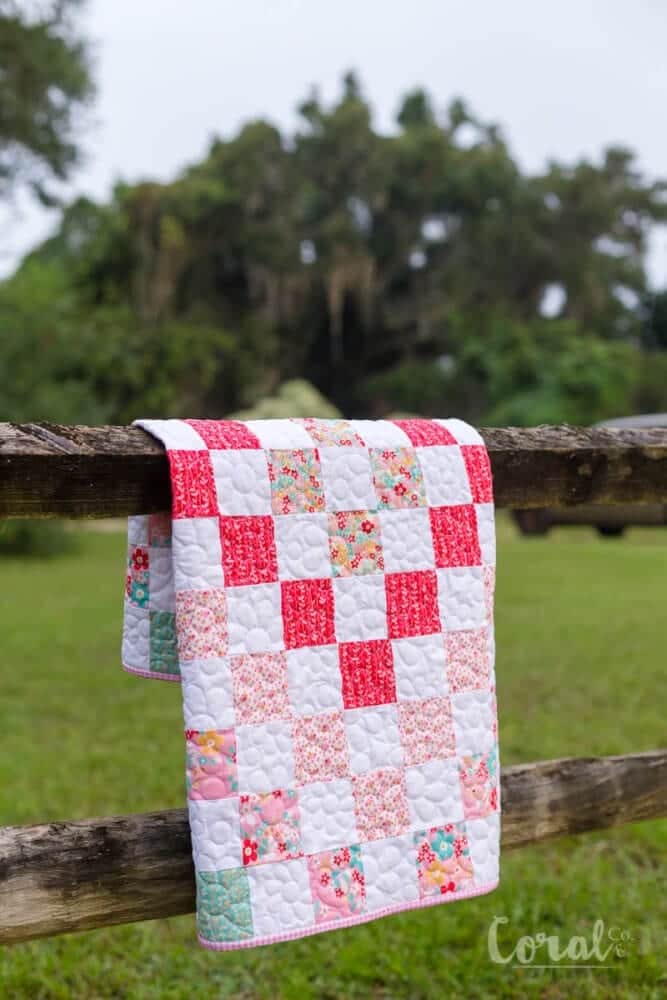
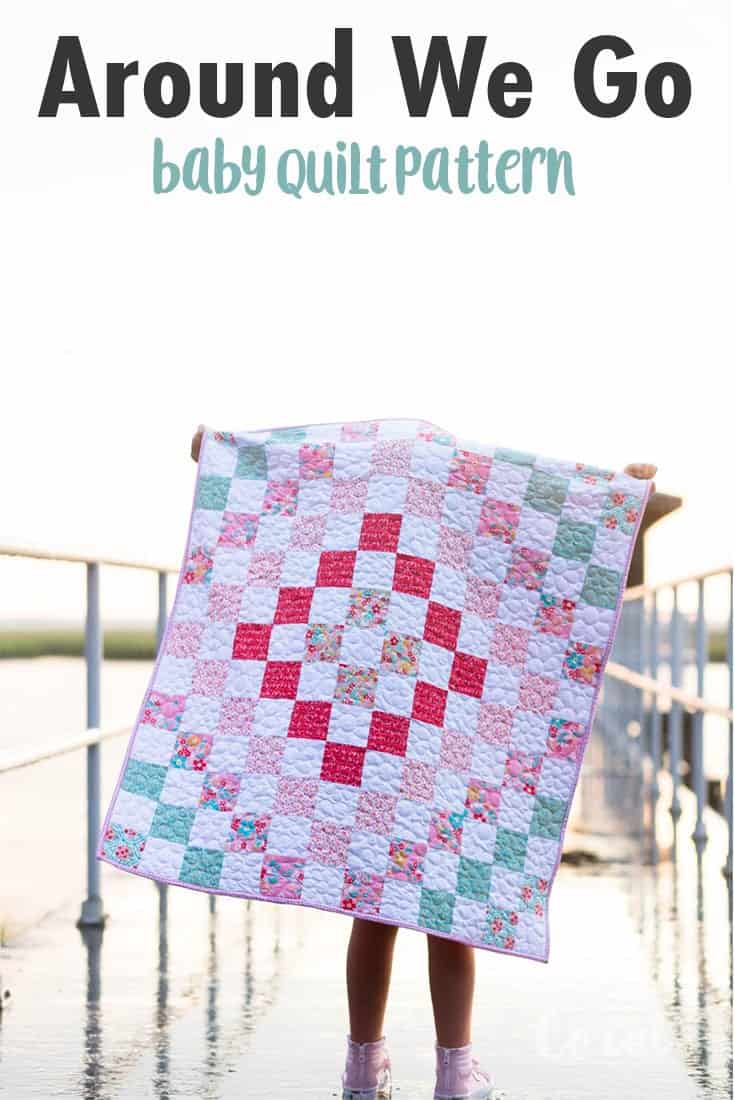
I'm back showing you Cricut Quilt Patterns piecing tips and tricks this week, as well as the finished quilt made with a fabric cutting machine for quilts. The quilt pattern is called Around We Go and it turned out so lovely.
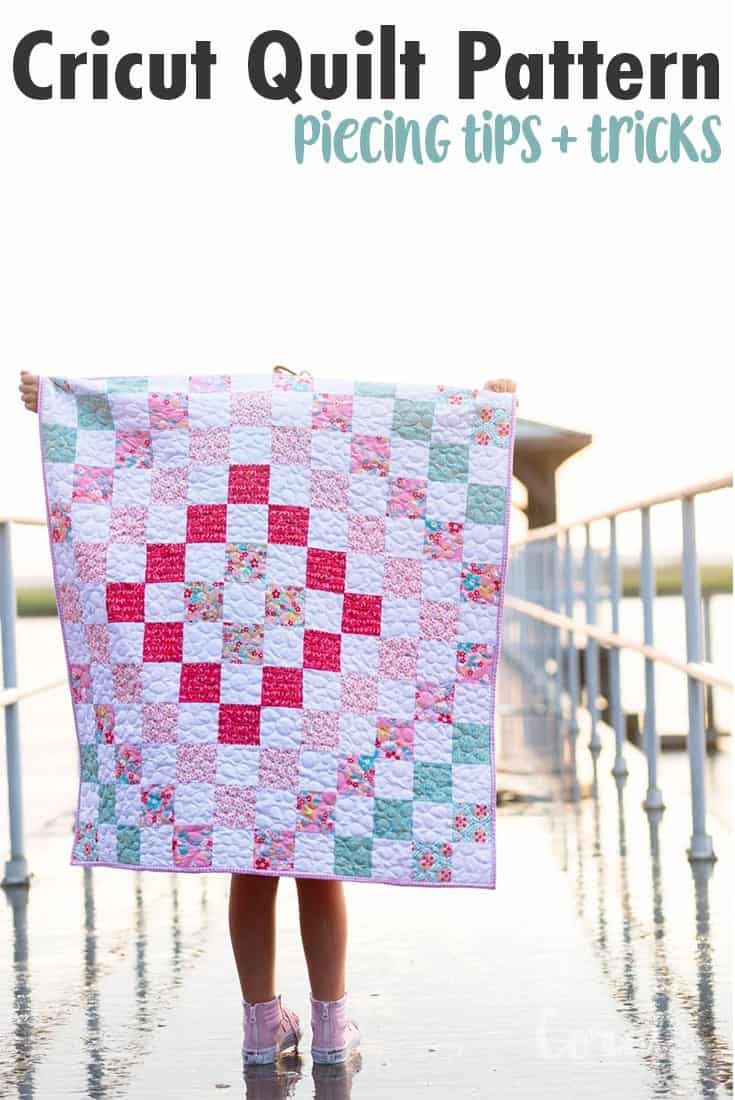 It's an adorable quilt pattern that is truly simple enough for the beginner but the pattern has enough interest to appeal to an experienced quilter. The pattern uses simple squares cut by the Cricut Maker, which is a fabric cutting machine for quilts and includes all the instructions for how to sew it together. Because the pattern only uses the square shape it comes together incredibly quickly. You can read more about how the how the Maker compares to the Cricut Explore Air 2.
You could easily quilt it with simple diamonds like the four square charm pack quilt pattern, but it is so nice to cuddle up with a heavily stitched quilt, so I sent it to Golden Isles Quilting to be longarm quilted. Liz, who does all the stitching is my go-to gal. She always knows exactly what motif will really make the quilt pattern shine. My favorite is the quilting on the Made Modern Quilt.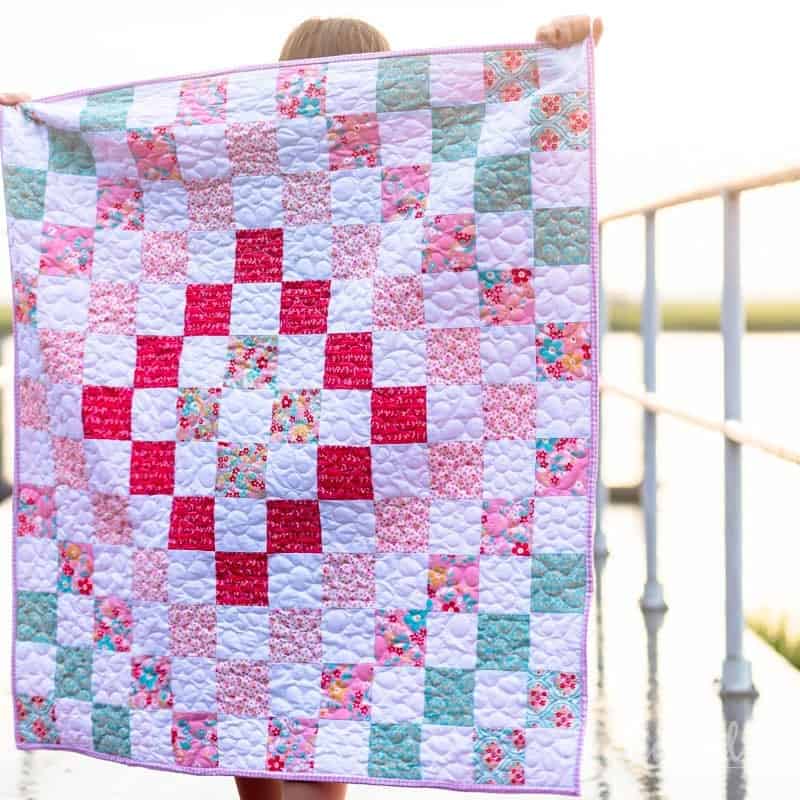
I started this three series showing you all about how easy it is to make a quilt using a fabric cutting machine for quilts a few weeks ago.
Be sure to read both parts of the series to learn all about the working with a fabric cutting machine for quilts. The first part of the series shows you all about how to get started finding quilt patterns in design space with coordinating quilt kits for each pattern.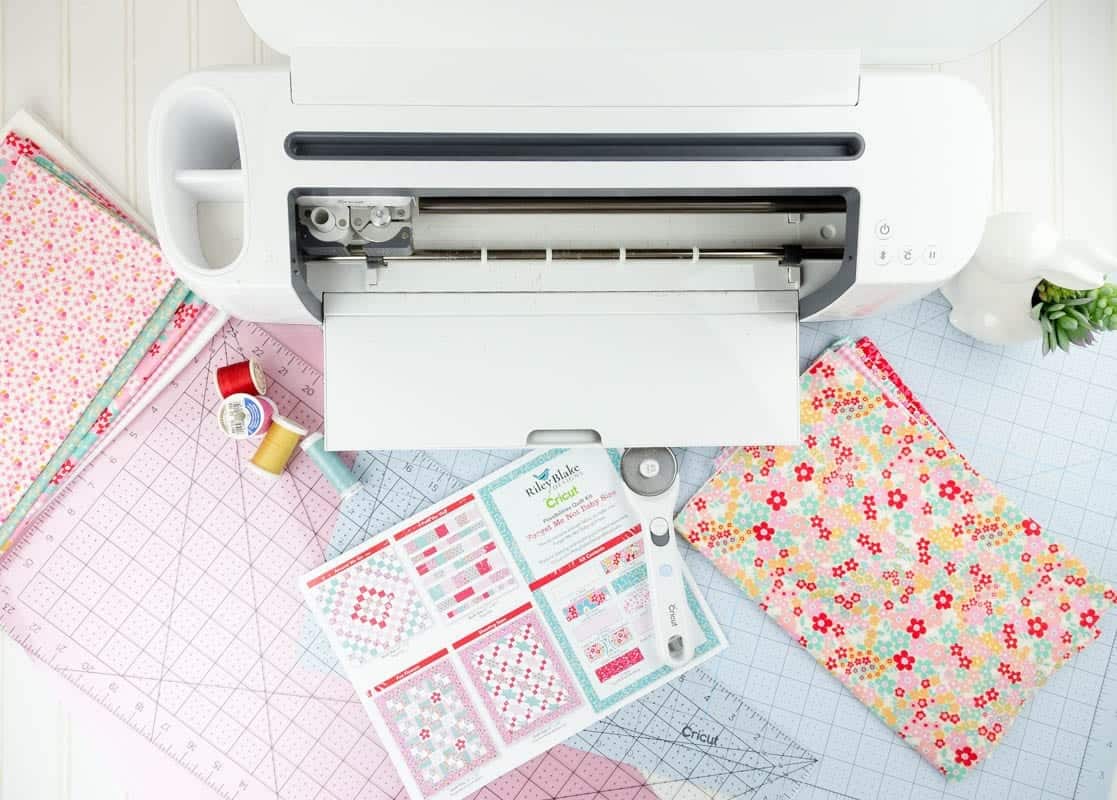
The second part of the series offers some great tips for cutting your Riley Blake Designs quilt kit with the Cricut Maker. And now we are on to the last part of the series where I show you the finished quilt and some great tips for how to organize and cut Cricut Quilt Patterns fabric and piece your quilt.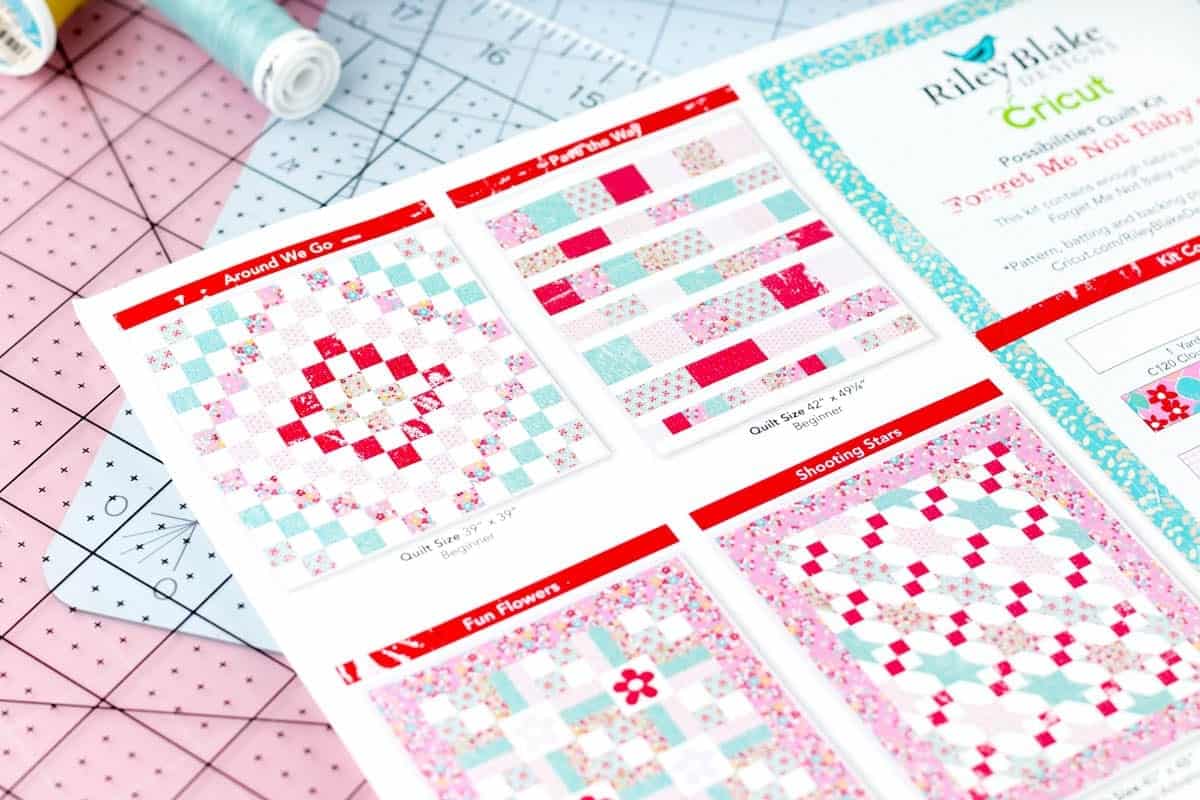
Materials Needed for Fabric Cutting Machine Quilt
- Riley Blake Forget Me Not Quilt Kit
- Backing Fabric - I chose red swiss dots to coordinate
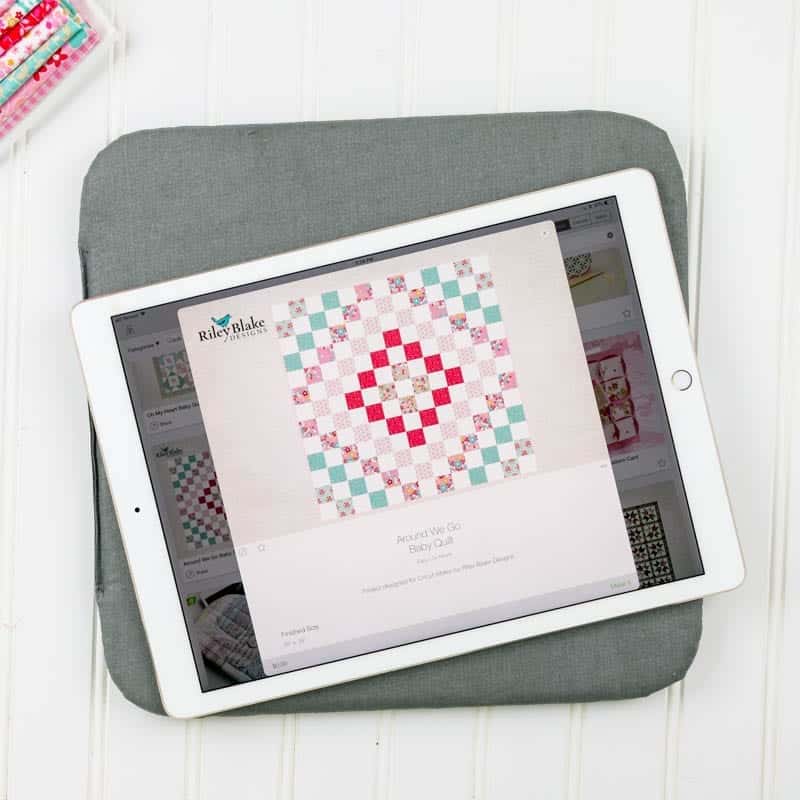
- Around We Go Baby Quilt Pattern in Design Space
- White Cotton Thread
- Rotary Blade and Mat
- Fabricgrip Mat
- Cricut Maker
Cricut Quilt Patterns Piecing Tips + Tricks
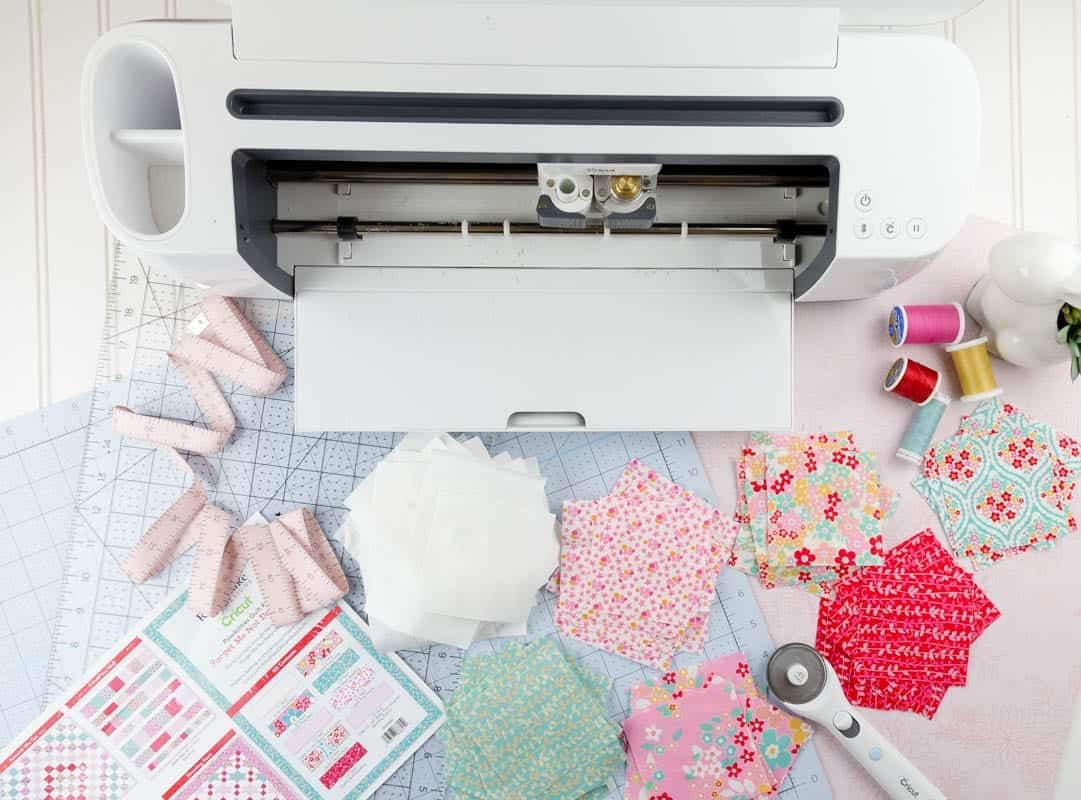
- After you remove the squares from your fabric mat, label them according to the number given to that color fabric
with the Cricut quilt patterns. I used a, b, c instead of 1,2,3 but you get the idea. This is incredibly important so as not to confuse you when trying to line of the square blocks in the correct color order.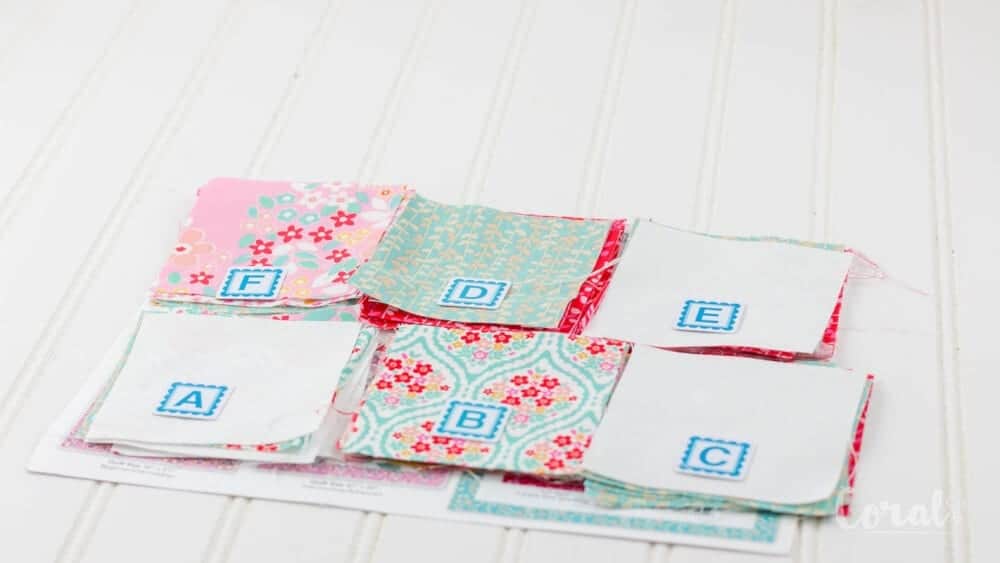
- Lay out your entire quilt on the floor or table before you start to sew. This will help you to make tidy little stacks that you can simply sew each row from.
- Starting with the first row across, pick up the first square and stack it upon the second square. Then stack both squares on the third square and so on, until you have all of the first row in a stack with the correct color order.
- Repeat this for all your rows.
- Lay your piles of fabric squares for each row from 1- 10, so that you can start with the first row and finish with the last row. ***When piecing quilts, organization is key.
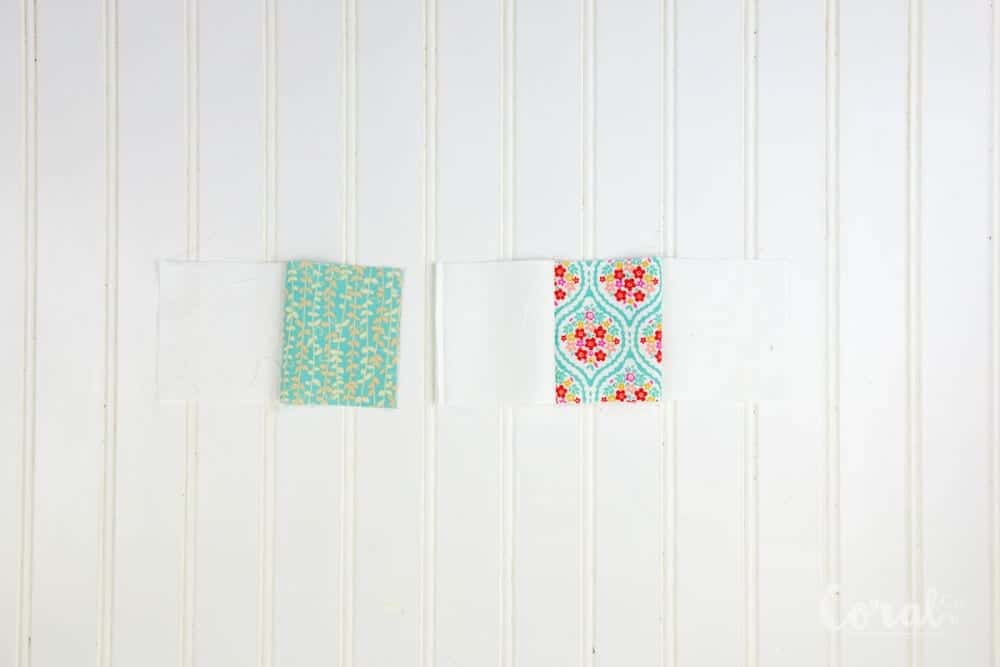
- To start piecing the row, attach the blocks in sets of two (a colored square and a white square), then combine the two square sets together with the other two squares sets to form a row adding the last single block onto the end.
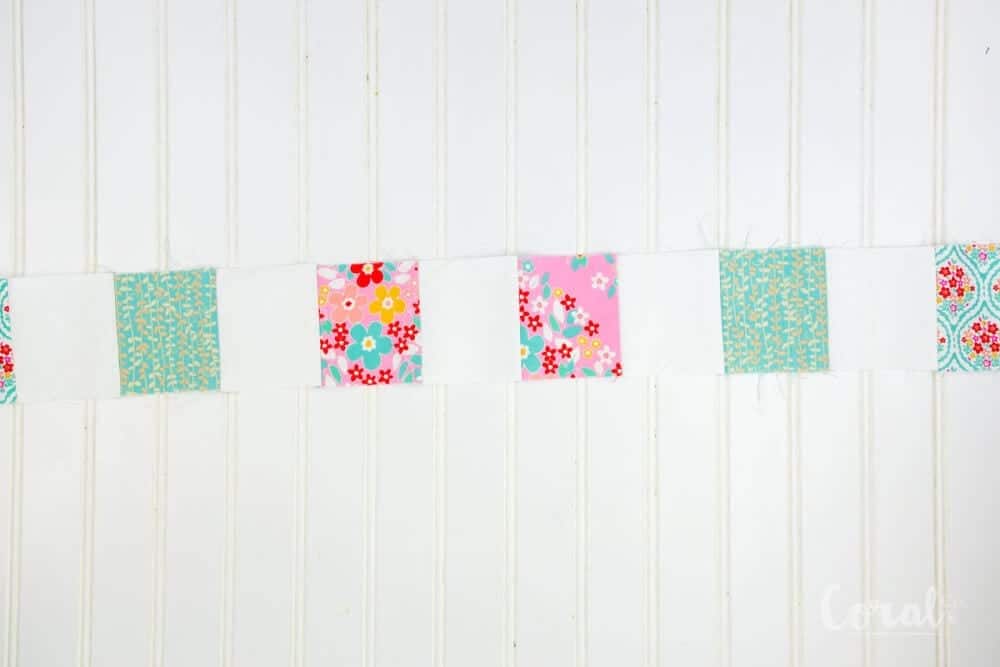
- Lay your rows in the correct order as you form them, so as not confuse which row belongs where. I find it easiest to drape them over the back of a chair so they don't wrinkle.
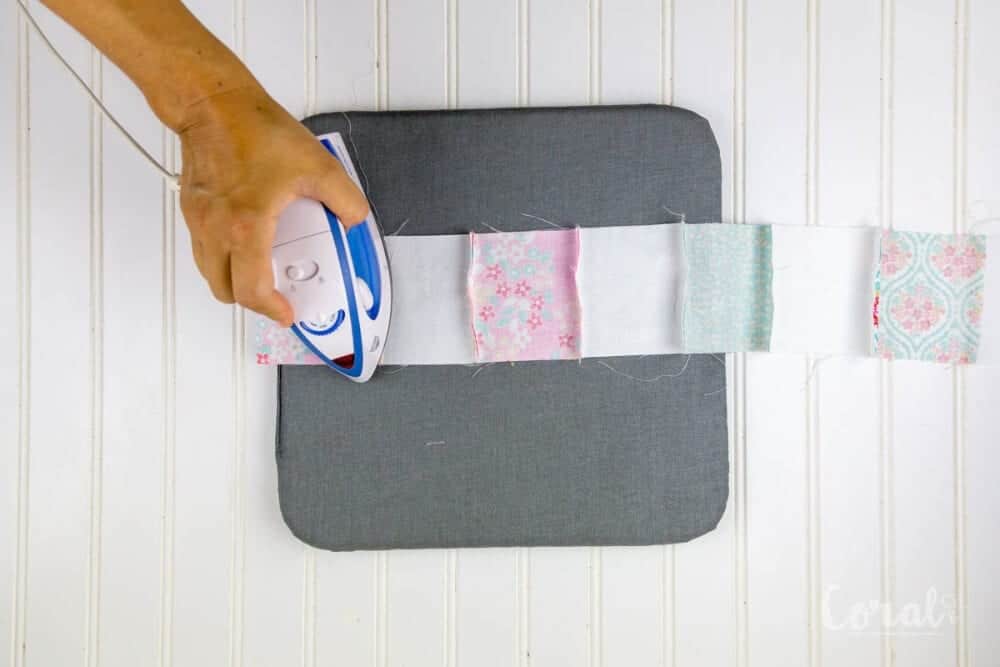
- Press, press, press. You will press you each row of squares in opposite directions in what is called nesting the seam. This will greatly help to reduce the bulk and help you line up the squares so they join together perfectly when finished.
- Press the top row so all the seams are facing toward the colored squares, and then press the next row so all the seams are facing toward the white squares. Repeat for all your rows.
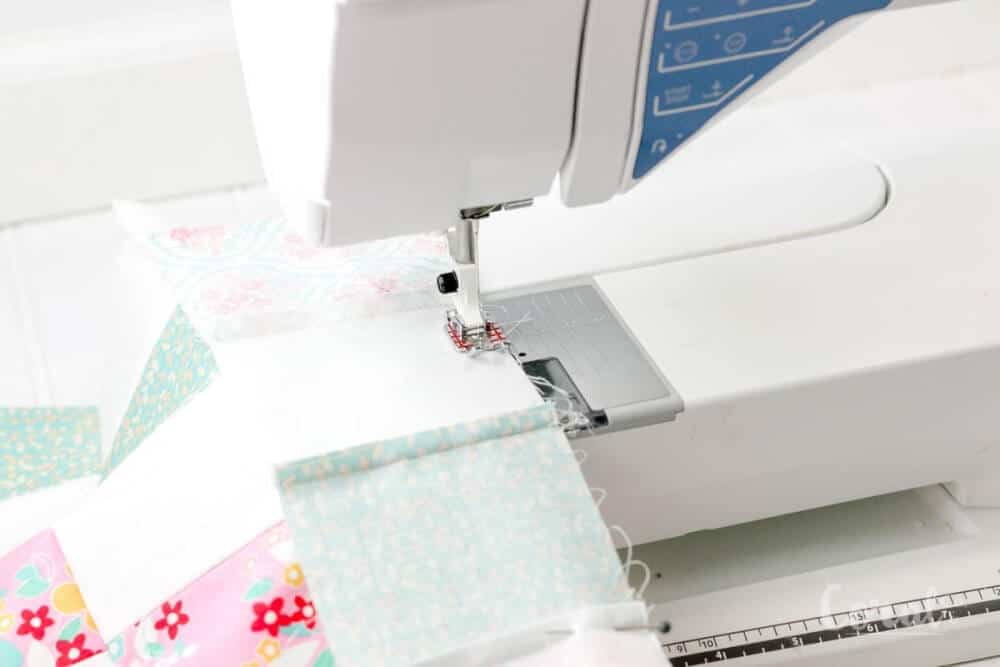
- Pin at the seams of the squares when joining the rows, so the squares join up nicely and don't shift as you sew.
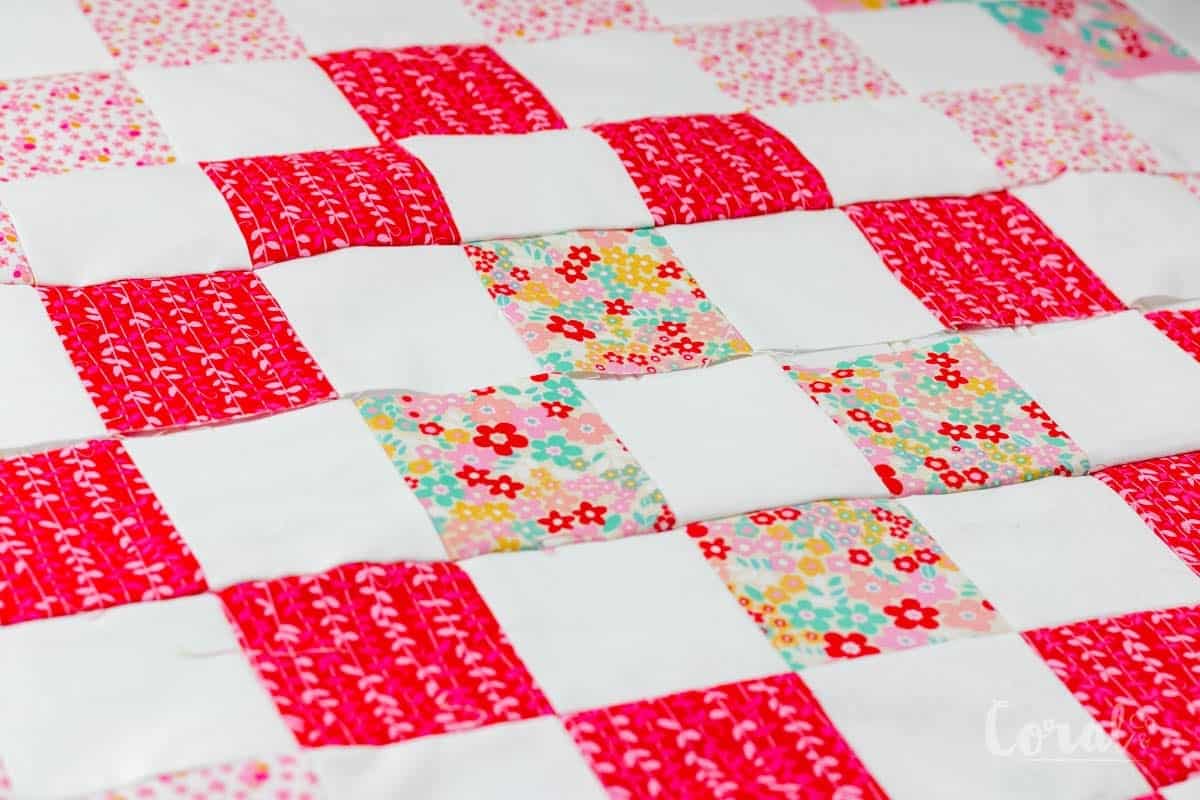
- Join all the rows for the top half of the quilt and then separately join all of the rows for the bottom half of the quilt. Then join both halves together. This will help to keep your quilt lined up squarely so the sides stay straight (this happens waaaaay more easily than you might think!)
Thoughts on Cricut Quilt Patterns
- I love the ease Cricut quilt patterns bring to quilting. All the fabric you need for the quilt top comes in the Riley Blake Quilt Kit in a pre-measured amount and the fabric in the kits is super cute.
- The Cricut makes cutting so easy! It cuts just the right amount of squares for each project in just the right size. So no cutting mistakes made and you won't need to make head back to the fabric store because you messed up while cutting your fabric.
- Time! Let it cut while you go do something else! Instead of tediously cutting out all the squares with your rotary blade cutter and ruler it does it for you!
- No calculating needed. You will not have to figure out how much to get of each fabric and which ones coordinate together. It is already done for you.
Finishing your Quilt
Quilting:
See your quilt all stitched up with its quilty design is my favorite part, it's also the part I like to sew the least. So sending it off to a longarm quilter like I did makes perfect sense. The quilting comes out flawlessly, and there are so many more design choices available. Plus you get to start on your next project.
Binding:
You will also need to bind your quilt. The binding fabric comes in the kit and you can find a great video tutorial on how to bind your quilt by Riley Blake Designs.
More Cricut Quilt Patterns and Cricut Sewing Patterns
- Hearts Quilt Block Mini Quilt Pattern
- Woven Knot Bow Headband Cricut Sewing Pattern
- More Around We Go Baby Quilt Patterns
Pin the Around We Go Baby Quilt Pattern for Later
 This is a sponsored conversation written by me on behalf of Cricut. The opinions and text are all mine.
What do you think?