
Learn how to sew a simple Christmas Stocking with this FREE Christmas Stocking Sewing Pattern. The Christmas Stocking Pattern comes with two options. Make either a basic Christmas Stocking or make a fun version with a toe and heel patch for a bit of whimsey.

This adorable Christmas Stocking pattern can be made with or without the toe and heel patch and can be made reversible as well!

Supplies needed to sew the Christmas Stocking Pattern
- 1 Yard Flannel Fabric or 2 - 1/2 Yards of coordinating fabric | Flannel Fabric at Joann | Robert Kaufman Mammoth Flannel -Etsy |Amazon
- Scissors - Joann |Amazon |Etsy
- or Rotary Cutter - Joann |Amazon |Etsy
- Thread - Joann |Amazon | Etsy
- Sewing Machine Needles - Joann |Amazon | Etsy
- Sewing Machine - Joann | Amazon
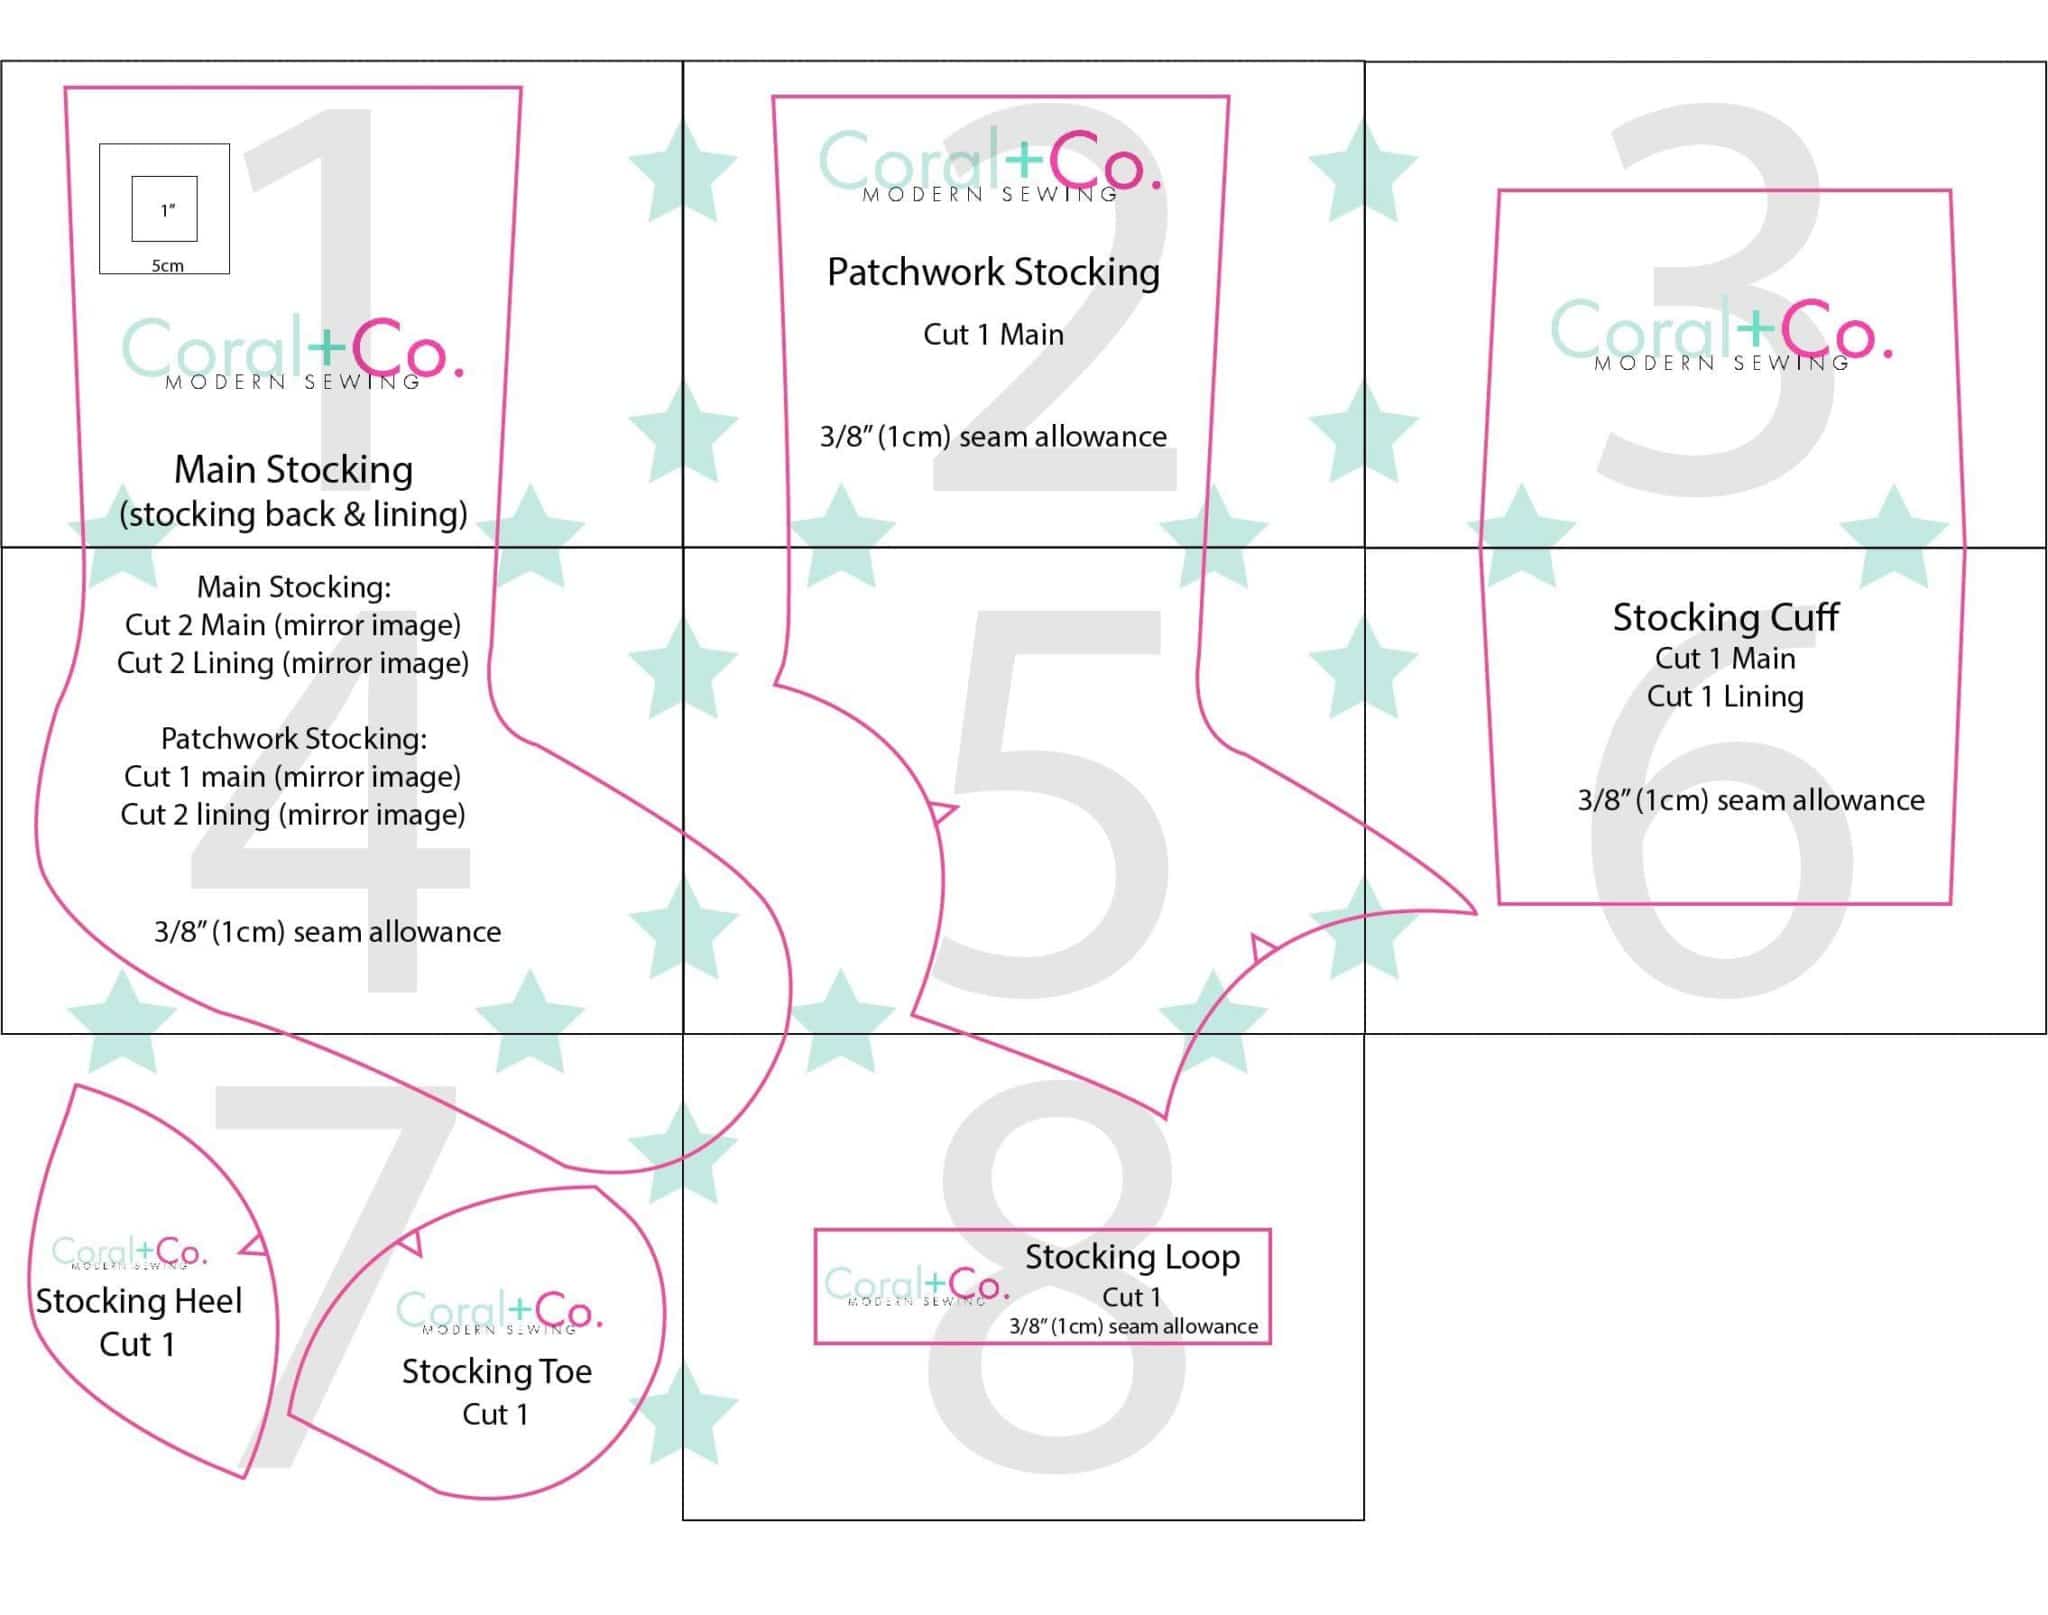
- Christmas Stocking Sewing Pattern (found in the Resource Library).
You may find these Tips for Sewing with Flannel helpful as well.
More Christmas Stocking Patterns
- Faux Fur Cuff Christmas Stocking
- Patchwork Quilt Christmas Stocking
- Quilted Christmas Stocking
- 25+ Christmas Stocking Patterns
To make the Christmas Stocking without the toe and heel patch skip to step 6 to start.
Time needed: 30 minutes
Christmas Stocking Sewing Pattern Instructions
- Print the Pattern
Download, print, and tape together the Christmas Stocking Sewing Pattern. The pattern can be found in the Resource Library.
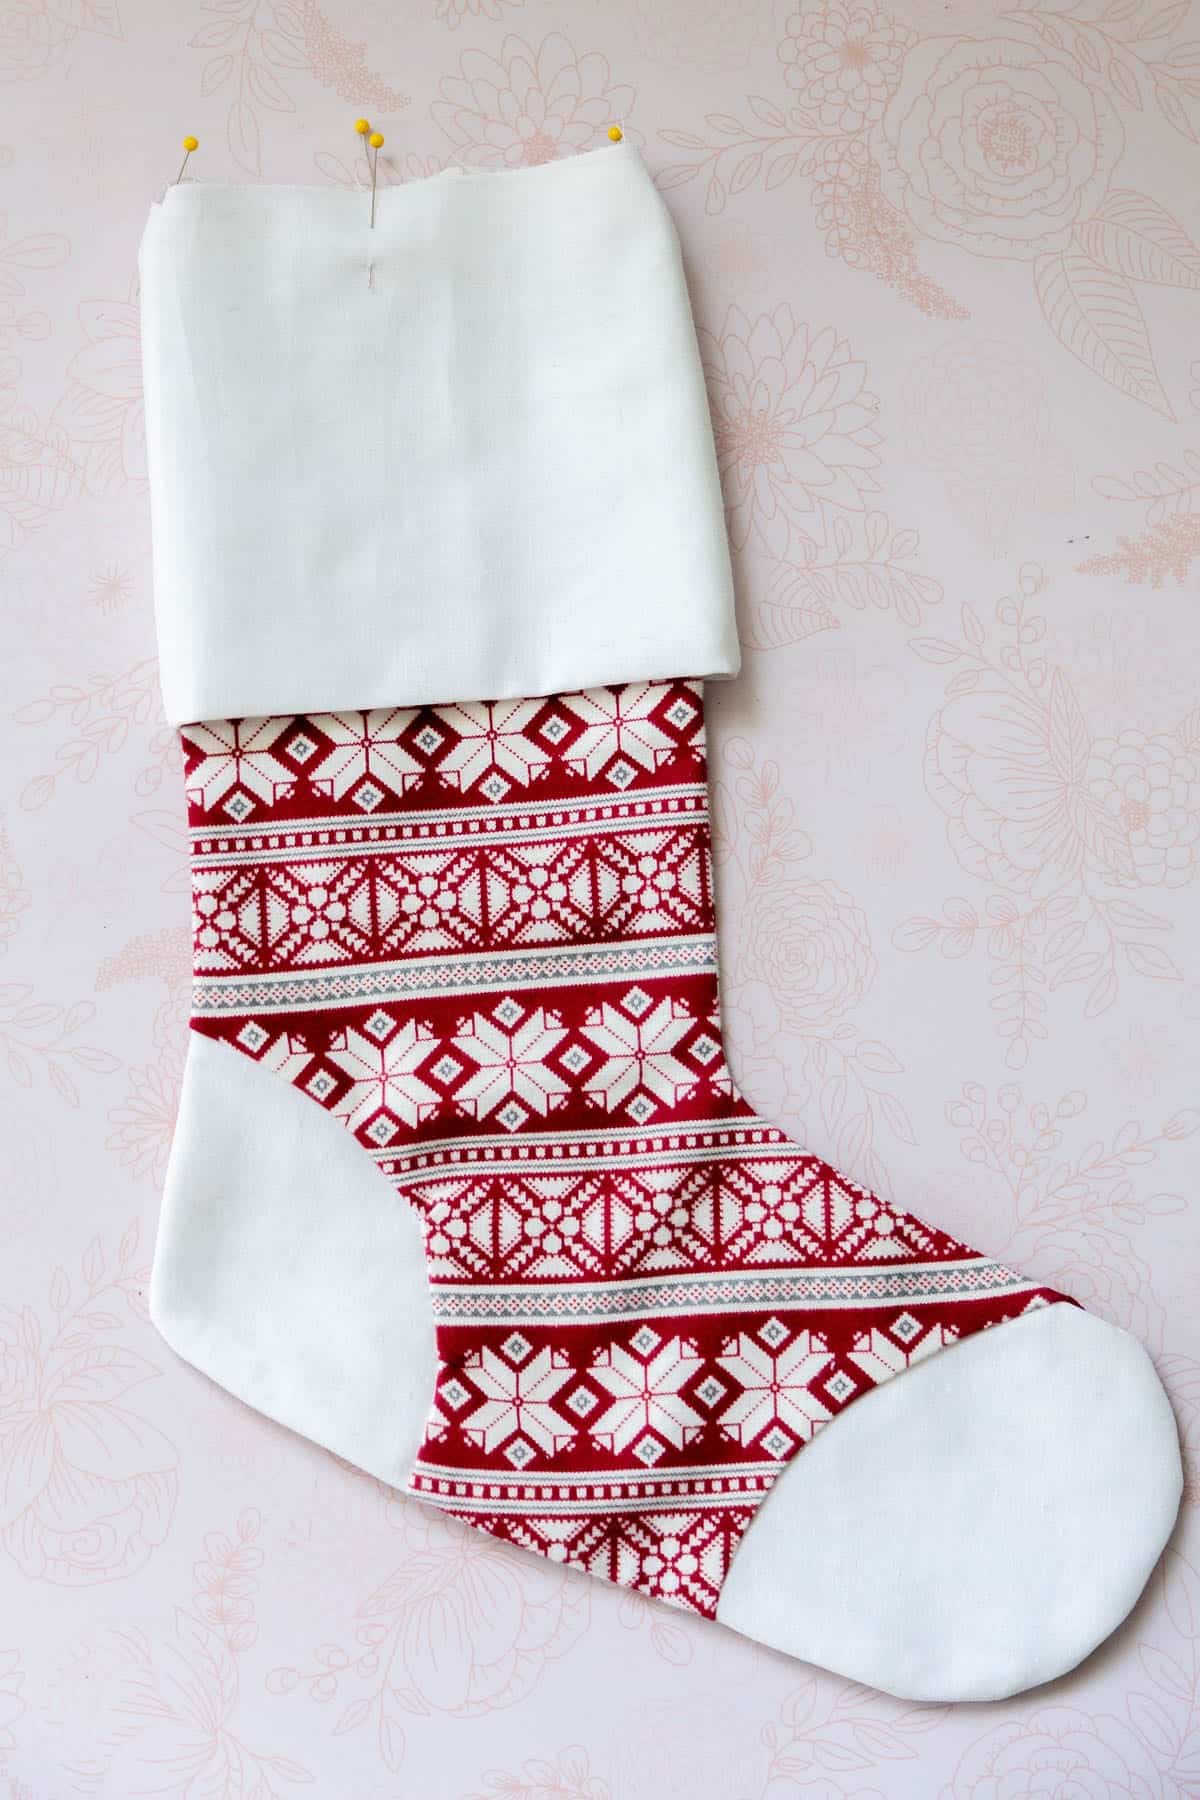
- Line up the heel patch
Line up the heel and toe patch curve notches that were noted in the pattern being sure that the top and bottom of the patches are facing the right way.
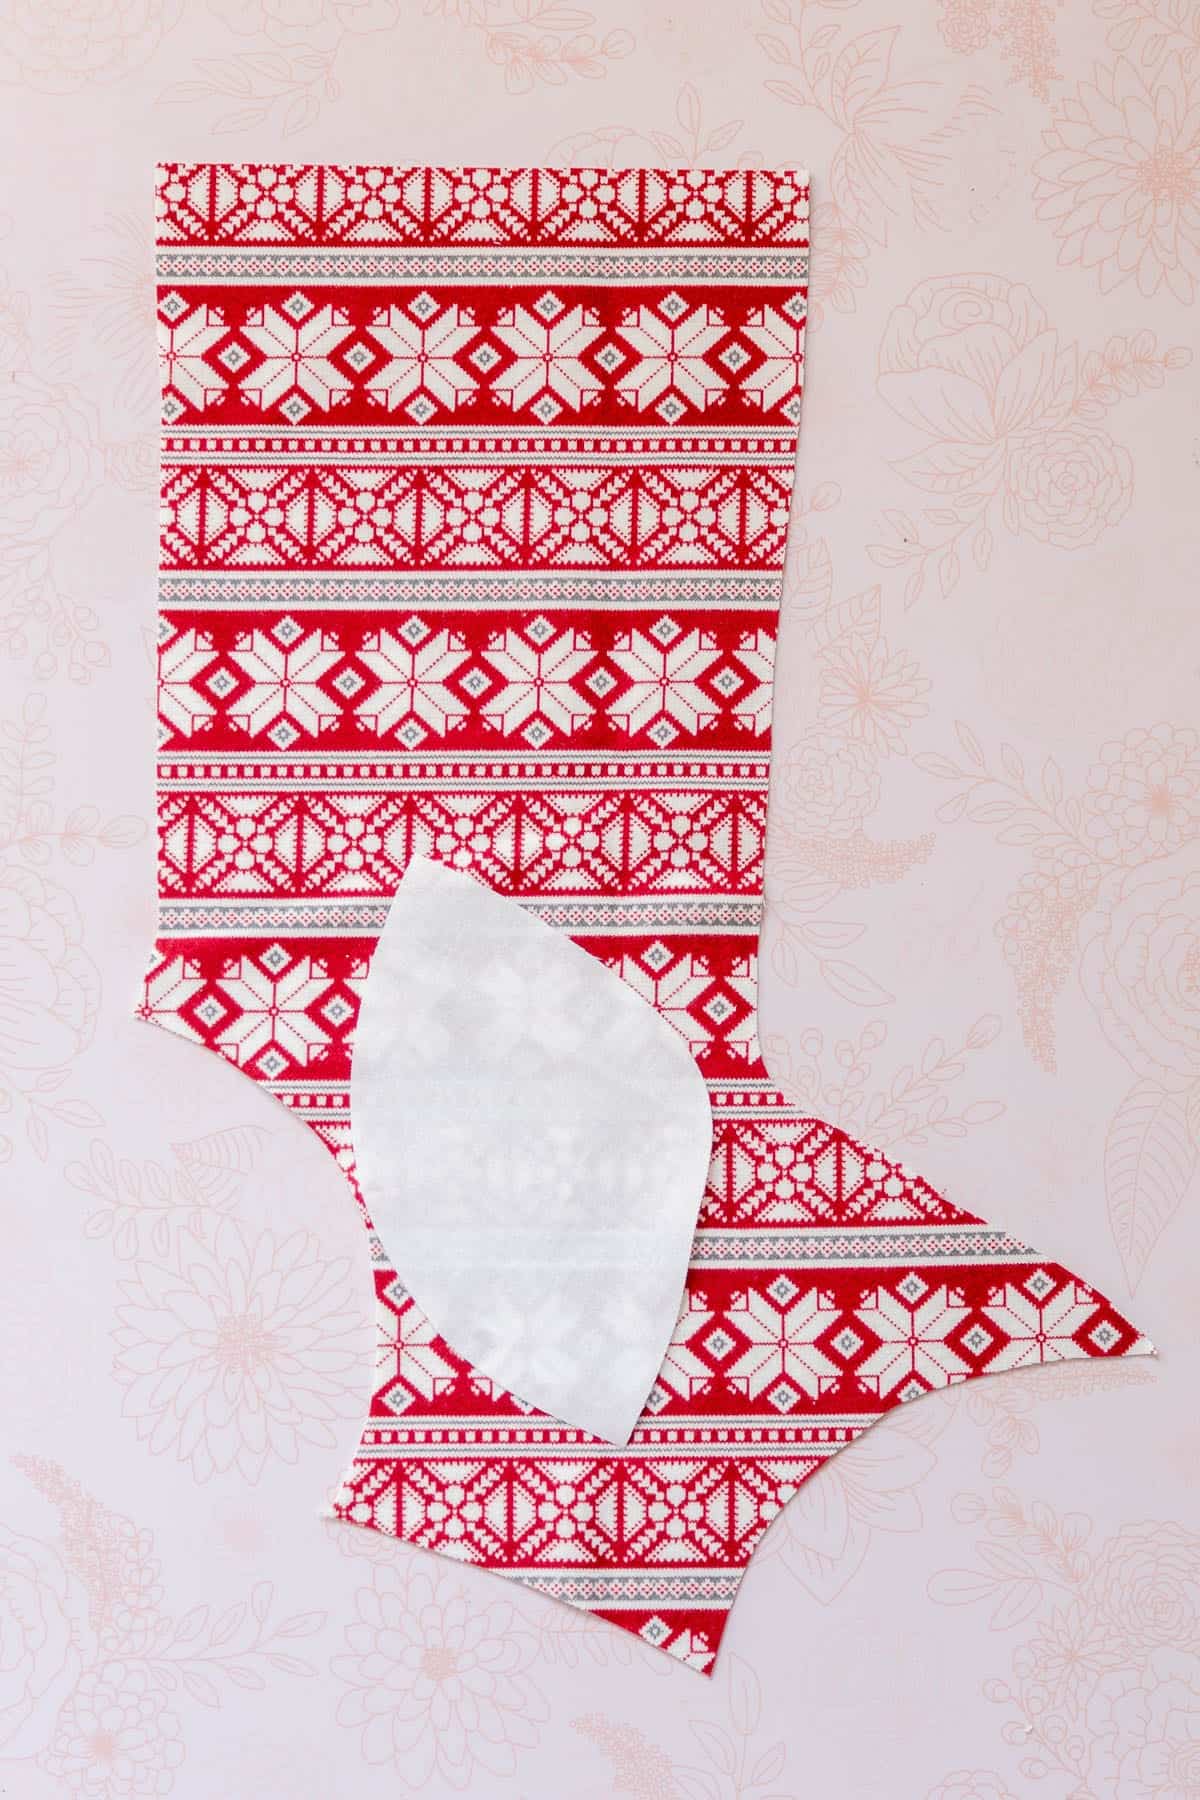
- Pin the heel patch
Place the heel patch RST over the stocking front piece. Pin in place. Since this is a curved piece you will want to use a lot of pins to make sure the pieces stay in place and the curve is sewn evenly.
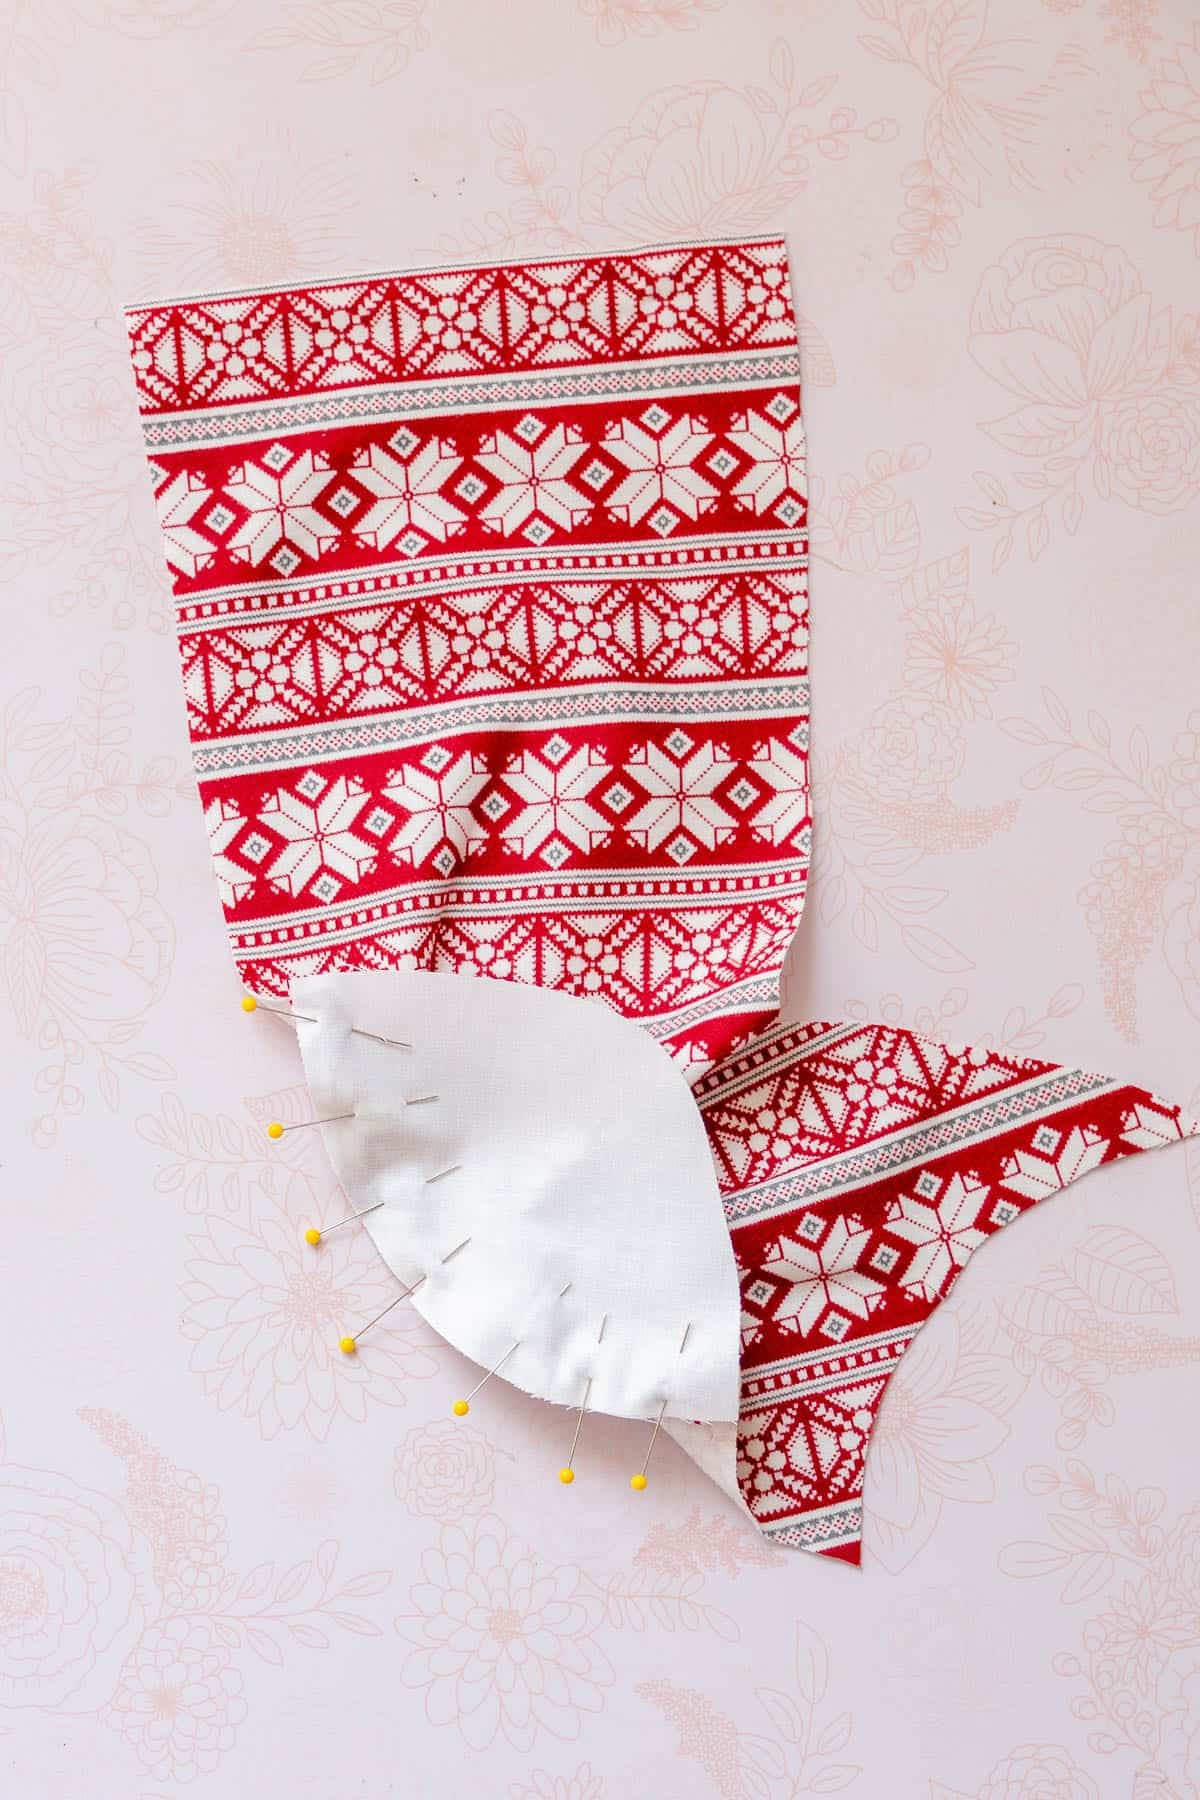
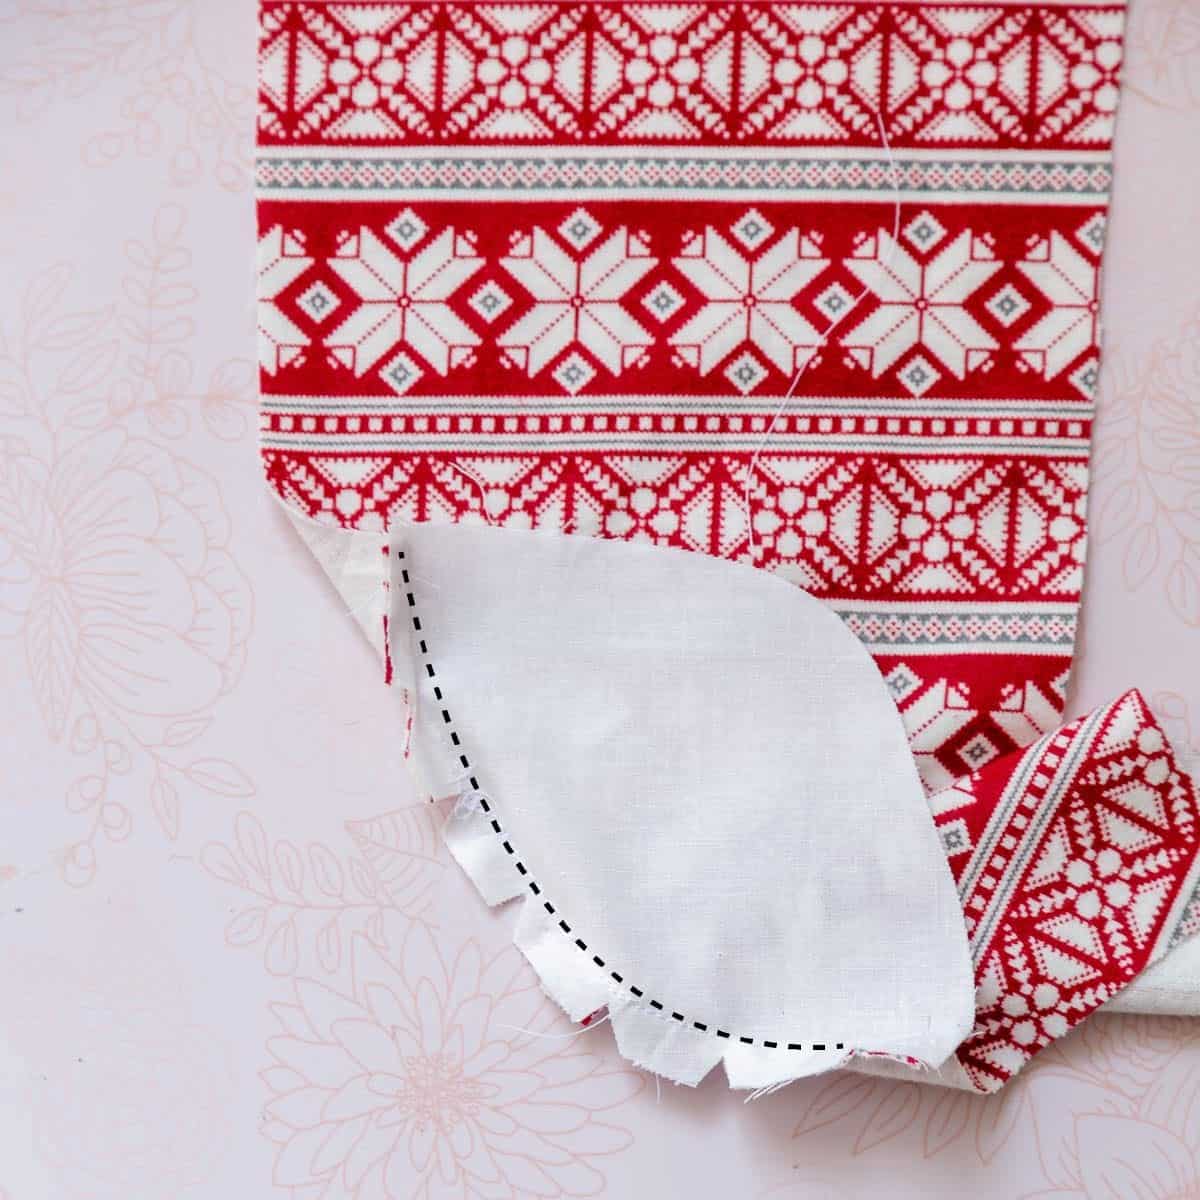
- Sew the heel patch
Sew 3/8" seam allowance along the raw edges of the heel piece. Trim notches to allow the seam to lie flat when pressed.
- Pin and sew the toe patch
Place the toe patch RST over the stocking front piece. Pin in place using a lot of pins to secure the curved piece.
Sew 3/8" seam allowance along the raw edges of the toe piece. Trim notches to allow the seam to lie flat when pressed.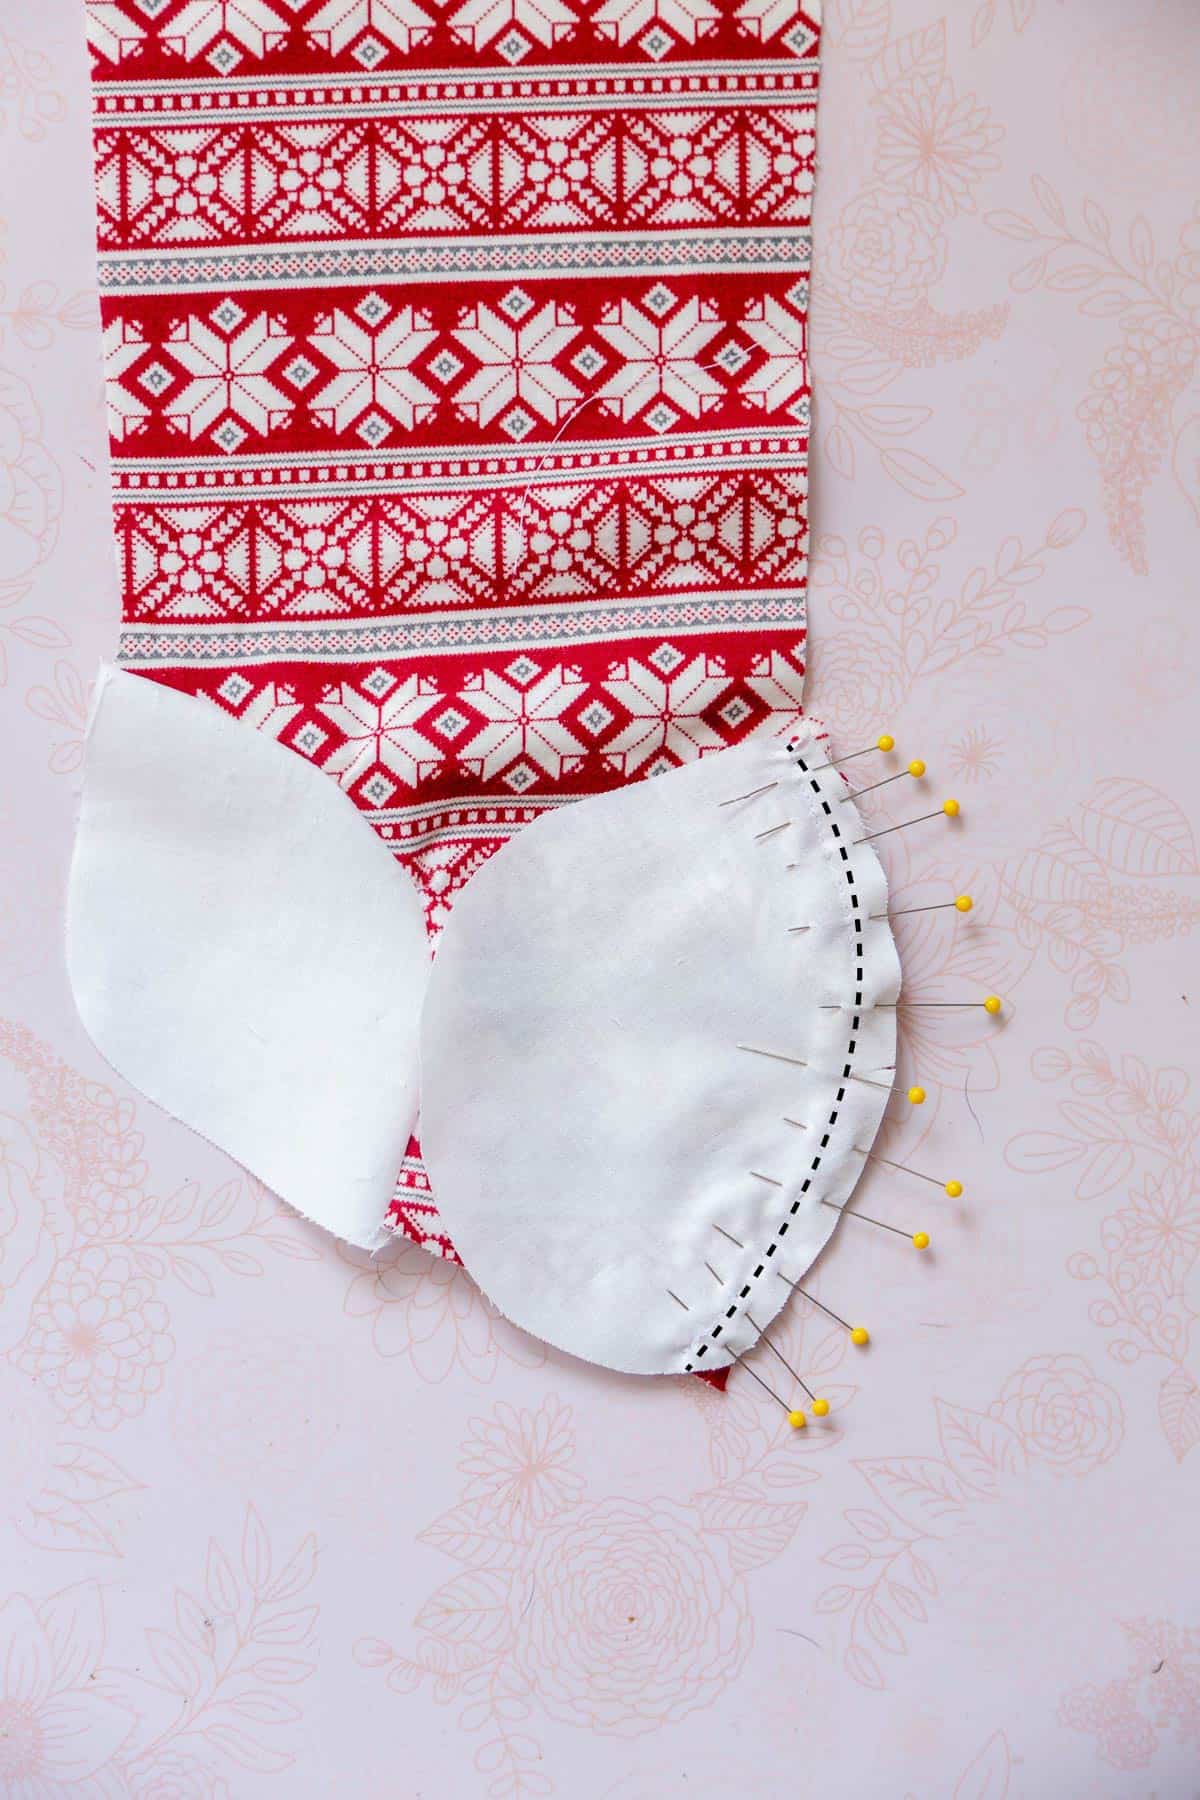
- Press flat
Press both the toe and heel pieces flat.

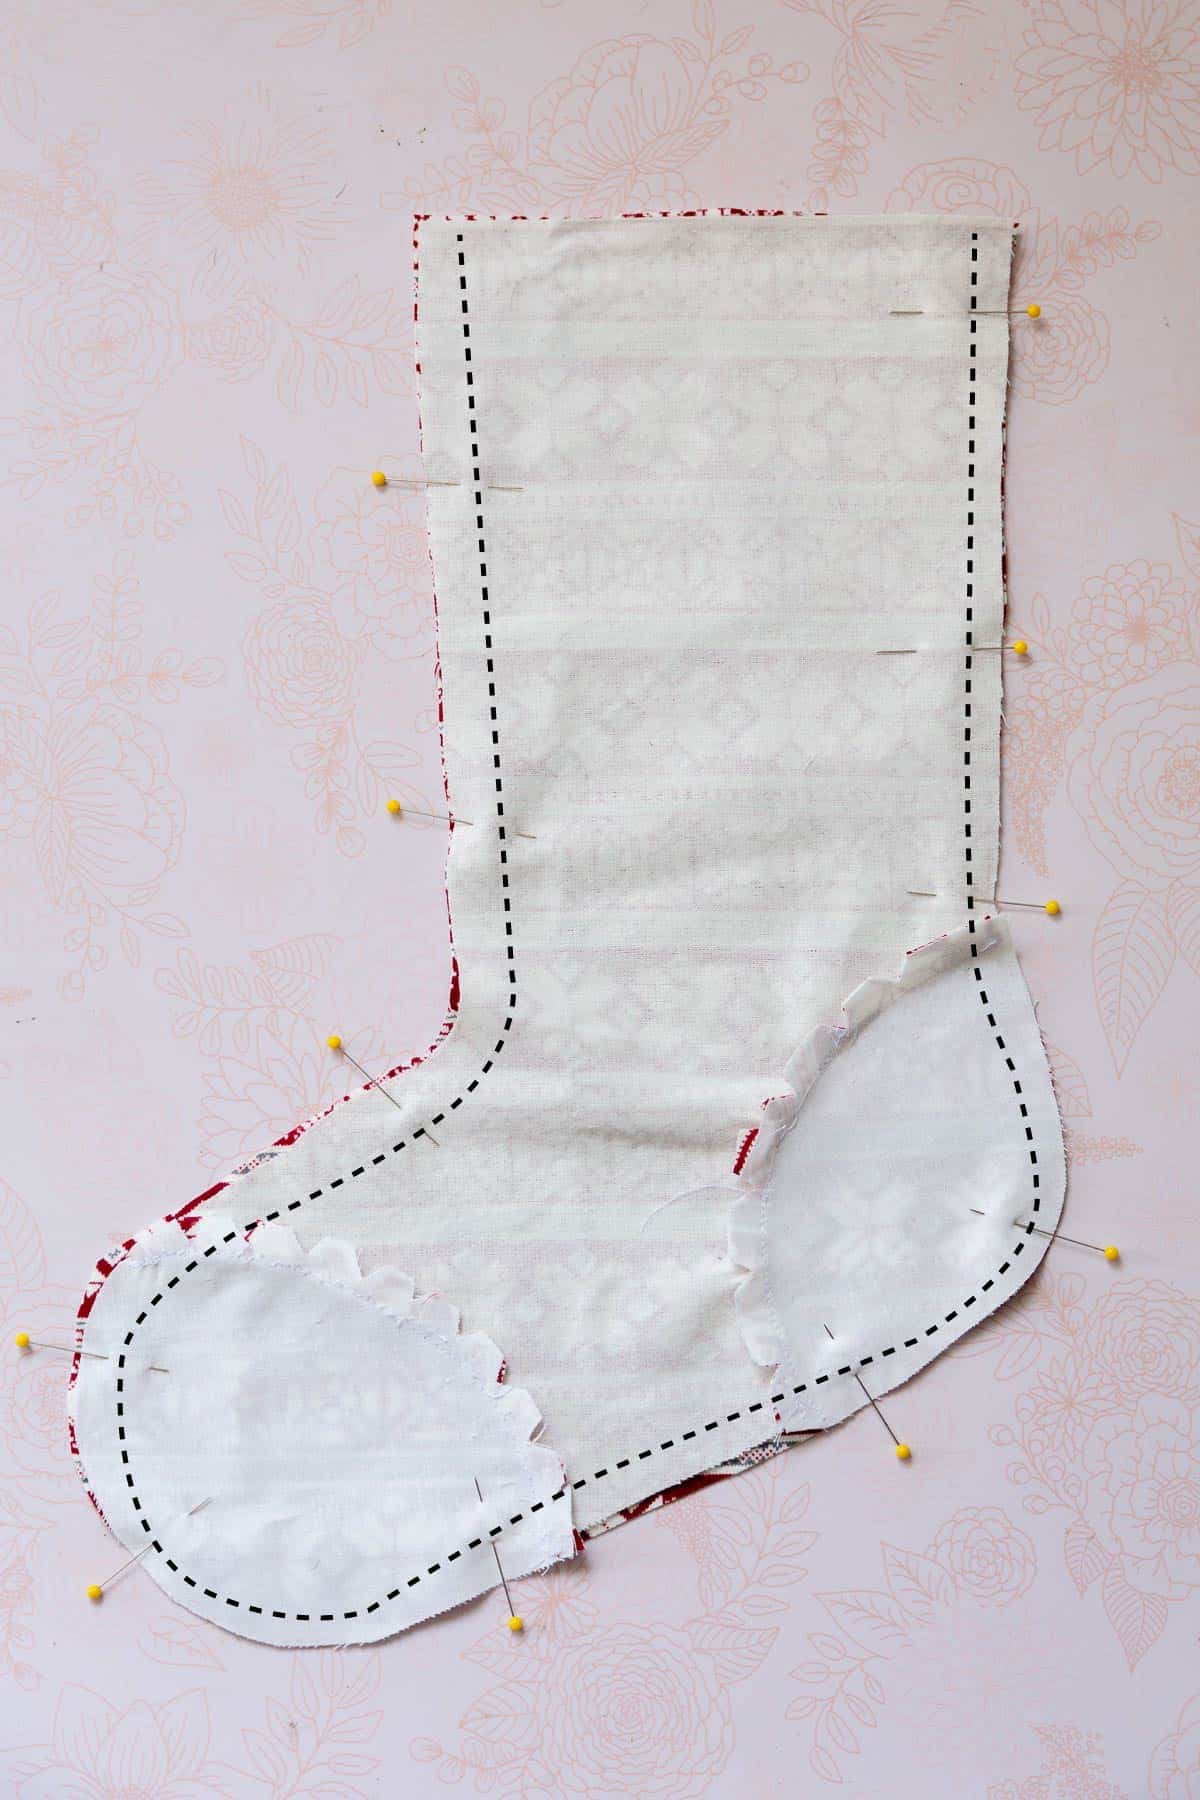
- Sew the outside pieces together
Place the Christmas Stocking front and back pieces RST together and sew 3/8" seam allowance along the outside edges leaving the top open. Cut notches in the curved pieces as shown.
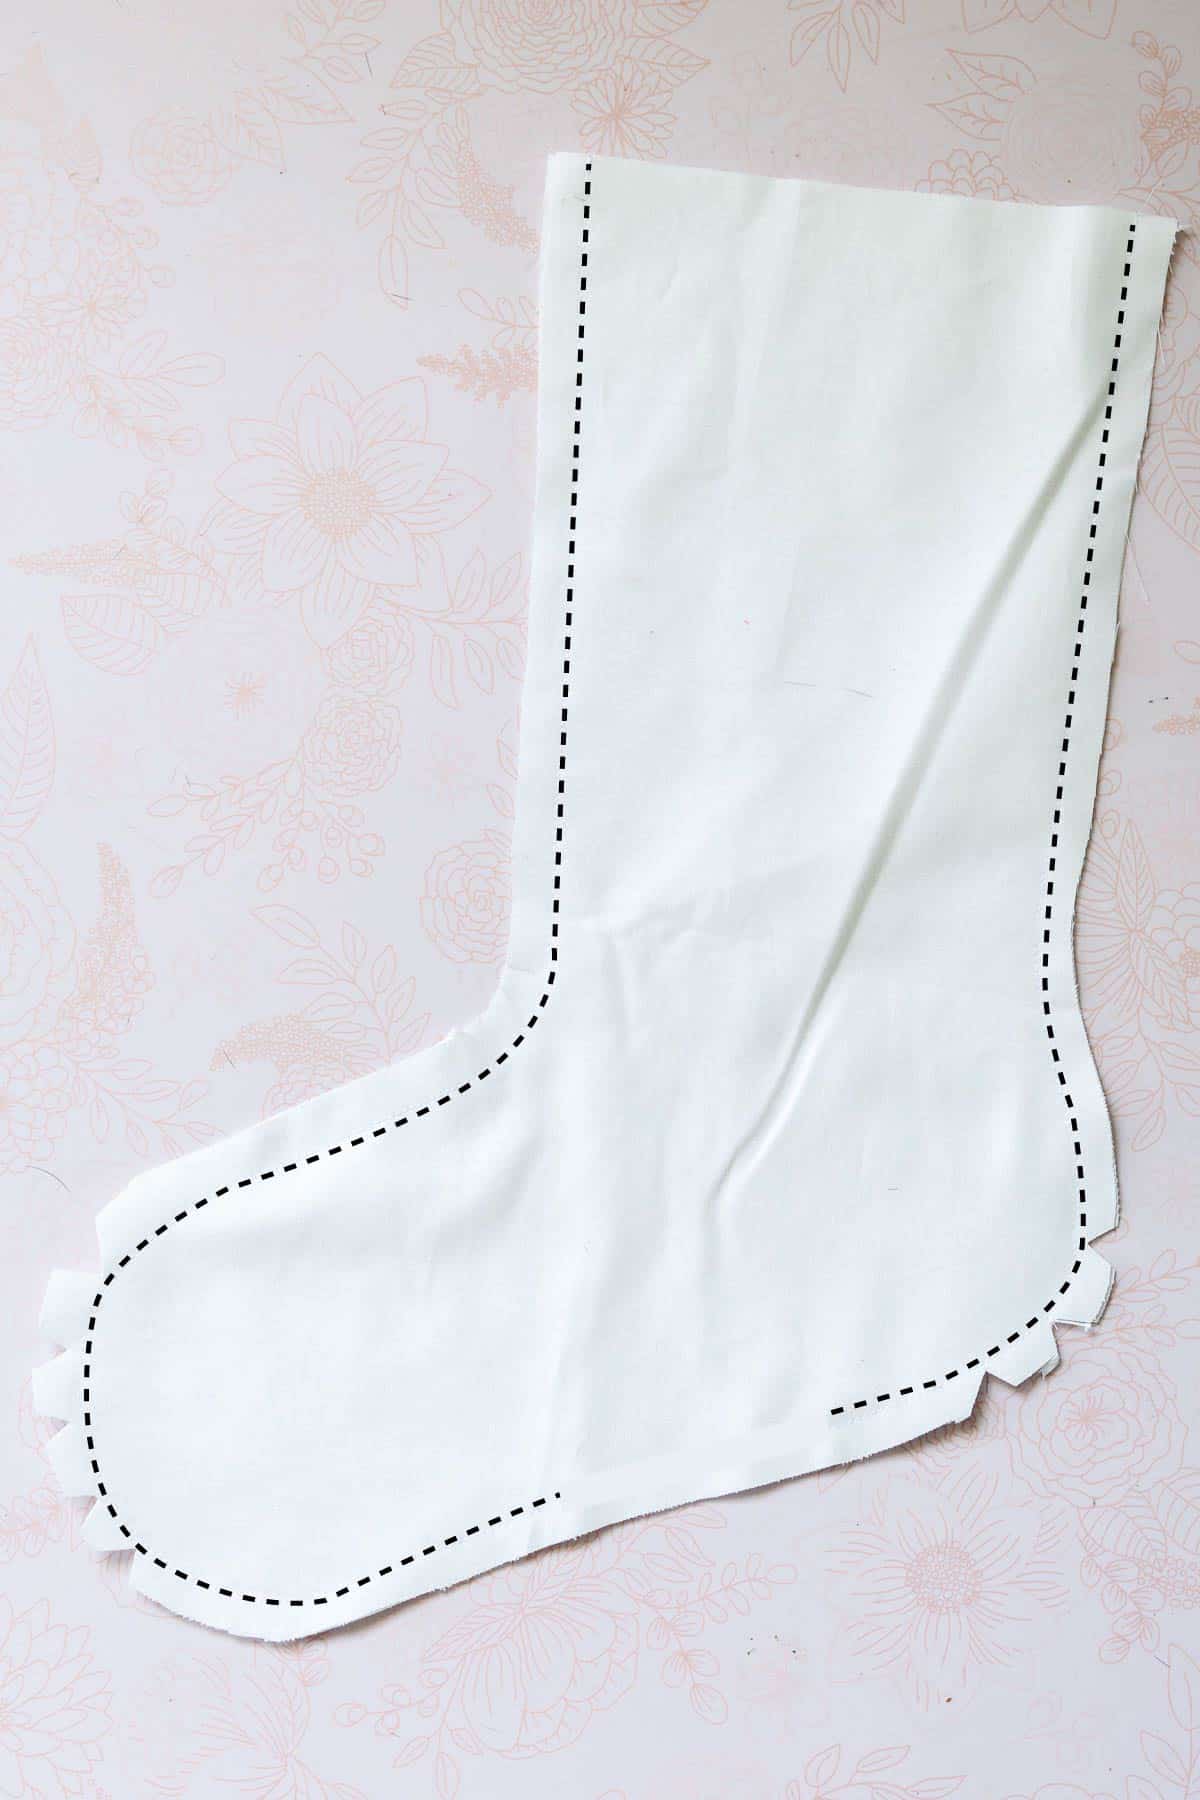
- Sew the lining pieces together
Place the Christmas Stocking lining pieces RST together and sew 3/8" seam allowance along the outside edges leaving a two to three-inch opening at the bottom. Cut notches in the curved pieces as shown.
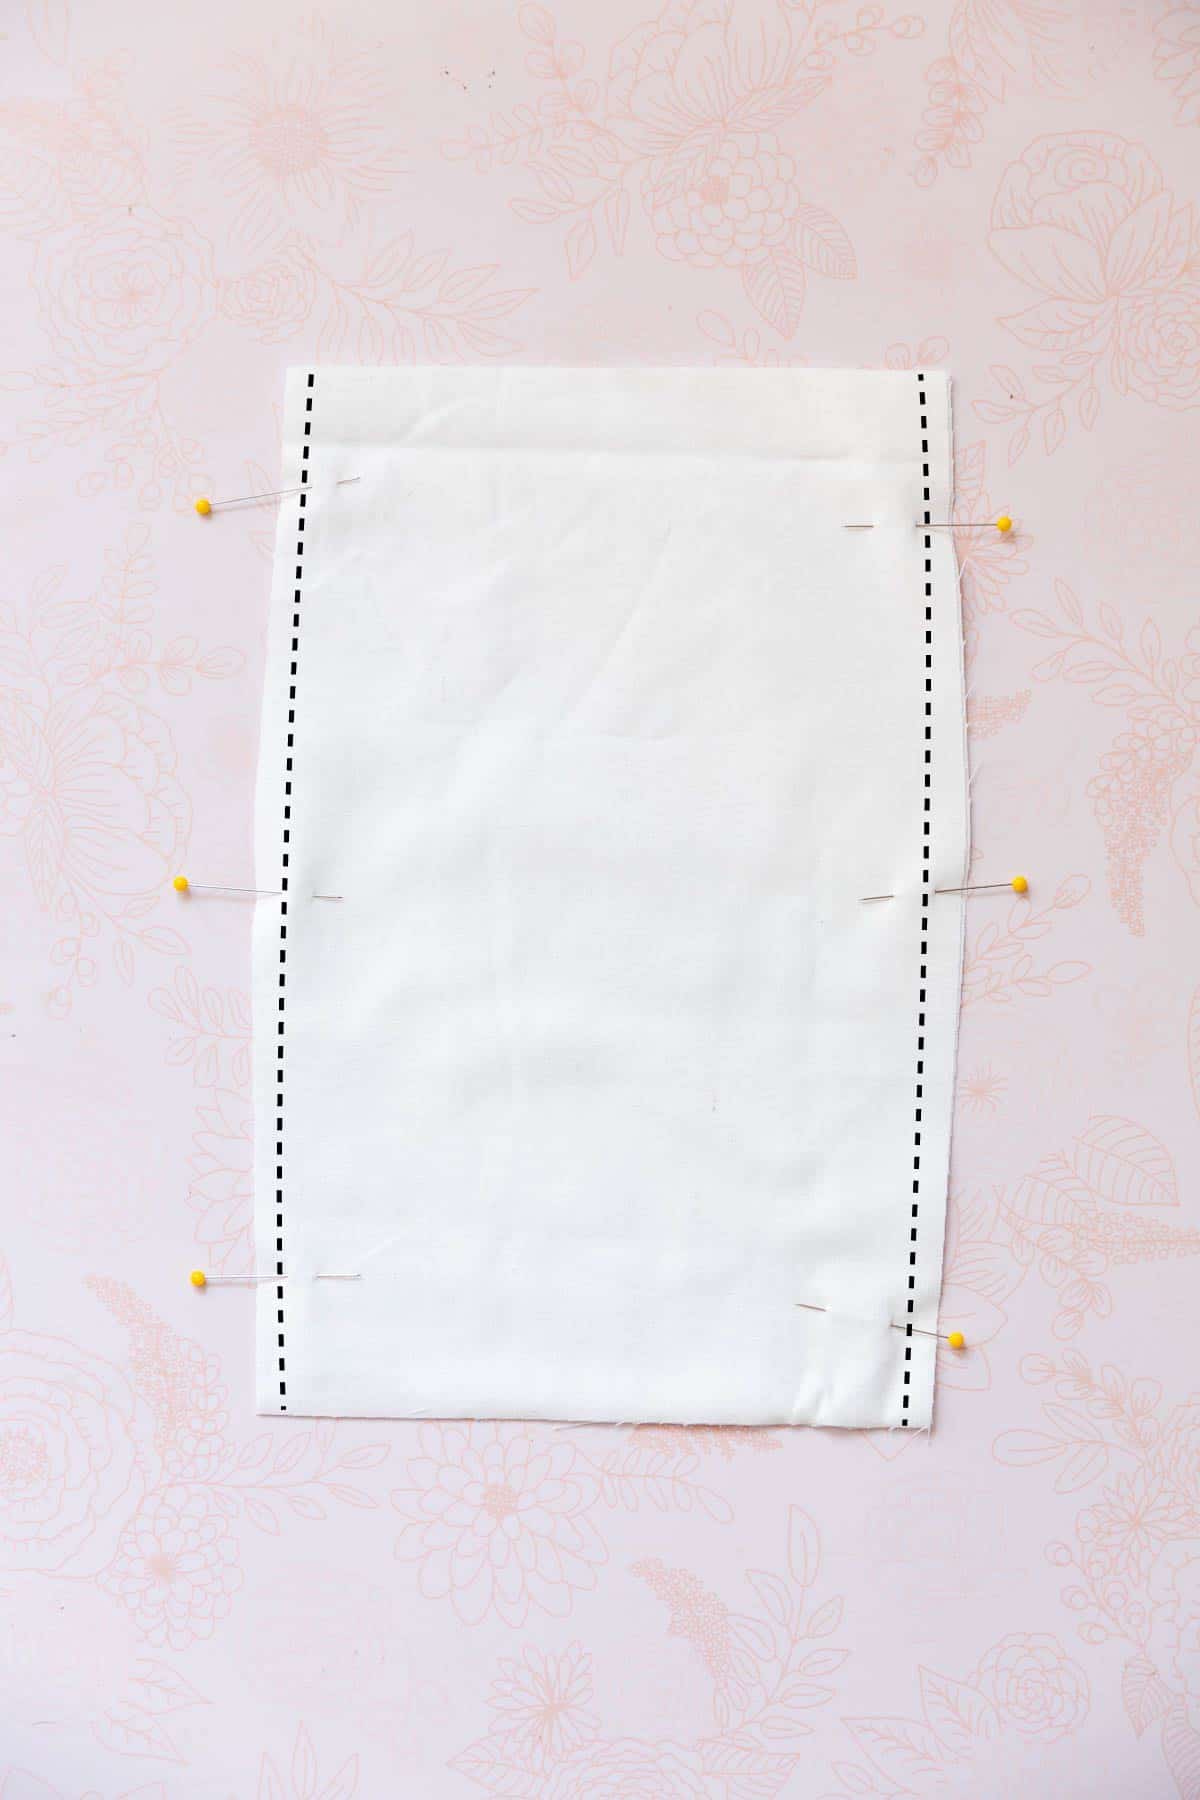
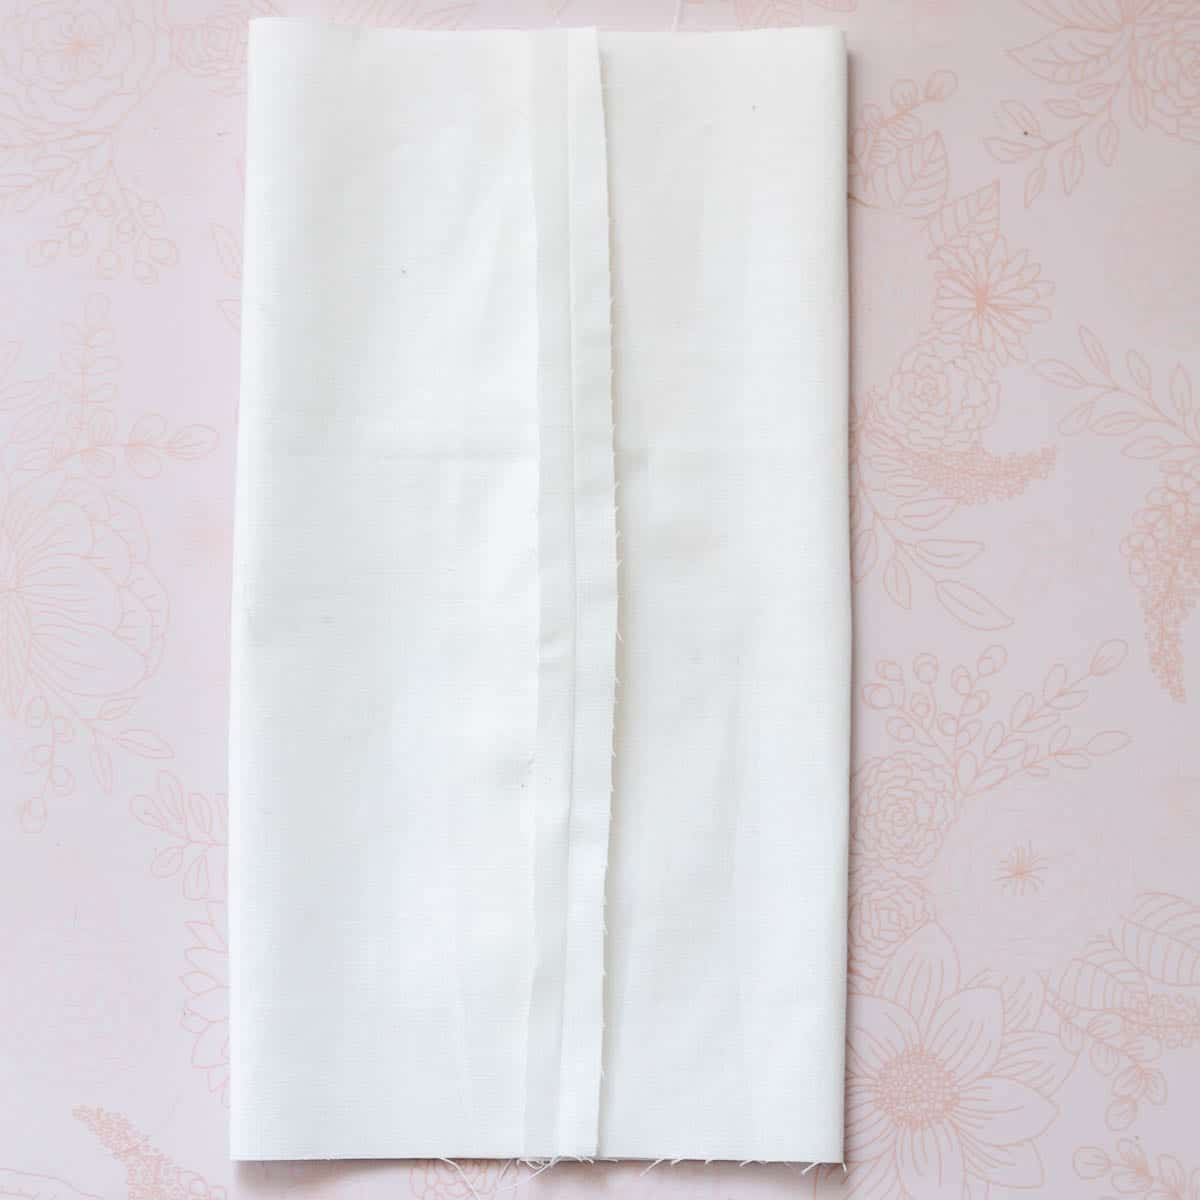
- Sew the cuff
Place the cuff pieces RST and sew 3/8" seam down both long sides.
- Press
Press the seam allowances open.
- Fold the cuff
Fold the cuff in half WST so the raw edges line up and the seam allowances face each other.
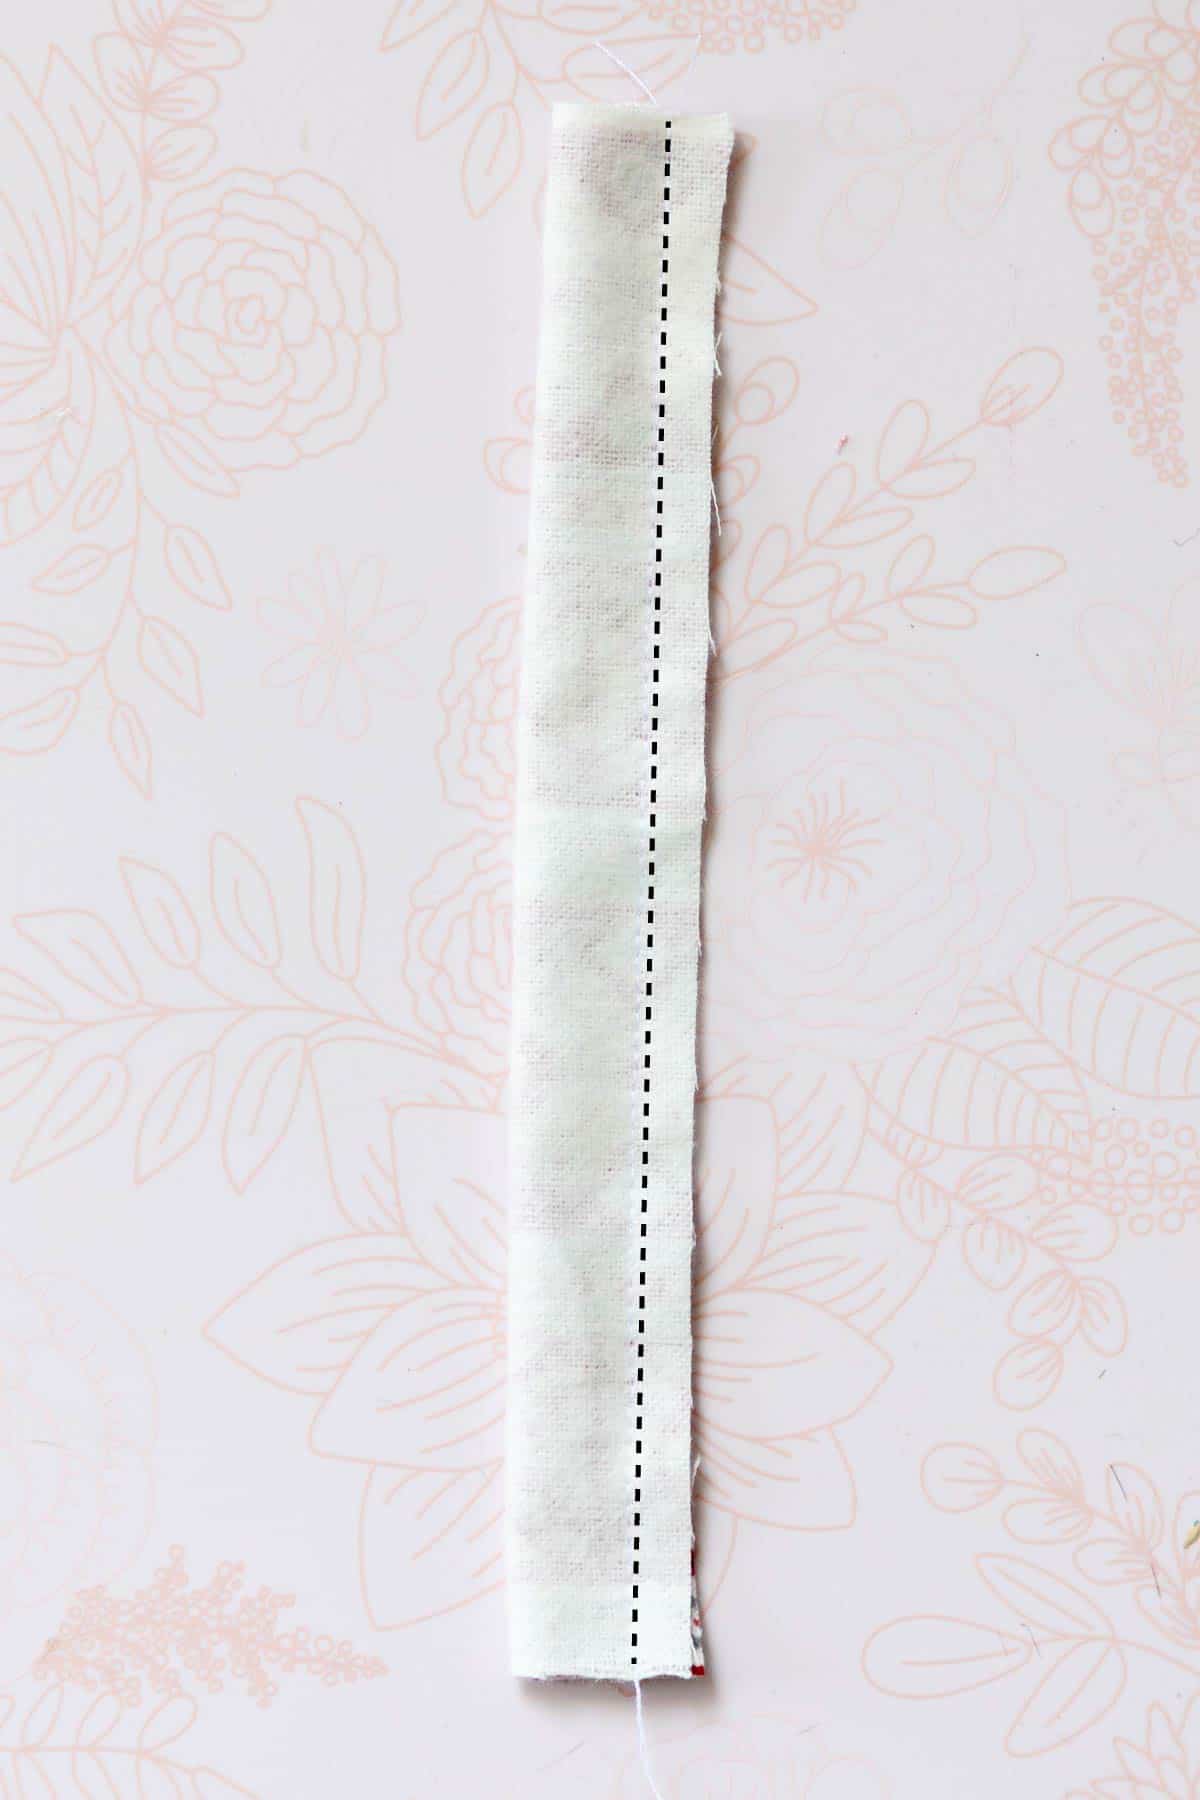
- Make the loop
Fold the hook piece RST along the long edge and sew a 1/4" seam allowance down the long edge. Turn right side out and press flat.
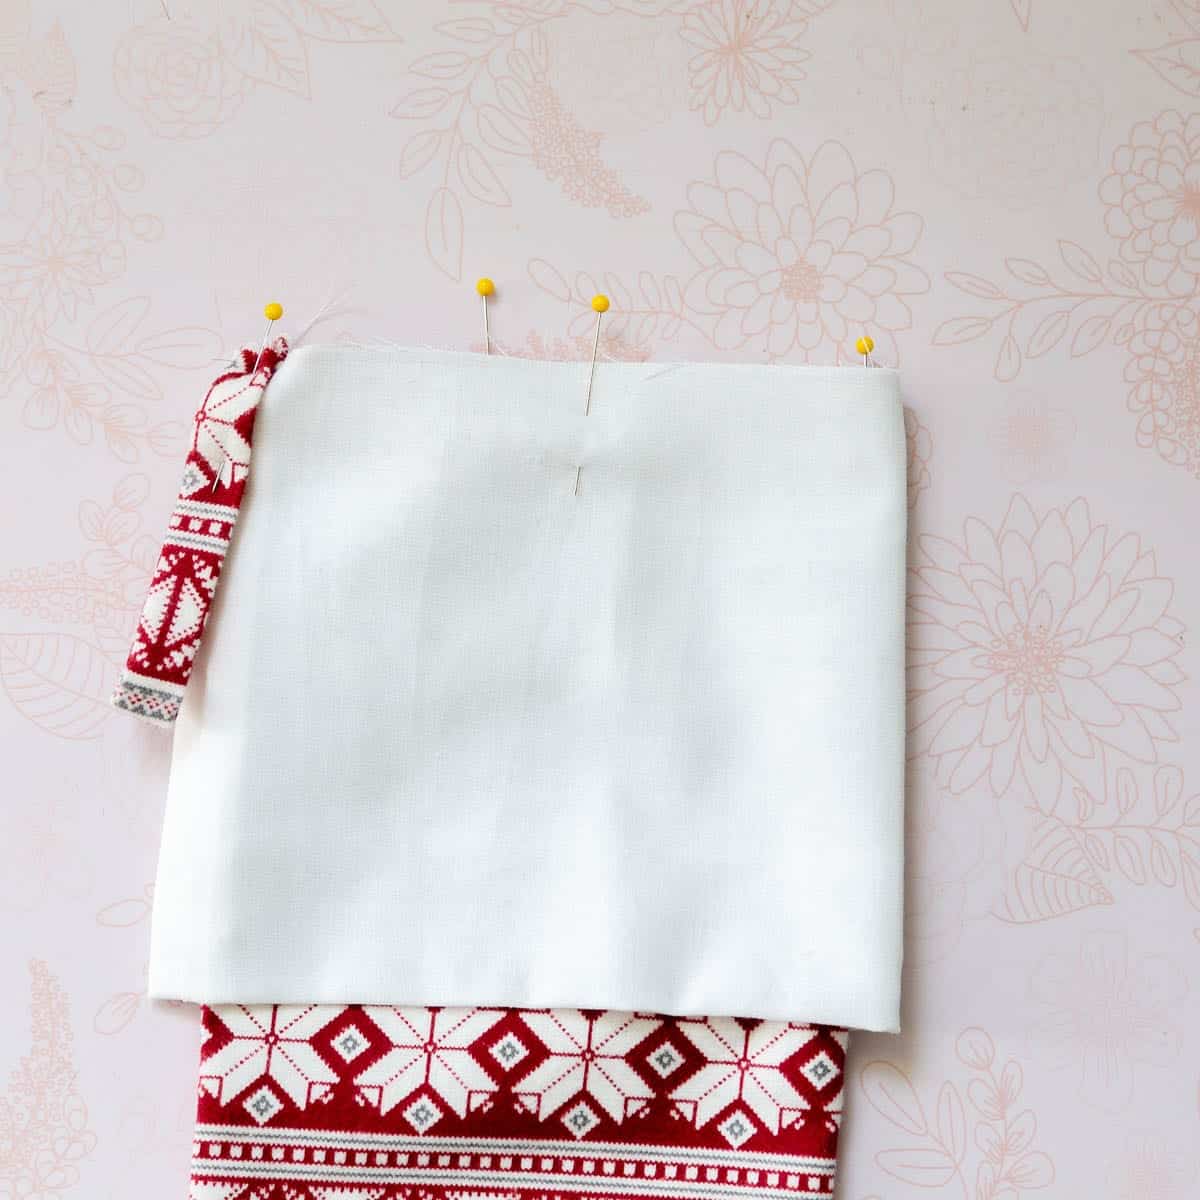
- Attach the cuff
Slide the cuff over the stocking with the right side of the stocking facing up. Line up the raw edges of the stocking and the cuff being sure to also line up the seam allowances on the sides and pin in place.
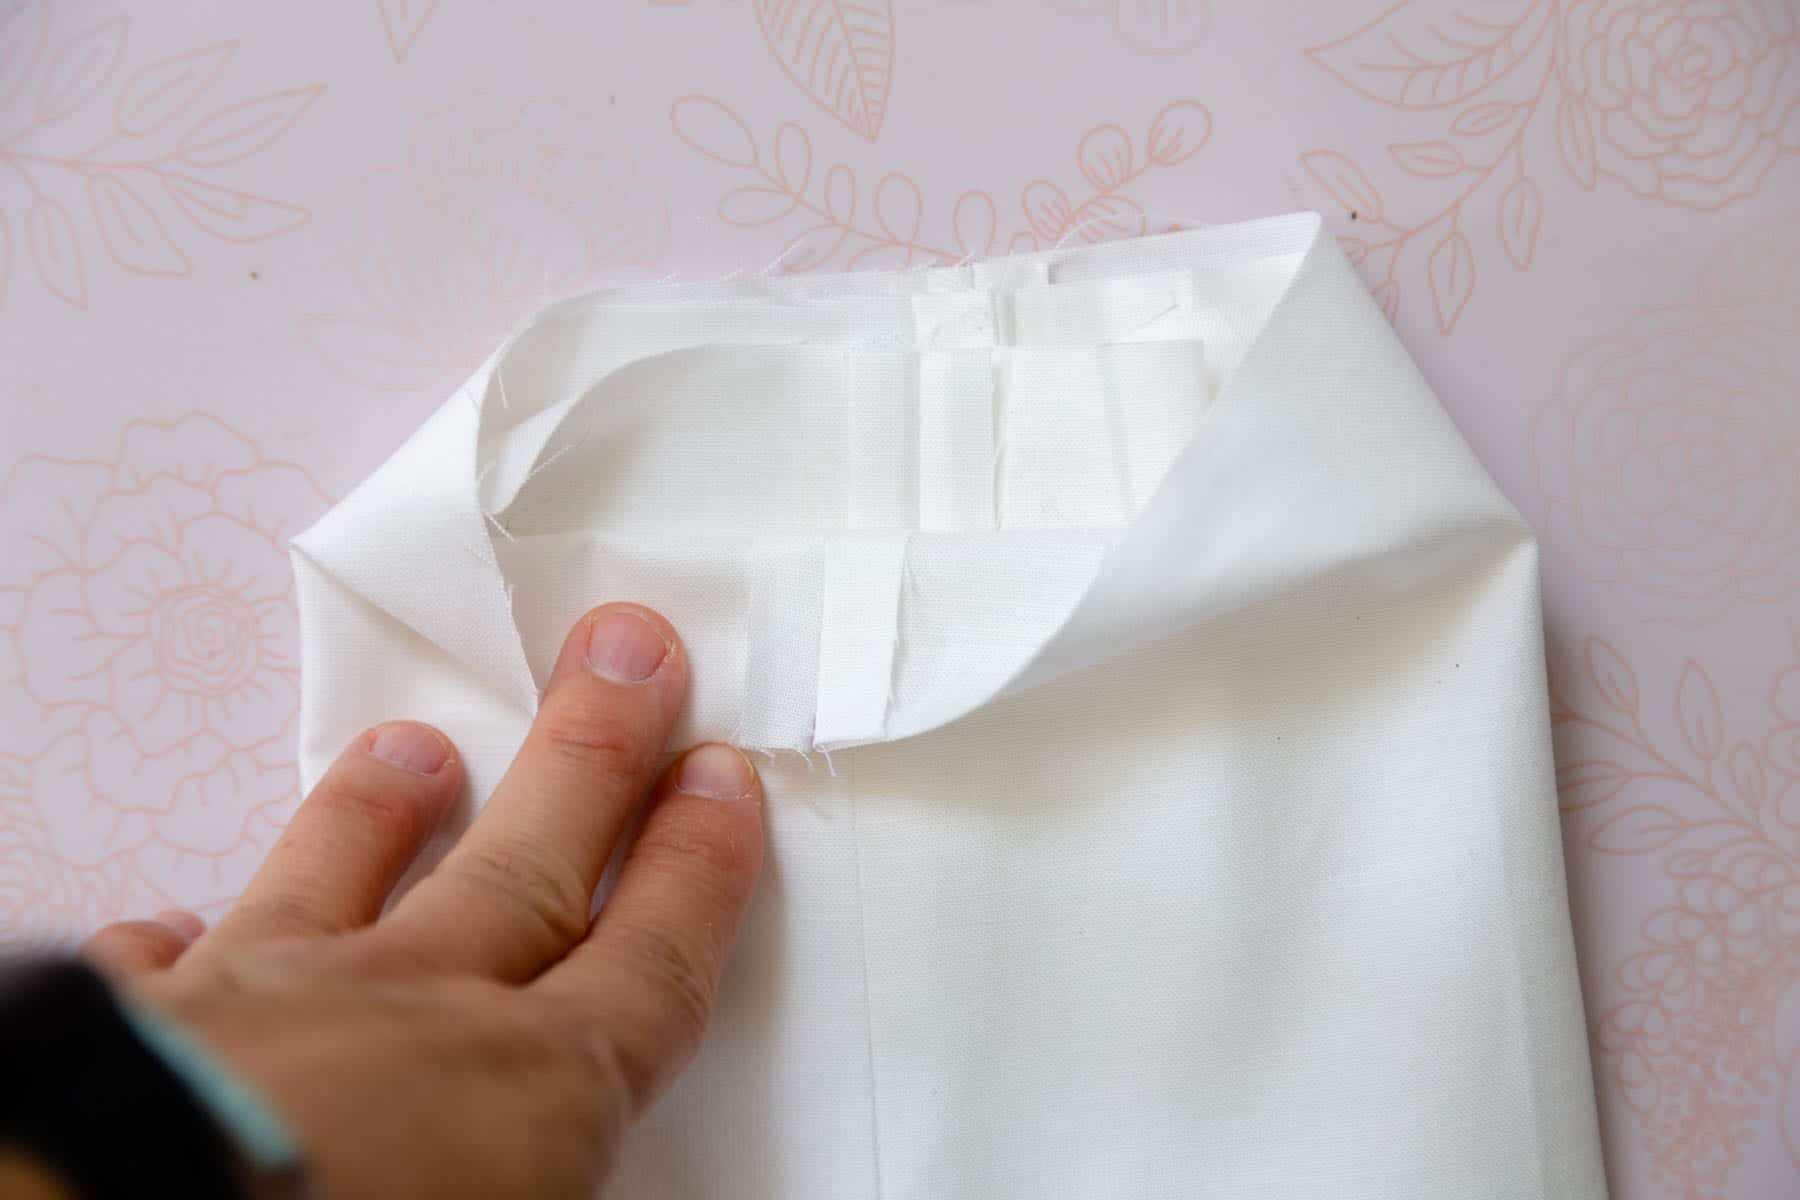
- Attach the loop
Pin the hook loop to the outside back edge at the seam allowance as shown.
- Attach the lining
Then slide the stocking lining over the stocking front, cuff, and hook loop with the stocking pieces facing RST.
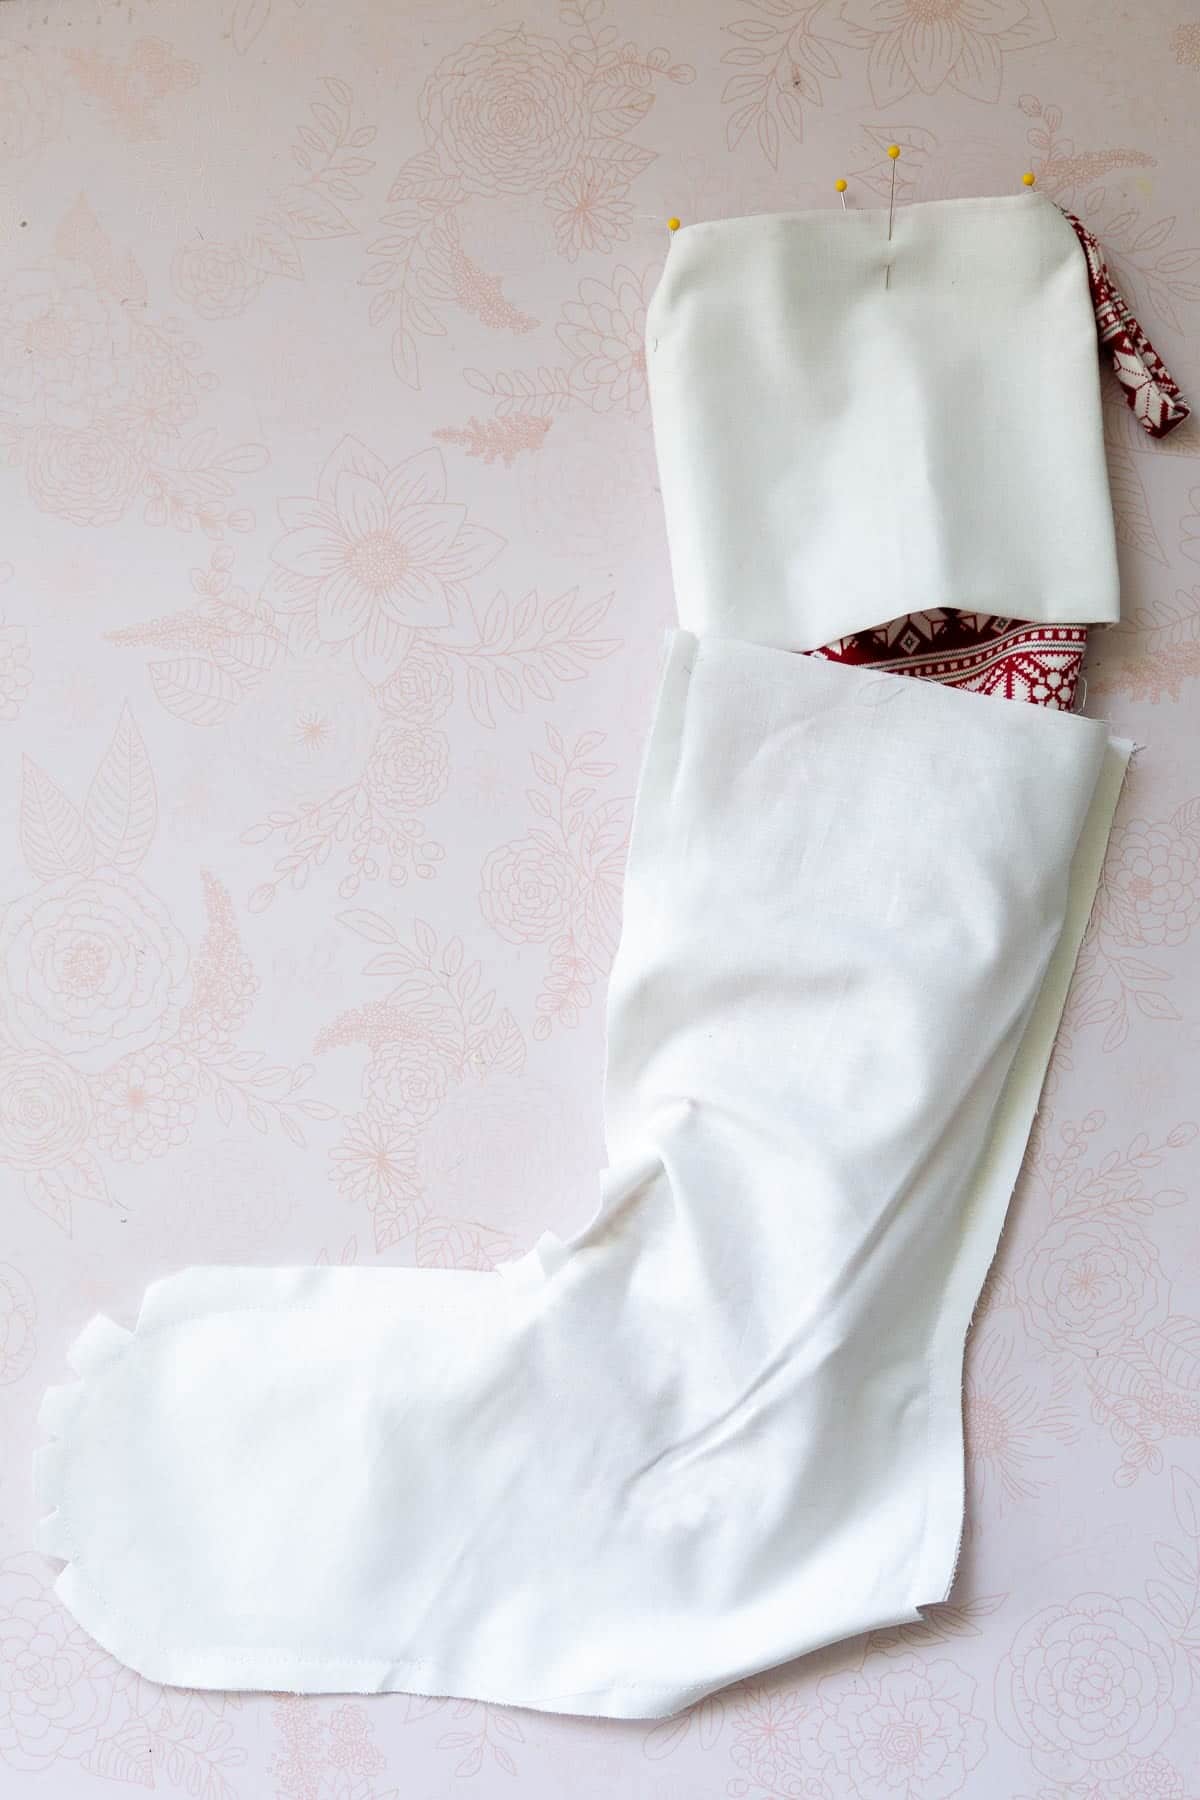
- Pin
Line up the raw edges and pin.

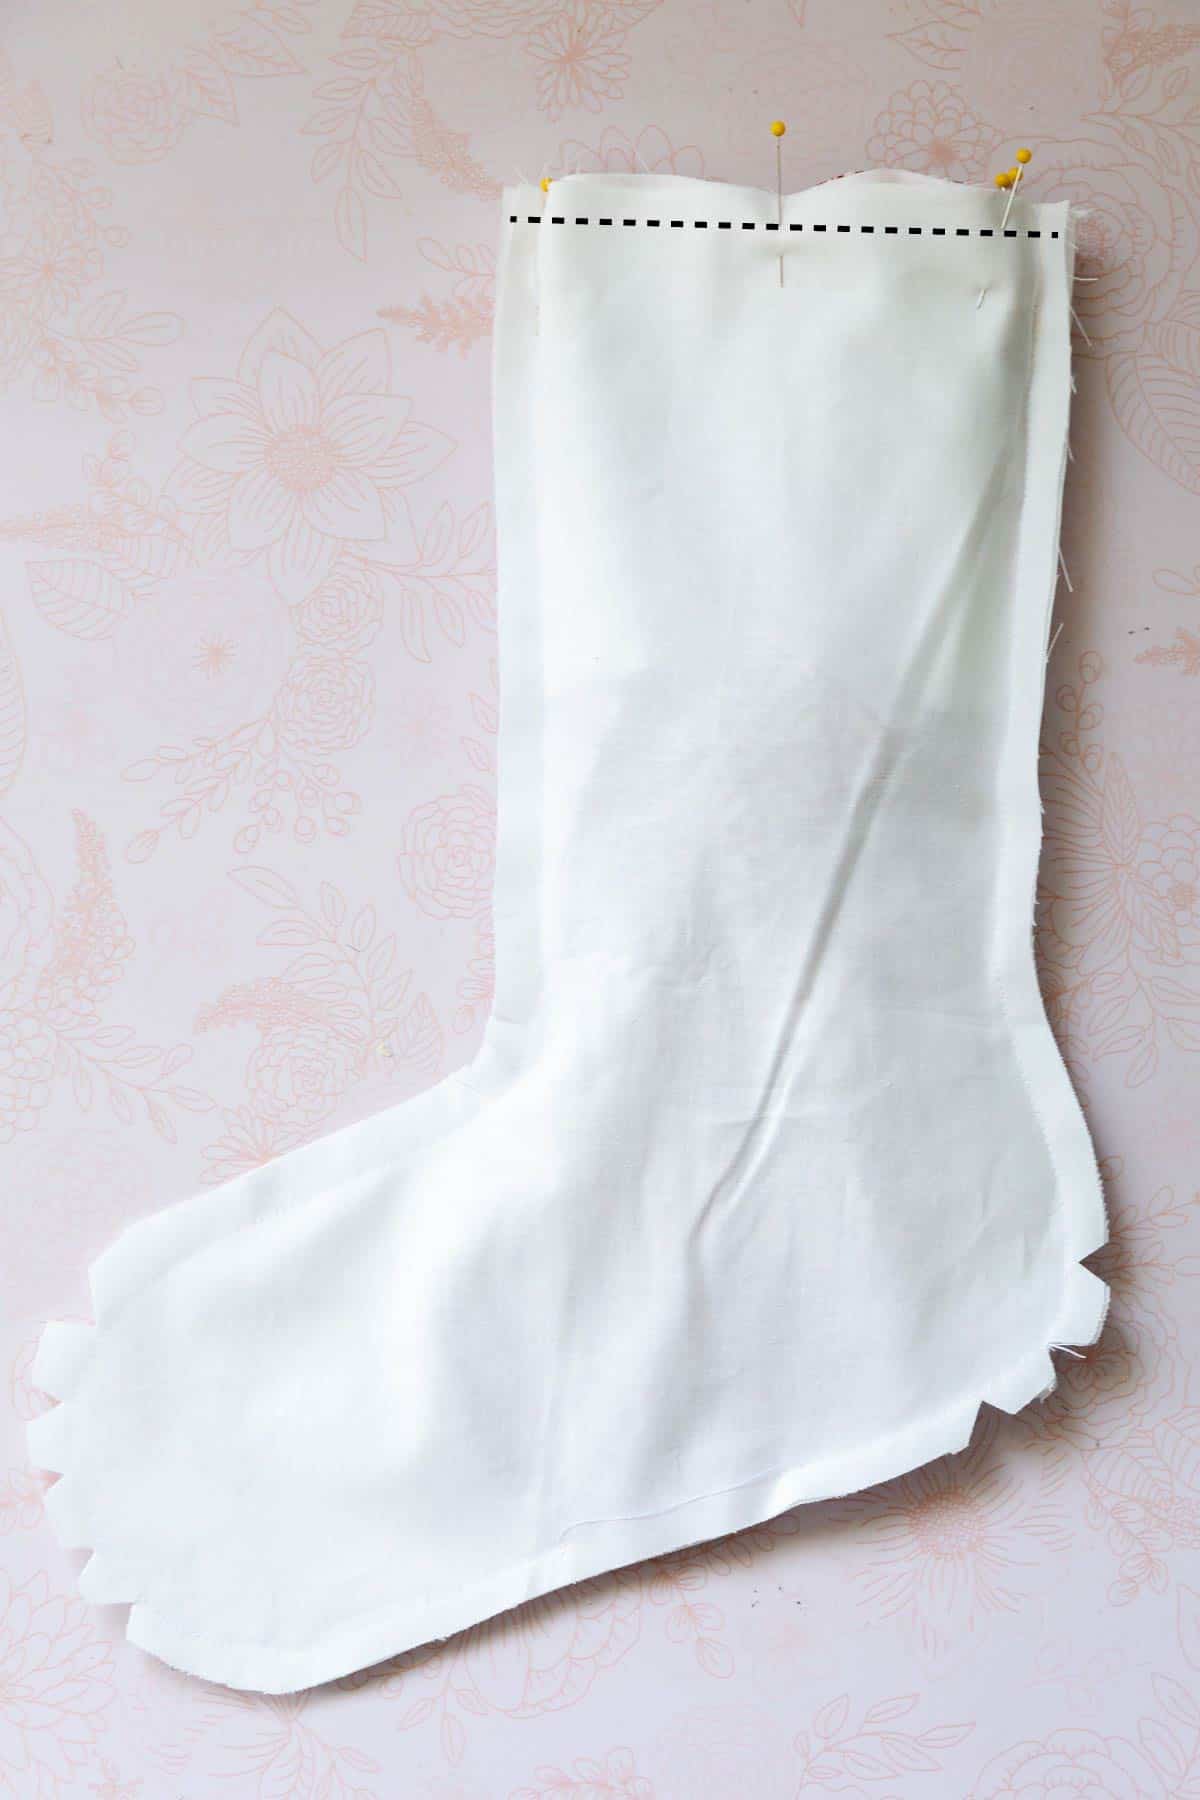
- Sew together
Sew around the entire top edge using a 3/8" seam allowance.
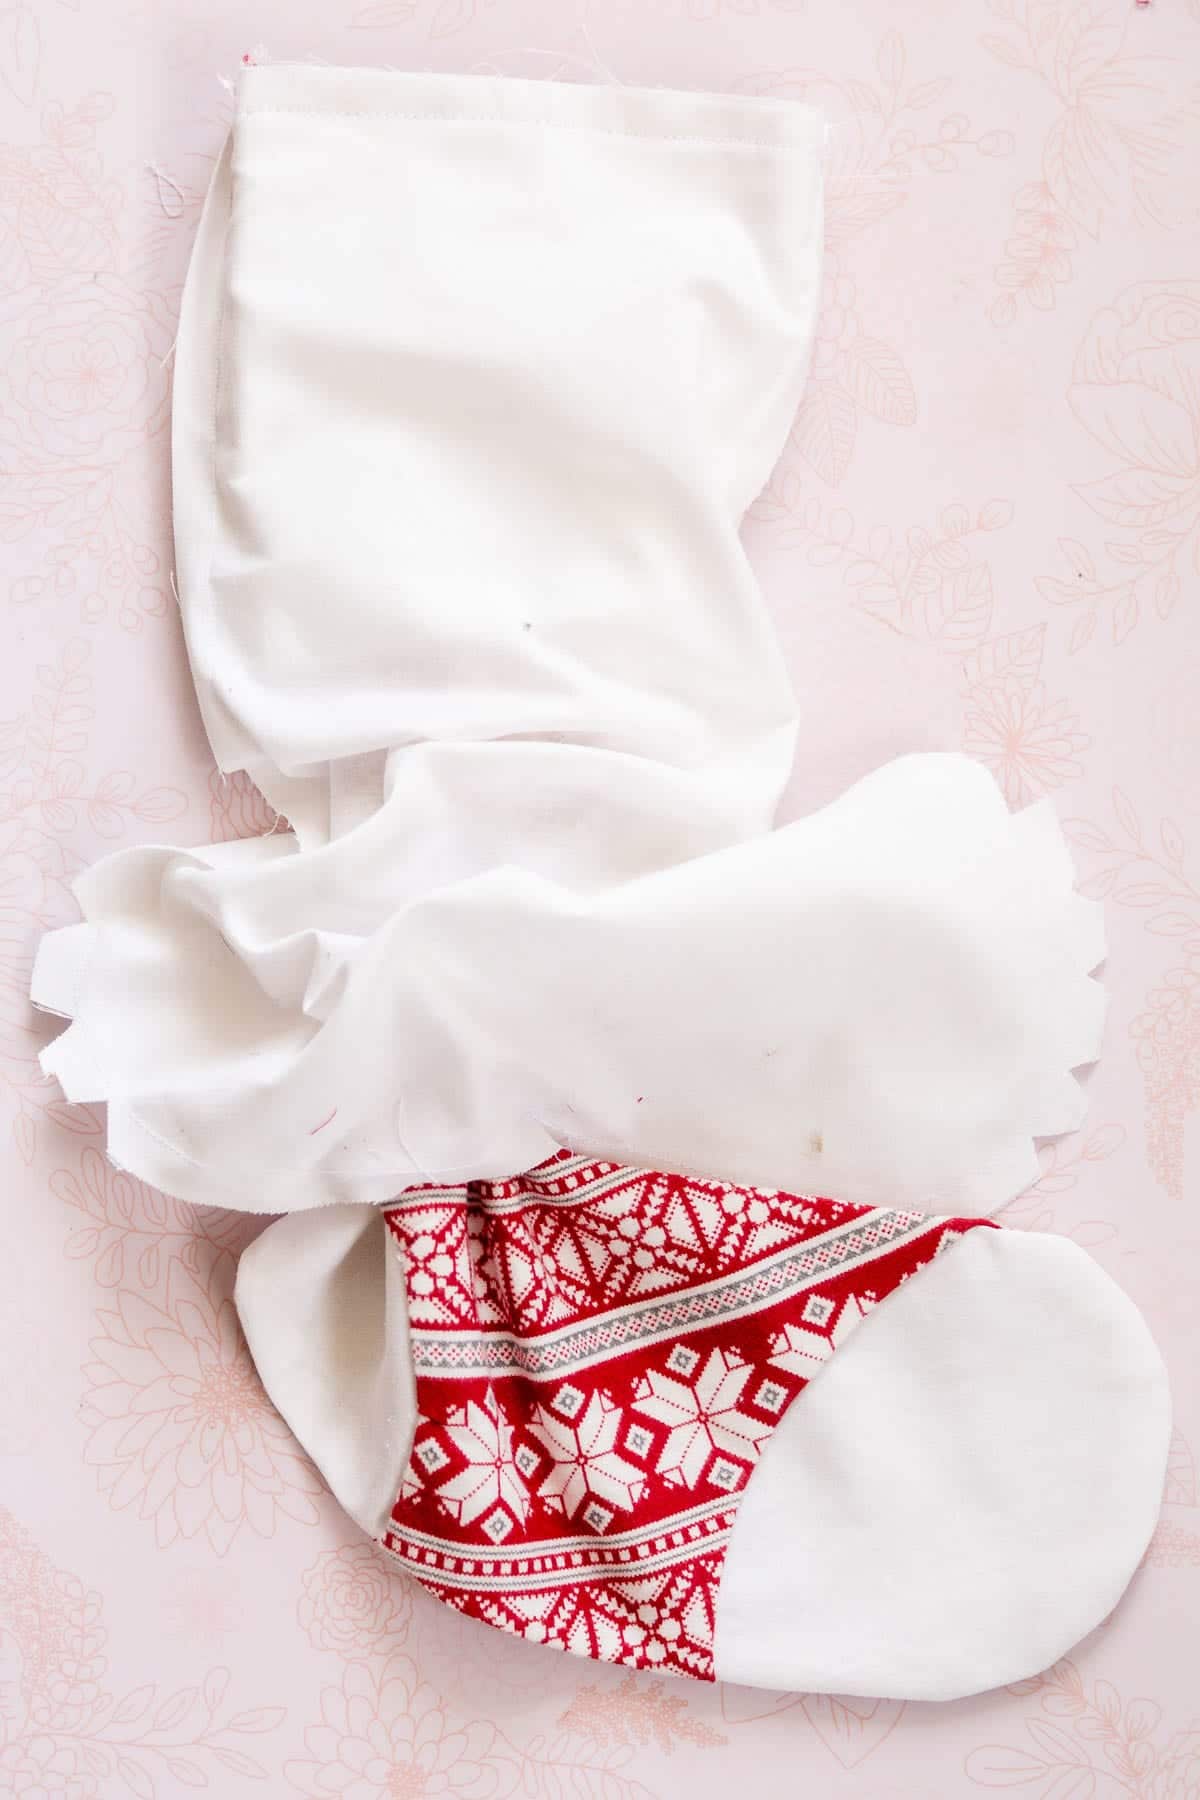
- Turn right side out
Turn the stocking right side out through the opening left in the bottom of the lining.
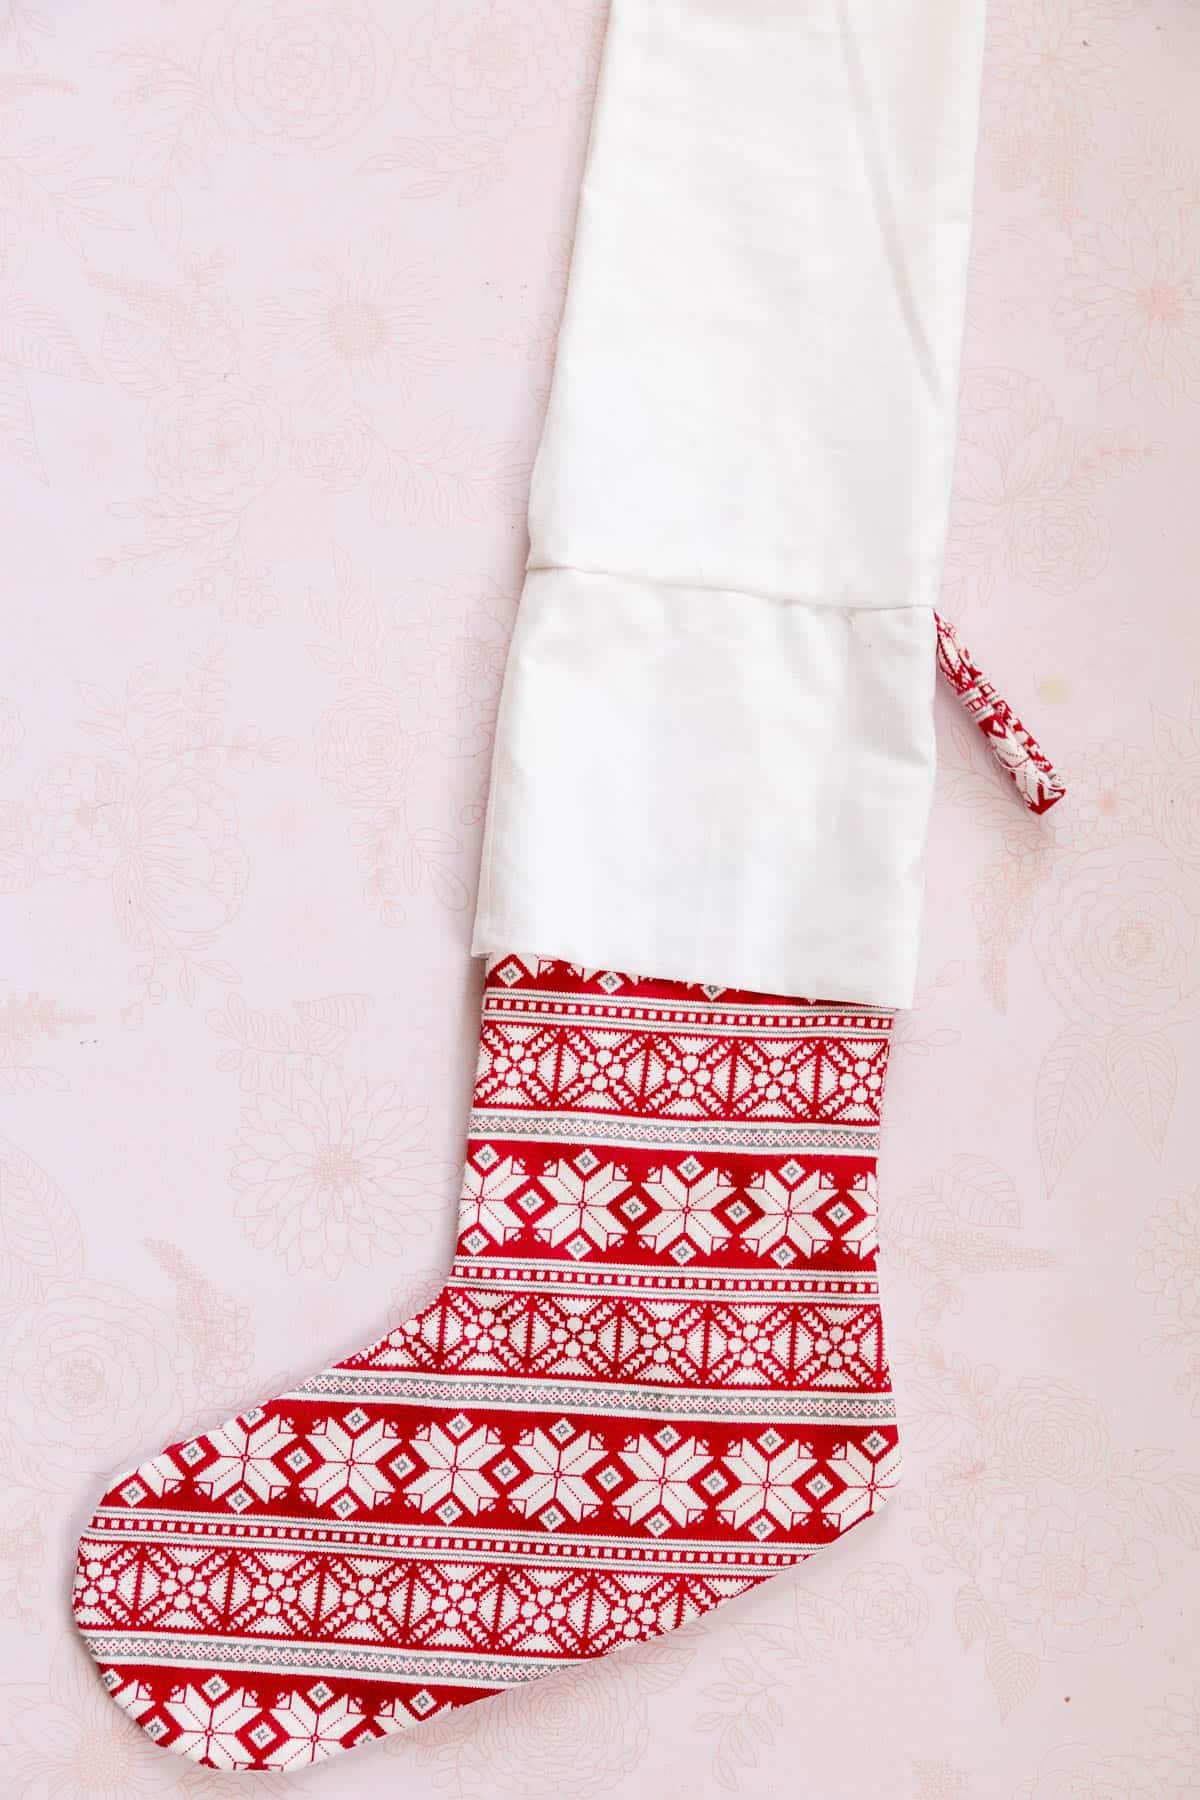
- Roll seam allowance flat
Pull the stocking all the way out as shown and roll the seam allowances flat so that it will lay nicely when tucked inside.
- Sew the opening closed
Tuck the raw edges of the lining inside and sew the opening closed. You can leave it as is, topstitch the opening closed, or hand stitch the opening closed for a more professional finish.

- Tuck lining inside
Tuck the lining inside the stocking.

- Press to finish
Press the outside of the stocking and cuff flat to finish.

***** YOU CAN FIND THE CHRISTMAS STOCKING SEWING PATTERN IN THE RESOURCE LIBRARY.

Watch the full-length video class with lots of tips here:
More Christmas Sewing Projects
- Quilted Christmas Stocking Pattern
- 25+ Christmas Sewing Projects
- 25+ Christmas Quilt Patterns
- Quilted Christmas Pot Holder Pattern
- Easy Stuffed Christmas Ornaments
- DIY Christmas Banner Tutorial

What are the dimensions of the finished stocking?