
Make a fun and colorful Christmas Stocking with this FREE Patchwork Quilted Christmas Stocking Sewing Pattern. Use fabric scraps or a mini charm pack to piece the Christmas stocking for a scrap happy crazy quilt Christmas Stocking.

Supplies needed to sew the Patchwork Quilt Christmas Stocking Pattern
- 2 Mini Charm Packs (2.5" squares) - Joann | Etsy |Amazon
- 1 Yard or 3 Fat Quarters Cotton Fabric for Back and Lining - Joann | Etsy |Amazon
- Scissors - Joann |Amazon |Etsy
- or Rotary Cutter - Joann |Amazon |Etsy
- Thread - Joann |Amazon | Etsy
- Sewing Machine Needles - Joann |Amazon | Etsy
- Sewing Machine - Joann | Amazon
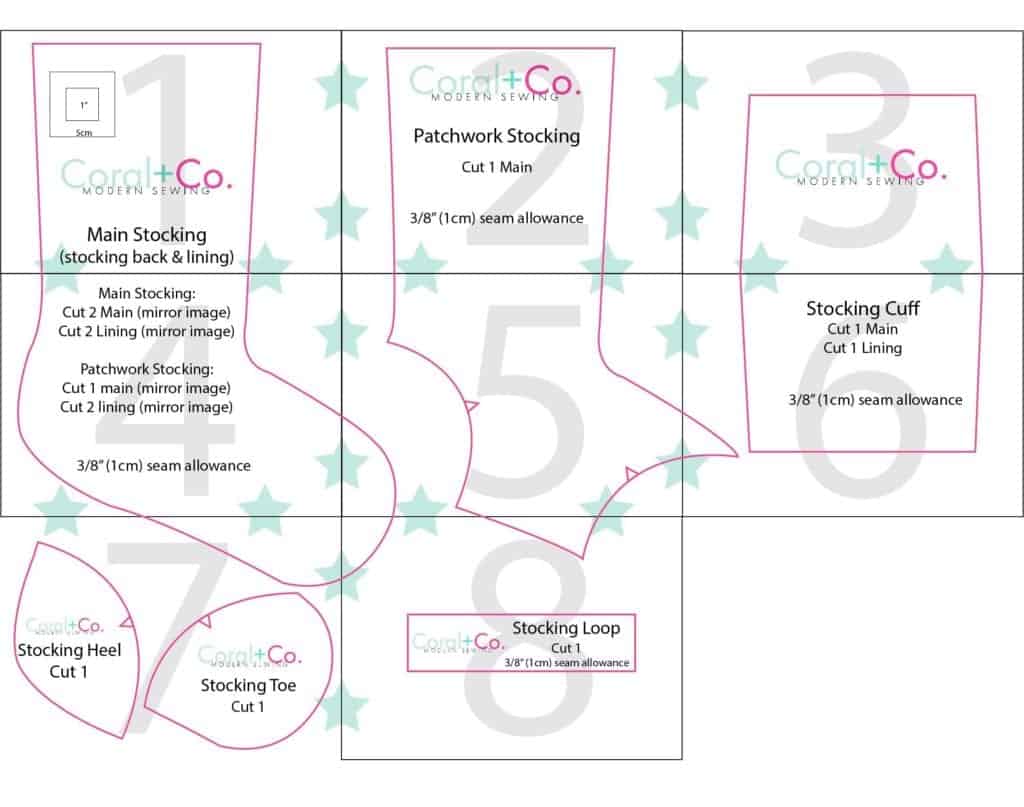
- Christmas Stocking Sewing Pattern (found in the Resource Library).
More Christmas Stocking Patterns
- Christmas Stocking with Toe and Heel Patch
- Quilted Christmas Stocking
- Faux Fur Cuff Christmas Stocking
- 25+ Christmas Stocking Patterns
Patchwork Quilt Christmas Stocking Pattern Instructions
- Step 1 - Download, print, and tape together the Christmas Stocking Sewing Pattern. The pattern can be found in the Resource Library.
- Step 2 - Cut: one of the stocking main pieces and two of the stocking lining pieces.
- Step 3 - Start by chain piecing your mini charm squares into columns. There will be six columns and 9 rows.
- Step 4 - Piece the columns into rows and press the seams so the first row seams face outward and the second-row seams face inward.
- Step 5 - For the loop piece together four 2.5" charm squares in a column.
- Step 6 - Cut the Stocking front pattern out of the patchwork rectangle. Depending on how many pieces your mini charm pack has you can make the patchwork piece in an L shape using 44 - 2.5" pieces.
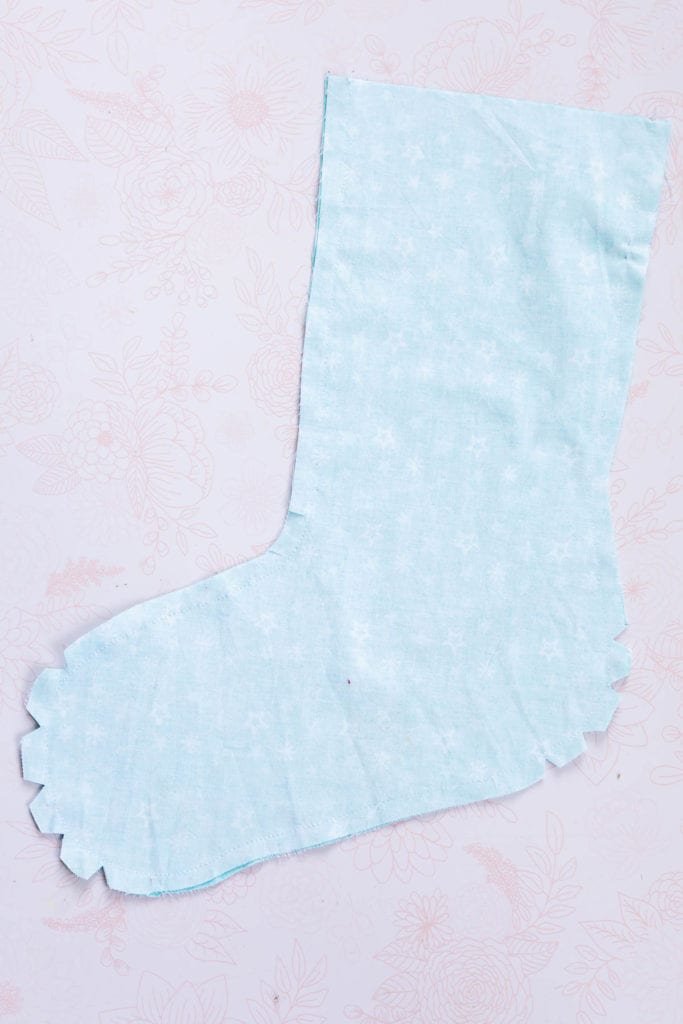
- Step 7 - Place the Christmas Stocking front and back pieces RST together and sew 3/8" seam allowance along the outside edges leaving the top open. Trim notches in the curves.
- Step 8 - Place the Christmas Stocking lining pieces RST together and sew 3/8" seam allowance along the outside edges leaving a two to three-inch opening at the bottom. Cut notches in the curved pieces as shown.
- Step 9 - Turn the stocking right side out and press.
- Step 10 - Fold the pieced hook strip RST along the long edge and sew a 1/4" seam allowance down the long edge. Turn right side out and press flat.
- Step 11 - Place the Christmas Stocking lining pieces RST together and sew 3/8" seam allowance along the outside edges leaving a two to three-inch opening at the bottom. Cut notches in the curved pieces as shown.
- Step 12 - Pin the hook loop to the outside back edge at the seam allowance as shown.
- Step 13 - Sew around the entire top edge using a 3/8" seam allowance.
- Step 14 - Turn the stocking right side out through the opening left in the bottom of the lining.
- Step 15 - Pull the stocking all the way out as shown and roll the seam allowances flat so that it will lay nicely when tucked inside.
- Step 16 - Tuck the raw edges of the lining inside and sew the opening closed. You can leave it as is, topstitch the opening closed, or hand stitch the opening closed for a more professional finish.
- Step 17 - Tuck the lining inside the stocking.
- Step 18 - Press the outside of the stocking flat to finish.
Step 1 - Download, print, and tape together the Christmas Stocking Sewing Pattern. The pattern can be found in the Resource Library.
Step 2 - Cut: one of the stocking main pieces and two of the stocking lining pieces.
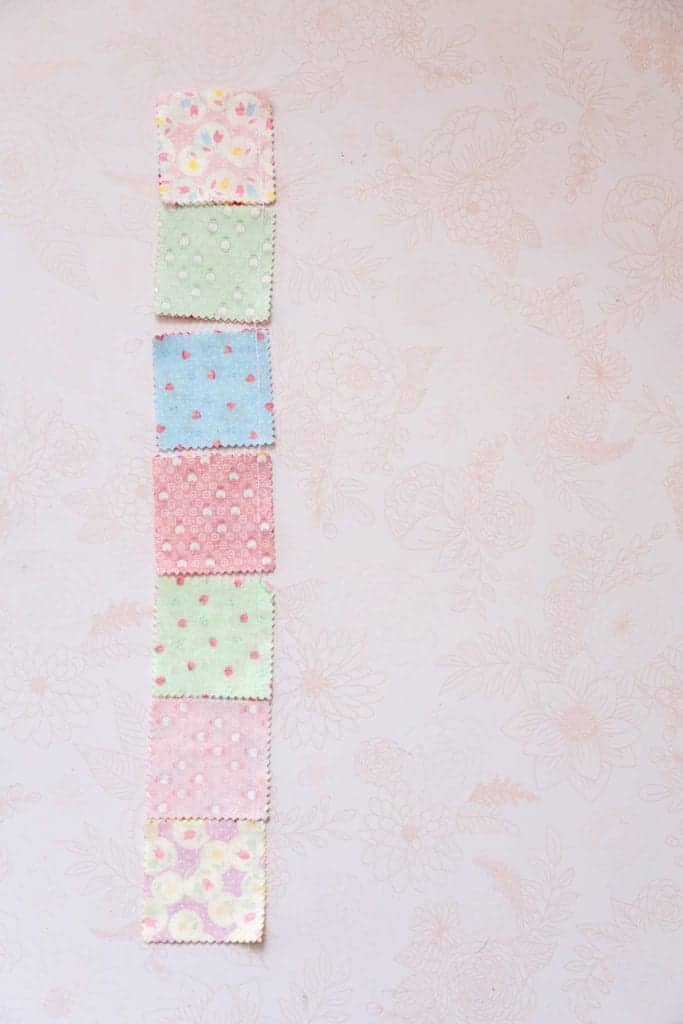
Step 3 - Start by chain piecing your mini charm squares into columns. There will be six columns and 9 rows.
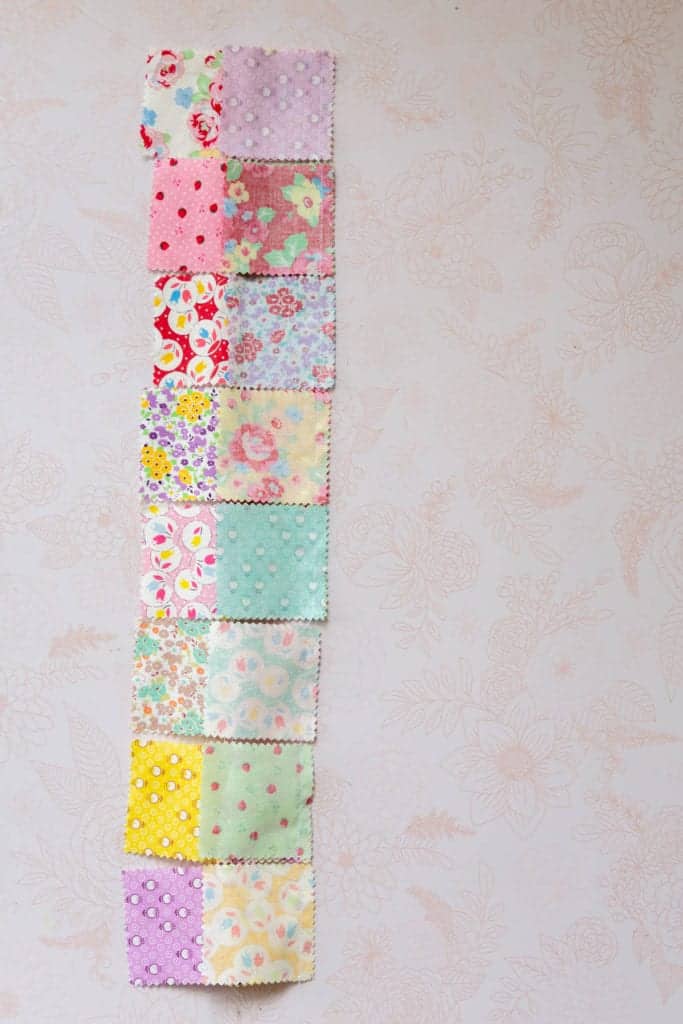
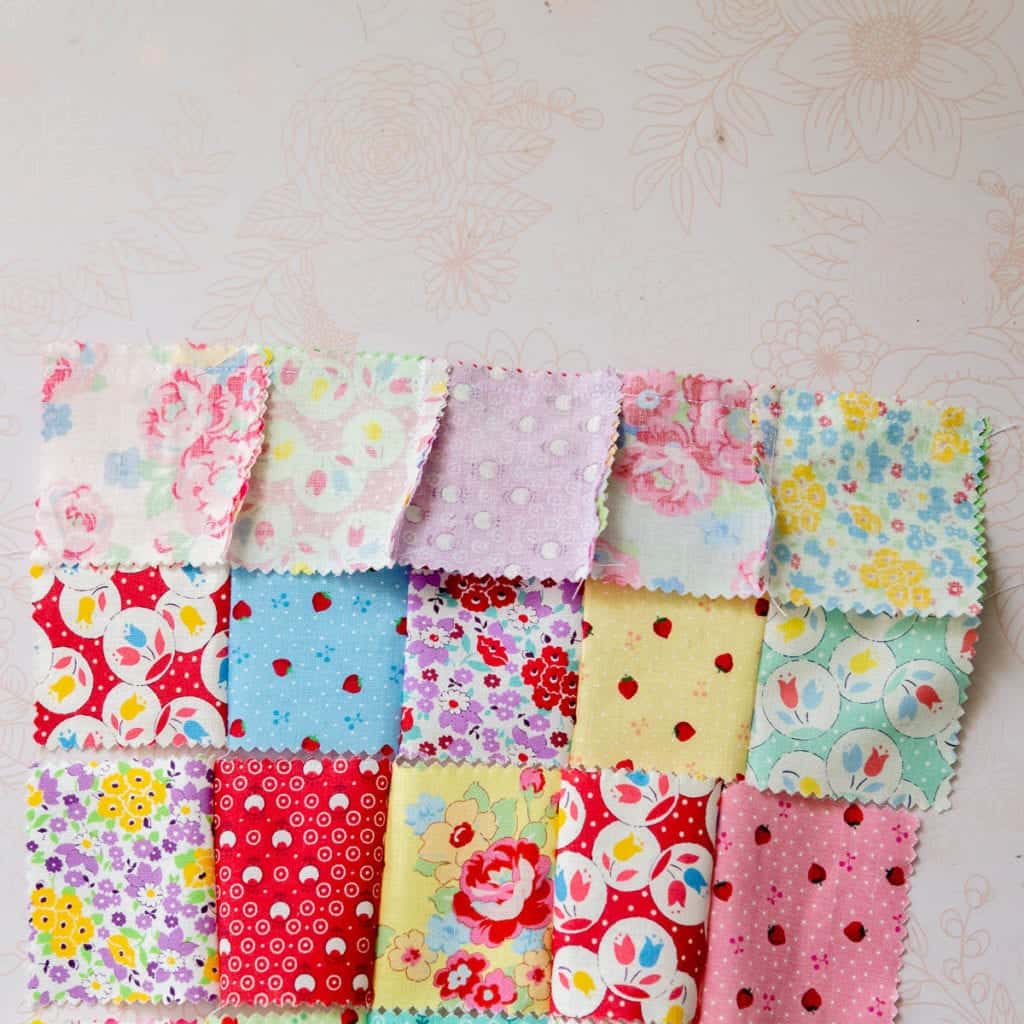
Step 4 - Piece the columns into rows.
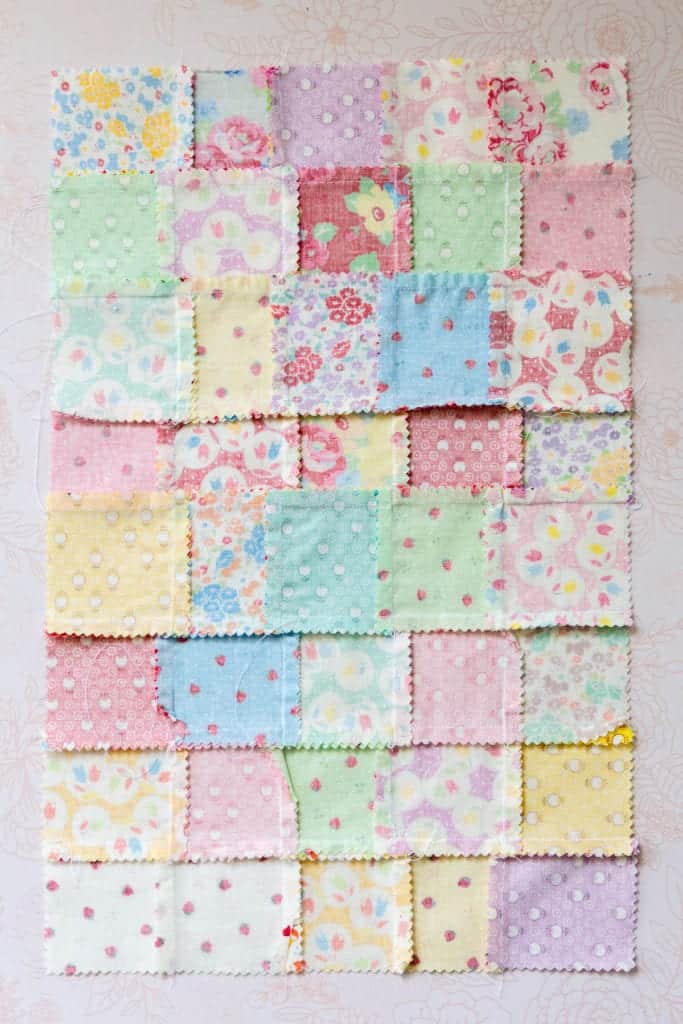
Step 5 - Press the seams so the first row seams face inward and the second-row seams face outward as shown above.
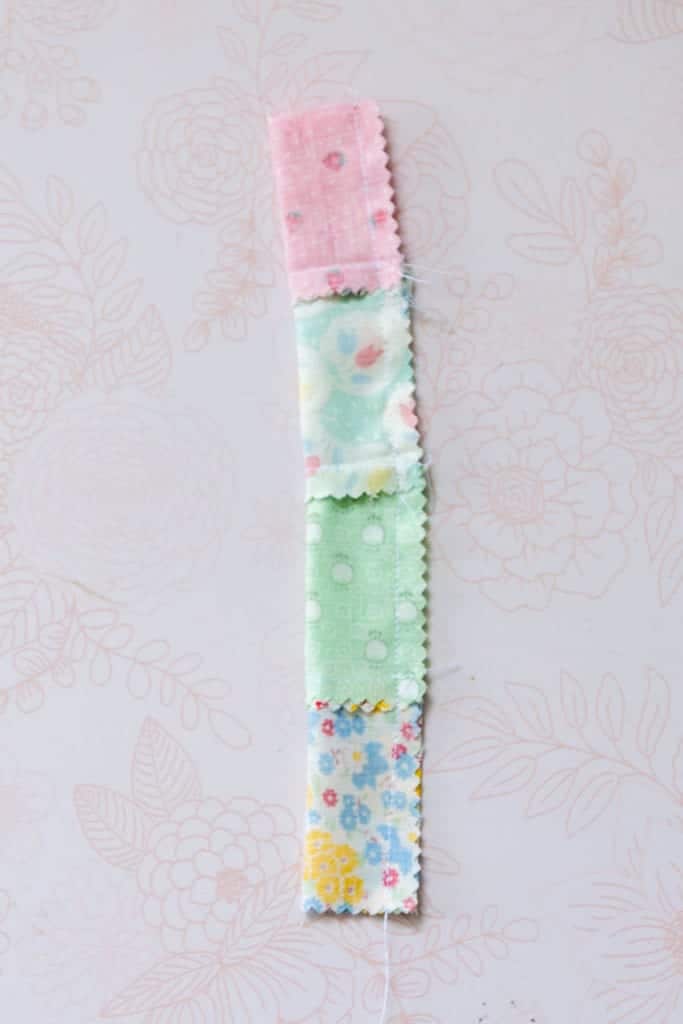
Step 6 - For the loop piece together four 2.5" charm squares in a column. Fold the pieced hook strip RST along the long edge and sew a 1/4" seam allowance down the long edge. Turn right side out and press flat.
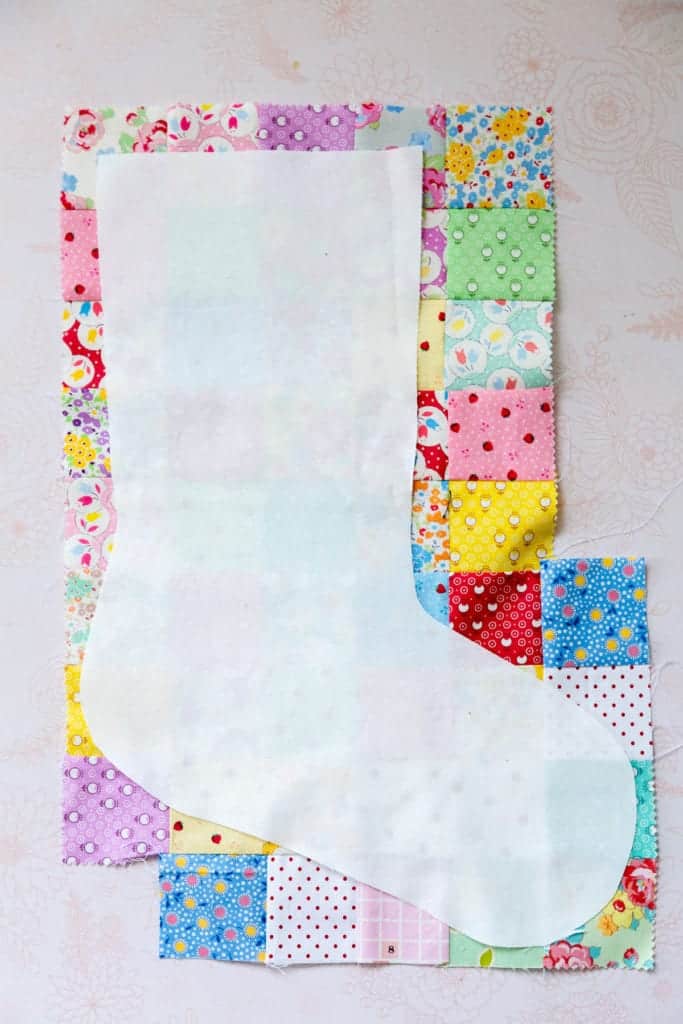
Step 7 - Cut the Stocking front pattern out of the patchwork rectangle. Depending on how many pieces your mini charm pack has you can make the patchwork piece in an L shape using 44 - 2.5" pieces.

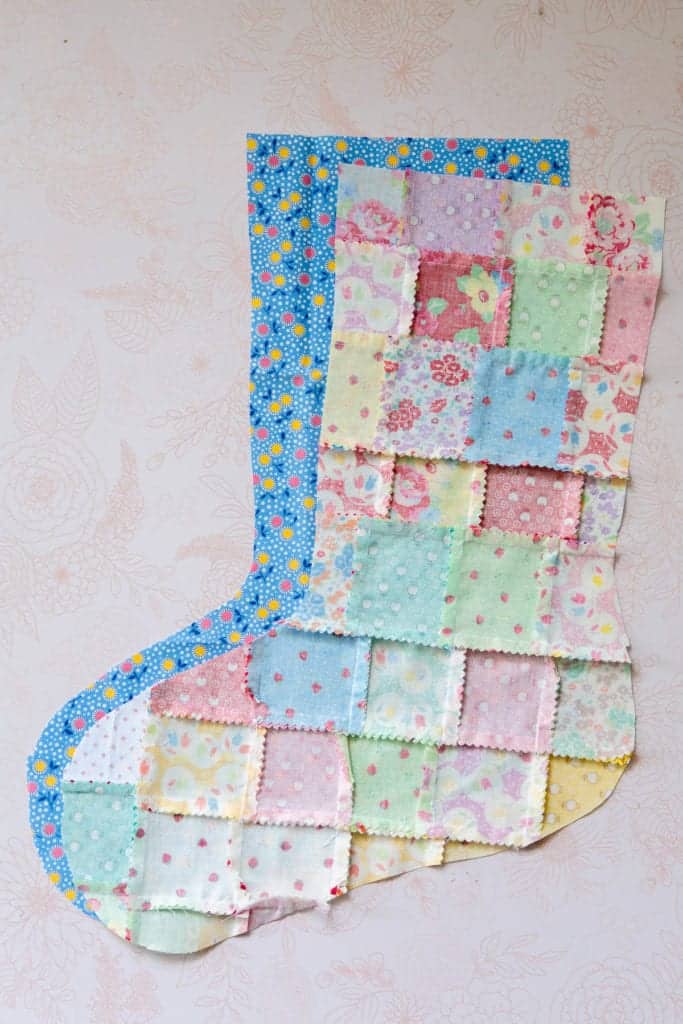
Step 8 - Place the Christmas Stocking front and back pieces RST together.

Step 9 - Sew 3/8" seam allowance along the outside edges leaving the top open. Trim notches in the curves.

Step 10 - Turn the stocking right side out and press.
Step 11 - Place the Christmas Stocking lining pieces RST together and sew 3/8" seam allowance along the outside edges leaving a two to three-inch opening at the bottom. Cut notches in the curved pieces as shown.
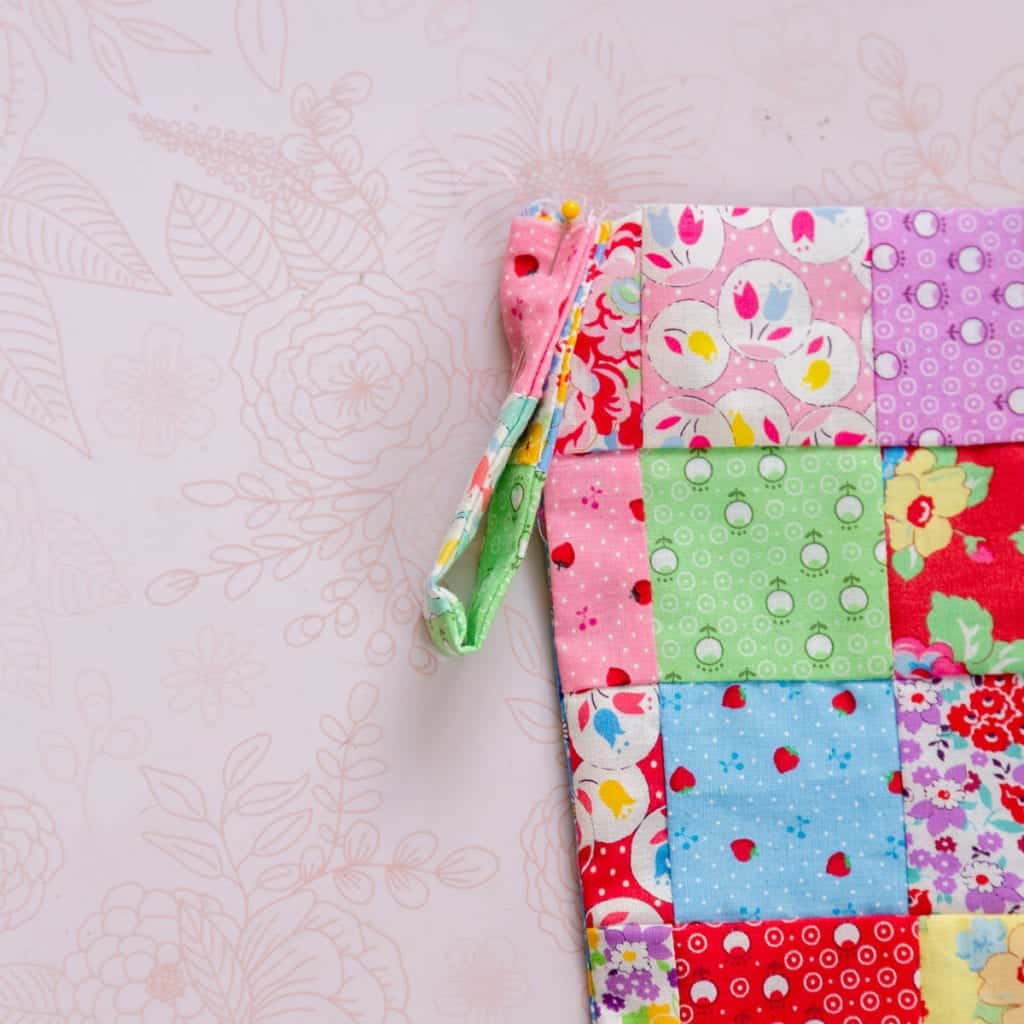
Step 12 - Pin the hook loop to the outside back edge at the seam allowance as shown.

Step 11 - Slide the stocking lining over the stocking front, cuff, and hook loop with the stocking pieces facing RST.

Step 12 - Line up the raw edges and pin.

Step 13 - Sew around the entire top edge using a 3/8" seam allowance.

Step 14 - Turn the stocking right side out through the opening left in the bottom of the lining.

Step 15 - Pull the stocking all the way out as shown and roll the seam allowances flat so that it will lay nicely when tucked inside.


Step 16 - Tuck the raw edges of the lining inside and sew the opening closed. You can leave it as is, topstitch the opening closed, or hand stitch the opening closed for a more professional finish.

Step 17 - Tuck the lining inside the stocking.

Step 18 - Press the outside of the stocking flat to finish.
***** YOU CAN FIND THE PATCHWORK QUILT CHRISTMAS STOCKING SEWING PATTERN IN THE RESOURCE LIBRARY.

Watch the full-length Christmas Stocking Tutorial Video Class here:
More Christmas Sewing Projects
- 25+ Christmas Sewing Projects
- 25+ Christmas Quilt Patterns
- Quilted Christmas Pot Holder Pattern
- Easy Stuffed Christmas Ornaments
- DIY Christmas Banner Tutorial
Pin the Quilted Christmas Stocking Pattern to make later

Very cute stocking! Such a good way to use up scraps, too!